1. บทนำ
This manual provides detailed instructions for the installation, operation, and maintenance of your Lorex 4K WiFi Halow 6-Channel NVR Indoor/Outdoor Security System. This system offers advanced surveillance capabilities with 4K Ultra HD resolution, wire-free battery-powered cameras, and intelligent features designed to enhance your property's security.
คุณสมบัติที่สำคัญ ได้แก่:
- 4K Ultra HD Visual Excellence: Experience superior video clarity and digital zoom.
- การมองเห็นสีกลางคืน: Capture detailed video in color under ambient lighting, or crisp black and white with Infrared Night Vision in complete darkness.
- Wire-Free Security: Battery-operated cameras provide flexible placement with up to 600 motion events per charge.
- การแจ้งเตือนอัจฉริยะ: Receive targeted alerts with Person Detection, without recurring monthly fees.
- การสนทนาแบบ 2 ทาง: Communicate with visitors directly through the Lorex Cirrus app.
- Private Local Storage: Recordings are stored on the included 1TB Hard Drive, ensuring privacy and no subscription fees.
2. อะไรอยู่ในกล่อง
ตรวจสอบว่าส่วนประกอบทั้งหมดมีอยู่ก่อนเริ่มการติดตั้ง:
- Lorex 4K NVR (Network Video Recorder)
- 4 x Battery-Powered Wireless Cameras
- 4 x Camera Batteries
- Mounting Kits for Cameras
- อะแดปเตอร์ไฟ NVR

Image: The Lorex 4K NVR unit with four battery-powered wireless cameras, illustrating the complete system components.
3. การตั้งค่า
3.1 การตั้งค่า NVR เบื้องต้น
- เชื่อมต่อ NVR เข้ากับแหล่งจ่ายไฟโดยใช้อะแดปเตอร์ไฟที่ให้มา
- Connect the NVR to your router via an Ethernet cable for initial network configuration.
- Connect the NVR to a monitor using an HDMI cable (not included) to complete the on-screen setup wizard.
3.2 Camera Preparation and Installation
- ชาร์จแบตเตอรี่: Fully charge all camera batteries using the provided USB cables and a compatible USB power adapter (not included) before first use.
- ใส่แบตเตอรี่: Open the battery compartment on each camera and insert the charged battery pack. Ensure it clicks into place securely.

Image: A hand demonstrates inserting a battery pack into the base of a Lorex wireless security camera.
- ตำแหน่งกล้อง: Choose optimal locations for your cameras, considering coverage area, Wi-Fi signal strength, and potential obstructions. The cameras are weatherproof (IP65 rated) for outdoor use.
- การติดตั้ง: Use the provided mounting kits to securely attach cameras to walls or other surfaces. Adjust the camera angle for desired viewการไอเอ็นจี

Image: A Lorex wireless camera is shown being mounted onto an exterior wall, illustrating the installation process.
3.3 การติดตั้งและการจับคู่แอป
- ดาวน์โหลด ลอเร็กซ์ เซอร์รัส ดาวน์โหลดแอปจากแอปสโตร์ของอุปกรณ์ของคุณ (Google Play Store หรือ Apple App Store)
- Follow the in-app instructions to create an account and add your NVR system.
- The cameras should automatically pair with the NVR once powered on and within range of the NVR's Wi-Fi Halow connection.

Image: A smartphone displays the Lorex Home app, showing multiple live camera feeds for remote viewการไอเอ็นจี
4. การใช้งานระบบของคุณ
4.1 สด View และการบันทึก
Access live camera feeds and recorded footage through the Lorex Cirrus app or directly from the NVR connected to a monitor. The system records in 4K Ultra HD, providing clear visuals.

Image: A split image demonstrates the difference between standard video and 4K Ultra HD, highlighting enhanced clarity and detail.
4.2 โหมดการมองเห็นตอนกลางคืน
Your cameras are equipped with two night vision modes:
- การมองเห็นสีกลางคืน: Provides full-color video in low-light conditions where some ambient light is present.
- กล้องมองกลางคืนอินฟราเรด (IR): Automatically activates in complete darkness, providing clear black and white video.

ภาพ: การแยก view shows a backyard scene captured with Infrared Night Vision (monochrome) and Color Night Vision (full color).

ภาพ: การแยก view illustrates the difference between Infrared Night Vision (monochrome) and daytime video capture on an outdoor patio.
4.3 Smart Notifications and Person Detection
The system utilizes Person Detection to minimize false alerts. You will receive notifications on your mobile device only when a person is detected, ensuring you are informed of relevant activity.
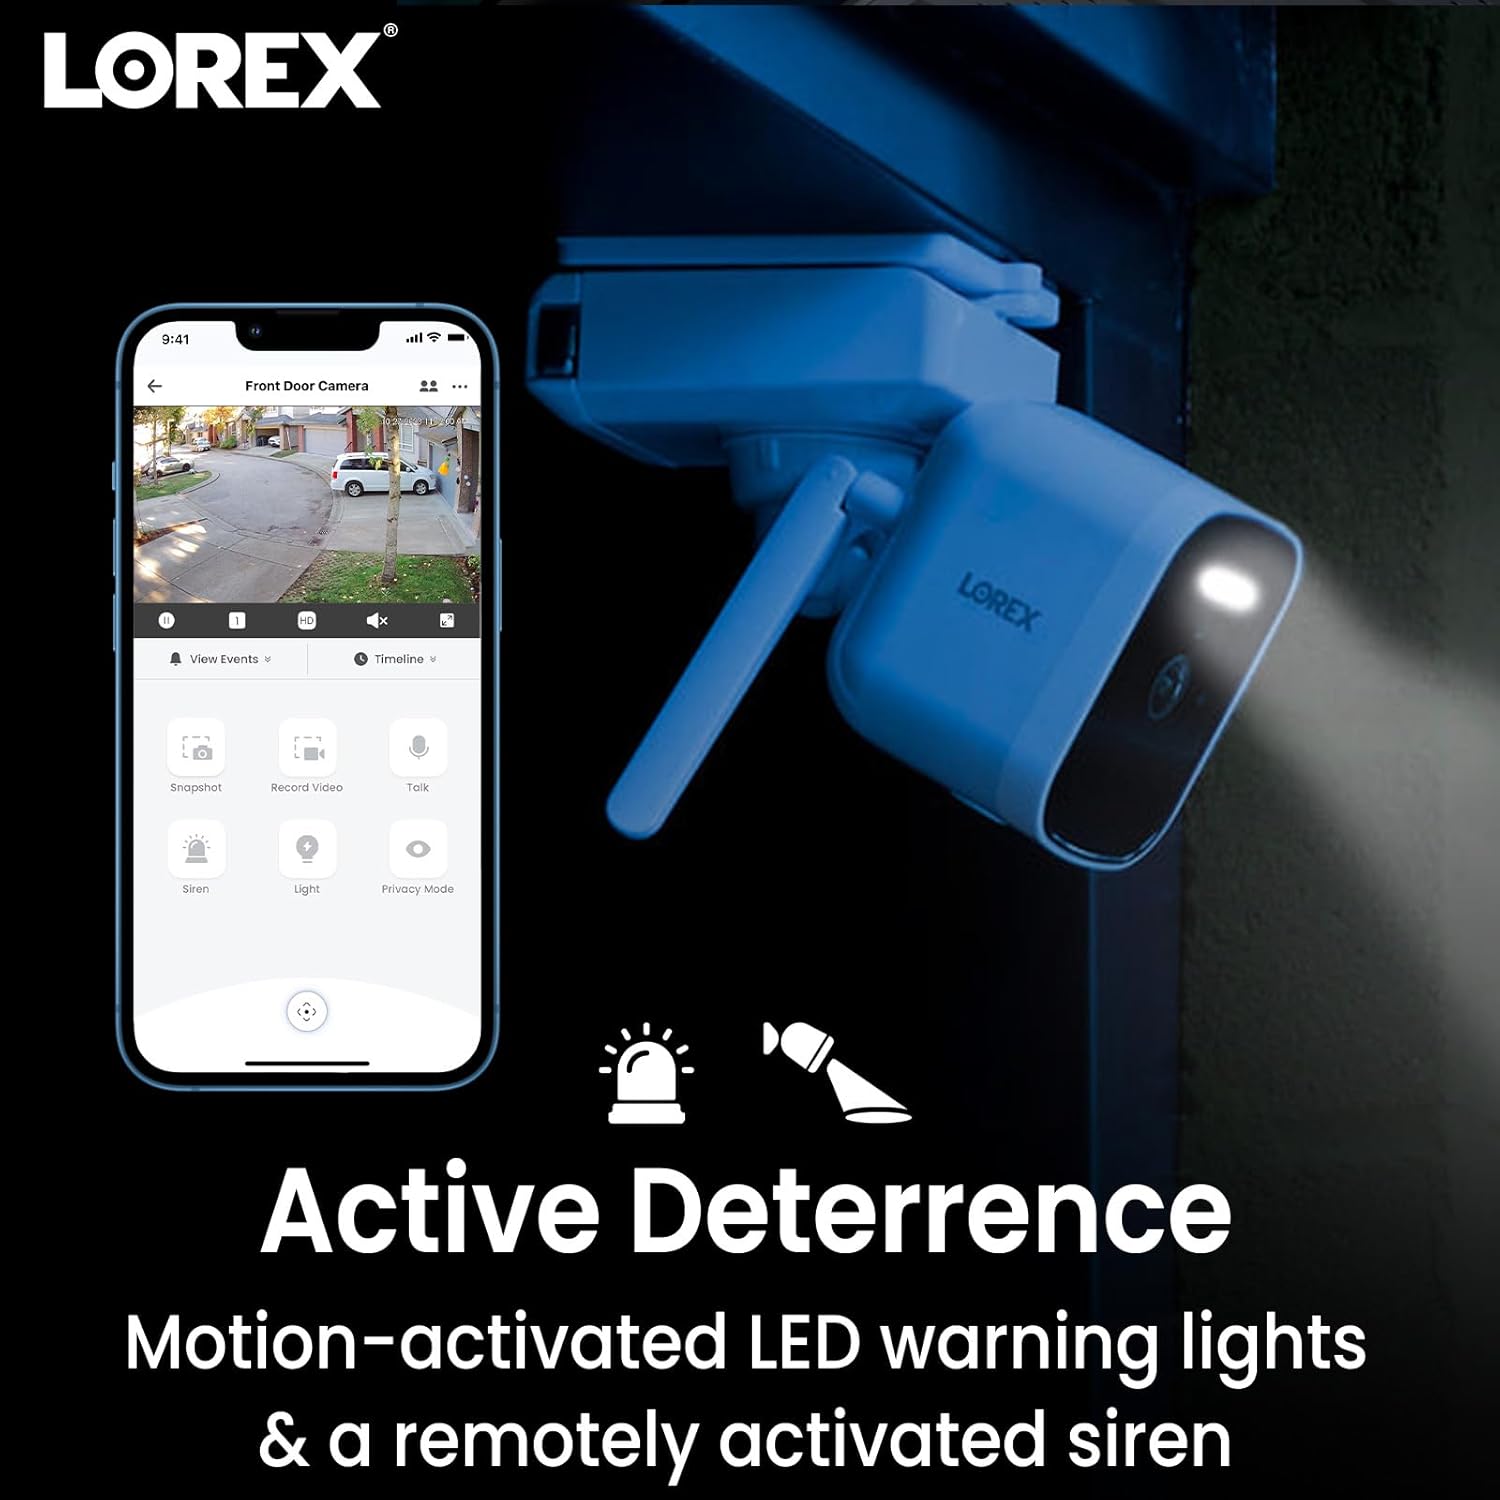
Image: A smartphone screen shows the Lorex app interface with a camera view and notification icons, indicating smart alerts.
4.4 การสนทนาแบบสองทาง
Use the Lorex Cirrus app to engage in two-way conversations through your camera. This feature allows you to speak to and hear individuals near the camera, such as delivery personnel or visitors.

Image: A delivery driver is shown at a door, with speech bubbles indicating a two-way conversation facilitated by the camera's 2-Way Talk feature.
4.5 การป้องปรามเชิงรุก
The cameras feature motion-activated LED warning lights and a remotely activated siren. These can be used to deter unwanted visitors or draw attention to an event.

Image: A Lorex camera is shown with its LED warning light activated, accompanied by icons representing motion-activated lights and a siren for active deterrence.
5. การบำรุงรักษา
5.1 การจัดการแบตเตอรี่
The wireless cameras are powered by rechargeable batteries. Battery life varies based on usage, temperature, and recording frequency. It is recommended to periodically check battery levels via the Lorex Cirrus app and recharge as needed. To recharge, remove the battery pack and connect it to a USB power source.
5.2 การทำความสะอาด
To ensure optimal performance, periodically clean the camera lenses and housing with a soft, damp ใช้ผ้าเช็ดทำความสะอาด หลีกเลี่ยงการใช้สารเคมีรุนแรงหรือวัสดุที่มีฤทธิ์กัดกร่อนซึ่งอาจทำให้กล้องเสียหายได้
5.3 ความต้านทานต่อสภาพอากาศ
The cameras are rated IP65 weatherproof, meaning they are protected against dust and low-pressure water jets. While designed for outdoor use, avoid submerging the cameras in water or exposing them to extreme weather conditions beyond their rating.

Image: A Lorex camera is shown outdoors with water droplets, accompanied by an IP66 weatherproof icon, indicating its resistance to elements.
6 การแก้ไขปัญหา
6.1 No Video/Offline Cameras
- ตรวจสอบพลังงาน: Ensure the NVR is powered on and cameras have charged batteries.
- การเชื่อมต่อ Wi-Fi: Verify that the NVR is connected to your network and cameras are within range of the NVR's Halow Wi-Fi signal. Obstructions can affect signal strength.
- รีบูต: Try restarting the NVR and cameras.
- Re-pair Cameras: If a camera consistently loses connection, try re-pairing it with the NVR through the app settings.
6.2 อายุการใช้งานแบตเตอรี่สั้น
- Motion Events: Frequent motion detection and recording will consume battery faster. Adjust motion sensitivity and recording zones in the app.
- สด View การใช้งาน: Excessive use of live view drains battery quickly.
- อุณหภูมิ: อุณหภูมิต่ำสามารถลดประสิทธิภาพของแบตเตอรี่ได้
- การชาร์จ: Ensure batteries are fully charged using a reliable power source.
6.3 Excessive/Irrelevant Notifications
- การตรวจจับบุคคล: Ensure Person Detection is enabled and configured correctly in the app.
- โซนการเคลื่อนไหว: Adjust motion detection zones to exclude areas with frequent, irrelevant movement (e.g., public sidewalks, trees swaying).
- ความไว: Lower the motion sensitivity setting in the app.
6.4 ปัญหาเกี่ยวกับแอป
- อัปเดตแอป: Ensure your Lorex Cirrus app is updated to the latest version.
- การเชื่อมต่ออินเตอร์เน็ต: ตรวจสอบให้แน่ใจว่าอุปกรณ์มือถือของคุณมีการเชื่อมต่ออินเทอร์เน็ตที่เสถียร
- ติดตั้งแอปใหม่อีกครั้ง: หากปัญหายังคงอยู่ ให้ลองถอนการติดตั้งแล้วติดตั้งแอปใหม่อีกครั้ง
7. ข้อมูลจำเพาะ
| คุณสมบัติ | รายละเอียด |
|---|---|
| ชื่อรุ่น | L85591-8AA4B-E |
| หมายเลขรุ่นสินค้า | Raysharp |
| การใช้งานภายใน/ภายนอกอาคาร | กลางแจ้ง |
| โปรโตคอลการเชื่อมต่อ | ไวไฟ |
| เทคโนโลยีการสื่อสารไร้สาย | ไวไฟ |
| ความละเอียดในการจับภาพวิดีโอ | 4K (Recording at 2K) |
| จำนวนช่องสัญญาณ | 6-Channel NVR (4 cameras included) |
| แหล่งพลังงาน | Corded Electric (NVR), Battery (Cameras) |
| แบตเตอรี่ที่จำเป็น | Yes, 4 Lithium Ion batteries (included) |
| เทคโนโลยีแสงน้อย | สีกลางคืน |
| ประเภทการแจ้งเตือน | Motion Only (with Person Detection) |
| การให้คะแนนการคุ้มครองระหว่างประเทศ | IP65 |
| ขนาดรายการ (ยาว x กว้าง x สูง) | 6.7 x 2.5 x 8.6 นิ้ว |
| น้ำหนักสินค้า | 11.18 ปอนด์ |
| ผู้ผลิต | Lorex |
8. การรับประกันและการสนับสนุน
สำหรับข้อมูลการรับประกัน การสนับสนุนทางเทคนิค และแหล่งข้อมูลเพิ่มเติม โปรดเยี่ยมชมเว็บไซต์อย่างเป็นทางการของ Lorex website or contact Lorex customer service. You can also find support and product information on the ร้าน Lorex บน Amazon.
เก็บหลักฐานการซื้อของคุณไว้เพื่อเรียกร้องการรับประกัน


