1. สินค้าหมดview
XMARTO WNS58 เป็นเครื่องบันทึกวิดีโอเครือข่ายดิจิทัล (NVR) 10 ช่องสัญญาณ H.265+ 4K Ultra HD ที่มีหน้าจอ HD ขนาด 12.1 นิ้วในตัว ระบบนี้ออกแบบมาสำหรับงานเฝ้าระวัง รองรับกล้องรักษาความปลอดภัย WiFi ของ xmartO ได้สูงสุด 10 ตัว มีโมดูล WiFi คู่สำหรับการสื่อสารระหว่างกล้องและการเชื่อมต่ออินเทอร์เน็ตโดยเฉพาะ พร้อมด้วยเทคโนโลยี G3 Auto WiFi Relay เพื่อขยายระยะการทำงานของกล้อง

ภาพที่ 1.1: เครื่องบันทึกวิดีโอเครือข่าย (NVR) รุ่น XMARTO WNS58 พร้อมหน้าจอ HD ขนาด 12.1 นิ้วในตัว แสดงภาพสดจากกล้องหลายตัว
คุณสมบัติหลัก:
- รองรับ 10 แชนแนล: สามารถจัดการกล้องรักษาความปลอดภัย WiFi xmartO ได้สูงสุด 10 ตัว (ต้องใช้เฟิร์มแวร์เวอร์ชั่น 3.2.4.2 หรือสูงกว่า)
- หน้าจอ HD ขนาด 12.1 นิ้วในตัว: ให้บริการวิดีโอโดยตรง viewใช้งานโดยไม่ต้องใช้จอภาพภายนอก
- โมดูล WiFi คู่: ช่องทางหนึ่งสำหรับเชื่อมต่อกล้อง อีกช่องทางหนึ่งสำหรับเชื่อมต่ออินเทอร์เน็ต เพื่อเพิ่มเสถียรภาพและความยืดหยุ่นของเครือข่าย
- G3 Auto WiFi Relay: ขยายระยะสัญญาณ WiFi ของกล้องโดยอัตโนมัติโดยใช้กล้องที่อยู่ใกล้เคียงเป็นตัวขยายสัญญาณ
- โหมดการบันทึกคู่: รองรับการบันทึกต่อเนื่องตลอด 24 ชั่วโมง 7 วันต่อสัปดาห์ และการบันทึกเหตุการณ์ที่ตรวจจับการเคลื่อนไหวได้พร้อมกัน
- การเข้าถึงผ่านแอปพลิเคชันมือถือ: เปิดใช้งานการถ่ายทอดสด view และสามารถเล่นซ้ำได้จากสมาร์ทโฟนหรือแท็บเล็ต
- รองรับความละเอียด 4K: บันทึกและจัดการกล้องที่มีความละเอียดสูงสุด 4K
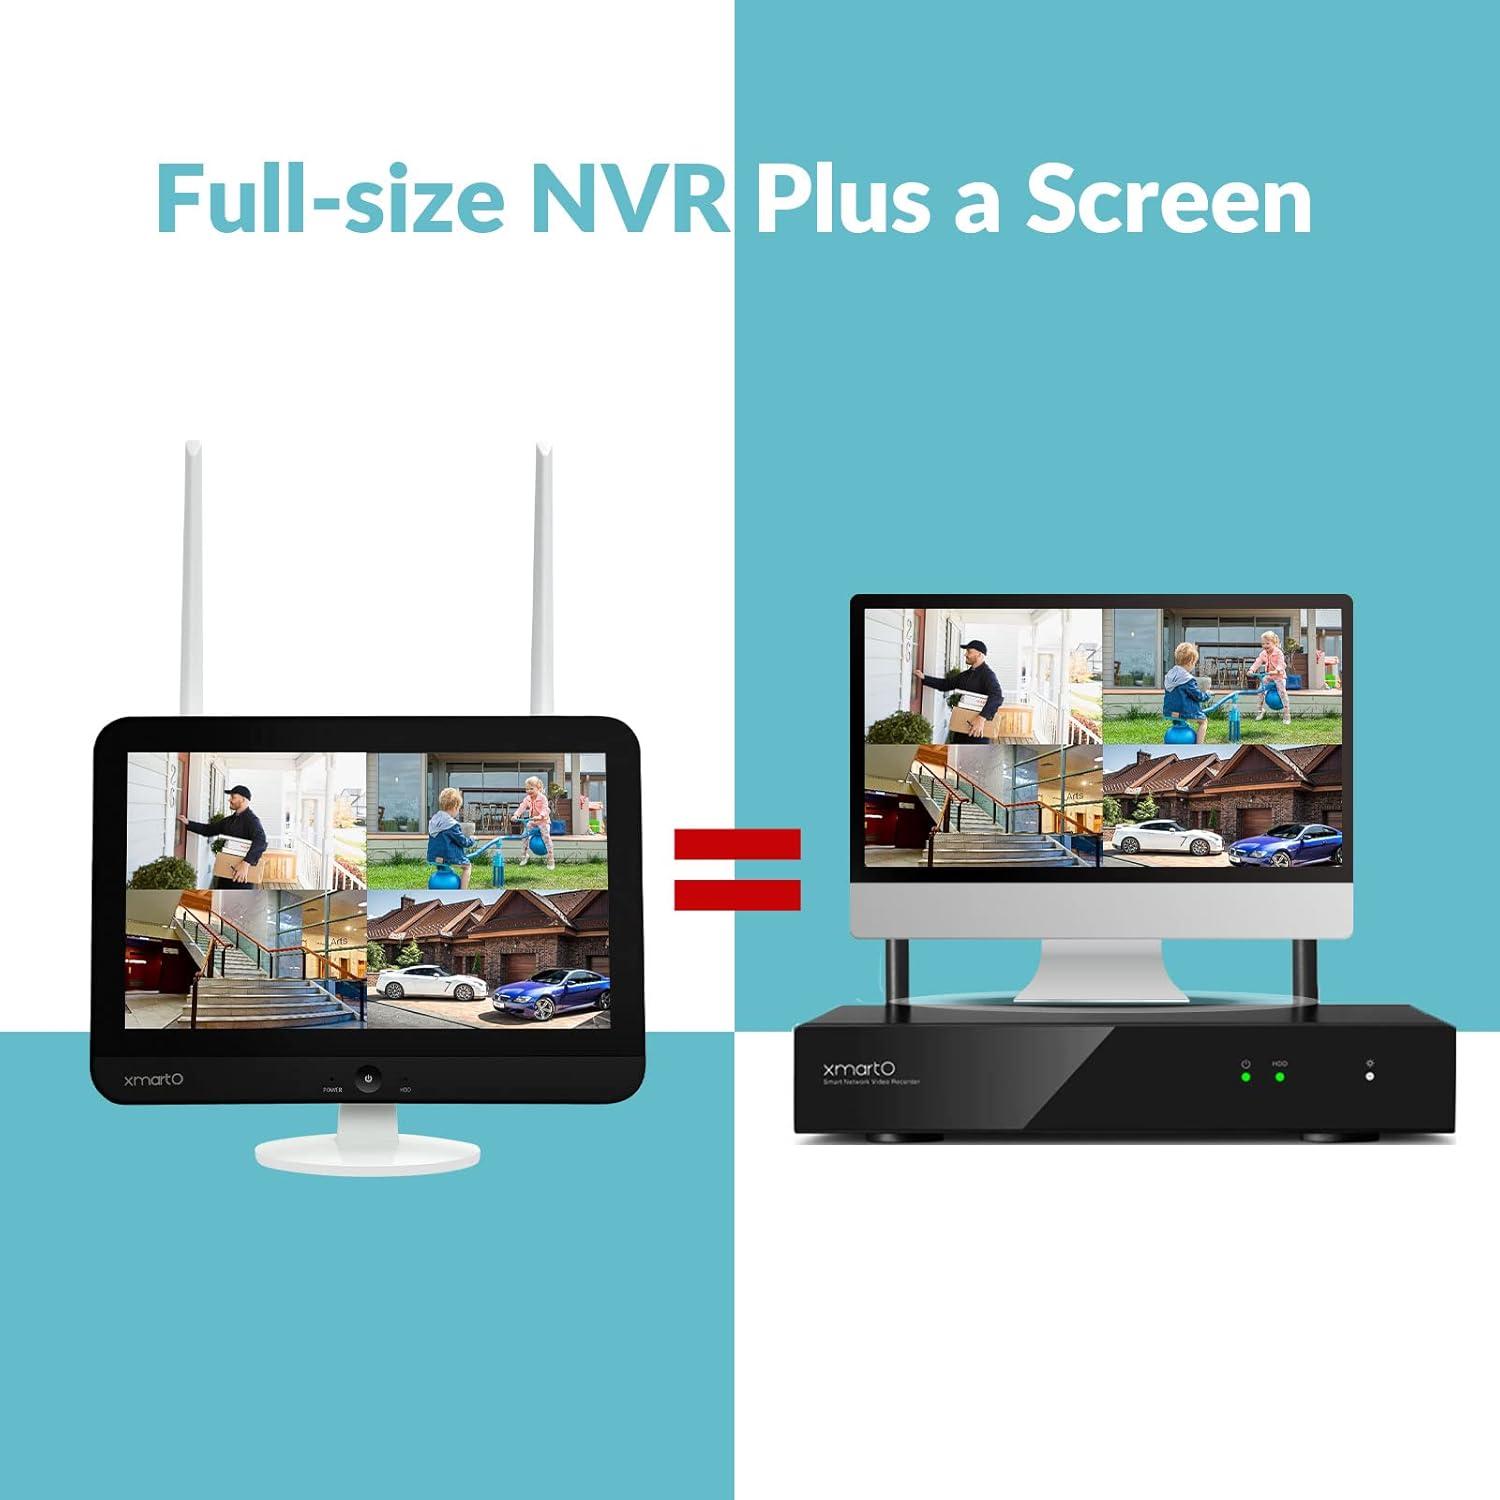
ภาพที่ 1.2: ภาพแสดงการออกแบบหน้าจอแบบรวมอยู่ในตัวของ XMARTO NVR เมื่อเทียบกับการตั้งค่า NVR และจอภาพแยกต่างหาก
2. คู่มือการติดตั้ง
2.1 เนื้อหาบรรจุภัณฑ์
ก่อนเริ่มต้น โปรดตรวจสอบให้แน่ใจว่ามีส่วนประกอบทั้งหมดอยู่ในบรรจุภัณฑ์:
- เครื่องบันทึกวิดีโอเครือข่าย (NVR) XMARTO WNS58 พร้อมหน้าจอ HD ขนาด 12.1 นิ้ว
- แหล่งจ่ายไฟสำหรับ NVR
- USB Mouse
- คู่มือการใช้งาน
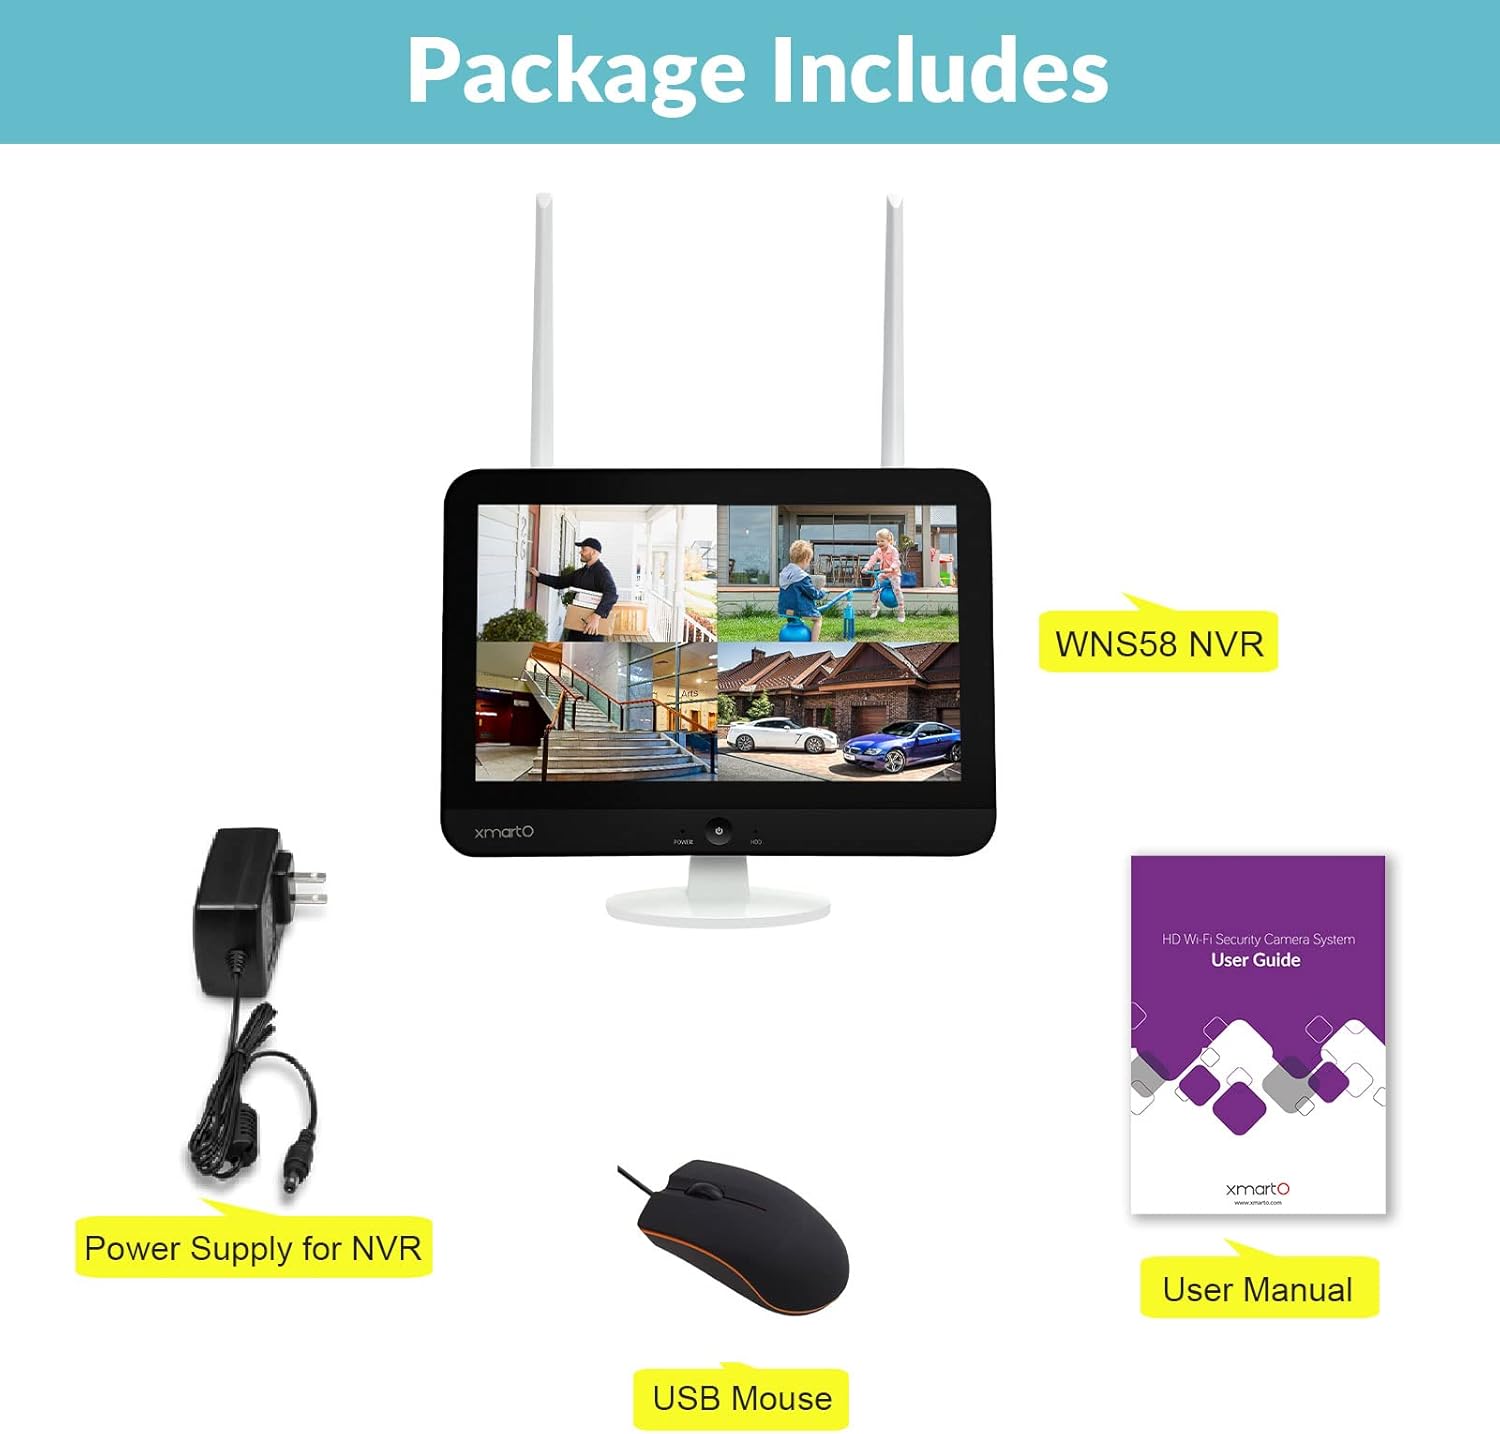
ภาพที่ 2.1: รายการอุปกรณ์มาตรฐานที่รวมอยู่ในชุดเครื่องบันทึกวิดีโอเครือข่าย XMARTO WNS58
2.2 การเชื่อมต่อฮาร์ดแวร์
ตรวจสอบพอร์ตและช่องเชื่อมต่อด้านหลังของ NVR:

ภาพที่ 2.2: รายละเอียด view บริเวณแผงด้านหลังและจุดเชื่อมต่อของเครื่องบันทึกวิดีโอเครือข่าย XMARTO NVR
- เชื่อมต่อเมาส์ USB: เสียบเมาส์ USB ที่ให้มาเข้ากับพอร์ต USB บนเครื่องบันทึกวิดีโอเครือข่าย (NVR)
- เชื่อมต่อพลังงาน: เสียบอะแดปเตอร์แปลงไฟเข้ากับพอร์ต 12V DC IN แล้วเสียบเข้ากับเต้ารับไฟฟ้า เครื่องบันทึกวิดีโอเครือข่าย (NVR) จะเปิดใช้งานโดยอัตโนมัติ
- ช่องต่อ HDMI (เลือกได้): หากต้องการใช้จอภาพภายนอก ให้เชื่อมต่อสาย HDMI จากพอร์ต HDMI ของ NVR ไปยังจอภาพ
- การเชื่อมต่อเครือข่าย (ไม่บังคับ): สำหรับการเชื่อมต่ออินเทอร์เน็ตแบบใช้สาย ให้เชื่อมต่อสายอีเธอร์เน็ตจากพอร์ตเครือข่าย RJ45 ไปยังเราเตอร์ของคุณ นอกจากนี้ NVR ยังรองรับการเชื่อมต่ออินเทอร์เน็ตผ่าน Wi-Fi ด้วย
2.3 การติดตั้งฮาร์ดไดรฟ์ (ไม่บังคับ)
เครื่องบันทึกวิดีโอเครือข่าย (NVR) รองรับฮาร์ดไดรฟ์ SATA มาตรฐานสำหรับการจัดเก็บวิดีโอในเครื่อง หากไม่มีฮาร์ดไดรฟ์ติดตั้งไว้ล่วงหน้า ให้ทำตามขั้นตอนต่อไปนี้:
- คลายสกรูฝาครอบช่องเสียบฮาร์ดไดรฟ์ SATA ที่ด้านหลังของ NVR ออก
- เชื่อมต่อสายเคเบิลข้อมูล SATA และสายไฟเข้ากับฮาร์ดไดรฟ์ SATA ขนาด 3.5 นิ้วของคุณอย่างระมัดระวัง
- เลื่อนฮาร์ดไดรฟ์เข้าไปในแท่นวางและยึดด้วยสกรู
- เปลี่ยนฝาครอบ
- หลังจากติดตั้งเสร็จแล้ว ให้เปิดเครื่อง NVR จากนั้นไปที่การตั้งค่าระบบเพื่อฟอร์แมตฮาร์ดไดรฟ์ใหม่ก่อนใช้งาน
ภาพที่ 2.3: ภาพประกอบขั้นตอนการติดตั้งฮาร์ดไดรฟ์สำหรับ NVR
2.4 การจับคู่กล้อง
เครื่องบันทึกวิดีโอเครือข่าย (NVR) มีโมดูล WiFi สองตัว: ตัวหนึ่งสำหรับเชื่อมต่อกล้องโดยเฉพาะ และอีกตัวสำหรับเข้าถึงอินเทอร์เน็ต กล้องจะเชื่อมต่อแบบไร้สายกับเครือข่าย WiFi ภายในของ NVR
- การจับคู่อัตโนมัติ: กล้อง XMARTO มักจะจับคู่กับ NVR ไว้ล่วงหน้าในชุดอุปกรณ์แล้ว เพียงเปิดกล้อง กล้องก็จะเชื่อมต่อกับ NVR โดยอัตโนมัติ
- การจับคู่ด้วยตนเอง: หากต้องการเพิ่มกล้องใหม่หรือจับคู่กล้องอีกครั้ง ให้เข้าถึงเมนูของ NVR ไปที่ 'การจัดการกล้อง' หรือ 'การตั้งค่าไร้สาย' และทำตามคำแนะนำบนหน้าจอเพื่อเพิ่มกล้อง โดยปกติแล้วจะต้องกดปุ่ม 'จับคู่' บนกล้องและเริ่มการค้นหาใน NVR
- G3 Auto WiFi Relay: เครื่องบันทึกวิดีโอเครือข่าย (NVR) นี้ใช้เทคโนโลยี G3 Auto WiFi Relay หากกล้องตัวใดตัวหนึ่งมีสัญญาณอ่อน ระบบจะใช้กล้องตัวอื่นที่อยู่ใกล้กว่าเป็นตัวขยายสัญญาณ WiFi โดยอัตโนมัติเพื่อรักษาการเชื่อมต่อกับ NVR ไม่จำเป็นต้องตั้งค่าด้วยตนเองสำหรับฟีเจอร์นี้

ภาพที่ 2.4: คำอธิบายระบบ G3 Auto WiFi Relay แสดงวิธีที่กล้องสามารถเพิ่มสัญญาณไปยัง NVR ได้
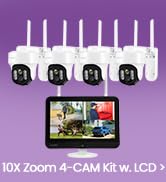
ภาพที่ 2.5: ความสามารถของ NVR ในการรองรับกล้องไร้สายได้สูงสุดถึง 10 ตัว
3. คู่มือการใช้งาน
3.1 การนำทางส่วนติดต่อผู้ใช้
ใช้เมาส์ USB ที่เชื่อมต่ออยู่เพื่อควบคุมส่วนติดต่อผู้ใช้แบบกราฟิก (GUI) ของ NVR ที่แสดงบนหน้าจอขนาด 12.1 นิ้ว หรือจอภาพภายนอก
- คลิกขวา: เข้าสู่เมนูหลักหรือกลับไปยังหน้าจอก่อนหน้า
- คลิกซ้าย: เลือกตัวเลือก เปิดเมนู หรือยืนยันการดำเนินการ
- ลาก: เลื่อนหน้าต่างหรือปรับการตั้งค่า
3.2 สด View
โดยปกติแล้ว เมื่อเริ่มต้นระบบ NVR จะแสดงภาพสด view ของกล้องที่เชื่อมต่อ คุณสามารถสลับระหว่างกล้องเดี่ยวได้ viewกล้อง 4 ตัว viewหรือกล้อง 9 ตัว view รูปแบบการจัดวางจากเมนู
3.3 โหมดการบันทึก
เครื่องบันทึกวิดีโอเครือข่าย (NVR) รองรับโหมดการบันทึกหลักสองโหมด:
- บันทึกเสียงต่อเนื่องตลอด 24 ชั่วโมง 7 วันต่อสัปดาห์: บันทึกวิดีโออย่างต่อเนื่องลงในฮาร์ดไดรฟ์ที่ติดตั้งไว้
- การบันทึกภาพเมื่อตรวจจับการเคลื่อนไหว: บันทึกเฉพาะเมื่อกล้องตรวจจับการเคลื่อนไหวได้ โหมดนี้สามารถทำงานพร้อมกับการบันทึกตลอด 24 ชั่วโมงได้ โดยจะมีการเน้นเหตุการณ์การเคลื่อนไหวระหว่างการเล่นวิดีโอ
สามารถกำหนดค่าการบันทึกได้ในส่วน 'บันทึก' ของเมนูหลัก ซึ่งช่วยให้คุณตั้งค่าตารางเวลา โซนตรวจจับการเคลื่อนไหว และความไวในการตรวจจับสำหรับกล้องแต่ละตัวได้
3.4 การเล่นวิดีโอ
เพื่อview บันทึกเสียงฟูtage:
- คลิกขวาที่รายการสด view หน้าจอเพื่อเปิดเมนูหลัก
- เลือก 'เล่น'
- เลือกกล้อง วันที่ และเวลาที่ต้องการ ไทม์ไลน์จะแสดงส่วนที่บันทึกไว้ โดยเหตุการณ์ที่มีการเคลื่อนไหวจะถูกเน้นให้เห็นชัดเจน
- ใช้ปุ่มควบคุมการเล่น (เล่น หยุดชั่วคราว กรอไปข้างหน้า กรอถอยหลัง) เพื่อเลื่อนดูไฟล์เสียงtage.
3.5 แอปพลิเคชันบนมือถือและการเข้าถึงระยะไกล
สามารถเข้าถึง XMARTO NVR จากระยะไกลผ่านแอปพลิเคชันมือถือเฉพาะ ซึ่งช่วยให้สามารถดูภาพสดได้ viewการเล่นและรับชมจากสมาร์ทโฟนหรือแท็บเล็ตของคุณ
- ดาวน์โหลดแอป: ค้นหา ดาวน์โหลดแอป XMARTO อย่างเป็นทางการได้จาก Apple App Store หรือ Google Play Store
- เชื่อมต่อ NVR กับอินเทอร์เน็ต: ตรวจสอบให้แน่ใจว่า NVR เชื่อมต่อกับเครือข่ายภายในบ้านของคุณผ่านโมดูล WiFi ภายในหรือสาย Ethernet แล้ว
- เพิ่มอุปกรณ์: เปิดแอป สร้างบัญชี และทำตามคำแนะนำเพื่อเพิ่ม NVR ของคุณโดยการสแกนคิวอาร์โค้ดหรือป้อนรหัสประจำตัวด้วยตนเอง
- View และการเล่น: เมื่อเชื่อมต่อแล้ว คุณสามารถ view รับชมภาพสด เล่นวิดีโอที่บันทึกไว้ และรับการแจ้งเตือนการตรวจจับการเคลื่อนไหวได้โดยตรงบนอุปกรณ์มือถือของคุณ แอปจะแสดงรายการข้อความรายวันพร้อมภาพนิ่งและคลิปวิดีโอของเหตุการณ์ที่ตรวจพบ
ภาพที่ 3.1: อดีตampชุดของการแจ้งเตือนการตรวจจับการเคลื่อนไหวและรายละเอียดเหตุการณ์ภายในแอปพลิเคชันมือถือ XMARTO

ภาพที่ 3.2: ระบบ XMARTO รองรับการทำงานร่วมกับ Alexa และ Google Assistant และแอปพลิเคชันบนมือถือมีให้บริการบน Google Play และ App Store
3.6 พื้นที่จัดเก็บข้อมูลบนคลาวด์ (ไม่บังคับ)
นอกเหนือจากการจัดเก็บข้อมูลในฮาร์ดไดรฟ์ภายในเครื่องแล้ว ระบบอาจมีตัวเลือกการจัดเก็บข้อมูลบนคลาวด์สำหรับเหตุการณ์ที่บันทึกไว้ โปรดดูรายละเอียดเกี่ยวกับการเปิดใช้งานและการจัดการบริการจัดเก็บข้อมูลบนคลาวด์ได้ในแอปพลิเคชันบนมือถือหรือการตั้งค่า NVR
ภาพที่ 3.3: แอปพลิเคชันบนมือถือมีตัวเลือกสำหรับการบันทึกวิดีโอtagบันทึกข้อมูลไปยังที่เก็บข้อมูลบนคลาวด์หรือฮาร์ดไดรฟ์ภายในเครื่องก็ได้
4. การบำรุงรักษา
4.1 การอัพเกรดเฟิร์มแวร์
ตรวจสอบการอัปเดตเฟิร์มแวร์เป็นระยะเพื่อให้มั่นใจถึงประสิทธิภาพสูงสุดและการเข้าถึงคุณสมบัติใหม่ๆ โดยทั่วไปแล้ว การอัปเดตเฟิร์มแวร์สามารถทำได้ผ่านการตั้งค่าระบบของ NVR หรือผ่านฝ่ายสนับสนุนของ XMARTO webตรวจสอบให้แน่ใจว่า NVR มีการเชื่อมต่ออินเทอร์เน็ตที่เสถียรในระหว่างกระบวนการอัปเกรด
4.2 การจัดการฮาร์ดไดรฟ์
ตรวจสอบสถานะของฮาร์ดไดรฟ์ในตั้งค่าพื้นที่จัดเก็บข้อมูลของ NVR เป็นประจำ หากฮาร์ดไดรฟ์เต็ม NVR จะทำการเขียนทับข้อมูลที่เก่าที่สุดโดยอัตโนมัติtage. นอกจากนี้ คุณยังสามารถฟอร์แมตฮาร์ดไดรฟ์ด้วยตนเองได้หากจำเป็น ซึ่งจะลบข้อมูลทั้งหมดที่บันทึกไว้
4.3 การทำความสะอาด
รักษาความสะอาดของเครื่องบันทึกวิดีโอ (NVR) และหน้าจอ ใช้ผ้าแห้งนุ่มๆ เช็ดฝุ่นออกจากตัวเครื่อง สำหรับหน้าจอ ให้ใช้น้ำยาทำความสะอาดหน้าจอโดยเฉพาะและผ้าไมโครไฟเบอร์เพื่อป้องกันรอยขีดข่วน
5 การแก้ไขปัญหา
ส่วนนี้จะกล่าวถึงปัญหาทั่วไปที่คุณอาจพบเจอขณะใช้งาน XMARTO NVR
5.1 ปัญหาการจับคู่กล้อง
- อาการ: กล้องไม่สามารถเชื่อมต่อแบบไร้สายกับ NVR ได้
- สารละลาย:
- ตรวจสอบให้แน่ใจว่ากล้องเปิดใช้งานอยู่และอยู่ในระยะทำการของเครื่องบันทึกวิดีโอเครือข่าย (NVR) หรือกล้องตัวอื่นที่ทำหน้าที่เป็นตัวส่งต่อสัญญาณ
- หากข้อมูล WiFi ของ NVR (ESSID และรหัสผ่าน) เคยถูกเปลี่ยนแปลงมาก่อน อาจทำให้การจับคู่แบบไร้สายล้มเหลว ลองรีเซ็ต WiFi ในการตั้งค่าของ NVR เพื่อคืนค่า ESSID กลับไปเป็นค่าเดิม แล้วลองจับคู่ใหม่อีกครั้ง หรืออีกวิธีหนึ่งคือ ใช้สาย Ethernet ในการจับคู่กล้องในครั้งแรก
- โปรดดูข้อมูลในส่วนสนับสนุนของ XMARTO webเว็บไซต์สำหรับคู่มือการจับคู่กล้องโดยละเอียด: คำถามที่พบบ่อยเกี่ยวกับการจับคู่กล้อง.
5.2 หน้าจอกลับสู่โหมดพัก/ภาพนิ่ง
- อาการ: หน้าจอ NVR แสดงภาพนิ่งหรือว่างเปล่าหลังจากนั้นไม่นาน แม้ในขณะกำลังถ่ายทอดสดอยู่ก็ตาม view.
- สารละลาย: นี่มักเป็นคุณสมบัติประหยัดพลังงาน เข้าถึงการตั้งค่าระบบของ NVR ซึ่งโดยทั่วไปจะอยู่ภายใต้ 'การแสดงผล' หรือ 'โปรแกรมรักษาหน้าจอ' และปรับการตั้งค่าเวลาหมดอายุหรือปิดใช้งานฟังก์ชันโปรแกรมรักษาหน้าจอ
5.3 ปัญหาการเชื่อมต่อแอปพลิเคชันบนมือถือ
- อาการ: ไม่สามารถเชื่อมต่อกับ NVR ผ่านแอปบนมือถือ หรือพบปัญหาการตัดการเชื่อมต่อบ่อยครั้ง
- สารละลาย:
- ตรวจสอบให้แน่ใจว่า NVR มีการเชื่อมต่ออินเทอร์เน็ตที่เสถียร (ไม่ว่าจะผ่านสายเคเบิลหรือโมดูล WiFi ตัวที่สอง)
- ตรวจสอบให้แน่ใจว่าอุปกรณ์มือถือของคุณมีการเชื่อมต่ออินเทอร์เน็ตที่เสถียร
- ตรวจสอบว่าแอปมือถือได้รับการอัปเดตเป็นเวอร์ชันล่าสุดหรือไม่
- รีสตาร์ททั้งเครื่องบันทึกวิดีโอเครือข่าย (NVR) และอุปกรณ์มือถือของคุณ
- หากปัญหายังคงอยู่ ให้ลบ NVR ออกจากแอป แล้วเพิ่มเข้าไปใหม่อีกครั้ง
5.4 ปัญหาที่เกี่ยวข้องกับรหัสผ่าน
- อาการ: ลืมรหัสผ่านหรือเข้าสู่ระบบไม่ได้
- สารละลาย: โปรดดูข้อมูลในส่วนสนับสนุนของ XMARTO webเว็บไซต์สำหรับขั้นตอนการกู้คืนรหัสผ่าน: คำถามที่พบบ่อยเกี่ยวกับรหัสผ่าน.
6. ข้อมูลจำเพาะ
| คุณสมบัติ | ข้อมูลจำเพาะ |
|---|---|
| หมายเลขรุ่น | WNS58 |
| จำนวนช่องสัญญาณ | 10 |
| การบีบอัดวิดีโอ | H.265 + |
| ความละเอียดสูงสุด | 4K อุลตราเอชดี |
| ขนาดหน้าจอแบบบูรณาการ | 12.1 นิ้ว |
| เทคโนโลยีการเชื่อมต่อ | Wi-Fi (โมดูล Wi-Fi สองตัว) |
| อุปกรณ์ที่รองรับ | กล้อง XMARTO, สมาร์ทโฟน, แท็บเล็ต |
| สื่อบันทึกข้อมูล | ฮาร์ดดิสก์ SATA (สูงสุด 6TB), พื้นที่จัดเก็บข้อมูลบนคลาวด์ |
| น้ำหนักสินค้า | 3.27 ปอนด์ |
| ขนาดแพ็คเกจ | 13.74 x 11.02 x 3.23 นิ้ว |
7. การรับประกันและการสนับสนุน
7.1 ข้อมูลการรับประกัน
เครื่องบันทึกวิดีโอเครือข่าย XMARTO WNS58 อยู่ภายใต้การรับประกัน รับประกันจำกัด 1 ปี นับจากวันที่ซื้อ การรับประกันนี้ครอบคลุมข้อบกพร่องจากการผลิตและการทำงานผิดปกติภายใต้การใช้งานปกติ โปรดเก็บหลักฐานการซื้อไว้เพื่อขอรับสิทธิ์การรับประกัน
นอกจากนี้ XMARTO ยังมีบริการอื่นๆ อีกด้วย รับประกันคืนเงินภายใน 30 วัน และส่งคืนสินค้าได้ฟรี นโยบาย.

ภาพที่ 7.1: สรุปบริการหลังการขายของ XMARTO รวมถึงนโยบายการรับประกันและการคืนสินค้า
7.2 การสนับสนุนลูกค้า
หากต้องการความช่วยเหลือด้านเทคนิค การแก้ไขปัญหา หรือสอบถามข้อมูลใดๆ เกี่ยวกับผลิตภัณฑ์ XMARTO มีบริการต่างๆ ดังนี้ บริการให้คำปรึกษาแบบตัวต่อตัวตลอด 24 ชั่วโมง 7 วันต่อสัปดาห์.
โปรดเยี่ยมชมเว็บไซต์อย่างเป็นทางการของ XMARTO webไซต์สำหรับทรัพยากรสนับสนุน คำถามที่พบบ่อย และข้อมูลการติดต่อ:
- ฝ่ายสนับสนุน XMARTO Webเว็บไซต์: support.xmarto.com
เมื่อติดต่อฝ่ายสนับสนุน โปรดเตรียมรุ่นผลิตภัณฑ์ของคุณ (WNS58) และรายละเอียดที่เกี่ยวข้องกับปัญหาของคุณให้พร้อม


