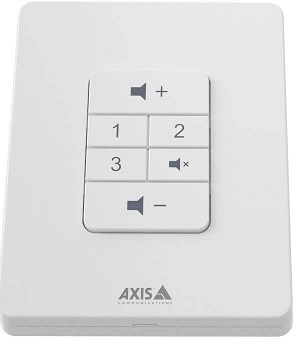
ตัวควบคุมระดับเสียง AXIS C8310
การติดตั้ง

Connect your AXIS C8310 Volume Controller to the I/O connector of any device in your system. We recommend that you simply choose the device that is located closest to your AXIS C8310 Volume Controller.
The volume controller 4-pin connector on AXIS C8310 is specifically designed to work with the I/O Port 1 on the connectivity hub, utilizing pins 1-4 (GND, 12V, I/O, and I/O). Once connected, those ports cannot be configured for other uses.
บันทึก
อุปกรณ์โฮสต์จะต้องมีเฟิร์มแวร์เวอร์ชัน 11.6 ขึ้นไป


เริ่มต้นใช้งาน
Use AXIS C8310 Volume Controller with AXIS Audio Manager Edge
For instructions, see Control audio with AXIS C8310 Volume Controller in the AXIS Audio Manager Edge user manual.
Use AXIS C8310 Volume Controller with AXIS Audio Manager Pro
You need to have AXIS Audio Manager Pro version 4.4 to use it with an AXIS C8310 Volume Controller.
For instructions, see Control audio with AXIS C8310 Volume Controller in the AXIS Audio Manager Pro user manual.
กำหนดค่าอุปกรณ์ของคุณ
โทรผ่าน SIP
ใช้ AXIS C8310 ของคุณเพื่อเริ่มการโทร SIP จากลำโพงที่มีไมโครโฟนในตัวไปยังผู้รับ SIP
ในอดีตที่ผ่านมาampเราเริ่มต้นและวางสายด้วยปุ่มเดียวกัน เราเลือกปุ่มต้นทาง 1 แต่คุณสามารถเลือกปุ่มใดก็ได้บน AXIS C8310 ของคุณ
บันทึก
If you are using the same button for source control in AXIS Audio Manager Edge or Pro, you might want to unassign that functionality in those applications.
สำหรับข้อมูลเพิ่มเติมเกี่ยวกับกฎที่กระตุ้นการดำเนินการ โปรดดู เริ่มต้นด้วยกฎสำหรับเหตุการณ์
- เปิด web อินเทอร์เฟซของลำโพงที่ AXIS C8310 ของคุณเชื่อมต่ออยู่:
กรอกที่อยู่ IP ของลำโพงลงในเบราว์เซอร์ - Go to Audio > Peripherals and make sure your AXIS C8310 is connected.
- Go to System > SIP and make sure SIP is set up and activated.
- เพิ่มผู้รับ:
- Go to System > Events > Recipients and click + Add recipient.
- Name the recipient.
- Under Type, select SIP or VMS.
- Select SIP and enter the details.
- คลิกบันทึก
- Add rule for initiating a call:
- Go to System > Events > Rules and click + Add a rule.
- Name the rule.
- Under Condition, select I/O > Digital input is active.
- Under Port, select Source 1 button.
- To avoid initiating more than one call, we add an extra condition:
- Click + Add a condition.
- Select Call > State.
- Under State, select Idle.
- Under Action, select Calls > Make call.
- Under Recipient, select your recipient.
- คลิกบันทึก
- Add a rule for ending the call:
- Click + Add a rule.
- Name the rule.
- Under Condition, select I/O > Digital input is active.
- Under Port, select Source 1 button.
- To only perform the action if there is an ongoing call, we need to add another condition:
- Click + Add a condition.
- Select Call > State.
- Under State, select Active.
- Under Action, select Calls > End calls.
- คลิกบันทึก
Lock the device after a certain time of inactivity
- Go to Audio > Peripherals.
- Turn on Enable auto-lock.
- Under Auto-lock time, select a time.
If no buttons have been pressed on your AXIS C8310 for the selected time, all buttons will be locked. - To unlock the buttons, press the volume up and volume down buttons at the same time.
ข้อมูลจำเพาะ
สินค้าหมดview

ติดต่อฝ่ายสนับสนุน
หากคุณต้องการความช่วยเหลือเพิ่มเติม โปรดไปที่ axis.com/support.
T10196055
2025-06 (ม.4.2)
© 2023 – 2025 Axis Communications AB
เอกสาร / แหล่งข้อมูล
 |
ตัวควบคุมระดับเสียง AXIS C8310 [พีดีเอฟ] คู่มือการใช้งาน C8310 ตัวควบคุมระดับเสียง, C8310, ตัวควบคุมระดับเสียง, ตัวควบคุม |