การแนะนำ
The FEELWORLD FW759PRO is a 7-inch full HD IPS touchscreen camera monitor designed to enhance your video production workflow. It features a 1280x800 resolution, 1000:1 contrast ratio, and a 178° ultra-wide viewing angle, providing a clear and detailed display for precise monitoring. This manual will guide you through the setup, operation, and maintenance of your FW759PRO monitor.
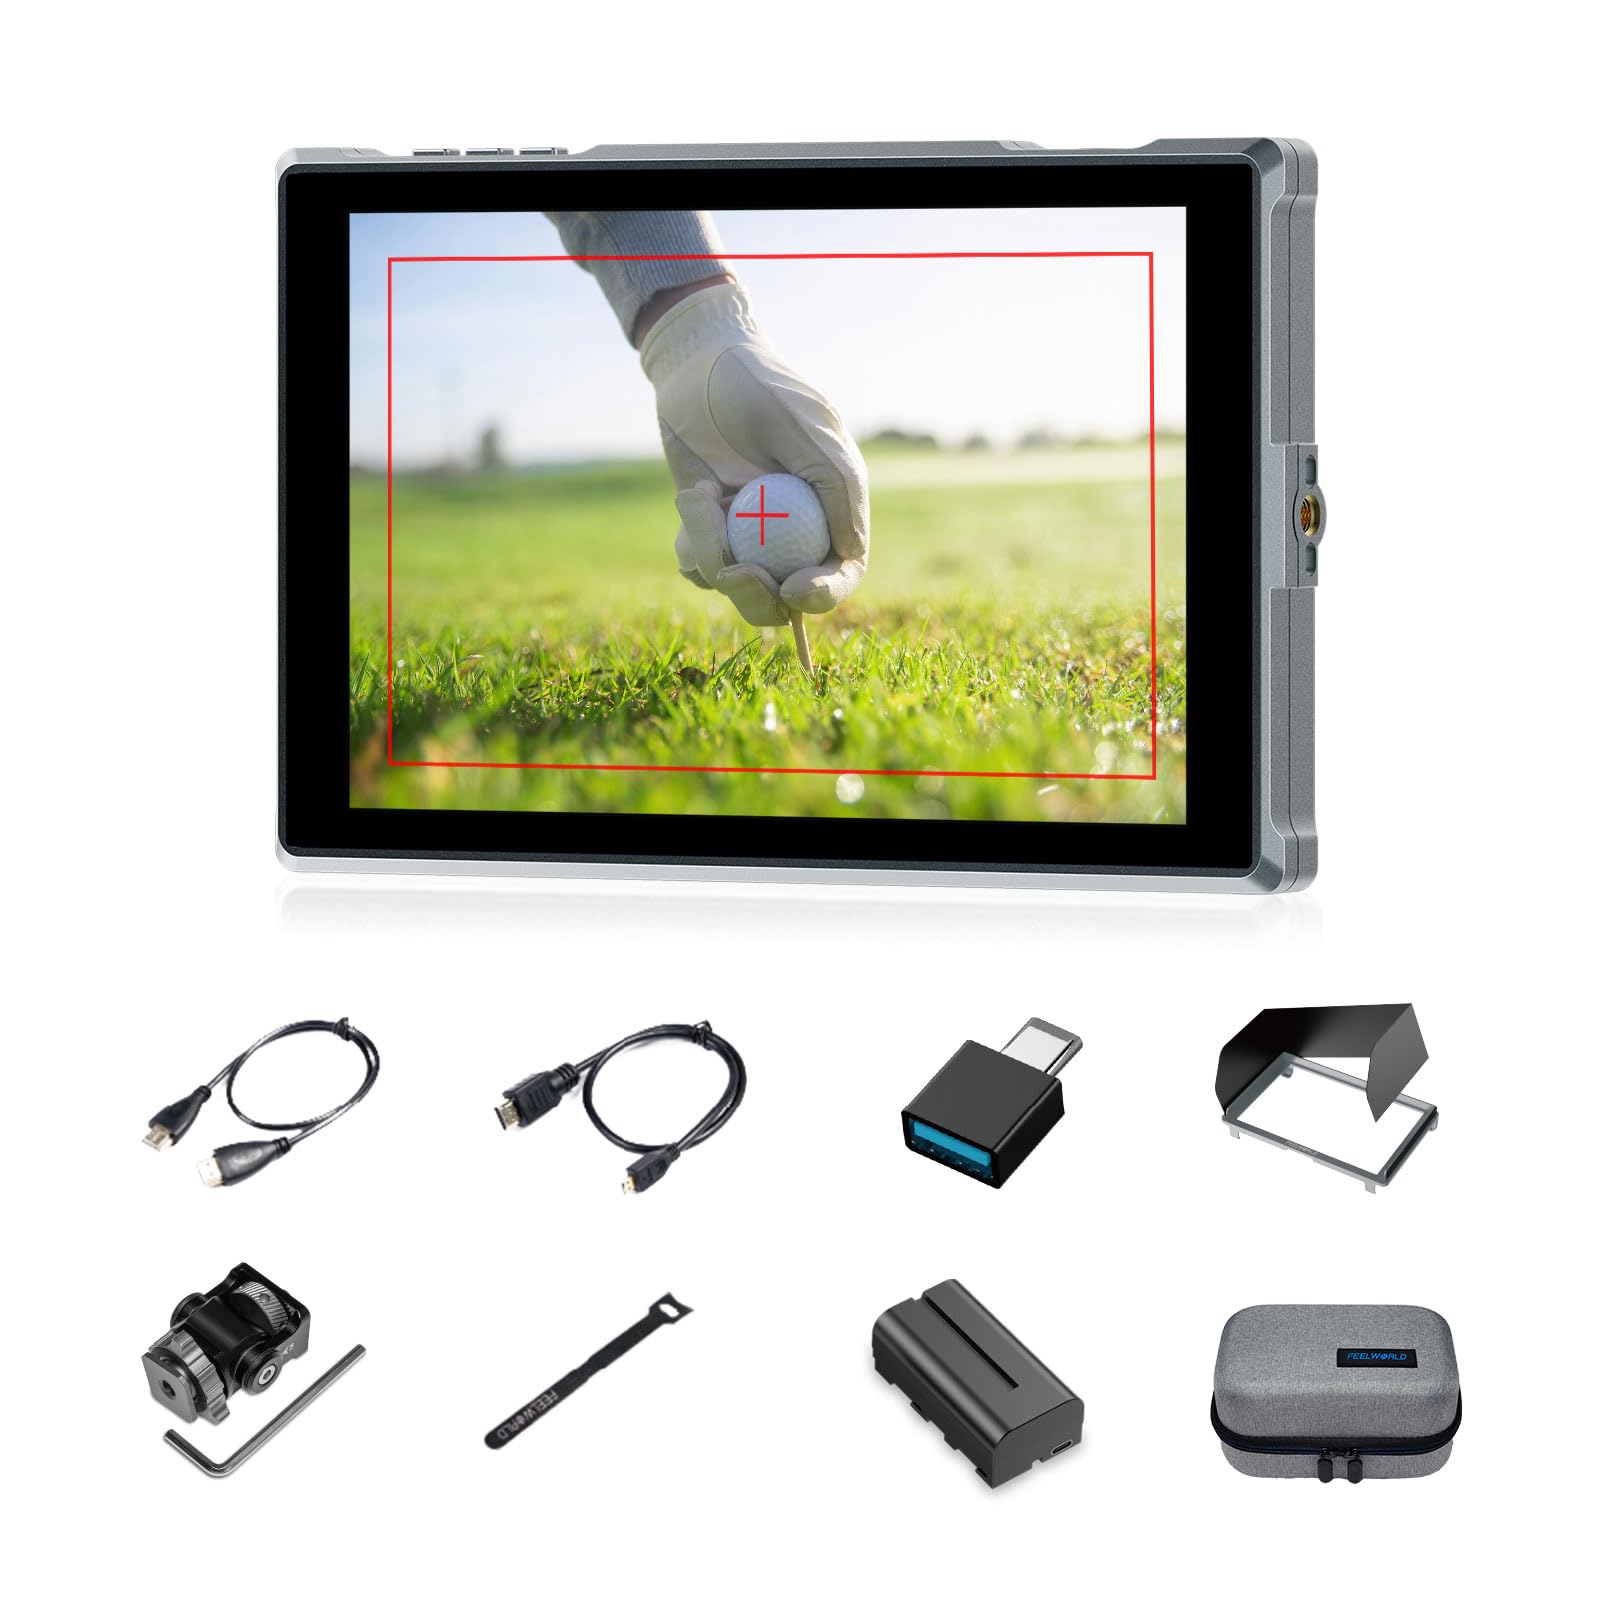
Figure 1: FEELWORLD FW759PRO Monitor Overview
คุณสมบัติหลัก:
- 7-inch Full HD IPS Touchscreen (1280x800 resolution)
- 4K HDMI Input & Output (up to 4K30Hz) and AV Input
- Slim and Lightweight Design (22mm thickness, 300g weight)
- Multiple Power Options: NP-F series battery, 12V DC IN, 5V Type-C
- Advanced Monitoring Functions: Histogram, Embedded Audio, False Colors, Peaking Filter, etc.
- Customizable Features: 4 groups of menu settings, 9:16 vertical screen marker
การตั้งค่า
1. เนื้อหาบรรจุภัณฑ์
ตรวจสอบว่ามีรายการทั้งหมดอยู่ในแพ็คเกจ:
- 1 x FW759PRO Monitor
- สาย HDMI 1 เส้น
- 1 x Micro HDMI Cable
- 1 x Mini Hot Shoe Mount + Hex Wrench
- 1 x อะแดปเตอร์ USB-A ถึง USB-C
- 1 x Sun Shade + Frame
- 1 x Cable Management Tie
- คู่มือเริ่มต้นอย่างรวดเร็ว 1 ชุด
- 1 x F550 Battery
- 1 x กระเป๋า

รูปที่ 2: อุปกรณ์เสริมที่รวมอยู่
2. การเปิดใช้งานจอภาพ
The FW759PRO offers three power options:
- แบตเตอรี่ซีรีส์ NP-F: Attach a compatible NP-F series battery to the battery plate on the rear of the monitor.
- 12V DC ใน: Connect a 12V DC power adapter (not included, suitable for 1A, DC 5.5*2.1mm plug) to the "DC IN 12V" port.
- พอร์ต Type-C 5V: Connect a 5V/2A (or higher) Type-C power source to the "TYPE-C 5V" port.

Figure 3: Power Input Options
3. การติดตั้งจอภาพ
The monitor features two 1/4"-20 mounting ports on its sides for versatile attachment to camera rigs, arms, or tripods. Use the included mini hot shoe mount to attach it to your camera's hot shoe or cold shoe mount.

Figure 4: 1/4 Inch Mounting Ports
4. Connecting to a Camera/Device
The FW759PRO supports 4K HDMI and AV inputs:
- อินพุต HDMI: Connect your camera or video source using an HDMI cable to the HDMI port. The monitor supports up to 4K30Hz signals.
- อินพุต AV: For specialized or legacy devices, use the AV input port.

รูปที่ 5: พอร์ตเชื่อมต่อ
คำแนะนำการใช้งาน
1. เปิด/ปิดเครื่อง
Press and hold the power button located on the top edge of the monitor to turn it on or off.
2. การใช้งานหน้าจอสัมผัส
The FW759PRO features an intuitive touchscreen interface for menu navigation and function control.
- ปรับแสงพื้นหลัง: Swipe up/down on the left half of the screen.
- ปรับระดับเสียง: Swipe up/down on the right half of the screen.
- Access Shortcut Menu: Swipe up/down on the bottom of the screen.

Figure 6: Touchscreen Gestures
3. Menu Navigation and Custom Buttons
Access the main menu by tapping the screen. Navigate through options using touch. The monitor also features customizable function buttons (F1, F2, F3) on the top edge, allowing quick access to frequently used features.

Figure 7: Menu and Custom Buttons
4. Advanced Monitoring Functions
The FW759PRO includes several tools for precise exposure and focus control:
- ฮิสโตแกรม: Displays the tonal distribution of your image.
- ตัวกรองจุดพีค: Highlights sharp edges to assist with focus.
- เสียงในตัว: ตรวจสอบระดับเสียง
- สีปลอม: Helps set exposure by displaying different exposure levels as distinct colors.
- ตรวจสอบฟิลด์: Assists in calibrating the monitor.
- ตารางเก้าช่อง: Aids in composition.
- Screen Marker: Various aspect ratio markers for framing.
- เครื่องหมายกลาง: Marks the center of the screen.
- เครื่องหมายแสดงอัตราส่วน: Provides different aspect ratio guides.
- โอเวอร์สแกน: Adjusts the display area.
- โหมดอนามอร์ฟิก: De-squeezes anamorphic footage (1.33x, 1.6x, 2.0x, or custom).
- พลิกภาพ: พลิกภาพในแนวนอนหรือแนวตั้ง
- ตรึงภาพ: Freezes the current frame.
- ขยายเข้า: Magnifies a portion of the image for detailed inspection.
- Pixel-to-Pixel: Displays the image at its native resolution without scaling.

Figure 8: Auxiliary Functions Overview

Figure 9: False Color Function

Figure 10: Anamorphic Mode
5. New Feature Upgrades
- 9:16 Vertical Screen Marker: Ideal for content creators producing vertical video for platforms like TikTok and YouTube Shorts.
- 4 Groups Menu Setting Saving: Save up to four custom menu configurations for quick recall. Once settings are adjusted, they save automatically and can be called directly.

Figure 11: 9:16 Vertical Screen Marker
การซ่อมบำรุง
1. การทำความสะอาดจอภาพ
- ใช้ผ้าเนื้อนุ่มที่ไม่เป็นขุยเช็ดหน้าจอและตัวเครื่องมอนิเตอร์เบาๆ
- สำหรับรอยเปื้อนฝังแน่น ให้เช็ดออกเล็กน้อยampเทน้ำหรือน้ำยาทำความสะอาดที่ปลอดภัยต่อหน้าจอลงบนผ้า
- Avoid using harsh chemicals, solvents, or abrasive materials, as these can damage the screen or finish.
2. การดูแลแบตเตอรี่
- เก็บแบตเตอรี่ไว้ในที่เย็นและแห้งเมื่อไม่ได้ใช้งาน
- Avoid fully discharging lithium-ion batteries frequently to prolong their lifespan.
- หากเก็บรักษาเป็นเวลานาน ควรชาร์จแบตเตอรี่ให้มีความจุประมาณ 50-60%
การแก้ไขปัญหา
ไม่แสดงสัญญาณ
- ตรวจสอบการเชื่อมต่อสายเคเบิล: Ensure HDMI or AV cables are securely connected to both the monitor and the camera/source.
- ตรวจสอบแหล่งอินพุต: Confirm that the correct input source (HDMI or AV) is selected on the monitor.
- Camera Output Settings: Check your camera's video output settings to ensure it is sending a signal and that the resolution/frame rate is compatible with the monitor (up to 4K30Hz).
- ทดสอบด้วยสายเคเบิล/อุปกรณ์อื่น: If possible, try a different HDMI/AV cable or connect the monitor to another video source to isolate the issue.
Monitor Does Not Power On
- ตรวจสอบแบตเตอรี่: Ensure the NP-F battery is charged and correctly installed.
- ตรวจสอบอะแดปเตอร์ไฟฟ้า: If using DC IN or Type-C, confirm the power adapter is connected and providing sufficient power (12V DC IN, 5V/2A Type-C).
- ปุ่มเปิด/ปิด: Ensure the power button is pressed and held for a few seconds to initiate power-on.
หน้าจอสัมผัสไม่ตอบสนอง
- Restart Monitor: Power off and then power on the monitor.
- ทำความสะอาดหน้าจอ: ตรวจสอบให้แน่ใจว่าหน้าจอสะอาด ปราศจากฝุ่นละอองหรือความชื้นที่อาจรบกวนการสัมผัส
ข้อมูลจำเพาะ
| คุณสมบัติ | รายละเอียด |
|---|---|
| ยี่ห้อ | FEELWORLD |
| ชื่อรุ่น | FW759PRO |
| ขนาดหน้าจอ | 7 นิ้ว |
| ปณิธาน | ขนาด 1280x800 |
| อัตราส่วนภาพ | 16:10 น. |
| อัตราส่วนคอนทราสต์ | 1000:1 น. |
| ประเภทจอภาพ | ไอพีเอส |
| Viewอิงแองเกิล | 178 องศา |
| เทคโนโลยีการเชื่อมต่อ | Auxiliary, HDMI |
| การเชื่อมต่อฮาร์ดแวร์ | HDMI |
| คุณสมบัติเพิ่มเติม | Touchscreen, Portable |
| เวลาตอบสนอง | 2 มิลลิวินาที |
| จำนวนพอร์ต HDMI ทั้งหมด | 2 |
| ผู้ผลิต | ลาอิซเก |
การรับประกันและการสนับสนุน
ข้อมูลการรับประกัน
The FEELWORLD FW759PRO monitor comes with a รับประกัน 1 ปี นับจากวันที่ซื้อ การรับประกันนี้ครอบคลุมข้อบกพร่องจากการผลิตและการทำงานผิดปกติภายใต้การใช้งานปกติ โปรดเก็บหลักฐานการซื้อไว้เพื่อขอรับสิทธิ์การรับประกัน
For detailed warranty terms and conditions, please refer to the official FEELWORLD webไซต์หรือติดต่อฝ่ายสนับสนุนลูกค้าของพวกเขา
การสนับสนุนลูกค้า
If you encounter any issues not covered in this manual or require further assistance, please contact FEELWORLD customer support. Contact information can typically be found on the official FEELWORLD webดูได้ในเว็บไซต์ หรือในคู่มือเริ่มต้นใช้งานฉบับย่อที่มาพร้อมกับผลิตภัณฑ์ของคุณ


