การแนะนำ
This manual provides detailed instructions for the VEVOR GPS Navigator S900. Please read this manual thoroughly before using the device to ensure proper operation and to maximize its features. The VEVOR GPS Navigator S900 is a versatile navigation system designed for various vehicle types, offering advanced features like a built-in dash cam, voice guidance, and custom routing.

Figure 1: VEVOR GPS Navigator S900 with suction mount.
ข้อมูลด้านความปลอดภัย
Always prioritize safety while operating your vehicle. Do not operate the GPS device in a manner that distracts you from driving. Ensure the device is securely mounted and does not obstruct your view of the road. Adhere to all local traffic laws and regulations. Keep the device away from extreme temperatures and direct sunlight for prolonged periods.
เนื้อหาแพ็คเกจ
ตรวจสอบว่ารายการทั้งหมดที่ระบุไว้ด้านล่างนี้รวมอยู่ในแพ็คเกจของคุณ:
- 1 x VEVOR GPS Navigator S900 Unit
- 1 x Car Charger (Cable Length: 1.5m, DC 12-40V to 5V/2.5A)
- 1 x ฐานดูด
- 1 x Type-C Data Cable (Cable Length: 50cm)
- 1 x คู่มือผู้ใช้
- กระเป๋าผ้า 1 x
- 1 x Round Pad
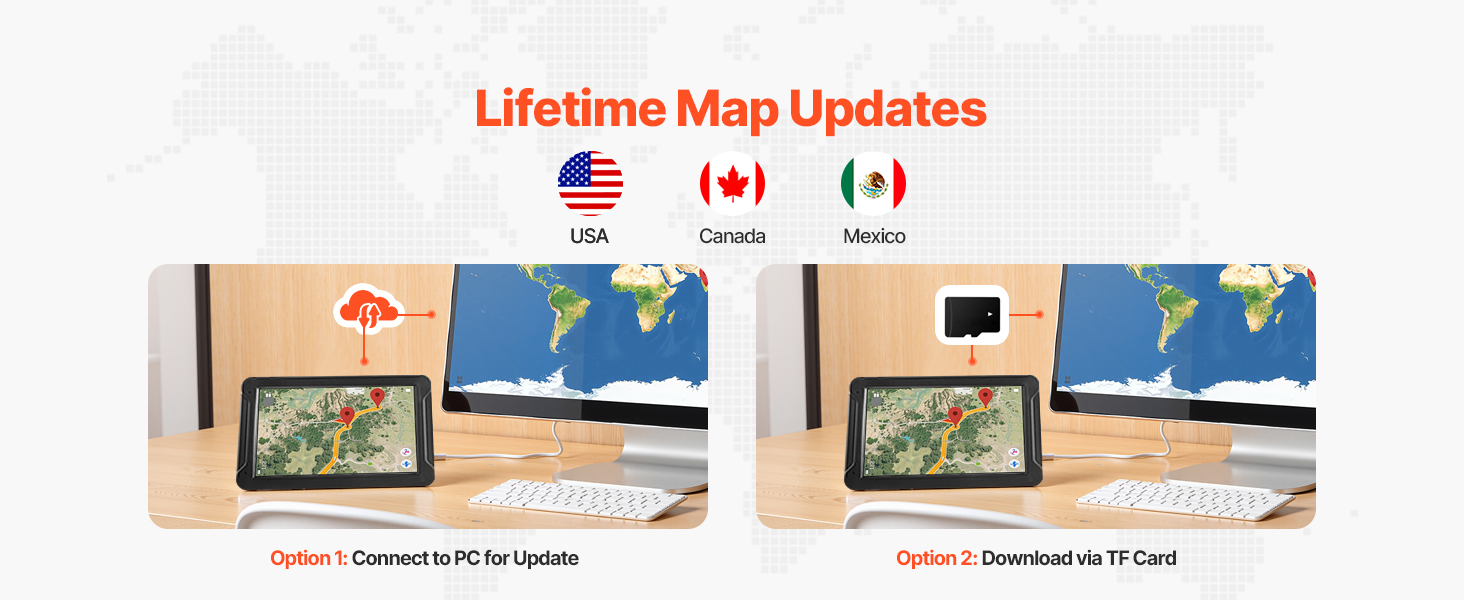
Figure 2: Included accessories and device dimensions.
การตั้งค่า
1. การติดตั้งอุปกรณ์
The VEVOR GPS Navigator S900 can be mounted using the provided suction mount. For optimal stability, attach the suction mount to a clean, smooth surface on your dashboard or windshield. Use the round pad if mounting on a textured surface.
- Confirm the mounting holes of the bracket align with the device.
- Insert the device into the slot of the suction mount until it clicks securely.
- Wipe the installation area on your dashboard or windshield clean.
- Press the suction cup firmly onto the cleaned surface and engage the lever to secure it.

Figure 3: Mounting instructions for the GPS Navigator.
2. การชาร์จครั้งแรก
Before first use, fully charge the device using the provided car charger. Connect the car charger to your vehicle's 12V-40V power outlet and the Type-C data cable to the GPS unit.
3. การเปิด/ปิดเครื่อง
Press and hold the power button located on the device to turn it on or off. A short press will typically put the device into sleep mode or wake it up.
การใช้งานอุปกรณ์
1. Touch Screen Usage
The 9-inch anti-glare HD screen (800x480) is touch-sensitive. Navigate menus and input information by tapping or swiping on the screen.
2. คุณสมบัติการนำทาง
The device offers comprehensive navigation capabilities:
- ค้นหาปลายทาง: Supports searching by zip code, address, coordinates, saved favorites, and Points of Interest (POI).
- การวางแผนเส้นทาง: Provides various route planning options to optimize your journey.
- เสียงแนะนำ: Features clear, multi-language voice guidance for turn-by-turn directions.
- การแจ้งเตือน: Includes overspeed alerts, speed camera warnings, and traffic light warnings.
- ระบบช่วยควบคุมเลน: Helps you navigate complex intersections by indicating the correct lane.
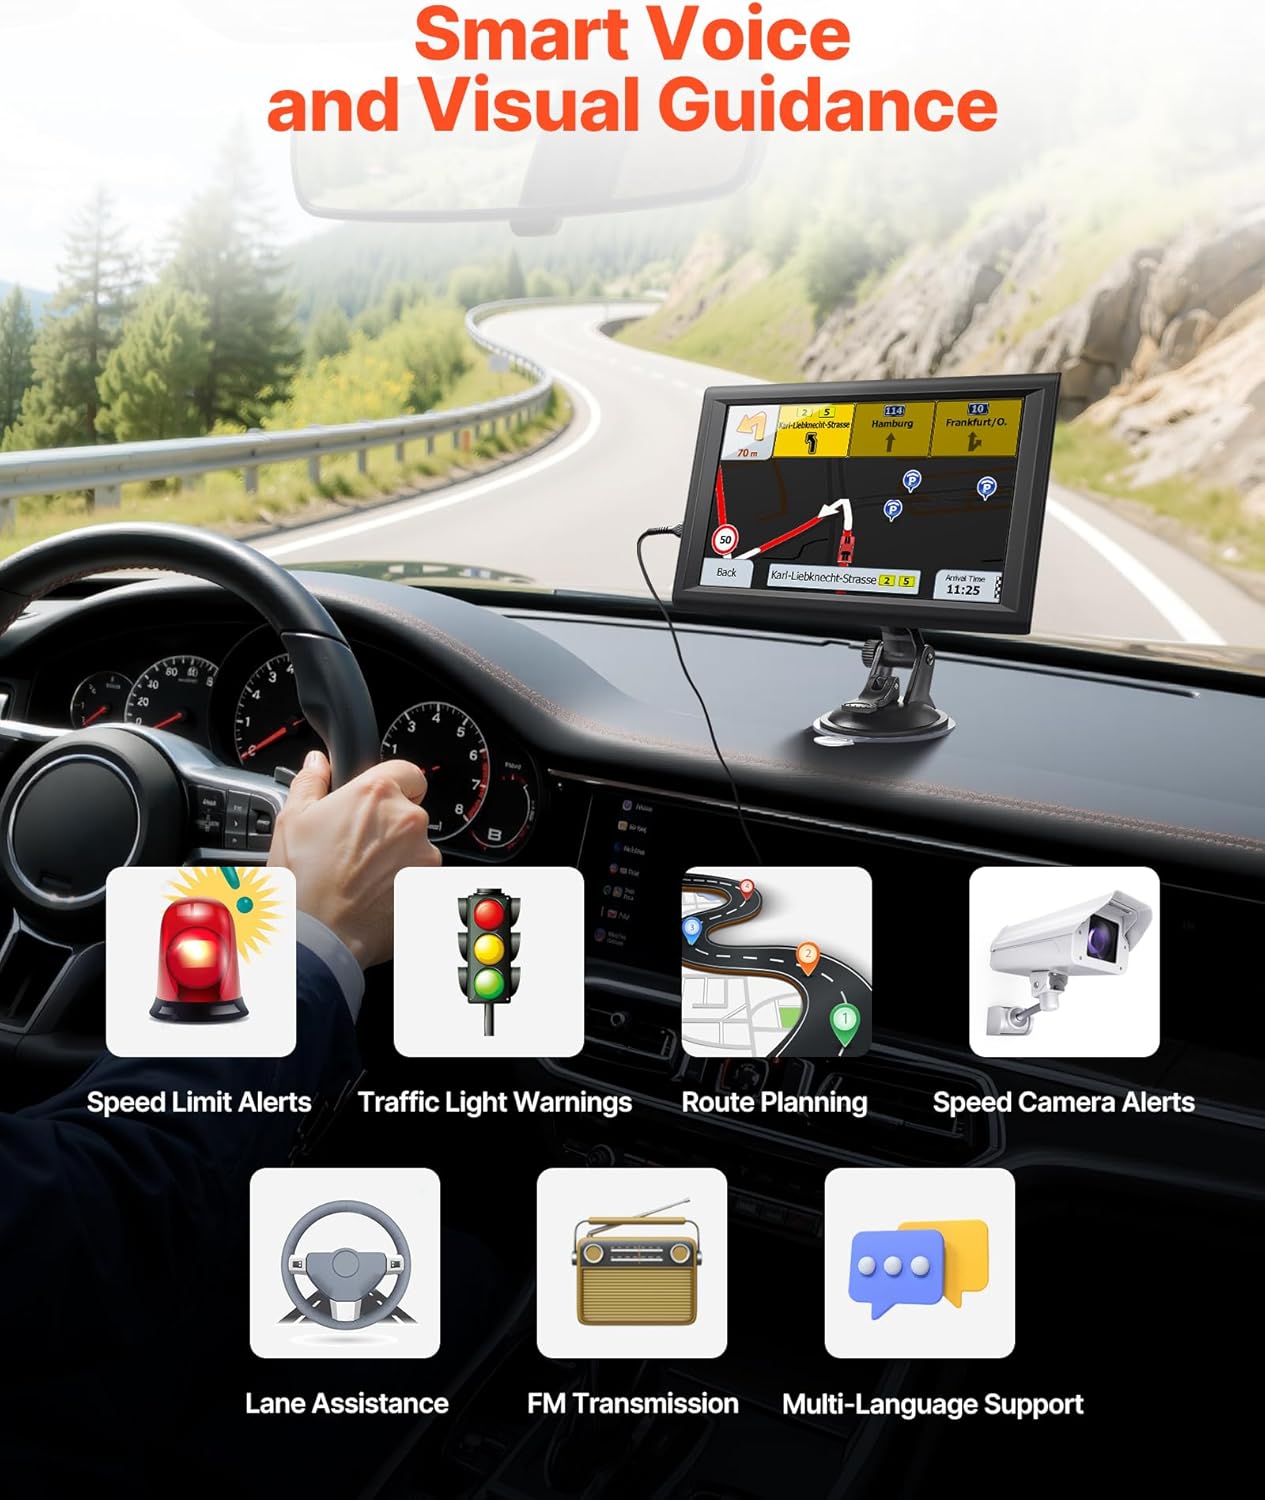
Figure 4: Smart voice and visual guidance features.

Figure 5: Precision truck navigation with restricted road avoidance.
3. Built-in Dash Cam
The integrated dash cam provides an additional layer of security by recording your journey. Refer to the on-screen menu for dash cam settings and recording options.
4. FM Transmission
The device supports FM transmission to your car stereo, allowing navigation audio to play through your vehicle's speakers. This is not an FM radio function but a way to broadcast audio from the GPS to your car's radio frequency.
5. Multiple Vehicle Modes
The GPS Navigator supports 7 different vehicle modes to provide tailored routing:
- รถ
- คนเดินเท้า
- จักรยาน
- ภาวะฉุกเฉิน
- รสบัส
- แท็กซี่
- รถบรรทุก
To switch to "Truck" mode, navigate to Navigation > Settings > Route Settings > Vehicle > Truck. This mode allows for custom truck routing, considering vehicle dimensions and weight to avoid restricted roads.

Figure 6: Versatile use across 7 vehicle types.
6. Map Updates
The device comes with preloaded maps and supports lifetime map updates. Updates can be performed via two methods:
- Option 1: Connect to PC via USB: Connect the device to a computer using the provided USB cable and follow the instructions for map updates.
- Option 2: Download via TF Card: Download map updates to a TF card (expandable storage) and insert it into the device.

Figure 7: Lifetime map updates and custom experience.
การซ่อมบำรุง
1. การทำความสะอาดหน้าจอ
Use the provided cloth bag or a soft, lint-free cloth to gently wipe the screen. Avoid using abrasive cleaners or solvents that could damage the display.
2. การดูแลแบตเตอรี่
To prolong battery life, avoid fully discharging the battery frequently. Charge the device regularly, especially before long trips. Store the device in a cool, dry place when not in use.
การแก้ไขปัญหา
| ปัญหา | สาเหตุที่เป็นไปได้ | สารละลาย |
|---|---|---|
| อุปกรณ์ไม่เปิดเครื่อง | Low battery; faulty charger/cable | Ensure the device is fully charged. Check car charger and Type-C cable for damage. |
| ไม่มีสัญญาณ GPS | ถูกขัดขวาง view of sky; device not acquiring satellites | ย้ายไปยังพื้นที่เปิดโล่งที่มีอากาศบริสุทธิ์ view of the sky. Allow several minutes for the device to acquire satellites. |
| หน้าจอสัมผัสไม่ตอบสนอง | Software glitch; screen protector interference | Restart the device. Ensure any screen protector is properly applied or remove it to test. |
| ระบบนำทางด้วยเสียงใช้งานไม่ได้ | Volume too low; FM transmission not configured | Check volume settings. Ensure FM transmission is correctly set up with your car stereo. |
ข้อมูลจำเพาะ
- ชื่อรุ่น : S900
- ขนาดหน้าจอ: 9.06 นิ้ว
- ความละเอียดการแสดงผล: 800 x 480
- พื้นที่จัดเก็บ: 16GB (with 1GB RAM), TF card expandable
- แบตเตอรี่: Built-in 2500mAh (Nonstandard Battery required, included)
- การเชื่อมต่อ: ยูเอสบี
- ระบบปฏิบัติการ: หน้าต่าง
- คุณสมบัติพิเศษ: Touchscreen, Built-in Dash Cam, Voice Turn-by-Turn Guidance, Speed and Red Light Warning, Custom Truck Routing
- ประเภทรถที่ให้บริการ: Car, Pedestrian, Bicycle, Emergency, Bus, Taxi, Truck
- ประเภทแผนที่: ถนน
- น้ำหนักสินค้า: 1.48 ปอนด์
- ขนาดแพ็คเกจ: 10.24 x 10.24 x 6.1 นิ้ว
- ผู้ผลิต: เวเวอร์
การรับประกันและการสนับสนุน
สำหรับข้อมูลการรับประกันและการสนับสนุนทางเทคนิค โปรดดูที่ VEVOR อย่างเป็นทางการ website or contact VEVOR customer service. Keep your purchase receipt as proof of purchase for any warranty claims.


