1. บทนำ
The SINGER M1000 Mending Machine is a compact, lightweight, and portable sewing machine designed for light to medium weight fabrics and various mending and repair tasks. It features 32 stitch applications, an LED light, and user-friendly controls, making it suitable for both beginners and experienced sewists.
This manual provides essential information for setting up, operating, and maintaining your SINGER M1000 machine to ensure optimal performance and longevity.
2. คำแนะนำด้านความปลอดภัย
- Always unplug the machine from the electrical outlet immediately after using and before cleaning, removing covers, or performing any user servicing adjustments.
- วางนิ้วให้ห่างจากชิ้นส่วนที่เคลื่อนไหวทั้งหมด ต้องใช้ความระมัดระวังเป็นพิเศษรอบ ๆ เข็มจักรเย็บผ้า
- ใช้เฉพาะอุปกรณ์เสริมที่ผู้ผลิตแนะนำตามที่ระบุไว้ในคู่มือนี้เท่านั้น
- ห้ามใช้งานเครื่องหากสายไฟหรือปลั๊กชำรุด หากเครื่องทำงานผิดปกติ หรือหากเครื่องตกหล่นหรือได้รับความเสียหาย
- ห้ามดำเนินการในบริเวณที่มีการใช้ผลิตภัณฑ์สเปรย์ หรือในบริเวณที่มีการส่งออกซิเจน
3. ส่วนประกอบของเครื่องจักร
Familiarize yourself with the main parts of your SINGER M1000 Mending Machine:

- แกนหมุน: Holds the spool of thread.
- Bobbin Winder Spindle: Used to wind thread onto the bobbin.
- ปุ่มปรับความตึงด้าย: ปรับความตึงของด้ายด้านบน
- แป้นหมุนเลือกตะเข็บ: Used to choose from the 32 available stitch applications.
- คันโยกเย็บย้อนกลับ: ใช้การเย็บแบบย้อนกลับเพื่อยึดตะเข็บให้แน่น
- เข็ม Clamp สกรู: Secures the needle in place.
- ตีนผีเย็บผ้า: ช่วยยึดผ้าให้แนบสนิทกับฟันเฟืองของจักรเย็บผ้า
- ฟีดด็อก: Move the fabric under the needle.
- ไฟ LED: ช่วยให้บริเวณเย็บผ้าสว่างขึ้น
- แขนอิสระ: Allows for easy sewing of tubular items like cuffs and sleeves.
4. การตั้งค่า
4.1. การแกะกล่องและการตรวจสอบเบื้องต้น
Carefully remove the machine from its packaging. Ensure all included accessories are present:
- All-Purpose Foot
- Extra Needle
- Bobbins: Class 15 (transparent)
- ที่สนเข็มแบบแมนนวล
- สายไฟ

4.2. การเชื่อมต่อไฟฟ้า
Connect the power cord to the machine and then to a suitable electrical outlet. Plug the foot pedal into its designated port on the machine.
4.3. การพันด้ายกระสวย
- วางหลอดด้ายไว้บนแกนยึดหลอดด้าย
- สอดด้ายผ่านตัวนำด้ายด้านบนและรอบจานปรับความตึงของแกนม้วนด้าย
- วางหลอดด้ายเปล่าลงบนแกนม้วนหลอดด้าย
- พันด้ายตามเข็มนาฬิการอบกระสวยสองสามรอบ
- ดันแกนกรอไส้กระสวยไปทางขวา
- เหยียบแป้นเหยียบเพื่อเริ่มการกรอด้าย หยุดเมื่อด้ายเต็มกระสวยแล้ว
- ตัดด้ายและดันแกนม้วนด้ายกลับไปทางซ้าย
4.4. การใส่กระสวย
The SINGER M1000 features a convenient top drop-in bobbin system:
- Open the transparent bobbin cover plate.
- ใส่กระสวยที่พันด้ายแล้วเข้าไปในกล่องกระสวย ตรวจสอบให้แน่ใจว่าด้ายคลายตัวในทิศทางที่ถูกต้อง (โดยปกติคือทวนเข็มนาฬิกา)
- Follow the indicated threading path on the machine for the bobbin thread.
- เปลี่ยนแผ่นปิดฝากระสวย

4.5. การร้อยด้ายบน
Follow the numbered threading guides on the machine for proper upper thread tension and needle threading:
- ยกคันโยกตีนผีขึ้น
- วางม้วนด้ายลงบนแกนม้วนด้าย
- Guide the thread through the upper thread guide (1).
- Bring the thread down through the right thread channel (2).
- Loop the thread up and around the take-up lever (3) from right to left.
- Bring the thread down through the left thread channel (4).
- Pass the thread behind the needle bar thread guide (5).
- Thread the needle from front to back. Use the manual needle threader if desired.

4.6. การติดตั้งเข็ม
To install or change the needle:
- หมุนมือหมุนเข้าหาตัวเพื่อยกเข็มขึ้นไปที่ตำแหน่งสูงสุด
- คลายเข็ม clamp สกรู
- ถอดเข็มเก่าออก (ถ้ามี)
- ใส่เข็มใหม่โดยให้ด้านแบนหันไปทางด้านหลังของเครื่อง แล้วดันเข้าไปให้สุดเท่าที่จะทำได้
- ขันเข็มให้แน่นamp ขันสกรูให้แน่น
5. การดำเนินการ
5.1. การเลือกเย็บ
The SINGER M1000 offers 32 stitch applications. Turn the Stitch Selector Dial to choose the desired stitch. The machine has preset stitch length and width for ease of use.

5.2. Adjustable Thread Tension
The thread tension dial allows you to customize the stitch appearance based on the fabric and thread type. Adjust the dial to achieve balanced tension for neat, professional-looking results. Refer to the manual for recommended tension settings for different stitches and fabrics.
5.3. การเย็บแบบย้อนกลับ
To reinforce seams at the beginning and end, use the reverse stitch lever. Press and hold the lever while sewing to stitch backward. Release the lever to resume forward stitching. This prevents stitches from unraveling.
5.4. Free Arm Functionality
The machine features a built-in free arm. To access it, slide off the removable accessory storage compartment. The free arm is ideal for sewing tubular or hard-to-reach fabric areas such as cuffs, sleeves, and pant hems.
5.5. ไฟ LED
The integrated LED light illuminates the sewing area, providing clear visibility for detailed work and reducing eye strain, especially in low-light conditions.
5.6. Basic Sewing Applications
The M1000 is versatile for various tasks:
- Mending: Repair tears, holes, and worn areas on clothing.
- Hemming: Create neat and durable hems on garments.
- การแก้ไข: Apply patches to strengthen or decorate fabric.
- Embellishments: Add decorative stitches or appliques to personalize items.

6. การบำรุงรักษา
6.1. การทำความสะอาด
การทำความสะอาดอย่างสม่ำเสมอจะช่วยรักษาประสิทธิภาพการทำงานของเครื่องของคุณ:
- ถอดปลั๊กเครื่องก่อนทำความสะอาดทุกครั้ง
- ถอดแผ่นรองเข็มและกล่องกระสวยออก
- ใช้แปรงขนาดเล็กปัดเศษฝุ่นและสิ่งสกปรกออกจากฟันเฟืองป้อนผ้าและบริเวณกระสวย
- เช็ดภายนอกเครื่องด้วยผ้าแห้งนุ่ม
6.2. การจัดเก็บ
When not in use, store your SINGER M1000 in a dry, dust-free environment. Using a dust cover is recommended to protect the machine from dust and debris.
7 การแก้ไขปัญหา
If you encounter issues with your SINGER M1000, consider the following common solutions:
- ข้ามตะเข็บ: ตรวจสอบให้แน่ใจว่าได้เสียบเข็มอย่างถูกต้อง ไม่บิดงอ และเป็นเข็มชนิดที่เหมาะสมกับเนื้อผ้าของคุณ ร้อยด้ายเข้าเครื่องให้เรียบร้อยทั้งหมด
- การขาดของเส้นด้าย: Check for proper threading, correct thread tension, and ensure the needle is not dull or bent. Use good quality thread.
- การติดขัดของเครื่องจักร: Remove any tangled threads from the bobbin area. Ensure the bobbin is correctly inserted and wound.
- เย็บไม่เท่ากัน: Adjust the thread tension. Ensure the fabric is fed evenly without pulling or pushing excessively.
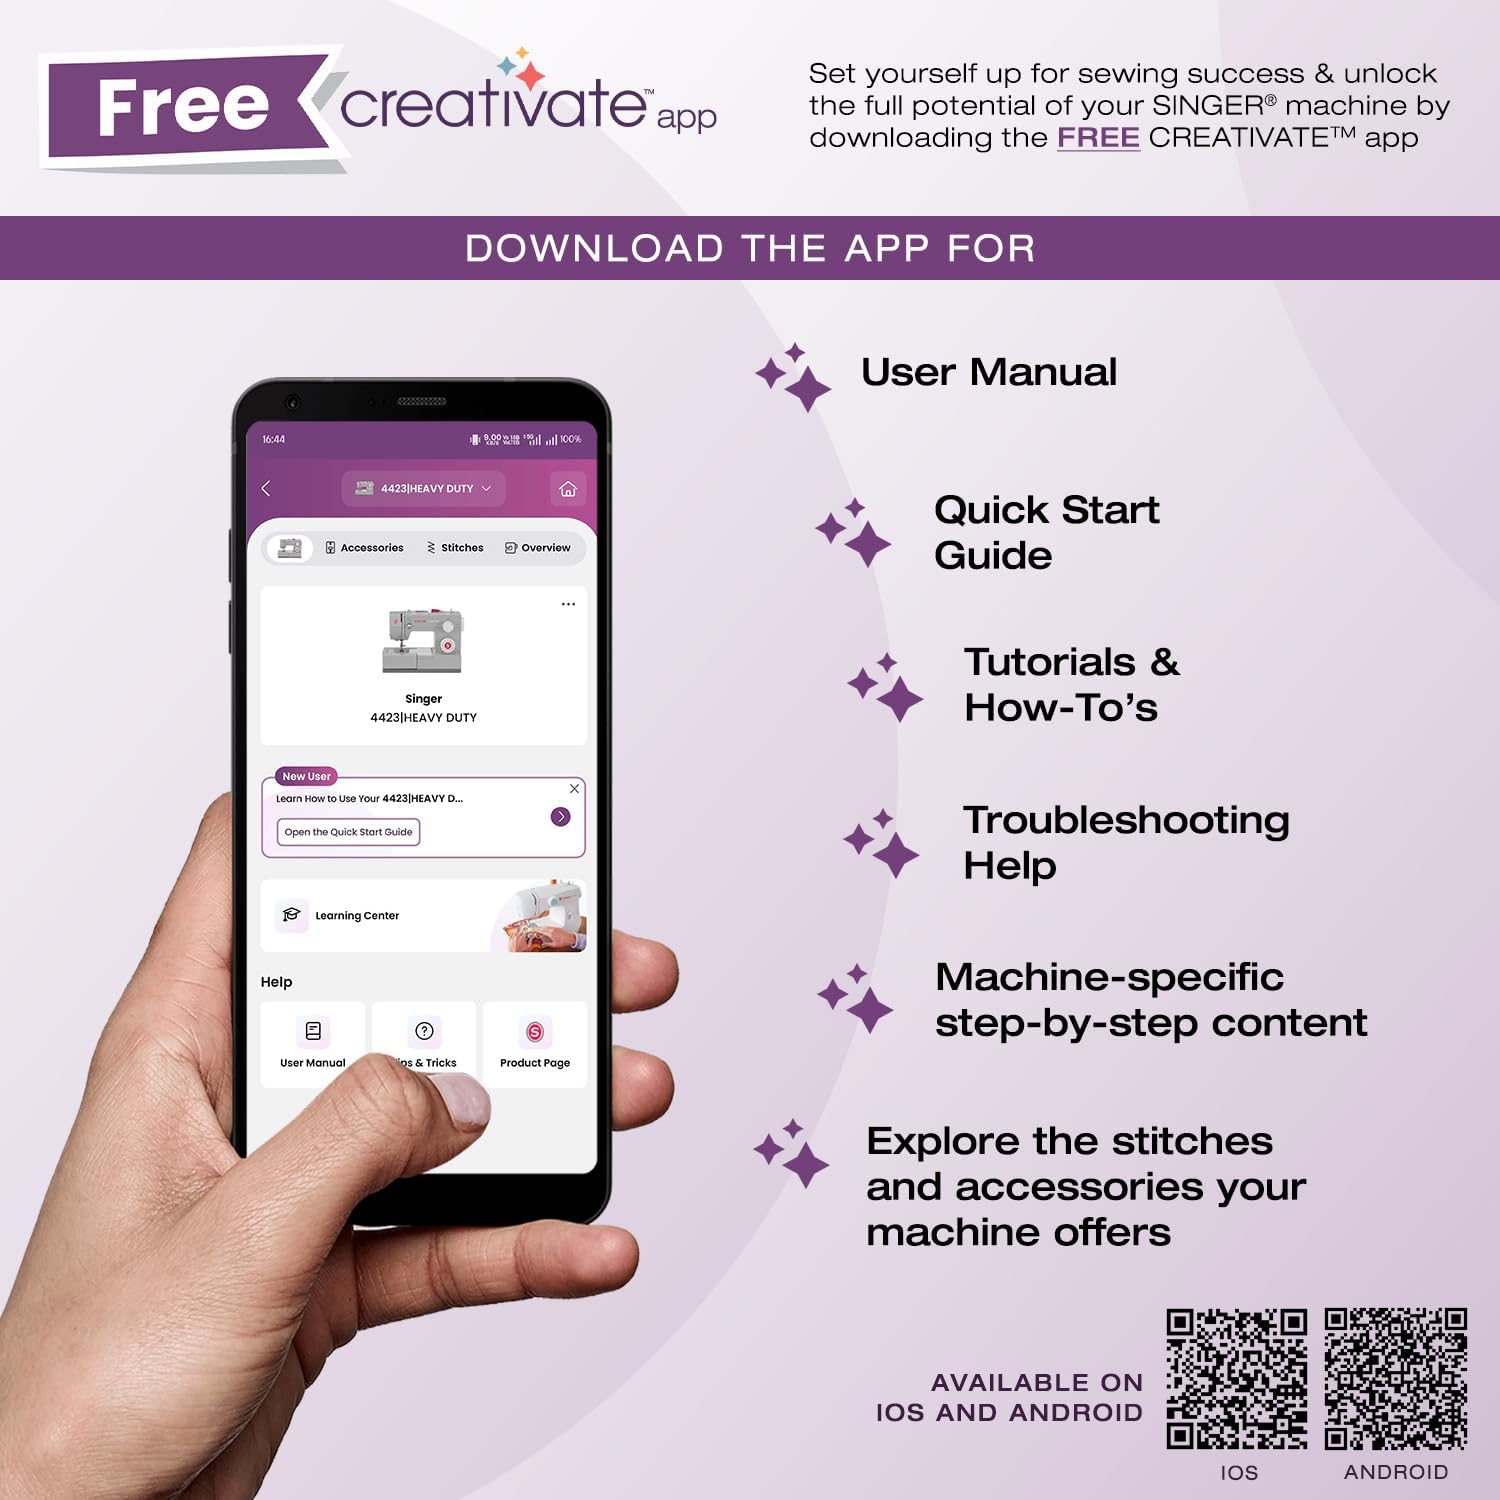
For more detailed troubleshooting guides and tutorials, refer to the SINGER Creativate App or the official SINGER support webเว็บไซต์.
8. ข้อมูลจำเพาะ
| คุณสมบัติ | รายละเอียด |
|---|---|
| หมายเลขรุ่น | M1000 |
| ยี่ห้อ | SINGER |
| ขนาดสินค้า | 11.4 x 5.1 x 9.4 นิ้ว (28.96 x 12.95 x 23.88 ซม.) |
| น้ำหนักสินค้า | 5.5 ปอนด์ (2.49 กก.) |
| การประยุกต์ใช้การเย็บ | 32 |
| ส่วนประกอบที่รวมอยู่ | All-Purpose Foot, Extra Needle, Bobbins: Class 15 (transparent), Manual Needle Threader, Power Cord |
| สี | สีดำ |
| ยูพีซี | 840163309608 |
9. การรับประกันและการสนับสนุน
สำหรับข้อมูลการรับประกัน การลงทะเบียนผลิตภัณฑ์ และการสนับสนุนเพิ่มเติม โปรดเยี่ยมชมเว็บไซต์อย่างเป็นทางการของ SINGER website or utilize the SINGER Creativate App.
การ SINGER Creativate App is your sewing support hub, offering access to your machine's manual, quick start guides, tutorials, troubleshooting tips, and information on accessories. Download the app to enhance your sewing experience.

ดาวน์โหลดแอป:
For direct support, visit the SINGER support page: singer.com/support


