1. บทนำ
This manual provides detailed instructions for the installation, operation, and maintenance of your MOES WiFi Smart Light Switch (1-Gang). This smart switch is designed to enhance your home lighting control with convenience and smart features.
คุณสมบัติหลัก:
- Supports both no-neutral wire and with-neutral wire configurations.
- No hub required; connects directly to your 2.4GHz Wi-Fi network.
- Compatible with Alexa and Google Assistant for voice control.
- Remote control via smartphone application.
- Timer and scheduling functions for automated lighting.
- Space-saving design fits most standard wall boxes.

Image 1.1: MOES WiFi Smart Light Switch packaging and the 1-gang switch unit.
2. ข้อมูลด้านความปลอดภัย
- ควรปิดเบรกเกอร์ทุกครั้งก่อนการติดตั้งหรือบำรุงรักษา
- หากคุณไม่แน่ใจเกี่ยวกับสายไฟฟ้า ควรปรึกษาช่างไฟฟ้าที่มีคุณสมบัติเหมาะสม
- This switch is designed for indoor use only.
- ห้ามเกินขีดจำกัดการรับน้ำหนักสูงสุดที่ระบุไว้ในคุณลักษณะของผลิตภัณฑ์
3. คู่มือการติดตั้ง
3.1. รายการตรวจสอบก่อนการติดตั้ง
- Ensure your home has a 2.4GHz Wi-Fi network. 5GHz networks are not supported.
- Confirm the existing wiring in your wall box (neutral wire present or not).
- Tools required: Screwdriver, wire strippers, voltagอีผู้ทดสอบ
3.2. คำแนะนำในการเดินสายไฟ
The MOES Smart Light Switch supports both neutral wire and no-neutral wire configurations. Please identify your wiring type before proceeding.
3.2.1. No-Neutral Wire Installation
If your wall box does not have a neutral wire, a capacitor (included in the package) is required for proper operation. This capacitor must be connected across the light bulb terminals.
- ปิดไฟ: หาตำแหน่งเบรกเกอร์วงจรและปิดไฟที่สวิตช์ที่คุณกำลังจะเปลี่ยน ตรวจสอบให้แน่ใจว่าไฟดับสนิทแล้วด้วยเครื่องวัดแรงดันไฟฟ้าtagอีผู้ทดสอบ
- Identify wires: In your wall box, identify the Line (Live) wire, Load wire(s), and Ground wire.
- Connect wires to the switch:
- Connect the Line wire to the 'L' terminal on the smart switch.
- Connect the Load wire(s) to the 'L1' (OUT) terminal. For 1-gang switches, typically only L1 is used.
- Connect the Ground wire to the 'GND' terminal.
- ติดตั้งตัวเก็บประจุ: Connect the provided capacitor across the light bulb terminals (between the live and neutral wires at the light fixture). This is crucial for no-neutral setups to ensure stable power to the smart switch.
- ติดตั้งสวิตช์: Secure the smart switch into the wall box and attach the faceplate.
- คืนพลังงาน: เปิดไฟที่เบรกเกอร์อีกครั้ง

Image 3.1: Wiring diagram for no-neutral wire installation, showing capacitor connection.

Image 3.2: Comparison of Neutral + Live Wire and No Neutral Wire diagrams, highlighting the capacitor for no-neutral setups.
3.2.2. With-Neutral Wire Installation
If your wall box has a neutral wire, the installation is straightforward.
- ปิดไฟ: หาตำแหน่งเบรกเกอร์วงจรและปิดไฟที่สวิตช์ที่คุณกำลังจะเปลี่ยน ตรวจสอบให้แน่ใจว่าไฟดับสนิทแล้วด้วยเครื่องวัดแรงดันไฟฟ้าtagอีผู้ทดสอบ
- Identify wires: In your wall box, identify the Line (Live) wire, Neutral wire, Load wire(s), and Ground wire.
- Connect wires to the switch:
- Connect the Line wire to the 'L' terminal on the smart switch.
- ต่อสายกลาง (Neutral) เข้ากับขั้ว 'N'
- Connect the Load wire(s) to the 'L1' (OUT) terminal. For 1-gang switches, typically only L1 is used.
- Connect the Ground wire to the 'GND' terminal.
- ติดตั้งสวิตช์: Secure the smart switch into the wall box and attach the faceplate.
- คืนพลังงาน: เปิดไฟที่เบรกเกอร์อีกครั้ง
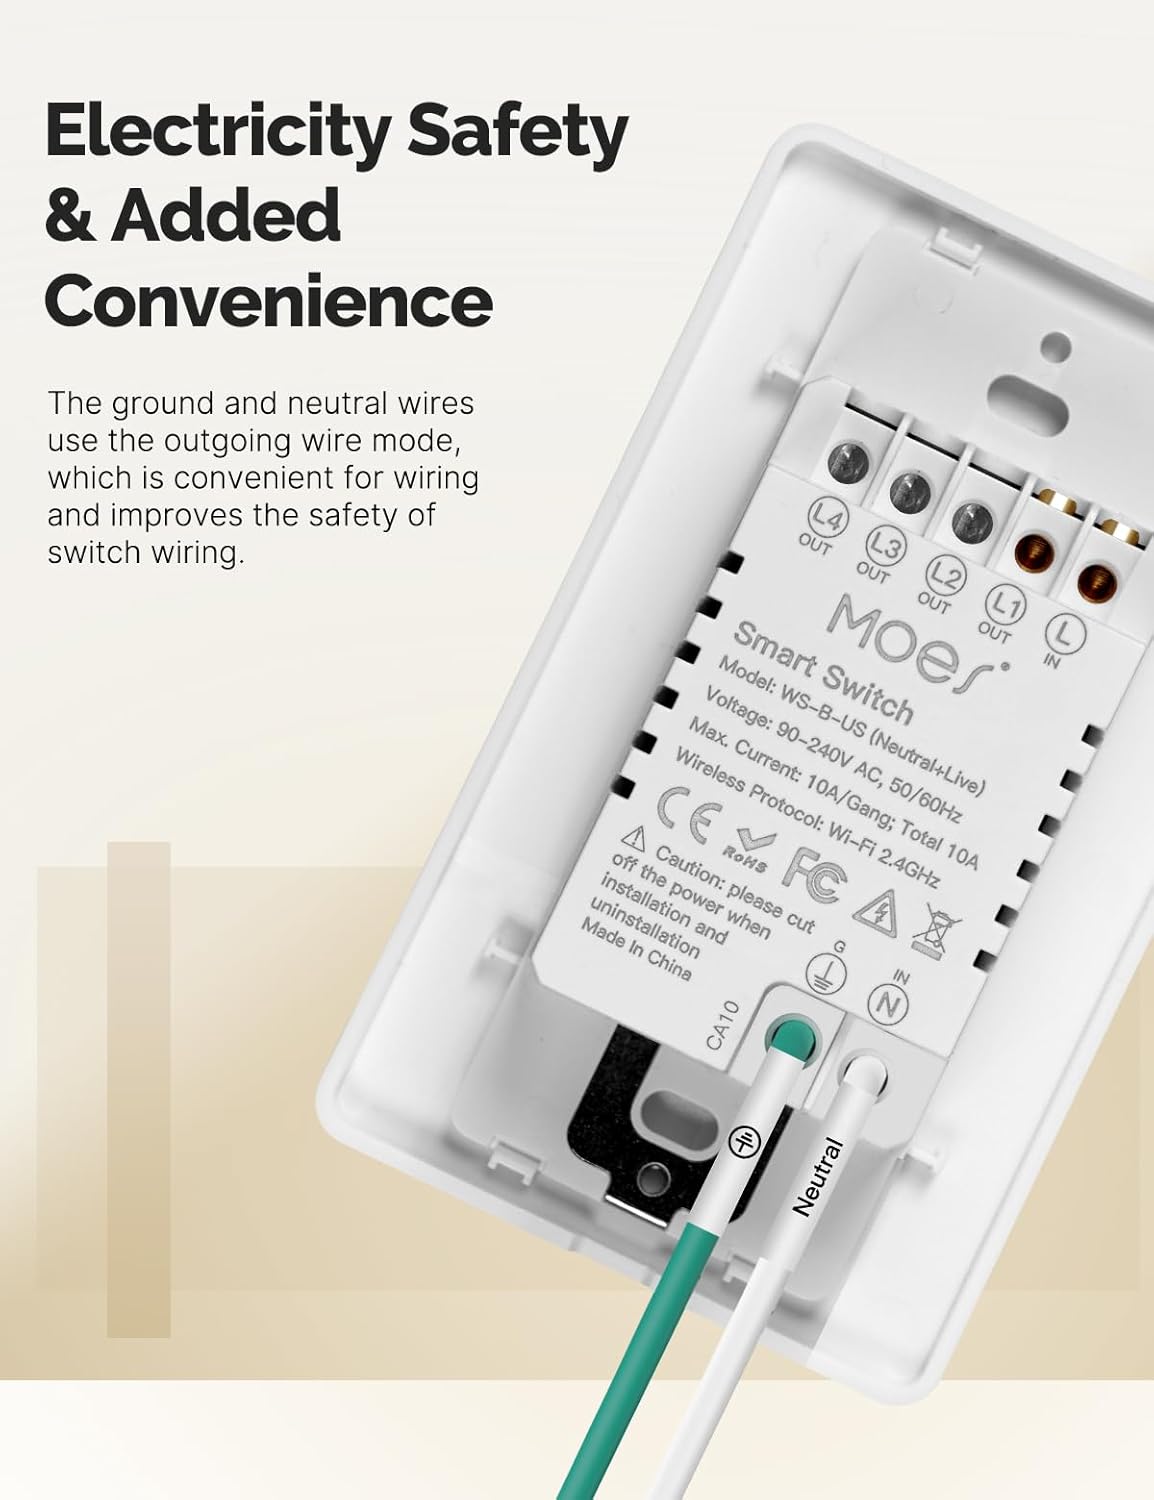
ภาพที่ 3.3: ด้านหลัง view of the MOES Smart Switch showing wiring terminals for Line, Neutral, Load, and Ground connections.
3.3. การจับคู่แอป
- ดาวน์โหลดแอป: Download the "Smart Life" or "MOES" app from your smartphone's app store.
- ลงทะเบียน/เข้าสู่ระบบ: สร้างบัญชีหรือเข้าสู่ระบบแอพ
- เพิ่มอุปกรณ์: แตะไอคอน '+' ที่มุมขวาบนของแอปเพื่อเพิ่มอุปกรณ์ใหม่
- เลือกประเภทอุปกรณ์: Choose "Electrical" then "Light Switch" or "Switch (Wi-Fi)".
- กรอกรายละเอียด Wi-Fi: Ensure your phone is connected to a 2.4GHz Wi-Fi network. Enter your Wi-Fi password.
- โหมดจับคู่: The switch should automatically enter pairing mode (indicator light blinking rapidly). If not, press and hold the switch button for 5-10 seconds until it blinks rapidly.
- การจับคู่แบบสมบูรณ์: Follow the on-screen instructions in the app to complete the pairing process. Once connected, you can rename the switch.
Video 3.1: A visual guide demonstrating the general installation process for the MOES Smart Light Switch, including wiring and app pairing. (Note: Video may show a multi-gang switch, but principles apply to 1-gang).
4. คู่มือการใช้งาน
4.1. การควบคุมด้วยตนเอง
Press the physical button(s) on the switch to turn the connected light(s) on or off. The switch features high-quality buttons for reliable operation.
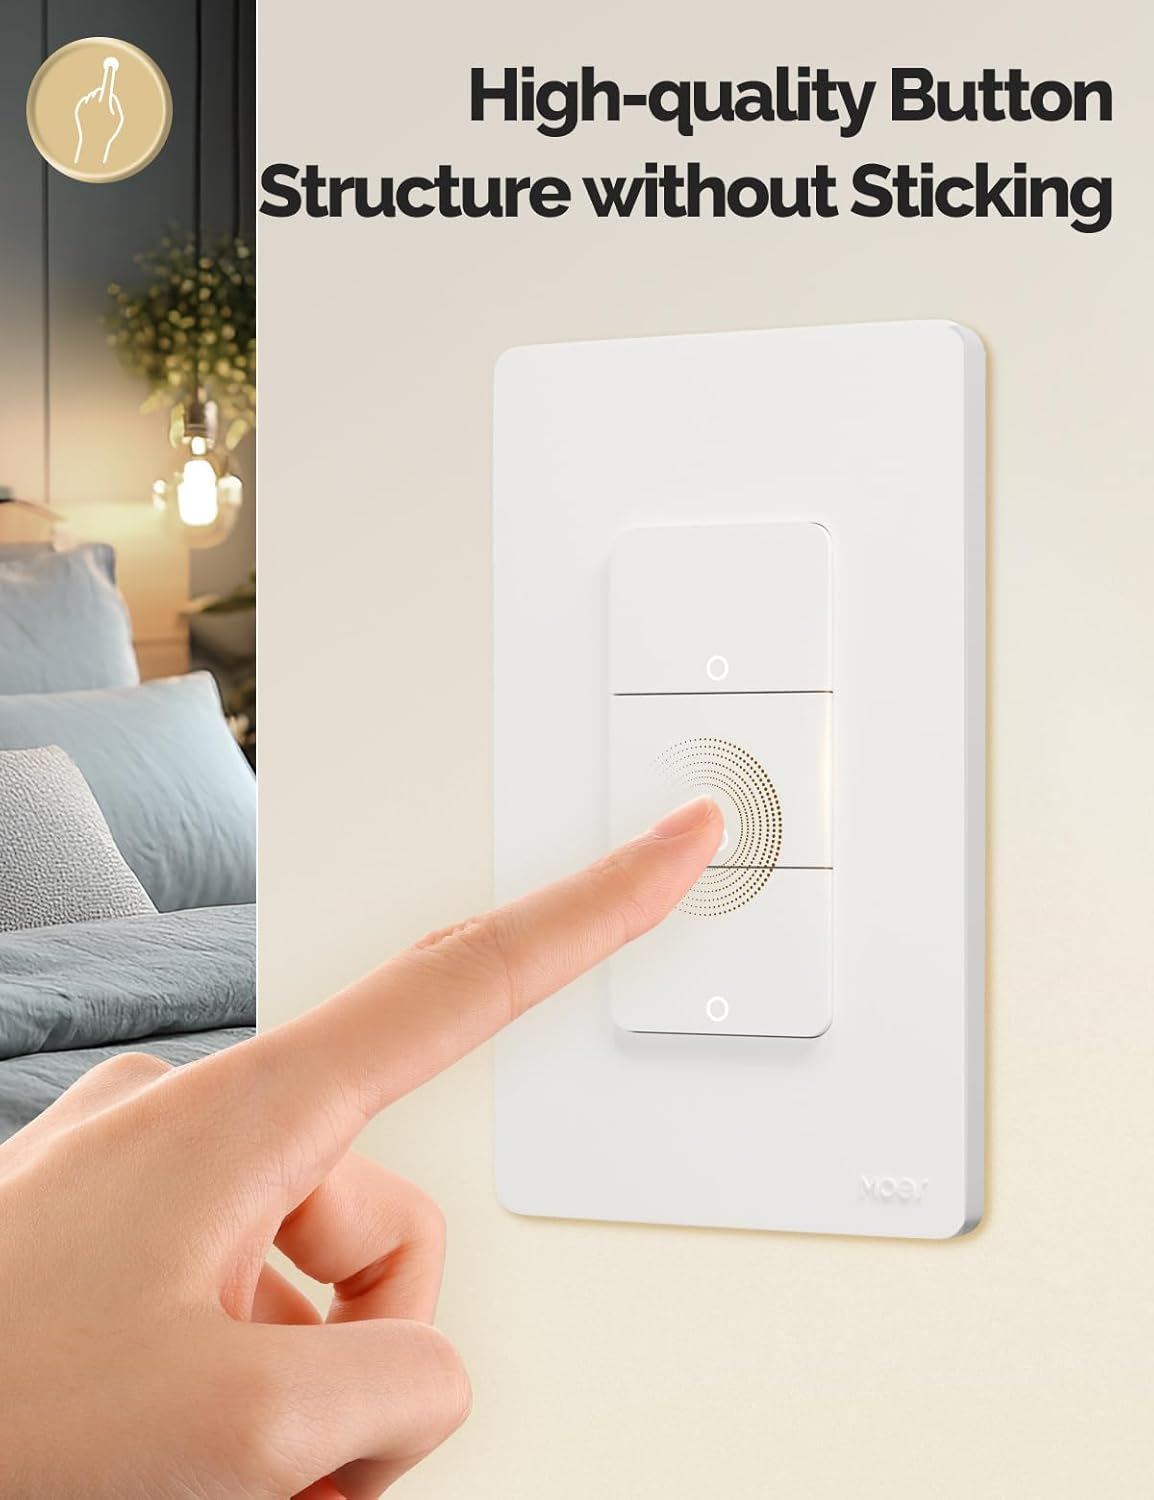
Image 4.1: Close-up of the MOES Smart Switch highlighting its high-quality button design.
4.2. App Control (Remote Control)
Once paired with the app, you can control your lights from anywhere using your smartphone.
- Open the "Smart Life" or "MOES" app.
- Select your smart switch from the device list.
- Tap the on/off icons to control your lights.

Image 4.2: Demonstrates remote control functionality of the smart switch via the mobile application.
4.3. การควบคุมด้วยเสียง
The switch is compatible with Amazon Alexa and Google Assistant for hands-free control.
- เชื่อมโยงบัญชี: In your Alexa or Google Home app, link your "Smart Life" or "MOES" account.
- ค้นพบอุปกรณ์: ขอให้ผู้ช่วยเสียงของคุณค้นพบอุปกรณ์ใหม่
- คำสั่งเสียง: Use commands like "Alexa, turn on the living room light" or "Hey Google, turn off the bedroom light."

Image 4.3: Setup showing smart speakers (Alexa, Google Home) interacting with the smart switch for voice control.
4.4. ฟังก์ชันจับเวลาและกำหนดตารางเวลา
Automate your lighting with customizable timers and schedules through the app.
- กำหนดการ: Set specific times for lights to turn on or off daily or on selected days.
- นับถอยหลัง: Set a countdown timer for lights to turn off after a set duration.
- การกำหนดเวลาของรอบ: Configure lights to cycle on and off at regular intervals.
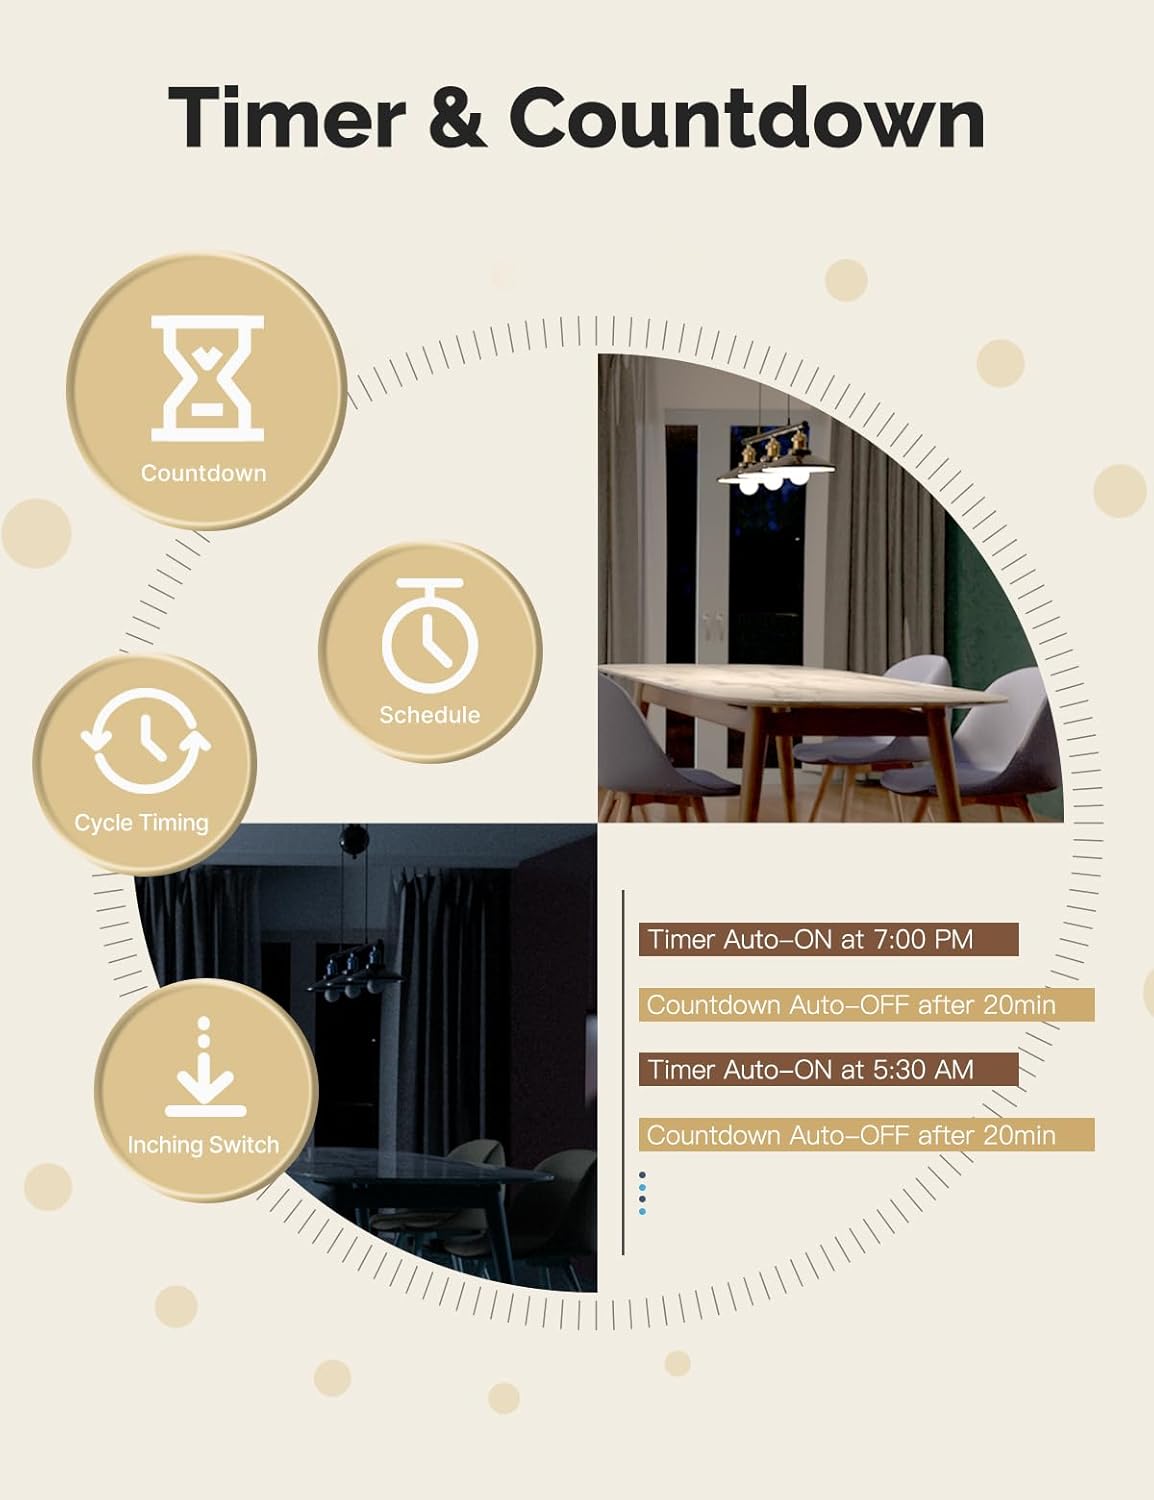
Image 4.4: Visual representation of timer and countdown settings available in the smart home application.
4.5. Indicator Light Mode
The switch features an indicator light that can be configured via the app to show ON/OFF status or switch location in the dark.

Image 4.5: Illustrates different indicator light modes, such as showing ON/OFF status or switch location.
4.6. Relay Status Settings
กำหนดค่าพฤติกรรมของสวิตช์หลังจากไฟดับtage (Power-off, Power-on, or Restart Memory) through the app settings.

Image 4.6: Screenshot of the app interface for configuring relay status settings after a power interruption.
5. การบำรุงรักษา
- Clean the switch faceplate with a soft, dry cloth. Avoid abrasive cleaners or solvents.
- Regularly check for app updates to ensure optimal performance and security.
- Ensure your Wi-Fi network is stable and within range of the switch.
6 การแก้ไขปัญหา
| ปัญหา | สาเหตุที่เป็นไปได้ | สารละลาย |
|---|---|---|
| Switch not responding to app/voice commands. |
|
|
| Lights flicker or do not turn off completely (no-neutral wiring). |
|
|
| Switch gets warm or burns out. |
|
|
| Difficulty with initial installation. |
|
|
7. ข้อมูลจำเพาะ
| คุณสมบัติ | รายละเอียด |
|---|---|
| ยี่ห้อ | Moes |
| แบบอย่าง | WS-US-L (1-Gang) |
| โหมดการทำงาน | อัตโนมัติ |
| ประเภทการติดต่อ | เปิดปกติ |
| ประเภทขั้วต่อ | ขั้วต่อสกรู |
| เทอร์มินัล | สกรู |
| ประเภทวงจร | 2 ทาง |
| ประเภทการติดตั้ง | ติดผนัง |
| วัสดุติดต่อ | ทองแดง |
| จำนวนตำแหน่ง | 1 |
| วิธีการควบคุม | แอป, รีโมท, สัมผัส, เสียง |
| โปรโตคอลไร้สาย | Wi-Fi 2.4GHz |
| เล่มที่tage | แรงดันไฟฟ้า 90-240 โวลต์ 50/60 เฮิรตซ์ |
| Max. Current (per gang) | 8A |
| Total Max. Current | 8A |

Image 7.1: Detailed dimensions and technical specifications of the MOES Smart Light Switch.
8. การรับประกันและการสนับสนุน
MOES products are designed for reliability and performance. For warranty information, technical support, or further assistance, please visit the official MOES webหรือติดต่อฝ่ายบริการลูกค้าโดยตรง
คุณสามารถค้นหาข้อมูลเพิ่มเติมและทรัพยากรสนับสนุนได้ที่ ร้านค้า MOES บน Amazon.


