1. บทนำ
This manual provides instructions for the safe and effective operation of the Landtek MILA48500 Digital Illuminance Lux Light Meter Datalogger. This device is designed for measuring illuminance (brightness) in various environments, offering a wide measurement range, data logging capabilities, and Bluetooth connectivity for real-time monitoring.
โปรดอ่านคู่มือนี้อย่างละเอียดก่อนใช้งานอุปกรณ์ เพื่อให้มั่นใจได้ว่าอุปกรณ์ทำงานได้อย่างถูกต้องและป้องกันความเสียหาย
2. ข้อมูลด้านความปลอดภัย
- ห้ามเปิดหรือดัดแปลงอุปกรณ์ด้วยตนเอง โปรดส่งต่ออุปกรณ์ดังกล่าวให้ช่างผู้ชำนาญการเป็นผู้ดำเนินการซ่อมแซม
- เก็บอุปกรณ์ให้ห่างจากน้ำ ความชื้น และอุณหภูมิที่สูงเกินไป
- ถอดแบตเตอรี่ออกหากจะไม่ได้ใช้งานอุปกรณ์เป็นเวลานานเพื่อป้องกันการรั่วไหล
- กำจัดแบตเตอรี่และอุปกรณ์ตามกฎระเบียบท้องถิ่น
- Avoid pointing the light sensor directly at extremely bright light sources for prolonged periods, as this may affect sensor longevity.
3. เนื้อหาบรรจุภัณฑ์
ตรวจสอบว่ามีสิ่งของทั้งหมดอยู่ครบเมื่อแกะกล่อง:
- Digital Illuminance Lux Light Meter Datalogger (MILA48500)
- กระเป๋าใส่อุปกรณ์
- คู่มือการใช้งานภาษาอังกฤษ
- แบตเตอรี่ AAA ขนาด 1.5V จำนวน 2 ก้อน (ติดตั้งมาแล้ว หรือซื้อแยกต่างหาก)

รูปที่ 3.1: The Landtek MILA48500 Lux Meter package contents, showing the meter, a black protective pouch, and the instruction manual.
4. อุปกรณ์โอเวอร์view
Familiarize yourself with the components of the Landtek MILA48500 Lux Meter:

รูปที่ 4.1: ด้านหน้าและด้านหลัง view of the Landtek MILA48500 Lux Meter with labeled components. Key parts include the light sensor, LCD screen, various function buttons (MAX/MIN, HOLD, UNIT, Power), and the battery compartment.
- เซ็นเซอร์แสง: Detects ambient light.
- หน้าจอ LCD: Displays measurement readings, units, and status indicators. Features a backlight for low-light conditions.
- ปุ่มสูงสุด/นาที: สลับระหว่างค่าสูงสุดและค่าต่ำสุดที่บันทึกไว้
- ปุ่มถือ: Freezes the current reading on the display. Also activates Bluetooth when pressed for 2 seconds.
- ปุ่ม UNIT: Switches between LUX and FC measurement units. Also activates the backlight when pressed for 2 seconds.
- ปุ่มเปิด/ปิด: เปิดหรือปิดอุปกรณ์
- ช่องใส่แบตเตอรี่: Located on the rear, houses two AAA batteries.
5. การตั้งค่า
5.1 การติดตั้งแบตเตอรี่
- ค้นหาฝาครอบช่องใส่แบตเตอรี่ที่ด้านหลังของอุปกรณ์
- เลื่อนหรือปลดล็อกฝาครอบเพื่อเปิดออก
- ใส่แบตเตอรี่ AAA ขนาด 1.5 โวลต์ จำนวน 2 ก้อน โดยตรวจสอบให้แน่ใจว่าขั้วบวก/ลบถูกต้องตามที่ระบุไว้ภายในช่องใส่แบตเตอรี่
- ใส่ฝาปิดช่องใส่แบตเตอรี่กลับเข้าที่อย่างแน่นหนา
5.2 การเปิด/ปิดเครื่อง
- การเปิดเครื่อง: กดปุ่ม ปุ่มเปิดปิด (). The LCD screen will illuminate.
- วิธีปิดเครื่อง: กดปุ่ม ปุ่มเปิดปิด again. The device also features an automatic power-off function to conserve battery life.
6. คู่มือการใช้งาน
6.1 การวัดพื้นฐาน
After powering on, the device will immediately begin measuring illuminance. Point the light sensor towards the light source or area you wish to measure.
6.2 Unit Selection (LUX / FC)
กดปุ่ม ปุ่มหน่วย to toggle between LUX (lux) and FC (foot-candle) measurement units. The selected unit will be displayed on the LCD screen.

รูปที่ 6.1: The meter's display showing measurements in FC (left) and LUX (right) units.
6.3 ฟังก์ชั่นการเก็บข้อมูล
กดปุ่ม ปุ่ม HOLD briefly to freeze the current reading on the display. Press it again to release the hold and resume live measurement.
6.4 MAX / MIN Display
กดปุ่ม ปุ่ม MAX/MIN to cycle through the maximum, minimum, and current readings recorded since the device was powered on or the function was reset. The display will indicate 'MAX' or 'MIN' accordingly.
6.5 ฟังก์ชันไฟแบ็คไลท์
กดปุ่มค้างไว้ ปุ่มหน่วย for approximately 2 seconds to turn the LCD backlight on or off.
6.6 Measurement Range Multipliers
The meter automatically adjusts its measurement range. When 'X10' or 'X100' appears on the display, the displayed reading must be multiplied by that factor to obtain the actual illuminance value.
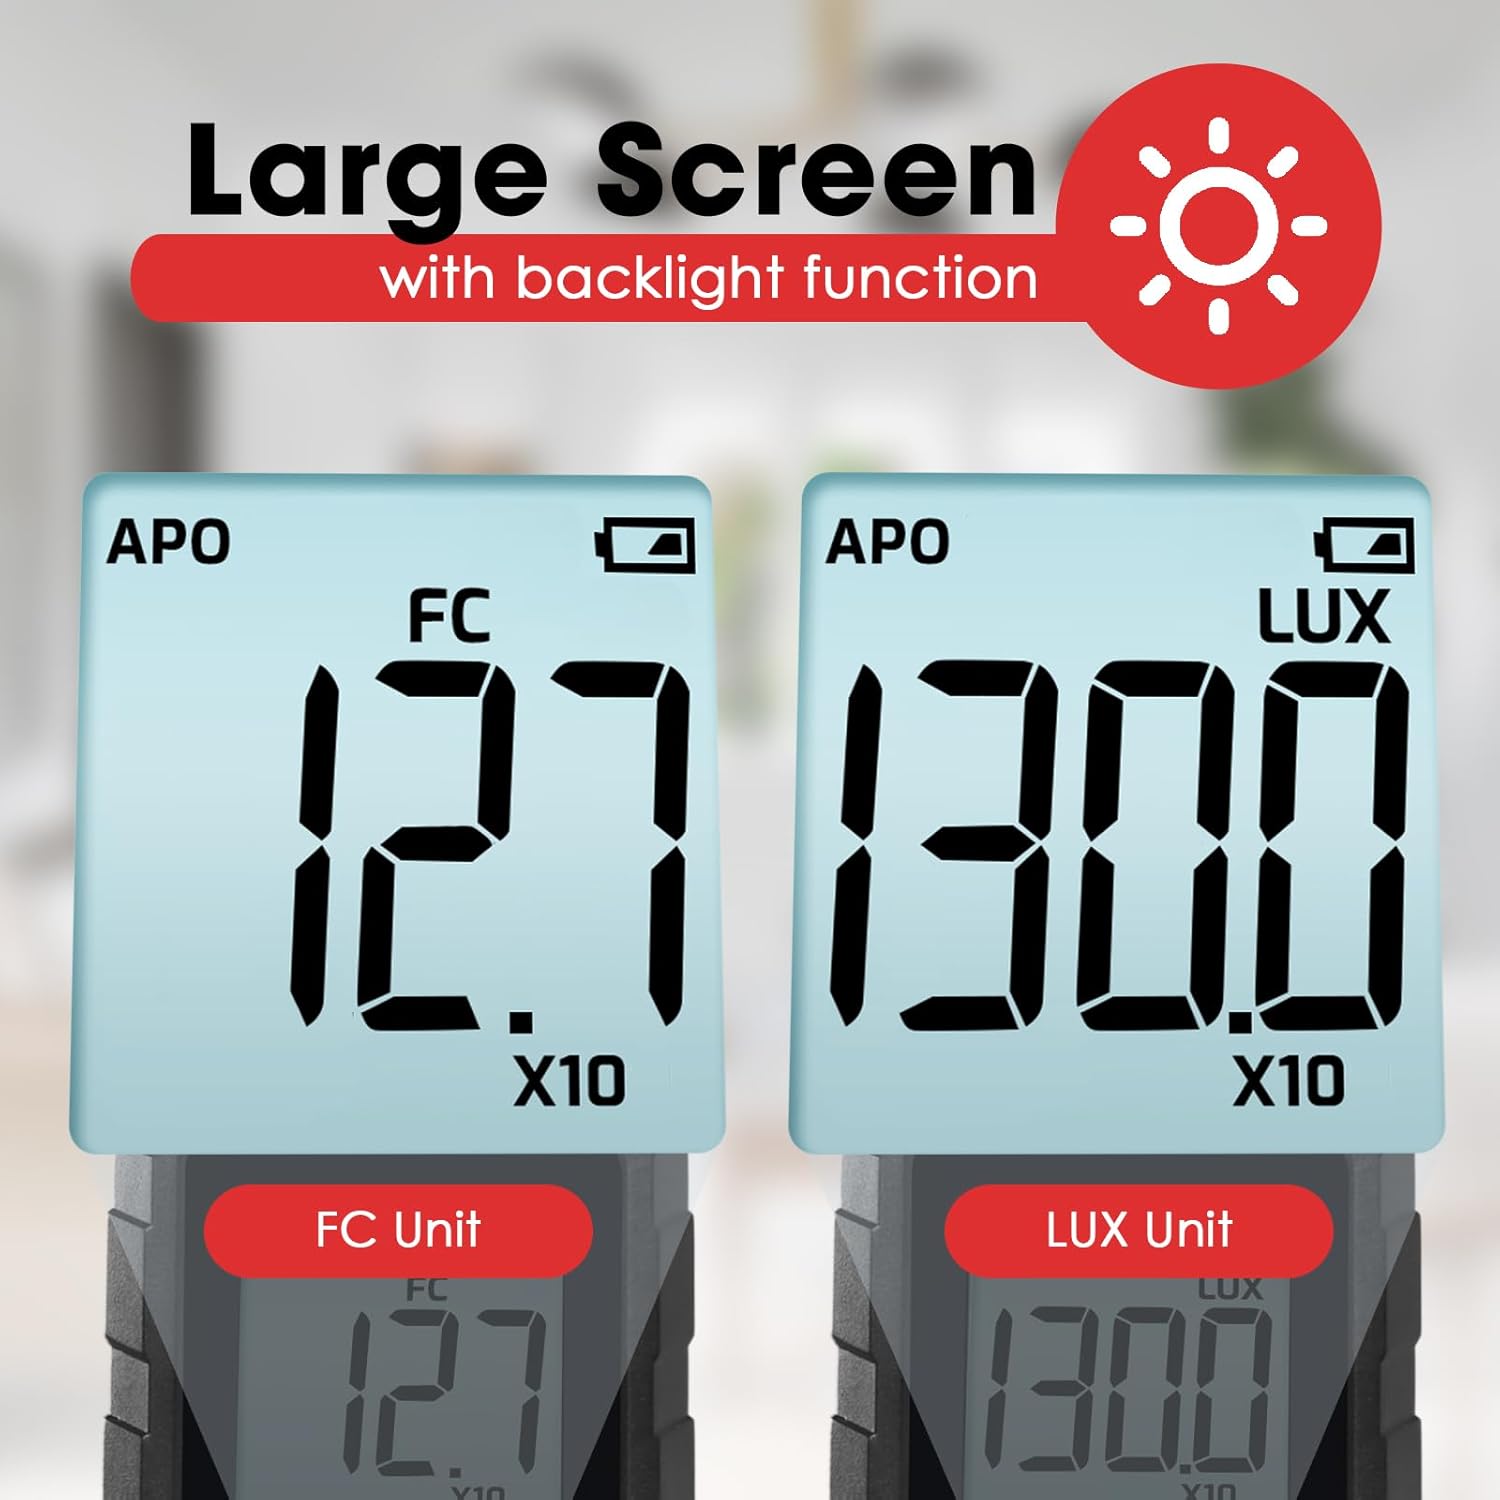
รูปที่ 6.2: Explanation of how to interpret readings when 'X10' or 'X100' multipliers are active on the display.
- If 'X10' is displayed, multiply the reading by 10. For example, a display of 16.47 with 'X10' means 164.7 LUX.
- If 'X100' is displayed, multiply the reading by 100. For example, a display of 16.47 with 'X100' means 1647 LUX.
6.7 Bluetooth Connectivity and Data Logging
The device supports Bluetooth connectivity for real-time monitoring and data logging via a compatible smartphone application.
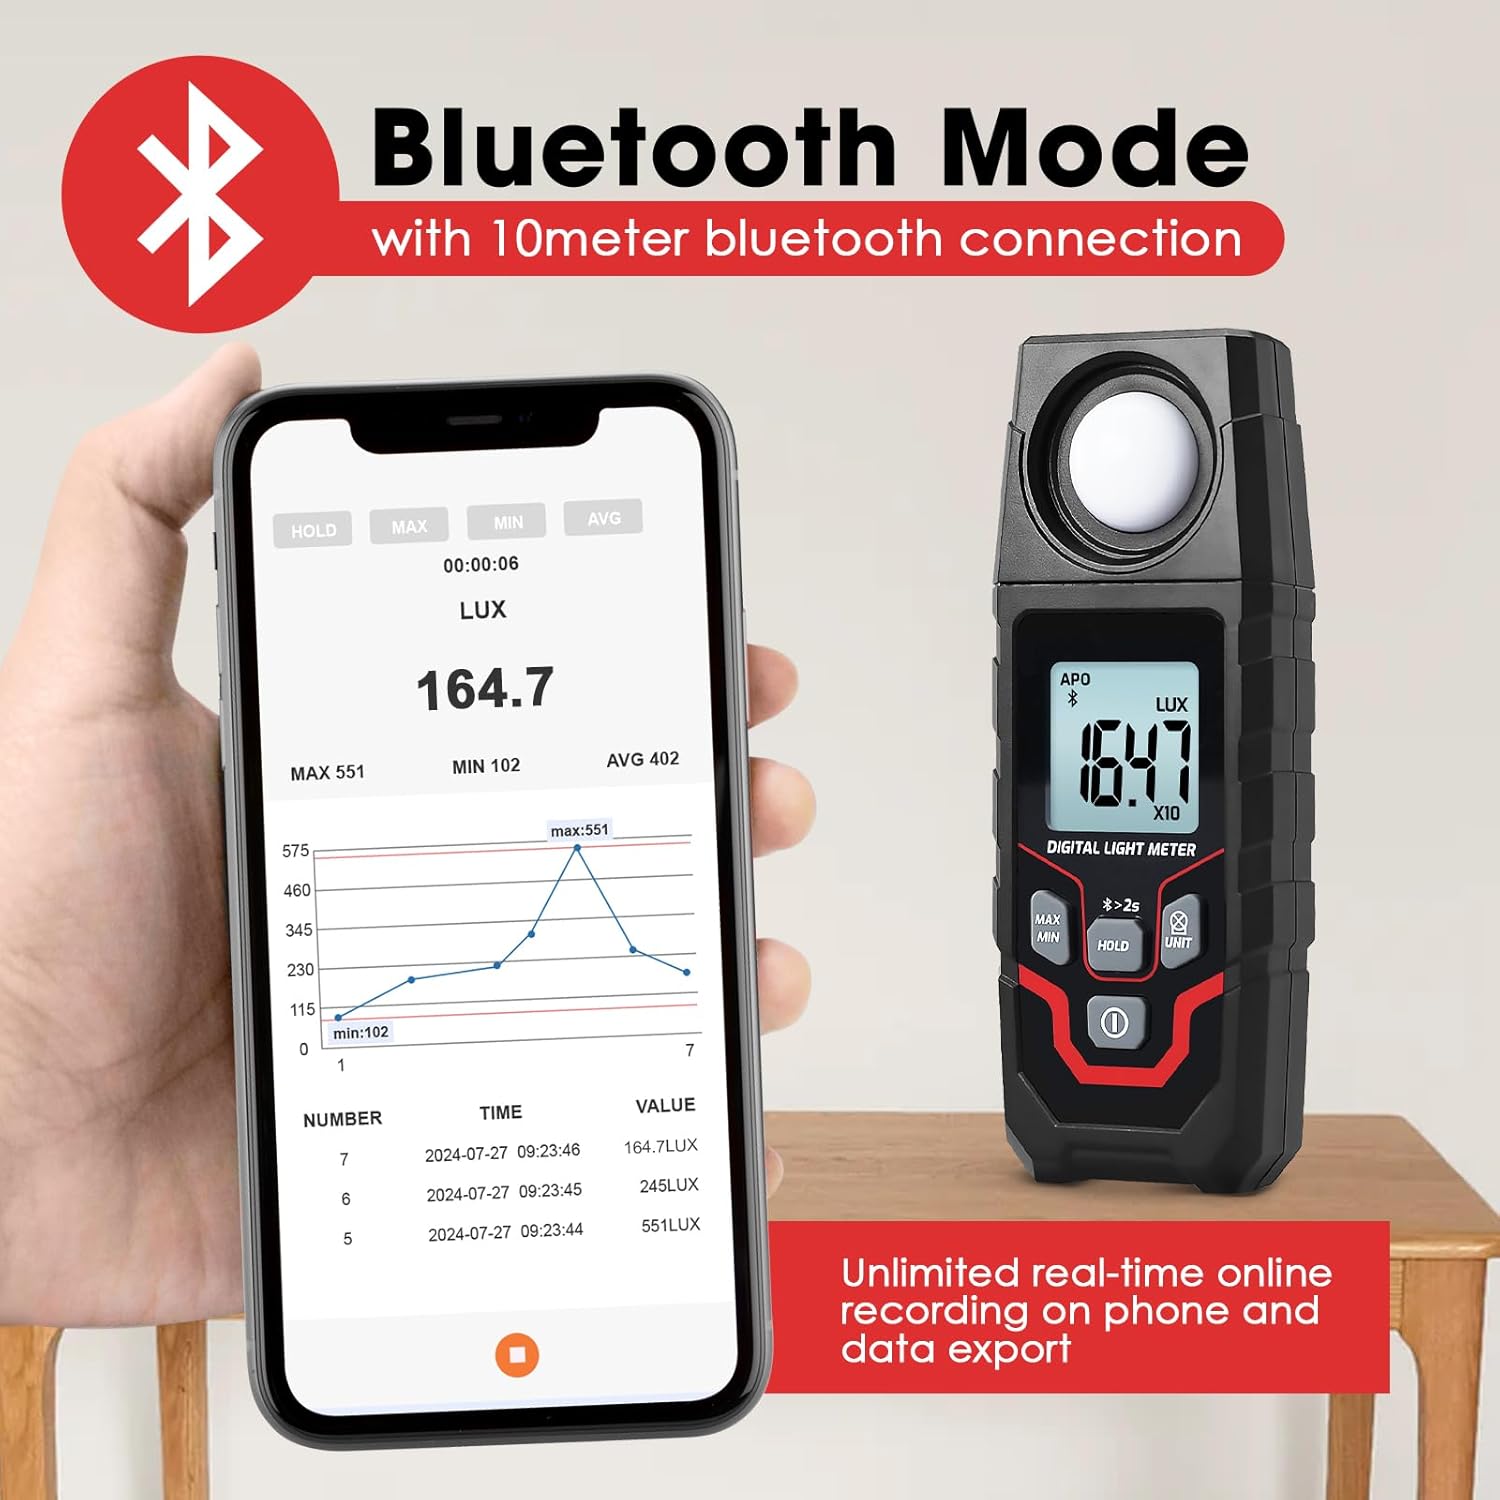
รูปที่ 6.3: The Lux Meter connected to a smartphone via Bluetooth, displaying real-time data and a historical graph.
- เปิดใช้งานบลูทูธ: กดปุ่มค้างไว้ ปุ่ม HOLD for approximately 2 seconds. A Bluetooth icon will appear on the meter's display.
- ดาวน์โหลดแอพ: Download the official Landtek application from your smartphone's app store.
- เชื่อมต่อ: Open the app on your smartphone and follow the instructions to pair with the MILA48500 device. The Bluetooth range is up to 10 meters.
- การบันทึกข้อมูล: The app allows for unlimited real-time online recording and data export. The meter can also store up to 2000 groups of data for offline recording, which can be downloaded to the app later.
7. การบำรุงรักษา
- การทำความสะอาด: Use a soft, dry cloth to clean the device. Do not use abrasive cleaners or solvents. Ensure the light sensor is kept clean and free of dust.
- พื้นที่จัดเก็บ: Store the device in a cool, dry place, away from direct sunlight and extreme temperatures. If storing for an extended period, remove the batteries.
- การเปลี่ยนแบตเตอรี่: ควรเปลี่ยนแบตเตอรี่เมื่อไฟแสดงสถานะแบตเตอรี่ต่ำปรากฏขึ้นบนหน้าจอ เพื่อให้ได้ค่าที่แสดงถูกต้องแม่นยำ
8 การแก้ไขปัญหา
| ปัญหา | สาเหตุที่เป็นไปได้ | สารละลาย |
|---|---|---|
| อุปกรณ์ไม่เปิดเครื่อง | แบตเตอรี่เสียหรือติดตั้งไม่ถูกต้อง | ตรวจสอบขั้วแบตเตอรี่ เปลี่ยนแบตเตอรี่ AAA ใหม่ |
| การอ่านที่ไม่ถูกต้อง | Dirty light sensor; low battery; incorrect unit/multiplier interpretation. | Clean the light sensor. Replace batteries. Ensure correct interpretation of LUX/FC units and X10/X100 multipliers. |
| การเชื่อมต่อบลูทูธล้มเหลว | Bluetooth not activated on meter; app issue; out of range. | Press and hold HOLD button for 2s to activate Bluetooth. Restart app/phone. Ensure meter is within 10m of phone. |
| จอภาพมืดหรือกระพริบ | แบตเตอรี่อ่อน | เปลี่ยนแบตเตอรี่ |
9. ข้อมูลจำเพาะ
| คุณสมบัติ | ข้อมูลจำเพาะ |
|---|---|
| วิธีการวัด | ประเภทอินทิกรัล |
| พิสัย | 0.1~200000 LUX / 0.01~20000 FC |
| Measuring Levels (LUX) | 200 / 2,000 / 20,000 / 200,000 |
| Measuring Levels (FC) | 20 / 200 / 2,000 / 20,000 |
| ความแม่นยำ | ±(4% + 10 digits) (calibrated under standard incandescent lamp 2856°K) |
| Resolution (LUX) | <200: 0.1; ≥200: 1 |
| มติ (FC) | <20: 0.01; 20≤FC<200: 0.1; ≥200: 1 |
| แสดง | 4-digit LCD, max 1999 |
| ขนาดหน้าจอ | 34 x 31มม. |
| เซ็นเซอร์แสง | โฟโตไดโอดซิลิกอนพร้อมฟิลเตอร์ |
| Sampลิงอัตรา | ประมาณ 2 ครั้งต่อวินาที |
| มุมตกกระทบ | 120° |
| Repeatability Deviation | ±2% |
| ช่วงสเปกตรัม | 400~700นาโนเมตร |
| ช่วงบลูทูธ | Up to 10 meters proximity |
| เงื่อนไขการใช้งาน | -10~50°C, สูงสุด 80% RH, ระดับความสูงภายในอาคาร <2000 ม |
| เงื่อนไขการจัดเก็บ | -10~50°C, max 70% RH (with battery removed) |
| แหล่งจ่ายไฟ | แบตเตอรี่ AAA 2x1.5V |
| ขนาด | 150 x 56 x 28มม. |
| น้ำหนัก | น้ำหนักประมาณ 150 กรัม (ไม่รวมแบตเตอรี่) |

รูปที่ 9.1: Physical dimensions and weight of the Landtek MILA48500 Lux Meter.
10. การรับประกันและการสนับสนุน
This product is covered by a manufacturer's warranty. Please refer to the warranty card included in your package or contact Landtek customer support for detailed warranty terms and conditions.
For technical assistance, troubleshooting, or service inquiries, please contact your local distributor or the manufacturer directly. Contact information can typically be found on the manufacturer's webไซต์หรือบนบรรจุภัณฑ์ผลิตภัณฑ์