1. บทนำ
The HornBlasters Shocker XL 6-Horn Upgrade Kit is designed to enhance your existing HornBlasters Spare Tire Delete 4-horn system by expanding it to a powerful 6-horn configuration. This kit provides two additional Shocker XL bells, along with necessary mounting extensions and hardware, to deliver an even louder and more commanding sound. Constructed from durable 14-gauge steel with a black powder-coated finish, this upgrade ensures longevity and seamless integration with your current setup.
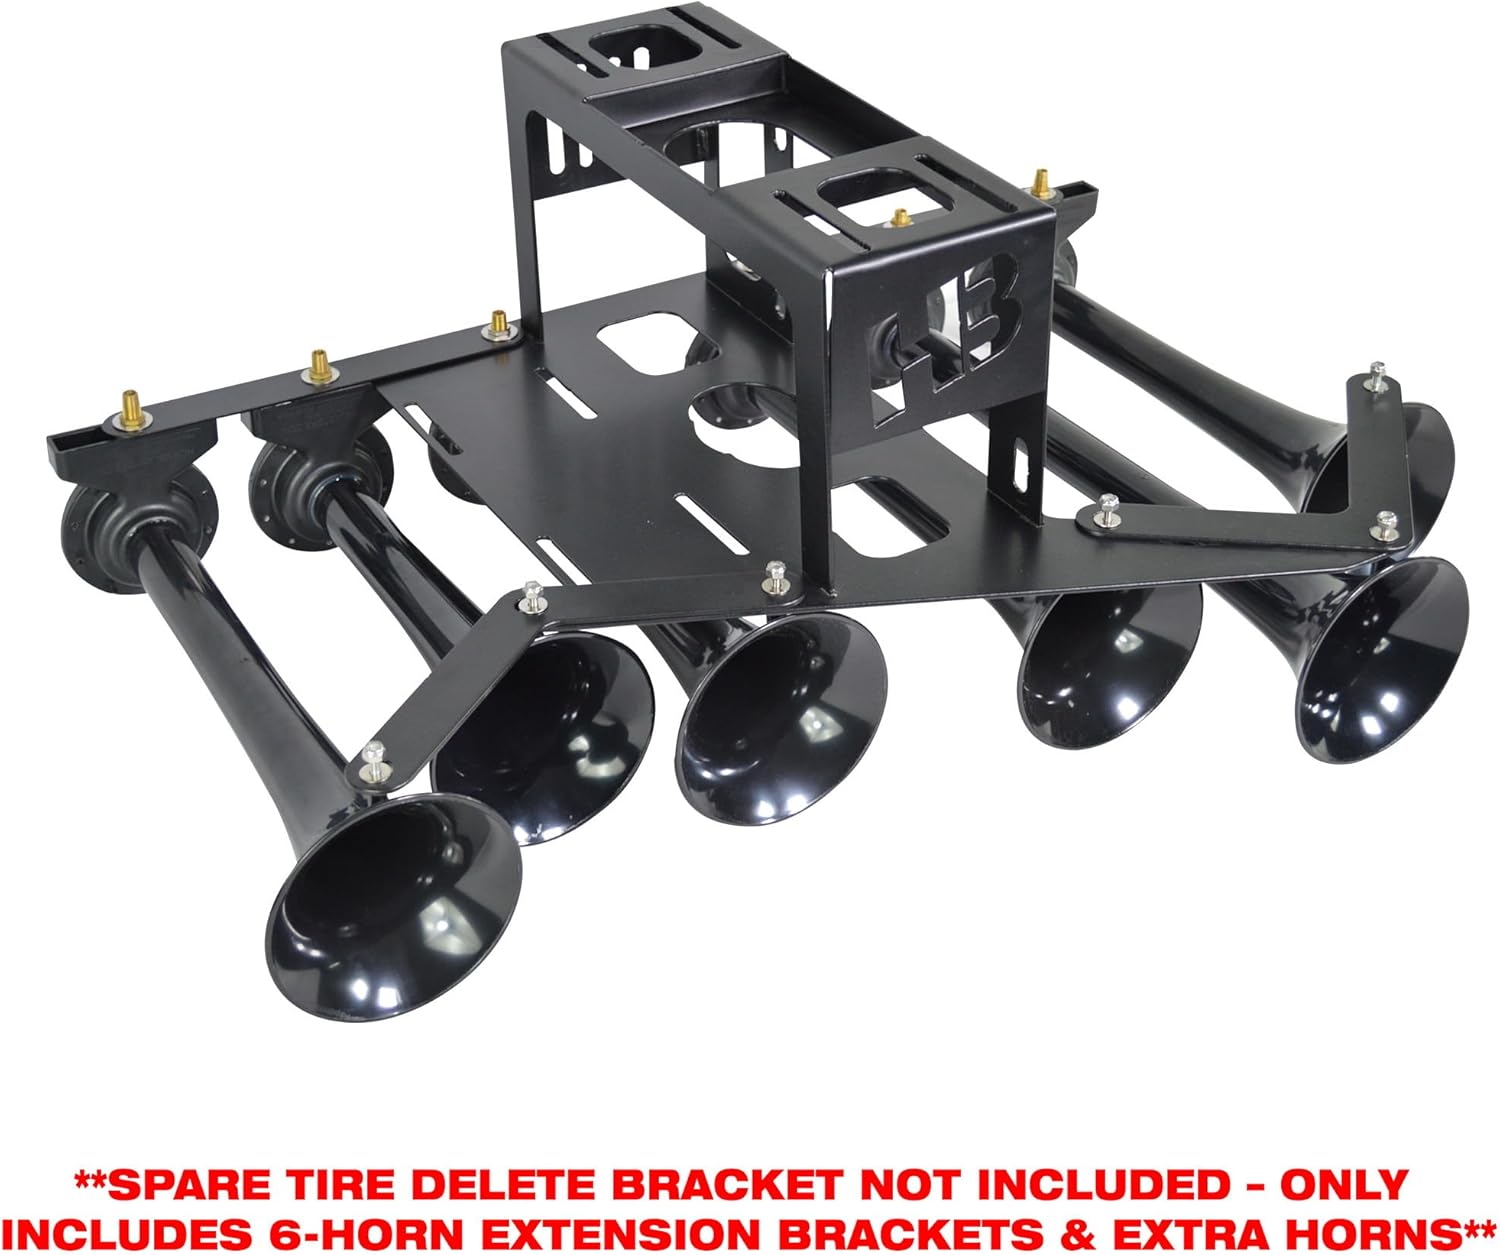
Important Note: This kit is an upgrade only. The Spare Tire Delete bracket is not included and is required for installation. This kit is designed to work with an existing HornBlasters Spare Tire Delete horn system.
2. ข้อมูลด้านความปลอดภัย
Always exercise caution when working with automotive components and air systems. Ensure all connections are secure to prevent air leaks. Wear appropriate personal protective equipment, such as eye protection, during installation. Disconnect the vehicle's battery before performing any electrical work.
คำเตือนข้อเสนอ 65: ผลิตภัณฑ์นี้อาจมีสารเคมีที่รัฐแคลิฟอร์เนียทราบว่าก่อให้เกิดมะเร็งและความพิการแต่กำเนิดหรืออันตรายต่อระบบสืบพันธุ์อื่นๆ
3. เนื้อหาบรรจุภัณฑ์
ตรวจสอบว่าอุปกรณ์ทุกชิ้นที่ระบุไว้ด้านล่างนี้มีอยู่ในชุดเครื่องมือของคุณครบถ้วน:
- Two (2) Shocker Train Horns
- Spare Tire Delete Extension Brackets
- อุปกรณ์ฟิตติ้ง
- สายการบิน
- ฮาร์ดแวร์สำหรับติดตั้ง

ภาพที่ 3.1: จบแล้วview of the HornBlasters Shocker XL 6-Horn Upgrade Kit components.

ภาพที่ 3.2: รายละเอียด view of the Spare Tire Delete Extension Brackets.
4. การตั้งค่าและการติดตั้ง
This kit is designed for seamless integration with your existing HornBlasters Spare Tire Delete 4-horn system. Follow these steps to upgrade your setup:
4.1. Prepare Your Existing System
- Ensure your vehicle is safely parked and the engine is off.
- Locate your existing HornBlasters Spare Tire Delete 4-horn system.
- Carefully disconnect the air lines from the existing horns if necessary to allow for easier access during the upgrade.
4.2. Attach Extension Brackets
- Identify the appropriate mounting points on your existing Spare Tire Delete bracket for the new extension brackets.
- Securely attach the provided extension brackets using the mounting hardware. Ensure they are firmly fastened to support the additional horns.
4.3. Mount Additional Horns
- Mount the two new Shocker Train Horns onto the newly installed extension brackets.
- Use the provided mounting hardware to ensure each horn is securely fastened and oriented correctly.
4.4. Connect Air Lines
- Connect the new air lines and fittings to the additional horns and integrate them into your existing air system.
- Ensure all air line connections are tight and free of leaks. Use thread sealant if recommended for your specific fittings.
- Once all connections are made, test the system for proper operation and sound.

ภาพที่ 4.1: อดีตample of the 6-horn assembly with extension brackets.

Image 4.2: Another perspective of the 6-horn assembly.
ภาพที่ 4.3: จากบนลงล่าง view of the 6-horn assembly.

Image 4.4: The 6-horn system installed on a vehicle.
5. การดำเนินการ
Once the HornBlasters Shocker XL 6-Horn Upgrade Kit is correctly installed and integrated with your existing air system, its operation remains consistent with your original setup. The additional horns will activate simultaneously with your existing horns, producing a fuller and more powerful sound. Ensure your air compressor and tank are adequately sized to support the increased air demand of six horns for optimal performance.
6. การบำรุงรักษา
To ensure the longevity and optimal performance of your HornBlasters Shocker XL 6-Horn system, regular maintenance is recommended:
- การทำความสะอาด: Periodically clean the exterior of the horns and brackets to remove dirt, dust, and road grime. The black powder-coated finish is designed to resist corrosion, but regular cleaning helps maintain its appearance and protective qualities.
- การตรวจสอบ: Regularly inspect all air line connections for signs of wear, cracks, or leaks. Tighten any loose fittings. Check the mounting hardware for tightness and ensure the horns are securely fastened.
- ตรวจสอบระบบอากาศ: Ensure your air compressor and tank are functioning correctly and that there are no leaks in the overall air system.
7 การแก้ไขปัญหา
If you encounter issues with your upgraded horn system, consider the following troubleshooting steps:
- ไม่มีเสียงหรือเสียงเบา:
- Check air pressure: Ensure your air tank has sufficient pressure.
- Inspect air lines: Look for kinks, damage, or loose connections that could cause air leaks.
- Verify solenoid operation: Ensure the air solenoid is receiving power and opening correctly.
- การรั่วไหลของอากาศ:
- Spray soapy water on all fittings and connections. Bubbles indicate a leak.
- Tighten or re-seal any leaking connections.
- Horns Not Activating:
- Check electrical connections to the solenoid and horn button.
- Ensure the compressor is building and holding pressure.
For persistent issues, contact HornBlasters customer support.
8. ข้อมูลจำเพาะ
| คุณสมบัติ | รายละเอียด |
|---|---|
| หมายเลขรุ่น | HU-S6-2 |
| ยี่ห้อ | ฮอร์นบลาสเตอร์ |
| วัสดุก่อสร้าง | เหล็ก 14 เกจ |
| เสร็จ | Black Powder-Coated |
| น้ำหนักสินค้า | 6 ปอนด์ |
| ขนาดแพ็คเกจ | 21 x 11 x 7 นิ้ว |
| ยูพีซี | 817562028911 |
| ประเภทความพอดีของยานยนต์ | Universal Fit (with compatible Spare Tire Delete system) |
9. การรับประกันและการสนับสนุน
HornBlasters products are manufactured with high-quality materials and craftsmanship. For specific warranty details regarding your Shocker XL 6-Horn Upgrade Kit, please refer to the warranty information provided with your original HornBlasters Spare Tire Delete system or visit the official HornBlasters webเว็บไซต์.
For technical support, troubleshooting assistance, or to inquire about replacement parts, please contact HornBlasters customer service directly. Contact information can typically be found on the HornBlasters official webเว็บไซต์หรือผ่านเอกสารการซื้อของคุณ


