1. บทนำ
Thank you for choosing the PRUVEEO Waterproof Rear Camera. This manual provides essential information for the proper installation, operation, and maintenance of your new rear camera. Please read this manual thoroughly before use to ensure optimal performance and longevity of the product.
2. เนื้อหาบรรจุภัณฑ์
Verify that all items listed below are present in your package. If any items are missing or damaged, please contact PRUVEEO customer support.
- 1x PRUVEEO Rear Camera (1080P)
- 1x สายต่อ
- Installation Tools (screws)

รูปที่ 2.1: Package contents including the rear camera, extension cable, and installation tools.
3. ความเข้ากันได้
This PRUVEEO Rear Camera is specifically designed for use with the following PRUVEEO Dash Camera models:
- PRUVEEO D90-4CH
- PRUVEEO A6
- PRUVEEO D88
It features a Type-C port for connection to the compatible dash camera. Ensure your dash camera model is listed above for proper functionality.
4. คุณสมบัติหลัก
- ความละเอียด 1080P: Provides clear and detailed video recording.
- การออกแบบกันน้ำ: Engineered to withstand various weather conditions.
- เลนส์มุมกว้าง: นำเสนอขอบเขตที่กว้างขวาง view for comprehensive rear coverage.
- พอร์ต Type-C: Ensures secure and reliable connection to compatible dash cameras.
- ติดตั้งง่าย: Designed for straightforward setup with included tools and extension cable.

รูปที่ 4.1: The rear camera demonstrating its waterproof feature.

รูปที่ 4.2: Visual representation of the camera's key features: waterproof, high resolution, car rear view, and wide angle.
5. การตั้งค่าและการติดตั้ง
Proper installation is crucial for optimal performance. It is recommended to have this camera installed by a professional if you are unfamiliar with vehicle wiring.
5.1 การเลือกตำแหน่งการติดตั้ง
The rear camera is typically mounted on the rear license plate area or near the rear window. Choose a location that provides a clear, unobstructed view of the road behind your vehicle. Ensure the camera is centered for the best perspective.
5.2 การติดตั้งกล้อง
- Clean the chosen mounting surface thoroughly to ensure proper adhesion or secure screw placement.
- Attach the camera bracket to the vehicle using the provided screws. Ensure it is securely fastened and angled correctly.
- ปรับมุมกล้องเพื่อให้ได้ภาพด้านหลังที่ต้องการ view.
5.3 การเชื่อมต่อสายไฟ
- Connect the rear camera's cable to the provided extension cable.
- Carefully route the extension cable from the rear of the vehicle to the location of your PRUVEEO dash camera. Ensure the cable is tucked away safely to avoid interference with vehicle operations and to protect it from damage.
- Connect the Type-C end of the extension cable to the designated rear camera input port on your compatible PRUVEEO dash camera (D90-4CH, A6, or D88).
- Once connected, power on your dash camera to verify the rear camera feed is displayed correctly.
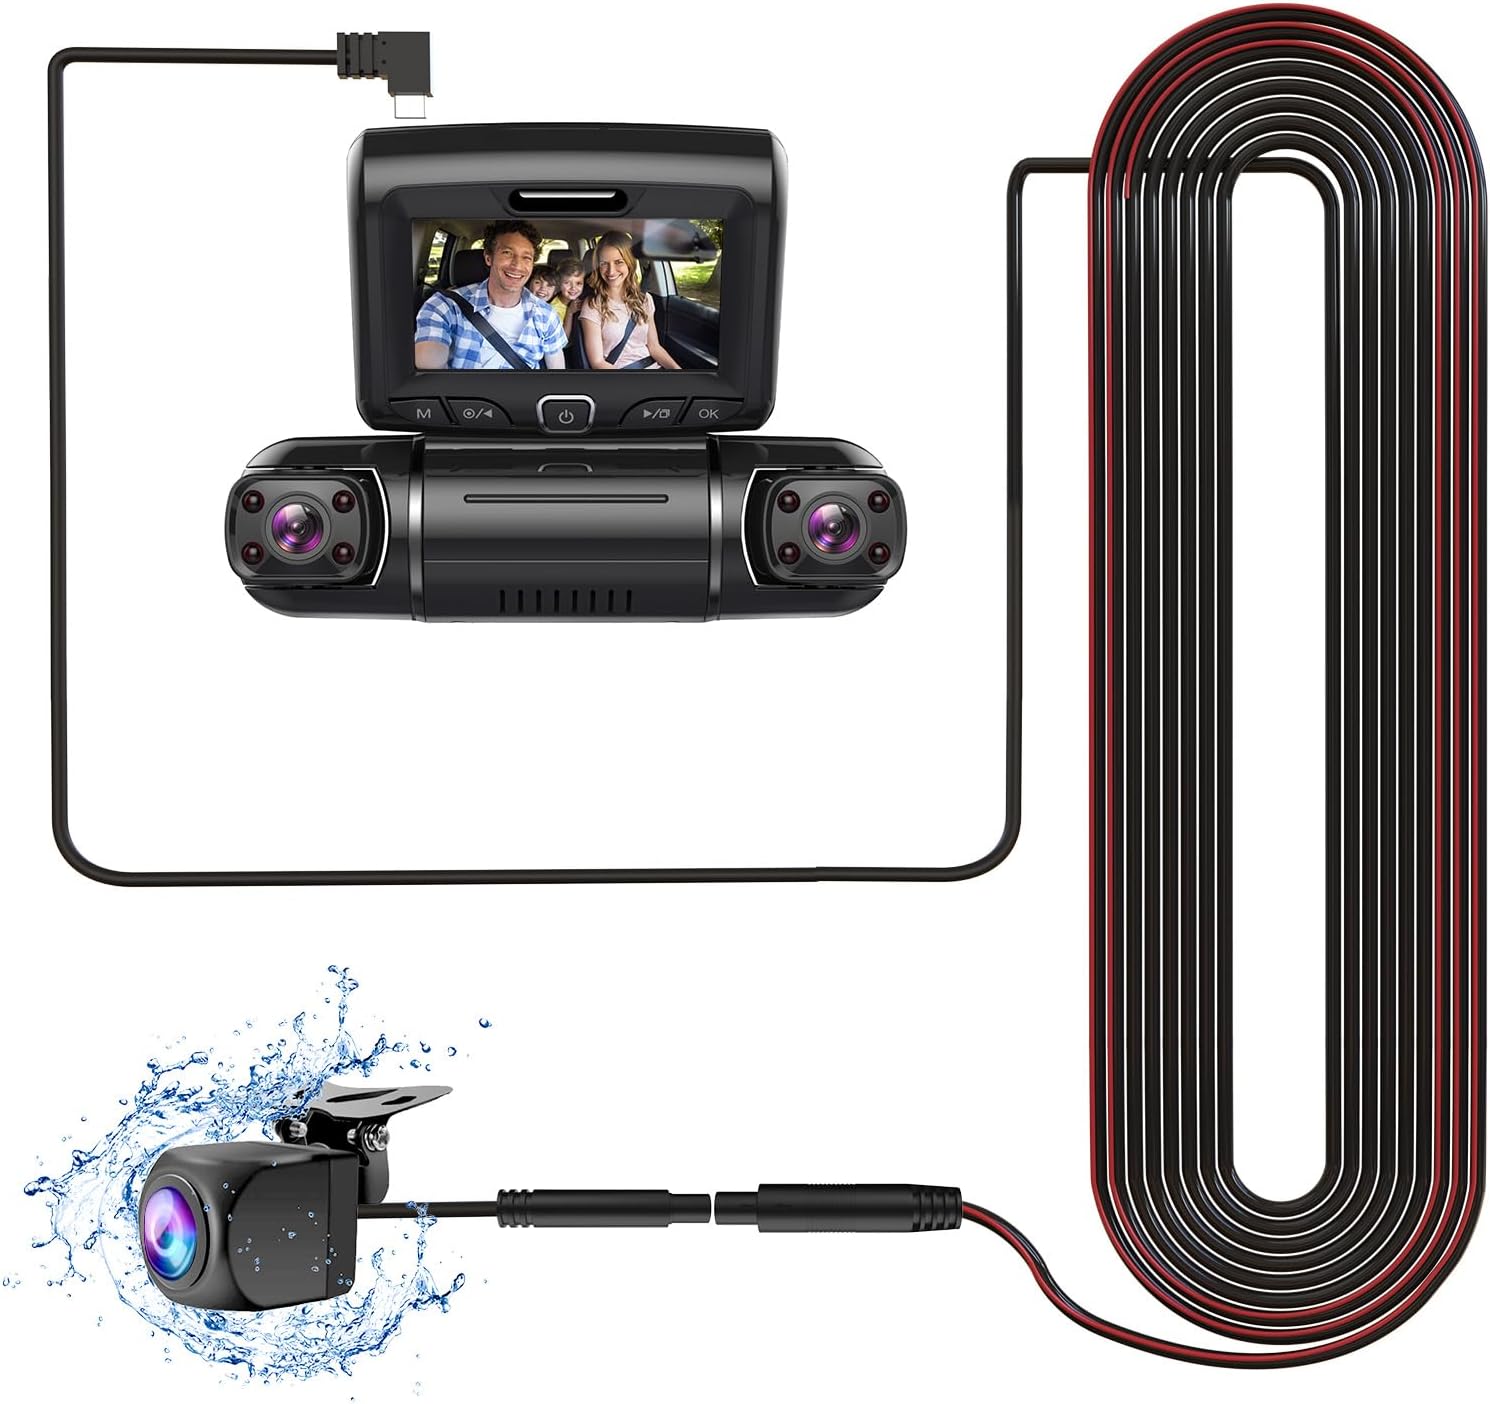
รูปที่ 5.1: Connection diagram of the rear camera to a compatible dash camera.

รูปที่ 5.2: The PRUVEEO Rear Camera and its extension cable.
6. การดำเนินการ
Once properly installed and connected to a compatible PRUVEEO dash camera, the rear camera operates in conjunction with the dash camera system.
- บันทึกอัตโนมัติ: The rear camera will automatically begin recording when the dash camera is powered on, typically when the vehicle's ignition is turned on.
- โหมดการแสดงผล: Refer to your specific PRUVEEO dash camera's manual for instructions on how to switch between front camera view,กล้องหลัง view, or picture-in-picture display modes.
- Parking Monitor (if supported by dash cam): If your dash camera supports a parking monitor feature, the rear camera will also record events when the vehicle is parked, depending on the dash camera's settings.
For detailed operational instructions, please consult the user manual of your PRUVEEO D90-4CH, A6, or D88 dash camera.
7. การบำรุงรักษา
Regular maintenance ensures the longevity and optimal performance of your rear camera.
- การทำความสะอาดเลนส์: ทำความสะอาดเลนส์กล้องเป็นระยะด้วยผ้านุ่มๆamp ผ้าสำหรับเช็ดทำความสะอาดสิ่งสกปรก ฝุ่น หรือคราบน้ำที่อาจอุดตันทางเดิน view. Avoid abrasive materials or harsh chemicals.
- การตรวจสอบสายเคเบิล: Regularly check the connection cable for any signs of wear, damage, or loose connections. Ensure it remains securely tucked away.
- ตรวจสอบการติดตั้ง: Verify that the camera remains securely mounted and its angle has not shifted due to vibrations or impacts.
- การอัปเดตซอฟต์แวร์: Ensure your main dash camera firmware is up-to-date, as this may affect the performance of connected accessories like the rear camera.
8 การแก้ไขปัญหา
If you encounter issues with your PRUVEEO Rear Camera, refer to the following common problems and solutions.
| ปัญหา | สาเหตุที่เป็นไปได้ | สารละลาย |
|---|---|---|
| No image from rear camera |
|
|
| ภาพเบลอหรือไม่ชัดเจน |
|
|
| การเชื่อมต่อเป็นระยะ |
|
|
If the problem persists after attempting these solutions, please contact PRUVEEO customer support for further assistance.
9. ข้อมูลจำเพาะ
| คุณสมบัติ | รายละเอียด |
|---|---|
| ความเข้ากันได้ของรุ่น | PRUVEEO D90-4CH, A6, D88 Dash Cameras |
| ปณิธาน | 1080พ |
| ระดับการกันน้ำ | Yes (Specific IP rating not provided, but described as "Waterproof") |
| ประเภทขั้วต่อ | ประเภท-ซี (USB) |
| เทคโนโลยีเซ็นเซอร์ออปติคัล | ซีมอส |
| ประเภทเลนส์ | มุมกว้าง |
| ขนาดเซ็นเซอร์ออปติคัล | 1/4 นิ้ว |
| ขนาดสินค้า | 11.02"L x 5.7"W x 1.95"H (Packaging dimensions, actual camera dimensions not specified, using packaging for reference) |
| น้ำหนักสินค้า | 10.6 ounces (Packaging weight, actual camera weight not specified, using packaging for reference) |
10. การรับประกันและการสนับสนุน
For information regarding warranty coverage, technical support, or to purchase replacement parts, please contact PRUVEEO customer service.
Please refer to the official PRUVEEO website or your purchase documentation for the most up-to-date contact information and warranty details.


