1. บทนำ
The Daitsu Aral ADD-12XB Dehumidifier is designed to efficiently remove excess moisture from indoor environments, helping to prevent mold, mildew, and musty odors. This manual provides essential information for the safe and effective operation, maintenance, and troubleshooting of your dehumidifier. Please read it thoroughly before first use and retain it for future reference.
2. คำแนะนำด้านความปลอดภัย
เพื่อให้มั่นใจถึงการทำงานที่ปลอดภัย ควรปฏิบัติตามข้อควรระวังต่อไปนี้เสมอ:
- ตรวจสอบให้แน่ใจว่าแหล่งจ่ายไฟตรงกับปริมาตรtage ระบุไว้บนฉลากการจัดอันดับของหน่วย
- ห้ามใช้งานเครื่องลดความชื้นหากสายไฟหรือปลั๊กชำรุด
- Keep the unit upright during transport and operation.
- Maintain at least 20 cm (8 inches) of clearance around the unit for proper airflow.
- ห้ามสอดวัตถุเข้าไปในช่องลมเข้าหรือช่องลมออก
- ถอดปลั๊กเครื่องก่อนทำความสะอาดหรือดำเนินการบำรุงรักษาใดๆ
- ห้ามใช้เครื่องลดความชื้นในบริเวณที่มีการเก็บก๊าซหรือของเหลวไวไฟ
- เครื่องใช้ไฟฟ้าตัวนี้ไม่ได้มีวัตถุประสงค์เพื่อให้บุคคล (รวมทั้งเด็ก) ที่มีความบกพร่องทางร่างกาย ทางประสาทสัมผัส หรือทางจิตใจ หรือขาดประสบการณ์และความรู้ ใช้งาน เว้นแต่จะมีการดูแลหรือคำแนะนำเกี่ยวกับการใช้เครื่องใช้ไฟฟ้าโดยบุคคลที่รับผิดชอบด้านความปลอดภัยของบุคคลดังกล่าว
3. สินค้าหมดview
Familiarize yourself with the main components of your Daitsu Aral ADD-12XB Dehumidifier.
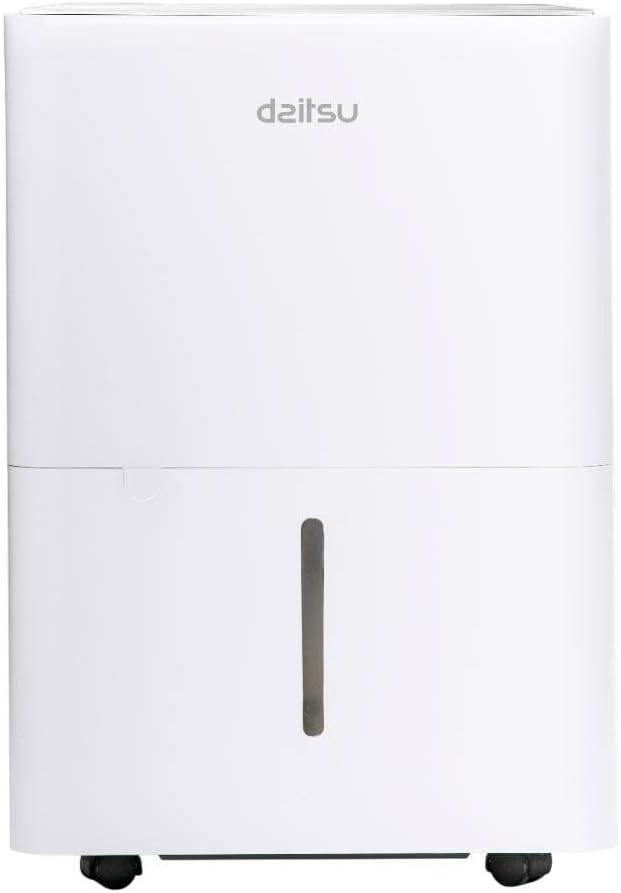
รูปที่ 1: ด้านหน้า view of the Daitsu Aral ADD-12XB Dehumidifier. This image displays the front of the Daitsu Aral ADD-12XB Dehumidifier, featuring its clean white design and the visible water level indicator on the collection tank.

รูปที่ 2: หลัง view of the Daitsu Aral ADD-12XB Dehumidifier. The rear view of the dehumidifier shows the removable air filter cover for maintenance and the continuous drainage outlet, typically used for connecting a hose for extended operation.

รูปที่ 3: Control panel of the Daitsu Aral ADD-12XB Dehumidifier. This close-up image shows the top control panel of the dehumidifier, featuring intuitive buttons for power, mode selection (Continuous, Dry, Turbo, Comfort), and timer settings, along with indicator lights.
4. การตั้งค่า
4.1 การแกะกล่อง
- นำเครื่องลดความชื้นออกจากบรรจุภัณฑ์อย่างระมัดระวัง
- ถอดวัสดุบรรจุภัณฑ์ทั้งหมดออก รวมถึงเทปหรือฟิล์มป้องกัน
- ตรวจสอบตัวเครื่องว่ามีร่องรอยความเสียหายหรือไม่ หากพบความเสียหาย ห้ามใช้งานและติดต่อฝ่ายบริการลูกค้า
4.2 การจัดวาง
- Place the dehumidifier on a firm, level surface to minimize vibration and noise.
- Ensure there is at least 20 cm (8 inches) of clear space around the air inlet and outlet to allow for efficient airflow.
- หลีกเลี่ยงการวางเครื่องไว้ใกล้แหล่งความร้อนหรือโดนแสงแดดโดยตรง
- For optimal performance, place the unit in the center of the room where dehumidification is needed most.
4.3 การเชื่อมต่อสายไฟ
เสียบสายไฟเข้ากับเต้ารับไฟฟ้าที่มีสายดิน ตรวจสอบให้แน่ใจว่าเต้ารับนั้นตรงตามข้อกำหนดทางไฟฟ้าที่ระบุไว้บนฉลากแสดงคุณสมบัติของเครื่อง
5. คู่มือการใช้งาน
5.1 ฟังก์ชั่นแผงควบคุม
ดูเค้าโครงของแผงควบคุมได้ในรูปที่ 3
- ปุ่มเปิด/ปิด: กดเพื่อเปิดหรือปิดเครื่อง
- ปุ่มโหมด: Press to cycle through available operating modes:
- Cont. (Continuous): เครื่องนี้ทำงานได้อย่างต่อเนื่องโดยไม่ขึ้นอยู่กับระดับความชื้นในอากาศโดยรอบ
- แห้ง: Designed for drying clothes or in very humid conditions.
- เทอร์โบ: Operates at maximum fan speed for rapid dehumidification.
- ปลอบโยน: รักษาระดับความชื้นที่เหมาะสมโดยอัตโนมัติ
- ปุ่มตั้งเวลา: Press to set the auto-on or auto-off timer (e.g., 24-hour timer).
- ไฟแสดงสถานะถังเต็ม: Illuminates when the water tank is full and needs to be emptied. The unit will automatically stop operating.
5.2 การระบายน้ำออกจากถังน้ำ
When the 'Tank Full' indicator lights up, the unit will stop operating. To empty the tank:
- ค่อยๆ ดึงถังน้ำออกจากด้านหน้าของเครื่อง
- ค่อยๆ ยกถังไปวางที่อ่างล้างจานหรือท่อระบายน้ำ
- เทน้ำที่เก็บกักไว้ออกไป
- เลื่อนถังเปล่ากลับเข้าไปในตัวเครื่องจนกระทั่งล็อคเข้าที่ เครื่องจะกลับมาทำงานอีกครั้ง
5.3 การระบายน้ำอย่างต่อเนื่อง (ทางเลือก)
For extended operation without needing to empty the water tank, you can set up continuous drainage:
- หาตำแหน่งช่องระบายน้ำต่อเนื่องที่ด้านหลังของตัวเครื่อง (ดูรูปที่ 2)
- ถอดจุกยางออกจากท่อระบายน้ำ
- Connect a suitable drain hose (not included) to the outlet. Ensure the connection is secure to prevent leaks.
- Direct the other end of the hose to a floor drain or a large container, ensuring the hose is sloped downwards for gravity drainage.
- The unit will now drain water continuously, bypassing the internal water tank.
6. การบำรุงรักษา
การบำรุงรักษาตามปกติจะช่วยให้เครื่องลดความชื้นทำงานได้อย่างเหมาะสมที่สุดและยืดอายุการใช้งานของเครื่องลดความชื้นของคุณ
6.1 การทำความสะอาดแผ่นกรองอากาศ
ควรทำความสะอาดตัวกรองอากาศทุกสองสัปดาห์หรือบ่อยกว่านั้น ขึ้นอยู่กับการใช้งานและคุณภาพอากาศ
- ปิดเครื่องลดความชื้นและถอดปลั๊กออกจากเต้าเสียบไฟฟ้า
- Locate the air filter cover on the back of the unit (refer to Figure 2).
- ถอดฝาครอบตัวกรองออกและดึงตัวกรองอากาศออกอย่างระมัดระวัง
- Clean the filter using a vacuum cleaner to remove dust and debris. For heavy dirt, wash the filter with lukewarm water and a mild detergent.
- Rinse the filter thoroughly and allow it to air dry completely before reinserting.
- Place the dry filter back into the unit and close the cover.
6.2 การทำความสะอาดถังเก็บน้ำ
ทำความสะอาดถังเก็บน้ำอย่างสม่ำเสมอเพื่อป้องกันการเจริญเติบโตของเชื้อราและแบคทีเรีย
- ถอดและเทน้ำออกจากถัง
- ล้างถังด้วยน้ำอุ่นและผงซักฟอกอ่อนๆ
- Rinse thoroughly and dry before placing it back into the unit.
6.3 การทำความสะอาดภายนอก
เช็ดด้านนอกของตัวเครื่องด้วยผ้านุ่มdamp ใช้ผ้าเช็ดทำความสะอาดเท่านั้น ห้ามใช้สารเคมีรุนแรง สารขัดถู หรือตัวทำละลาย เพราะอาจทำให้พื้นผิวเสียหายได้
6.4 พื้นที่จัดเก็บ
หากจะไม่ใช้เครื่องเป็นระยะเวลานาน:
- Empty and clean the water tank and air filter.
- ถอดปลั๊กเครื่องและม้วนสายไฟให้เรียบร้อย
- คลุมเครื่องด้วยถุงพลาสติกหรือผ้าเพื่อป้องกันฝุ่นละออง
- Store the dehumidifier in an upright position in a cool, dry place.
7 การแก้ไขปัญหา
ก่อนที่จะติดต่อฝ่ายสนับสนุนลูกค้า โปรดดูปัญหาทั่วไปและวิธีแก้ไขต่อไปนี้:
| ปัญหา | สาเหตุที่เป็นไปได้ | สารละลาย |
|---|---|---|
| เครื่องไม่เปิด | ไม่มีแหล่งจ่ายไฟ เชื่อมต่อสายไฟไม่ถูกต้อง ถังน้ำเต็ม | ตรวจสอบเต้ารับไฟฟ้า ตรวจสอบให้แน่ใจว่าเสียบสายไฟแน่นหนา เทน้ำออกจากถัง |
| ไม่มีการเก็บน้ำ | ความชื้นในห้องต่ำเกินไป ไส้กรองอากาศอุดตัน อุณหภูมิต่ำเกินไป Unit in continuous drainage mode | Dehumidification may not be needed ทำความสะอาดไส้กรองอากาศ Unit may not operate efficiently below 5°C (41°F) Check if continuous drainage hose is connected and draining |
| หน่วยมีเสียงดัง | หน่วยไม่อยู่บนพื้นผิวระดับ ไส้กรองอากาศอุดตัน | วางหน่วยบนพื้นผิวที่เรียบและมั่นคง ทำความสะอาดไส้กรองอากาศ |
| ลดความชื้นไม่ดี | ประตู/หน้าต่างเปิด ไส้กรองอากาศอุดตัน ขนาดห้องใหญ่เกินไป | ปิดประตูและหน้าต่างทั้งหมด ทำความสะอาดไส้กรองอากาศ Ensure unit capacity matches room size |
8. ข้อมูลจำเพาะ
Technical specifications for the Daitsu Aral ADD-12XB Dehumidifier:
| คุณสมบัติ | ข้อมูลจำเพาะ |
|---|---|
| ชื่อรุ่น | เอดีดี-12เอ็กซ์บี |
| ยี่ห้อ | ไดสึ |
| ลดความชื้นความจุ | 12 Liters/day (at specified conditions) |
| ปริมาตรถังเก็บน้ำ | 1.5 ลิตร |
| ขนาด (สูง x กว้าง x ลึก) | 38.6 x 28 x 19.5 ซม. (ประมาณ 15.2 x 11 x 7.7 นิ้ว) |
| น้ำหนักผลิตภัณฑ์ | 23.5 กก. (ประมาณ 51.8 ปอนด์) |
| เล่มที่tage | 230 โวลต์ |
| พลัง | 2.5 kW (This value seems unusually high for a dehumidifier, typically it would be in Watts, e.g., 250W. Please verify with product label if possible.) |
| ระดับเสียง | 54 เดซิเบล |
| คุณสมบัติพิเศษ | Automatic Shut-off, Continuous Drainage, Timer |
| สี | สีขาว |
หมายเหตุ: ข้อมูลจำเพาะอาจมีการเปลี่ยนแปลงโดยไม่ต้องแจ้งให้ทราบล่วงหน้า โปรดดูฉลากผลิตภัณฑ์เพื่อข้อมูลที่ถูกต้องที่สุด
9. การรับประกันและการสนับสนุน
9.1 ข้อมูลการรับประกัน
This Daitsu product is covered by a manufacturer's warranty. The warranty period and terms may vary by region. Please retain your proof of purchase for warranty claims. For specific warranty details, refer to the warranty card included with your product or contact Daitsu customer service.
9.2 การสนับสนุนลูกค้า
If you encounter any issues not covered in the troubleshooting section or require further assistance, please contact Daitsu customer support. Contact information can typically be found on the official Daitsu webไซต์หรือบนบรรจุภัณฑ์ผลิตภัณฑ์


