1. บทนำ
This user manual provides detailed instructions for the installation, operation, and maintenance of your RAYKUBE M5 TT Smart Fingerprint Door Lock. Please read this manual thoroughly before installation and use to ensure proper function and safety.
ข้อควรระวังเพื่อความปลอดภัย
- Do not expose the lock to direct water or extreme temperatures.
- Use only specified battery types (4x AAA).
- Keep keys and passcodes in a secure location.
- Ensure proper installation to prevent damage or malfunction.
2. สินค้าหมดview
The RAYKUBE M5 TT Smart Fingerprint Door Lock offers multiple unlocking methods and smart features for enhanced security and convenience in various living spaces.
คุณสมบัติหลัก:
- Touch Screen Interface for easy operation.
- Numeric Code Keyboard for secure access.
- Multi-functional Use, ideal for families, hotels, and apartments.
- Fingerprint Lock Function using biometric authentication.
- Multiple unlocking methods: Fingerprint, Passcode, IC Card, Key, and TTLock App.
- Emergency USB Type-C charging port.
Components and Design:

Figure 2.1: RAYKUBE M5 TT Smart Fingerprint Door Lock (Black and Silver models). This image displays both the black and silver versions of the smart lock, highlighting their sleek design and integrated keypad.

Figure 2.2: Silver M5 TT Lock with Bluetooth and TT Lock App compatibility. The silver model is shown with indicators for Bluetooth connectivity and compatibility with the TT Lock application.
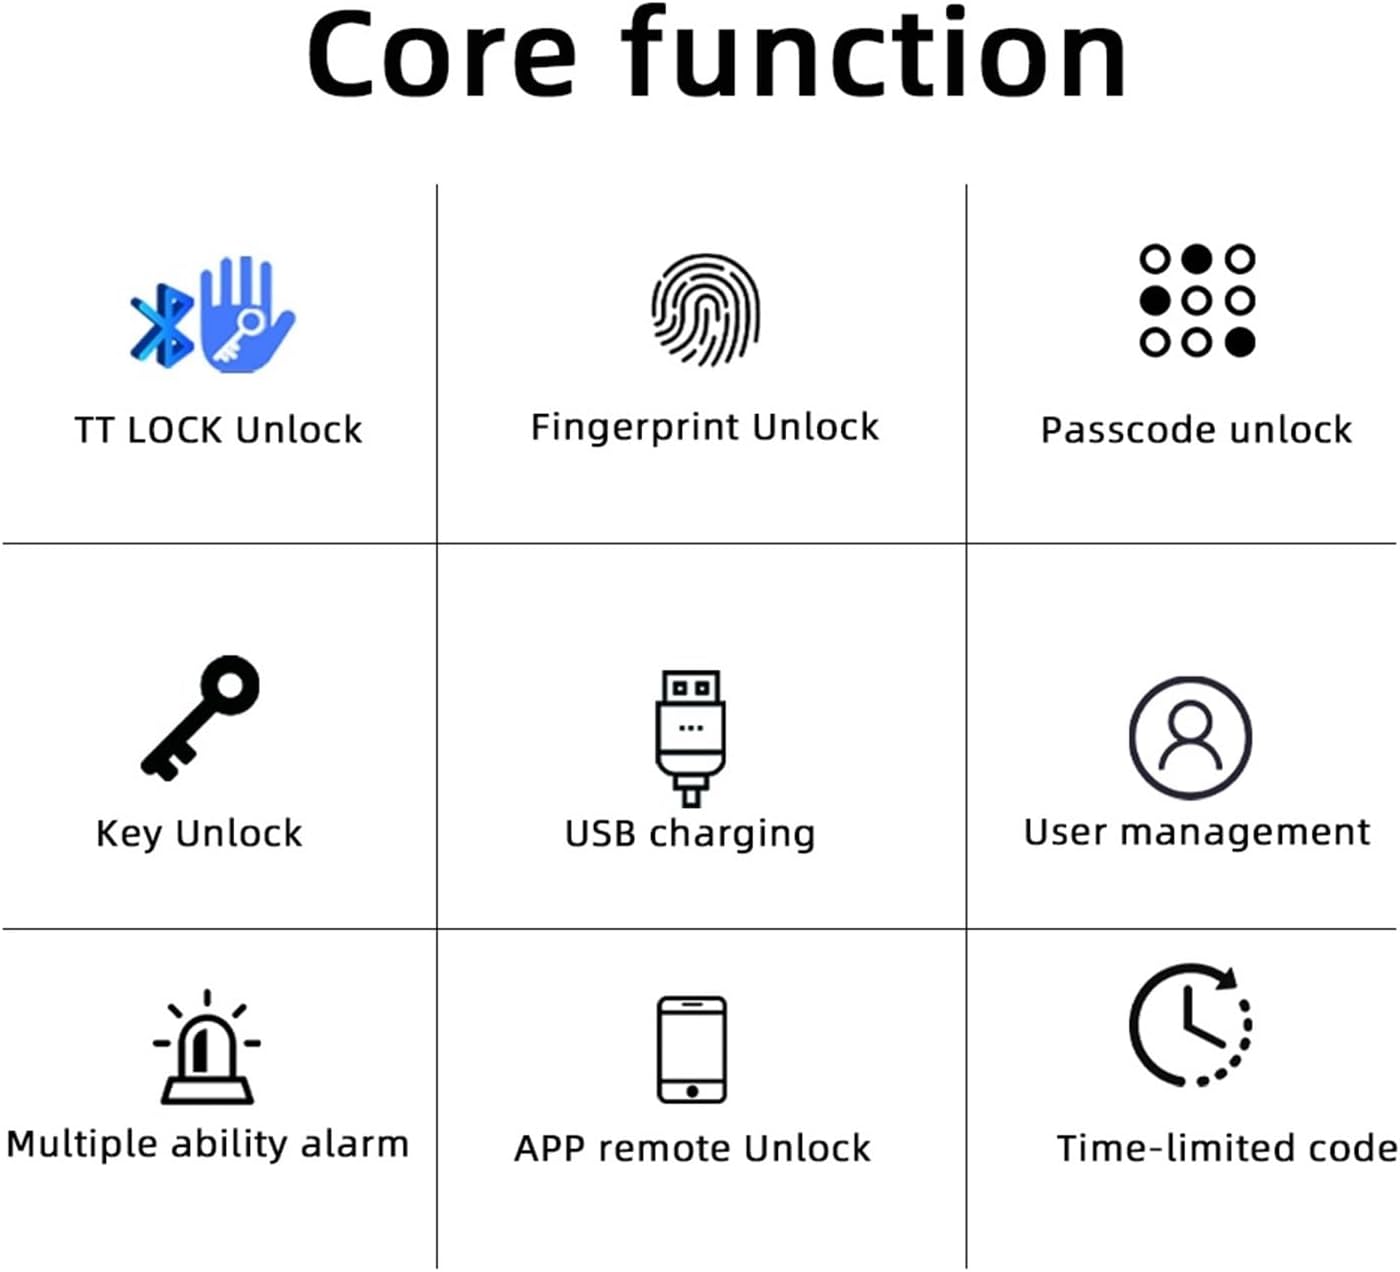
Figure 2.3: Core Functions. This diagram illustrates the various unlocking methods and features: TT LOCK Unlock, Fingerprint Unlock, Passcode Unlock, Key Unlock, USB Charging, User Management, Multiple Ability Alarm, APP Remote Unlock, and Time-limited Code.

Figure 2.4: TT LOCK APP Control and G2 Gateway. This image shows how the lock can be controlled via the TT Lock app and connected to Wi-Fi using an optional G2 Gateway for remote access.

Figure 2.5: Power Supply. The lock is powered by 4x AAA batteries, offering approximately 8 months of battery life. It includes a low battery reminder and a Type-C port for emergency power in case of full battery depletion.

Figure 2.6: Product Dimensions and Component Identification. This diagram provides key measurements (e.g., 58mm width, 160mm length) and labels important components such as the fingerprint sensor, card sensing area, keypad, keyhole, and Type-C charging port.
3. คู่มือการติดตั้ง
Follow these steps for a smooth installation of your smart lock.
รายการตรวจสอบก่อนการติดตั้ง:
- Ensure your door thickness is compatible with the lock.
- ตรวจสอบว่ามีส่วนประกอบทั้งหมดอยู่ในบรรจุภัณฑ์
- Gather necessary tools (e.g., screwdriver).
ขั้นตอนการติดตั้ง:
- Remove your existing door handle/lock.
- Install the new latch and strike plate into the door frame.
- Attach the exterior and interior lock assemblies, ensuring cables are properly connected.
- ยึดล็อคด้วยสกรู
- Insert 4x AAA batteries into the battery compartment.
- Test the lock's functionality with the mechanical key.

Figure 3.1: Easy and Convenient Installation. This image demonstrates the simple replacement process, showing a standard door handle before and after installation of the RAYKUBE M5 TT Smart Lock.
4. คู่มือการใช้งาน
The RAYKUBE M5 TT Smart Lock offers multiple convenient ways to unlock your door.
วิธีการปลดล็อค:
- ปลดล็อคลายนิ้วมือ: วางลายนิ้วมือที่ลงทะเบียนไว้ของคุณลงบนเซ็นเซอร์ลายนิ้วมือ ระบบจะปลดล็อกเมื่อตรวจสอบยืนยันสำเร็จ
- Passcode Unlock: Enter your registered passcode on the numeric keypad, followed by the '#' key.
- ปลดล็อคบัตร IC: Tap your registered IC card on the card sensing area.
- ปลดล็อคด้วยกุญแจกลไก: Insert the physical key into the keyhole and turn to unlock. This is for emergency use.
- ปลดล็อกด้วยแอป TTLock: เปิดแอป TTLock บนสมาร์ทโฟนของคุณ ตรวจสอบให้แน่ใจว่าเปิดใช้งานบลูทูธแล้ว จากนั้นแตะไอคอนปลดล็อก
โหมดทาง:
Passage mode allows the door to remain unlocked for continuous access without requiring authentication. This mode is useful for high-traffic periods. Refer to the TTLock app for instructions on how to activate and deactivate Passage Mode.
5. การบำรุงรักษา
การบำรุงรักษาอย่างถูกวิธีจะช่วยให้สมาร์ทล็อคของคุณมีอายุการใช้งานยาวนานและทำงานได้อย่างมีประสิทธิภาพสูงสุด
การเปลี่ยนแบตเตอรี่:
- The lock is powered by 4x AAA batteries.
- When the battery is low, the lock will provide a low battery reminder (audible alert or indicator light).
- To replace, open the battery cover on the interior handle and replace all four batteries with new ones.
ไฟฉุกเฉิน:
In case the batteries are completely depleted, you can use a portable power bank connected to the Type-C port on the exterior handle for emergency power to unlock the door.
การทำความสะอาด:
Wipe the lock surface with a soft, dry cloth. Avoid using abrasive cleaners or solvents that may damage the finish or electronic components.
6 การแก้ไขปัญหา
This section addresses common issues you might encounter with your smart lock.
| ปัญหา | สาเหตุที่เป็นไปได้ | สารละลาย |
|---|---|---|
| ล็อคไม่ตอบสนอง | แบตเตอรี่หมด | Replace batteries or use emergency Type-C power. |
| ลายนิ้วมือไม่ถูกจดจำ | Finger is dirty/wet, sensor is dirty, or fingerprint not properly registered. | Clean finger and sensor. Re-register fingerprint if issue persists. |
| รหัสผ่านใช้งานไม่ได้ | Incorrect passcode entered, or passcode not registered. | Verify passcode. Ensure passcode is correctly registered via the app. |
| TTLock App connection issues | Bluetooth off, app not updated, or lock too far from phone. | Ensure Bluetooth is on. Update app. Move closer to the lock. |
7. ข้อมูลจำเพาะ
| คุณลักษณะ | รายละเอียด |
|---|---|
| ยี่ห้อ | เรย์คูบ |
| หมายเลขรุ่น | M5 TT Silver |
| ขนาดสินค้า (โดยประมาณ) | 160 mm (Length) x 58 mm (Width) |
| น้ำหนักสินค้า | 50 กรัม |
| สี | M5 TT Silver |
| ปริมาณ | 1 |
| แหล่งพลังงาน | แบตเตอรี่ AAA 4 ก้อน |
| ไฟฟ้าฉุกเฉิน | พอร์ต USB Type-C |
| การเชื่อมต่อ | Bluetooth (TTLock App), Wi-Fi (with optional G2 Gateway) |
8. การรับประกันและการสนับสนุน
สำหรับข้อมูลการรับประกันหรือการสนับสนุนทางเทคนิค โปรดติดต่อผู้ขายหรือผู้ผลิตโดยตรง โปรดเก็บใบเสร็จรับเงินไว้เป็นหลักฐานการซื้อ
If you have any questions or require assistance, please refer to the contact information provided at the point of purchase or on the product packaging.


