การแนะนำ
Thank you for choosing the ATTACK SHARK G500 Wireless Over-ear Noise Canceling Headphones. This manual provides detailed instructions for setting up, operating, maintaining, and troubleshooting your new headphones. Please read this manual thoroughly before use to ensure optimal performance and longevity of your device.
สินค้าเกินview
The ATTACK SHARK G500 headphones are designed to deliver a superior audio experience with advanced Active Noise Cancellation (ANC) technology. They offer versatile connectivity options, comfortable wear, and long-lasting battery life, making them suitable for various activities from gaming to travel.

Figure 1: ATTACK SHARK G500 Wireless Over-ear Noise Canceling Headphones (Beige)
The image displays the ATTACK SHARK G500 headphones in a beige color, highlighting their over-ear design and cushioned earcups.
เนื้อหาแพ็คเกจ
- ATTACK SHARK G500 Wireless Over-ear Headphones
- สายชาร์จแบบ USB Type-C
- สายสัญญาณเสียงขนาด 3.5 มม.
- คู่มือการใช้งาน

Figure 2: Included accessories with the G500 headphones
This image shows the complete package contents, including the headphones, charging cable, 3.5mm audio cable, and the user manual.
การตั้งค่า
1. การชาร์จหูฟัง
- Locate the USB Type-C charging port on the headphone earcup.
- Connect the provided USB Type-C charging cable to the headphones and a compatible USB power source (e.g., computer, wall adapter).
- The LED indicator will illuminate during charging. A full charge typically takes approximately 2 hours.
- ไฟ LED จะเปลี่ยนสีหรือดับลงเมื่อการชาร์จเสร็จสมบูรณ์

Figure 3: Location of the charging port and LED indicator
This image highlights the USB Type-C charging port and the LED indicator on the headphone earcup, essential for monitoring charging status.
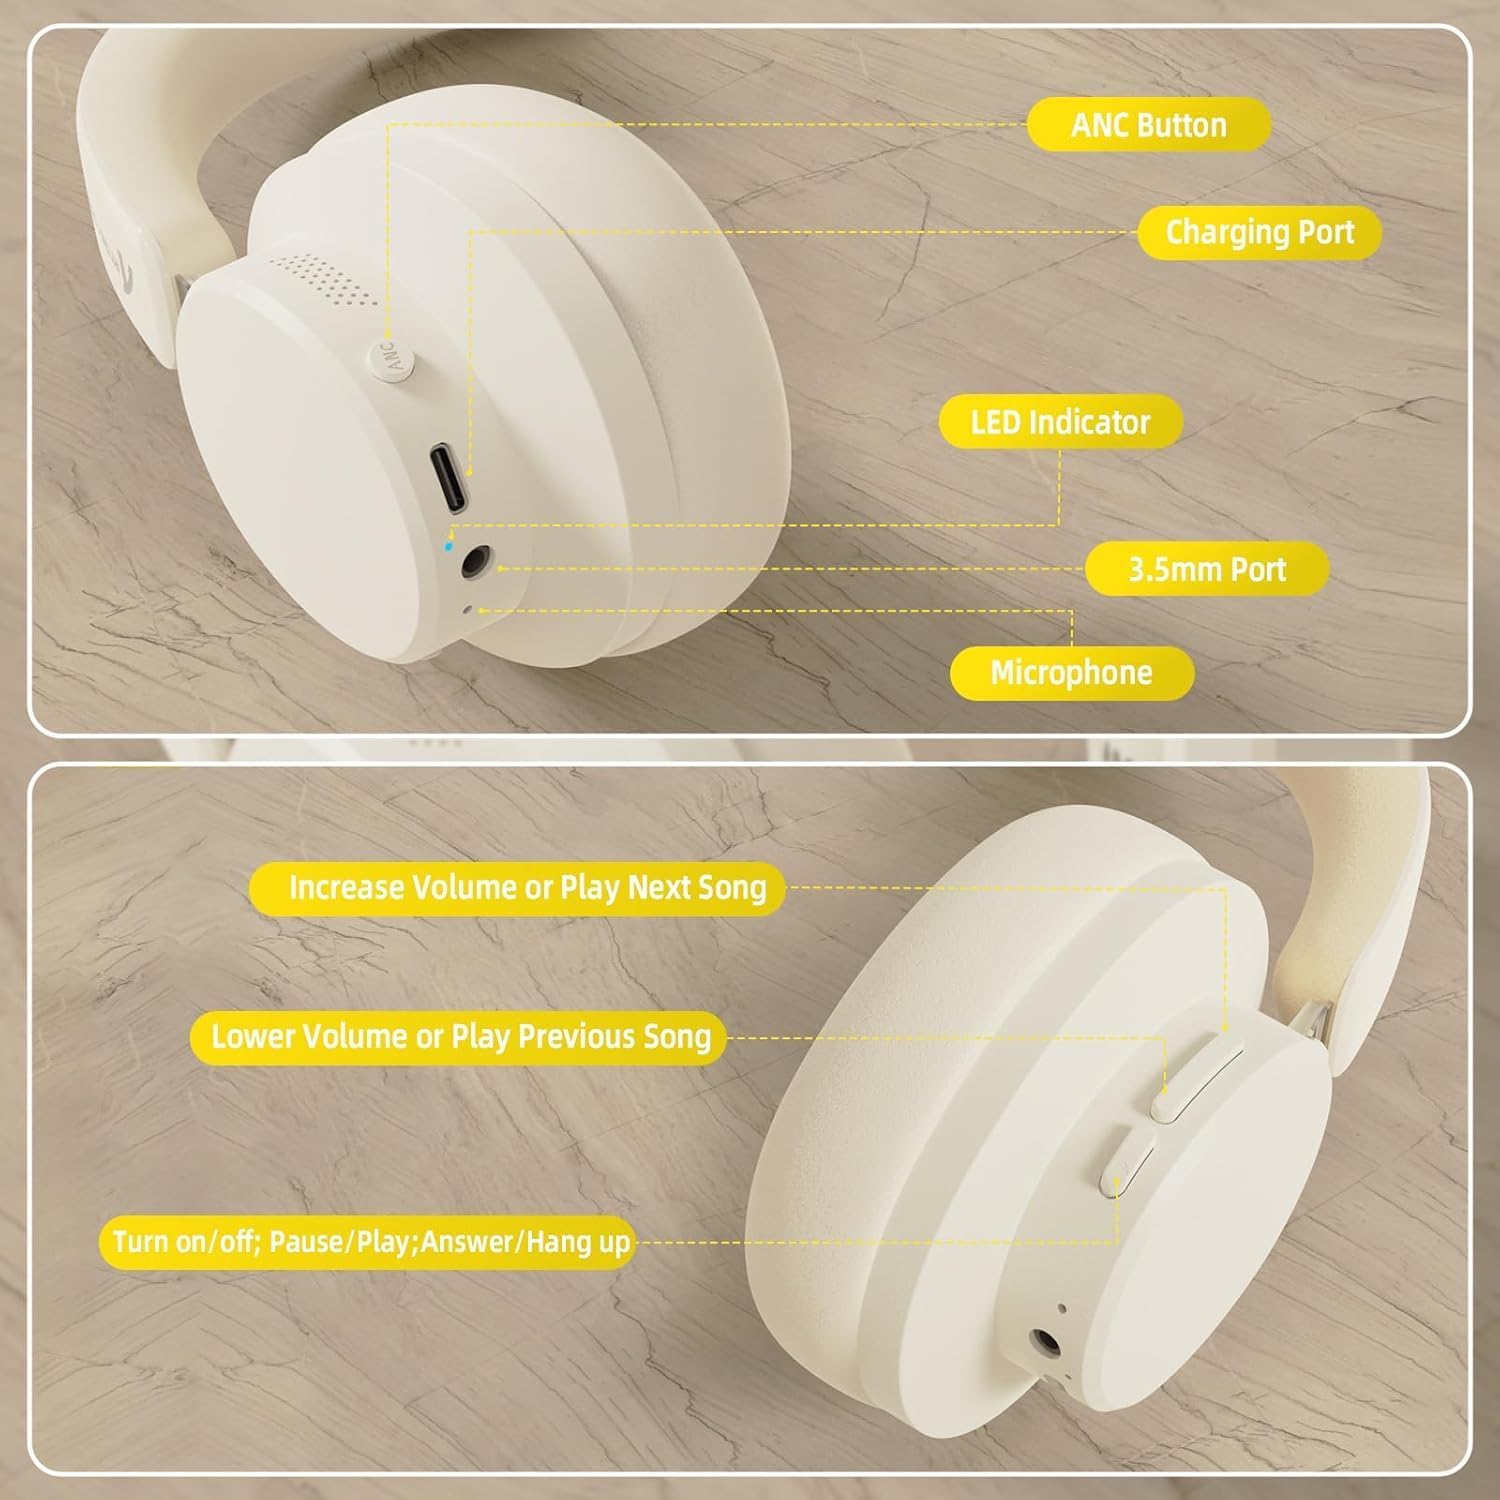
Figure 4: Visual representation of headphones charging
The image illustrates the headphones connected to a power source, with a battery icon indicating the charging process.
2. การจับคู่บลูทู ธ
- ตรวจสอบให้แน่ใจว่าหูฟังชาร์จเต็มและปิดเครื่องแล้ว
- กดปุ่มเปิด/ปิดค้างไว้จนกว่าไฟ LED จะกะพริบ ซึ่งแสดงว่าเข้าสู่โหมดจับคู่แล้ว
- บนอุปกรณ์ของคุณ (สมาร์ทโฟน แท็บเล็ต แล็ปท็อป) เปิดใช้งาน Bluetooth และค้นหาอุปกรณ์ที่มีอยู่
- Select "ATTACK SHARK G500" from the list of devices to pair.
- The LED indicator will stop flashing and remain solid once successfully paired.
Video 1: ATTACK SHARK G300 Wireless Over-Ear Headphones (demonstrates general headphone features, including connectivity)
วิดีโอนี้ให้ข้อมูลทั่วไปเกี่ยวกับview of ATTACK SHARK wireless over-ear headphones, showcasing their design and some features, which can be helpful for understanding the physical aspects and basic operation of the G500 model.

Figure 5: Dual mode connection example
The image illustrates the headphones connected wirelessly to both a smartphone and a laptop, demonstrating the dual-mode connectivity.
3. การเชื่อมต่อแบบมีสาย
- Insert one end of the 3.5mm audio cable into the 3.5mm port on the headphone earcup.
- ต่อปลายอีกด้านของสายสัญญาณเสียง 3.5 มม. เข้ากับช่องเสียบสัญญาณเสียงออกของอุปกรณ์ของคุณ
- หูฟังจะเปลี่ยนเป็นโหมดสายโดยอัตโนมัติ
คำแนะนำการใช้งาน
ควบคุมมากกว่าview
รูปที่ 6: รายละเอียด view of headphone controls
This image provides a clear diagram of all control buttons and ports on the headphones, including the ANC button, charging port, LED indicator, 3.5mm port, and microphone.
เปิด/ปิดเครื่อง
- To Power On: Press and hold the Multi-function button for 3 seconds.
- To Power Off: Press and hold the Multi-function button for 3 seconds.
การตัดเสียงรบกวนแบบแอคทีฟ (ANC)
- Press the ANC button to toggle Active Noise Cancellation on/off.
- เมื่อเปิดใช้งานระบบตัดเสียงรบกวน (ANC) เสียงรบกวนรอบข้างจะลดลงอย่างมาก
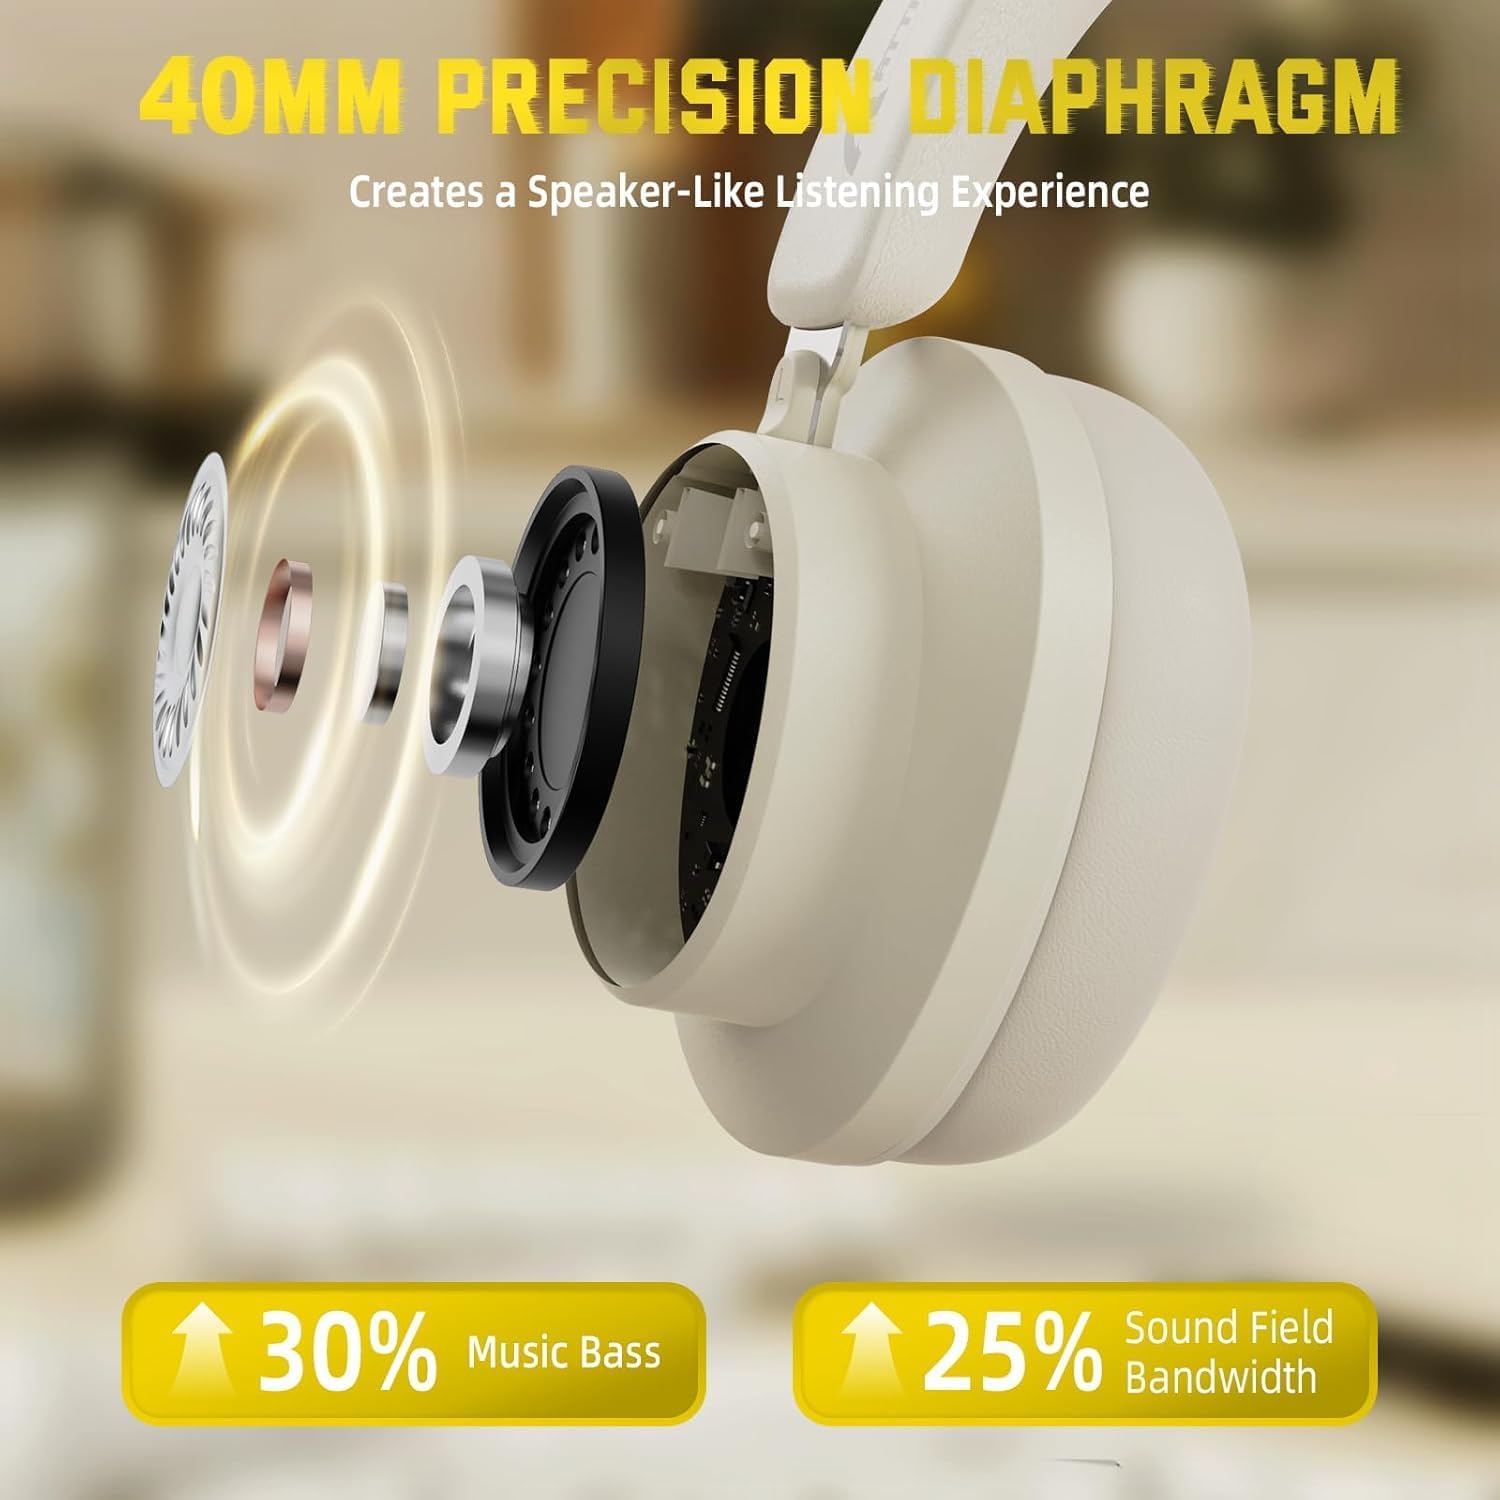
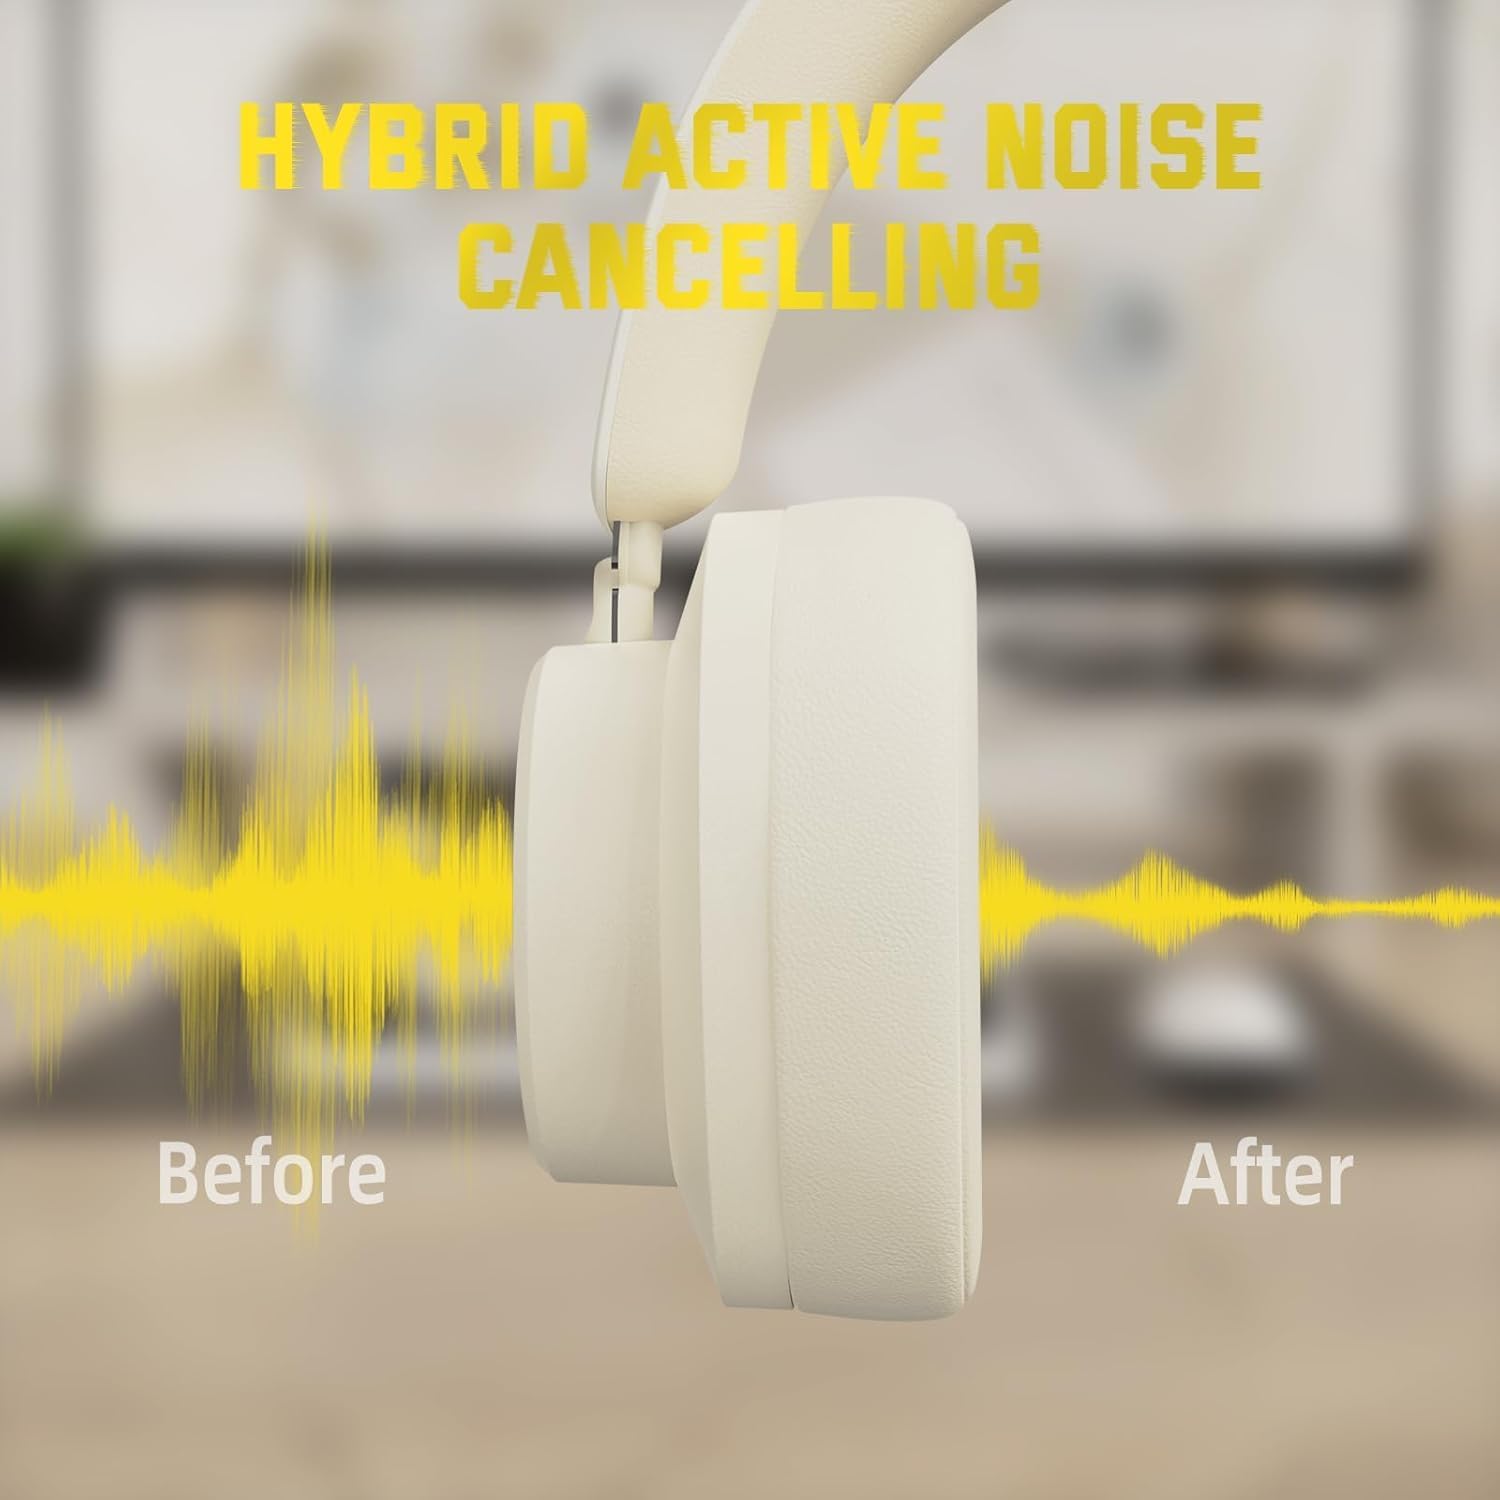
Figure 7: Hybrid Active Noise Cancelling in action
This diagram visually represents the effect of Hybrid Active Noise Cancelling, showing how external noise is reduced when the feature is activated.
การเล่นเพลงและการโทร
- Play/Pause: Short press the Multi-function button.
- Next Song: Long press the Volume + button.
- Previous Song: Long press the Volume - button.
- Volume Up: Short press the Volume + button.
- Volume Down: Short press the Volume - button.
- Answer/End Call: Short press the Multi-function button.
- Reject Call: Long press the Multi-function button.
การซ่อมบำรุง
- ทำความสะอาดหูฟังเป็นประจำด้วยผ้าแห้งนุ่ม
- หลีกเลี่ยงการให้หูฟังสัมผัสกับอุณหภูมิที่สูง ความชื้นสูง หรือของเหลวที่รุนแรง
- Store the headphones in a cool, dry place when not in use. The rotatable earcups allow for compact storage.
- อย่าพยายามถอดประกอบหรือซ่อมแซมหูฟังด้วยตัวเอง เพราะจะทำให้การรับประกันเป็นโมฆะ

Figure 8: Rotatable earcups for easy storage
This image demonstrates the rotatable earcups, which allow the headphones to be folded flat for convenient storage and portability.
การแก้ไขปัญหา
| ปัญหา | วิธีแก้ปัญหาที่เป็นไปได้ |
|---|---|
| หูฟังไม่เปิด | Ensure the headphones are fully charged. Press and hold the Multi-function button for 3-5 seconds. |
| ไม่สามารถจับคู่ผ่านบลูทูธได้ | Make sure the headphones are in pairing mode (flashing LED). Turn off and on Bluetooth on your device. Ensure the headphones are not connected to another device. |
| No sound in wireless mode | Check device volume and headphone volume. Ensure headphones are successfully paired. Try re-pairing. |
| ไม่มีเสียงในโหมดใช้สาย | Ensure the 3.5mm audio cable is securely connected to both the headphones and the device. Check device volume. |
| ANC ไม่ทำงานอย่างมีประสิทธิภาพ | Ensure the ANC button is pressed and the feature is active. Adjust headphone fit to ensure a good seal around your ears. |
ข้อมูลจำเพาะ
| คุณสมบัติ | รายละเอียด |
|---|---|
| ชื่อรุ่น | จี500 |
| เทคโนโลยีการเชื่อมต่อ | แบบมีสาย, ไร้สาย (บลูทูธ 5.0) |
| แจ็คหูฟัง | แจ็ค 3.5 มม. |
| การควบคุมเสียงรบกวน | Active Noise Cancellation (21±2DB reduction) |
| ประเภทไดร์เวอร์เสียง | ไดร์เวอร์ไดนามิกนีโอไดเมียม 40 มม. |
| อายุการใช้งานแบตเตอรี่ | Up to 20 Hours (300 mAh battery) |
| วัสดุ | Memory Foam, Plastic/Other Lightweight Polymer |
| น้ำหนักสินค้า | 10.8 ออนซ์ (ประมาณ 210 กรัม) |
| คุณสมบัติพิเศษ | Microphone Included, Rechargeable Battery, Rotatable Earcups |
| อุปกรณ์ที่รองรับ | Laptops, Desktops, Tablets, Telephones, Gaming Consoles, Cellphones |
การรับประกันและการสนับสนุน
สำหรับข้อมูลการรับประกันและการบริการลูกค้า โปรดดูที่เว็บไซต์อย่างเป็นทางการของ ATTACK SHARK webหรือติดต่อผู้ค้าปลีกของคุณ เก็บใบเสร็จรับเงินไว้เป็นหลักฐานการซื้อสำหรับการเรียกร้องการรับประกัน


