1. บทนำ
This manual provides detailed instructions for the setup, operation, and maintenance of your Phomemo WiFi Thermal Label Printer Model 249. This printer is designed for efficient and versatile label printing, compatible with various operating systems and e-commerce platforms. Please read this manual thoroughly to ensure proper use and to maximize the printer's performance.
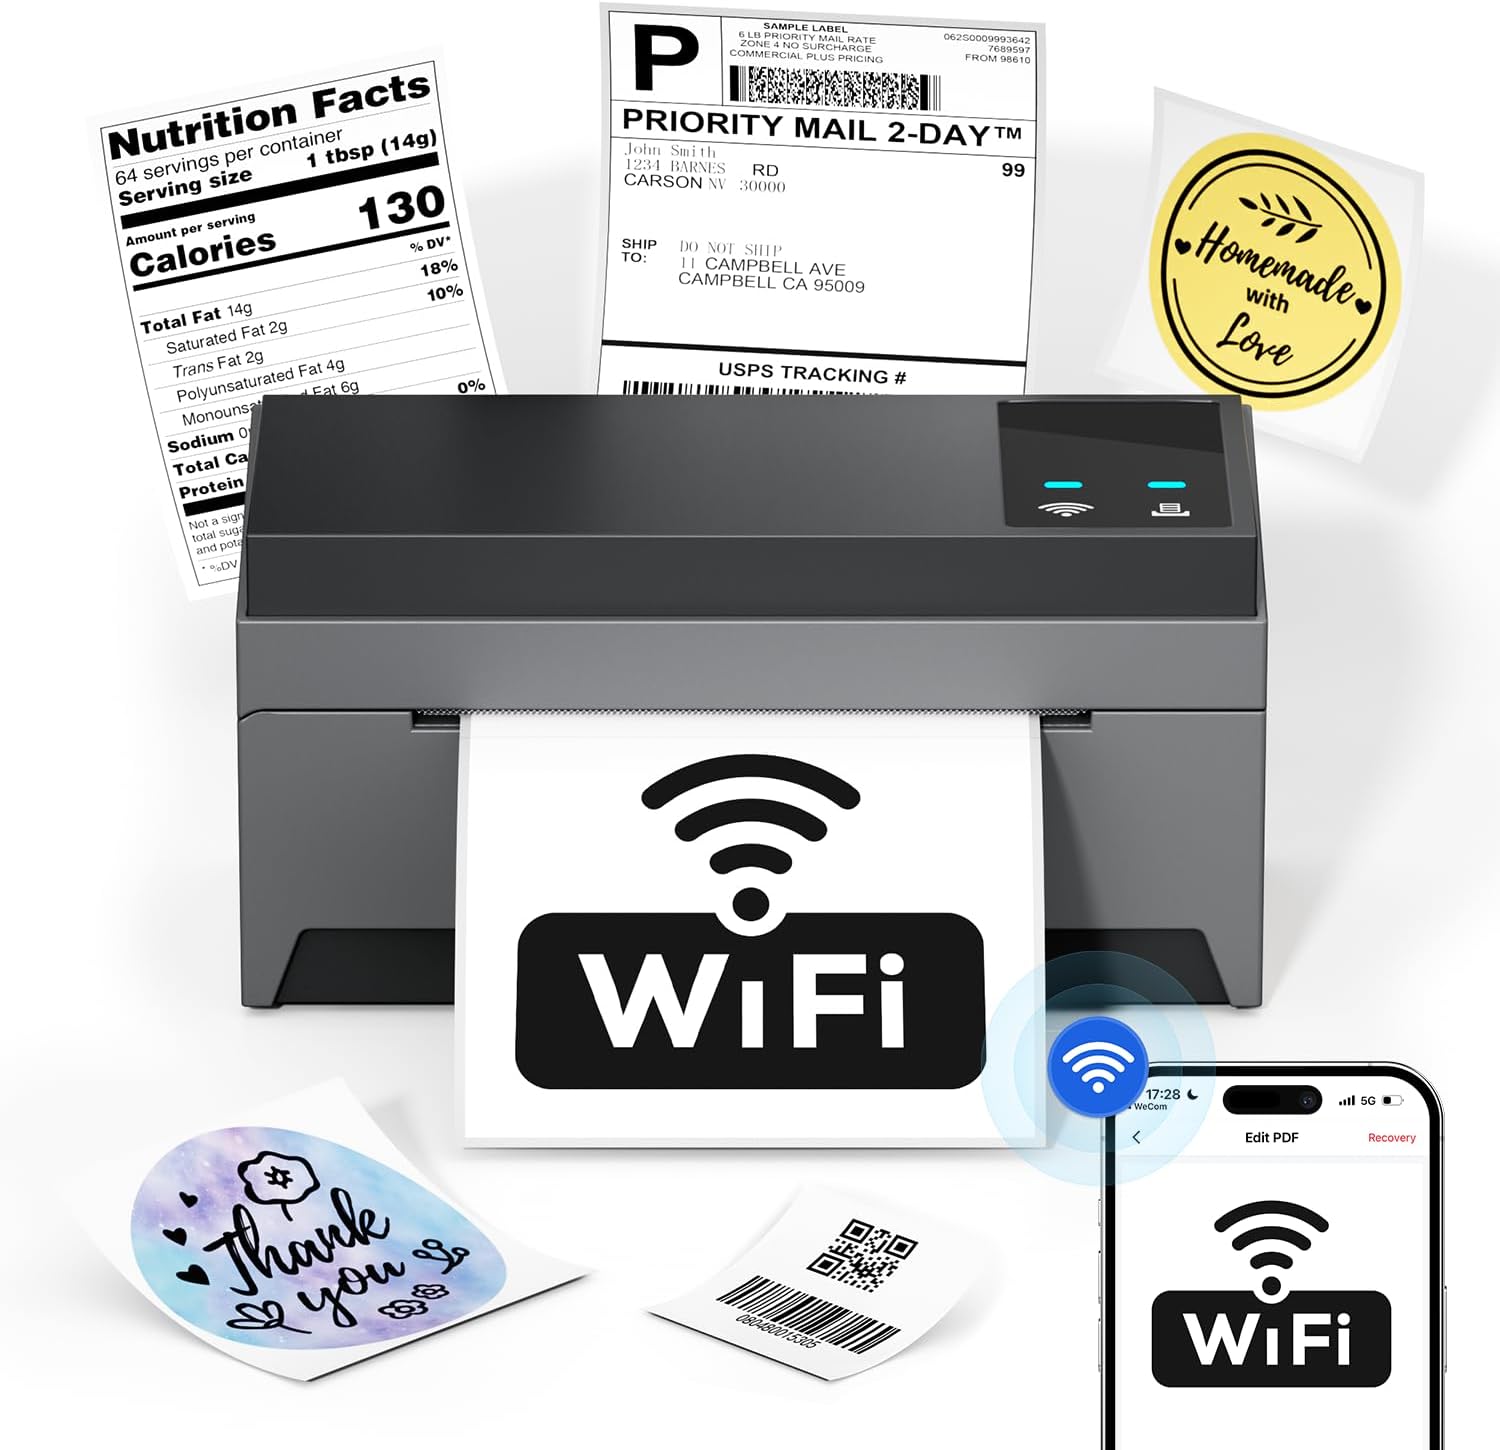
Image: The Phomemo Model 249 printer in operation, demonstrating its capability to print diverse label types such as shipping labels, product information, and custom designs.
2. เนื้อหาบรรจุภัณฑ์
ตรวจสอบว่ารายการทั้งหมดที่ระบุไว้ด้านล่างนี้รวมอยู่ในแพ็คเกจของคุณ:
- 1 Phomemo 249 WiFi label printer
- 1 USB-C Data cable
- 1 Power cord (US/UK/EU) with Adapters
- 10 pcs 4x6 shipping labels
- 1 คู่มือฉบับย่อ
- 1 อะแดปเตอร์ USB-C

Image: All components included in the Phomemo 249 printer package, neatly arranged on a wooden desk.
3. คู่มือการติดตั้ง
3.1 การตั้งค่าทางกายภาพ
- เชื่อมต่อพลังงาน: เสียบสายไฟเข้ากับเครื่องพิมพ์ แล้วเสียบเข้ากับเต้ารับไฟฟ้า
- โหลดฉลาก: Open the printer cover. Insert the thermal labels with the printable side facing up. Adjust the label guides to fit the width of your labels. Close the cover.
3.2 การติดตั้งซอฟต์แวร์
The Phomemo 249 printer can be operated via the Labelife mobile app or a Printer Setting Tool for computers.
For Mobile Devices (iOS & Android) - Labelife App
- ดาวน์โหลดแอพ: Scan the QR code or search for "Labelife" in the App Store (iOS) or Google Play Store (Android).
Download Labelife App - Enable Connectivity: Turn on Bluetooth and WiFi on your mobile device.
- เชื่อมต่อเครื่องพิมพ์: Open the Labelife app. Select the "Internet Connection" option and choose your printer from the list (e.g., PM-249-WF).
- กำหนดค่า WiFi: Enter your WiFi password to connect the printer to your network.

Image: Visual guide demonstrating the steps to connect the printer using the Labelife mobile application.
For Computers (MacOS & Windows) - Printer Setting Tool
- ดาวน์โหลดเครื่องมือ: เยี่ยมชมเว็บไซต์ทางการของ Phomemo website or the link provided in your quick guide to download the Printer Setting Tool for your operating system (Windows or MacOS).
- USB Connection (Initial Setup): Connect your computer to the printer using the provided USB-C cable. This is often required for the initial WiFi configuration from a computer.
- กำหนดค่า WiFi: Use the Printer Setting Tool to select your WiFi network and enter the password. Once configured, the printer will automatically connect to WiFi for future use, eliminating the need for repeated USB connections unless the WiFi settings change.

Image: Instructions for setting up the printer's WiFi connection using the Printer Setting Tool on a computer.
3.3 ตัวเลือกการเชื่อมต่อ
- WiFi (5GHz): Supports fast and reliable wireless printing from Android, iOS, Mac, Windows, and Linux devices. Up to 10 devices can connect simultaneously.
- ยูเอสบี: Provides a direct wired connection for all computer systems, including Chrome OS.
- บลูทูธ: Note that Bluetooth is for auxiliary WiFi connection setup only and does not support direct printing.

Image: Visual representation of the printer's versatile connectivity via WiFi and USB, compatible with various operating systems.
4. คู่มือการใช้งาน
4.1 กระบวนการพิมพ์
Once your printer is connected and labels are loaded, you can initiate printing from your chosen device:
- เตรียมเอกสารของคุณ: Open the label file (e.g., PDF, image) on your computer or mobile device.
- เลือกเครื่องพิมพ์: In your application's print dialog, select the Phomemo 249 printer.
- ปรับการตั้งค่า: Ensure the label size and orientation are correctly set to match your physical labels.
- พิมพ์: Confirm settings and send the print job to the printer.
4.2 Labelife App Features
The Labelife app provides tools for creating and customizing labels:
- Access a library of free label styles.
- Design custom shipping labels, product tags, and other personalized labels.
- นำเข้า PDF fileสำหรับการพิมพ์
- Edit labels with various fonts, shapes, and barcodes.
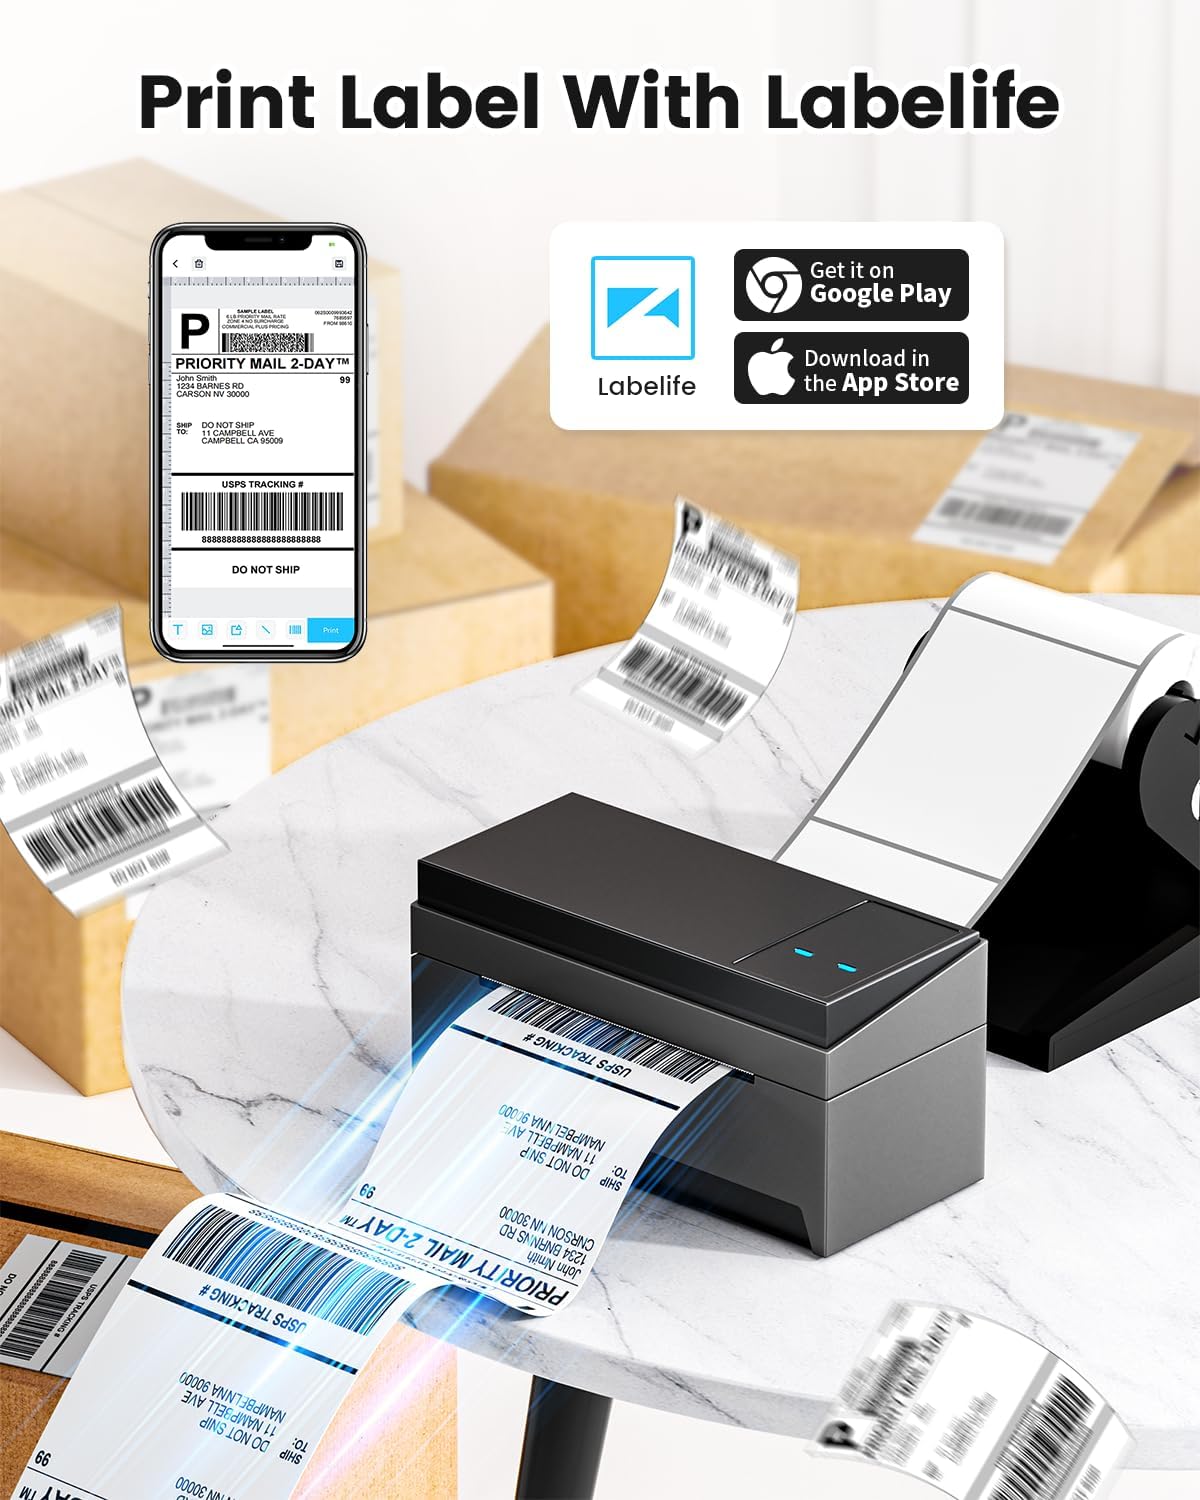
Image: A smartphone displaying the Labelife app, ready to print a shipping label, with the Phomemo printer in the background.
4.3 แพลตฟอร์มที่รองรับ
The Phomemo 249 printer is compatible with a wide range of e-commerce and logistics platforms, ensuring accurate label generation for your needs:
- อีเบย์
- อเมซอน
- วอลมาร์ท
- ช้อปปี้
- สำนักงานบริการไปรษณีย์สหรัฐ
- เอทซี่
- เพย์พาล
- เฟดเอ็กซ์
- ดีเอชแอล
- ยูพีเอส
- และอื่นๆอีกมากมาย.
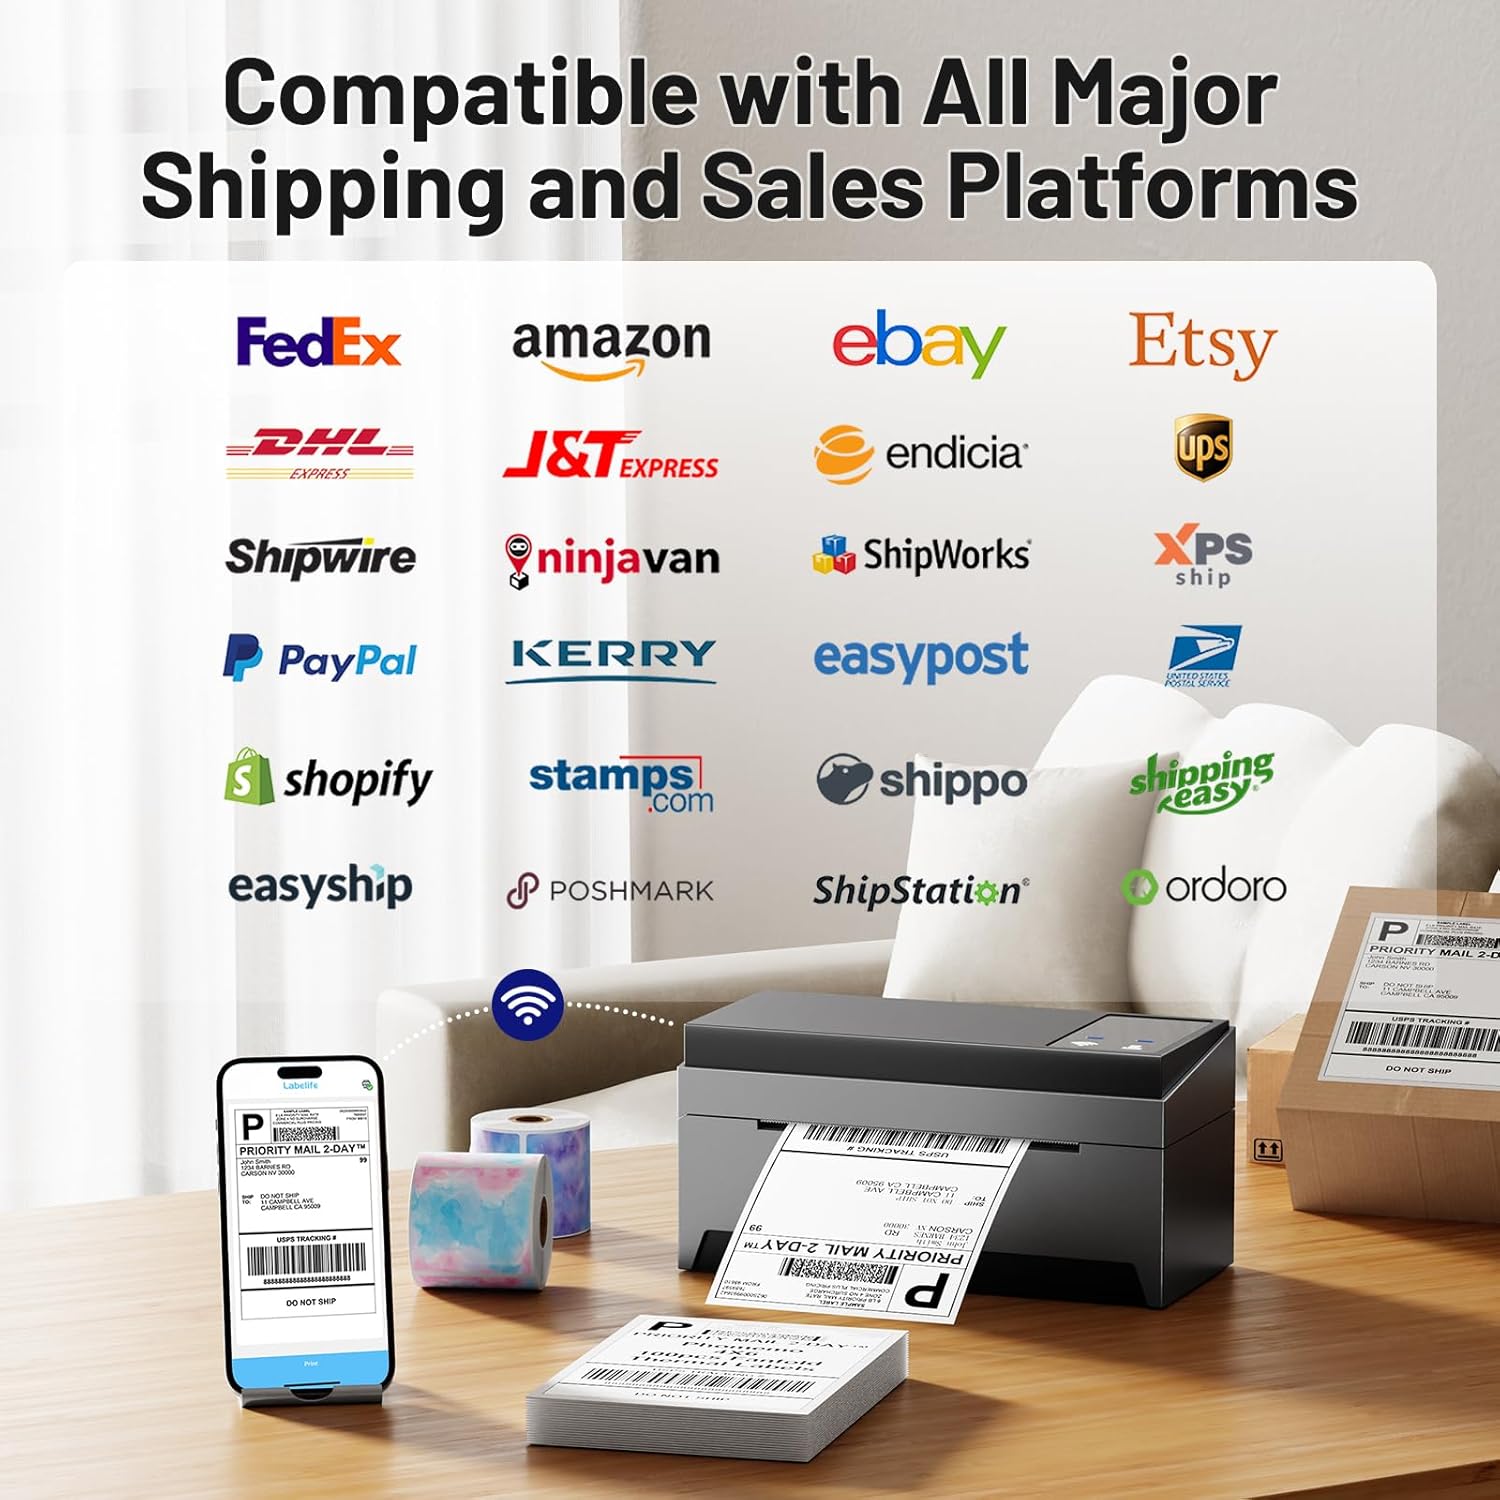
Image: A collage of logos from major e-commerce and logistics platforms, highlighting the printer's broad compatibility.
4.4 Label Types and Sizes
The printer supports various label sizes and types, with a printing range from 1 inch to 4.6 inches in width. This includes standard 4x6 inch shipping labels, smaller product labels, and custom shapes.
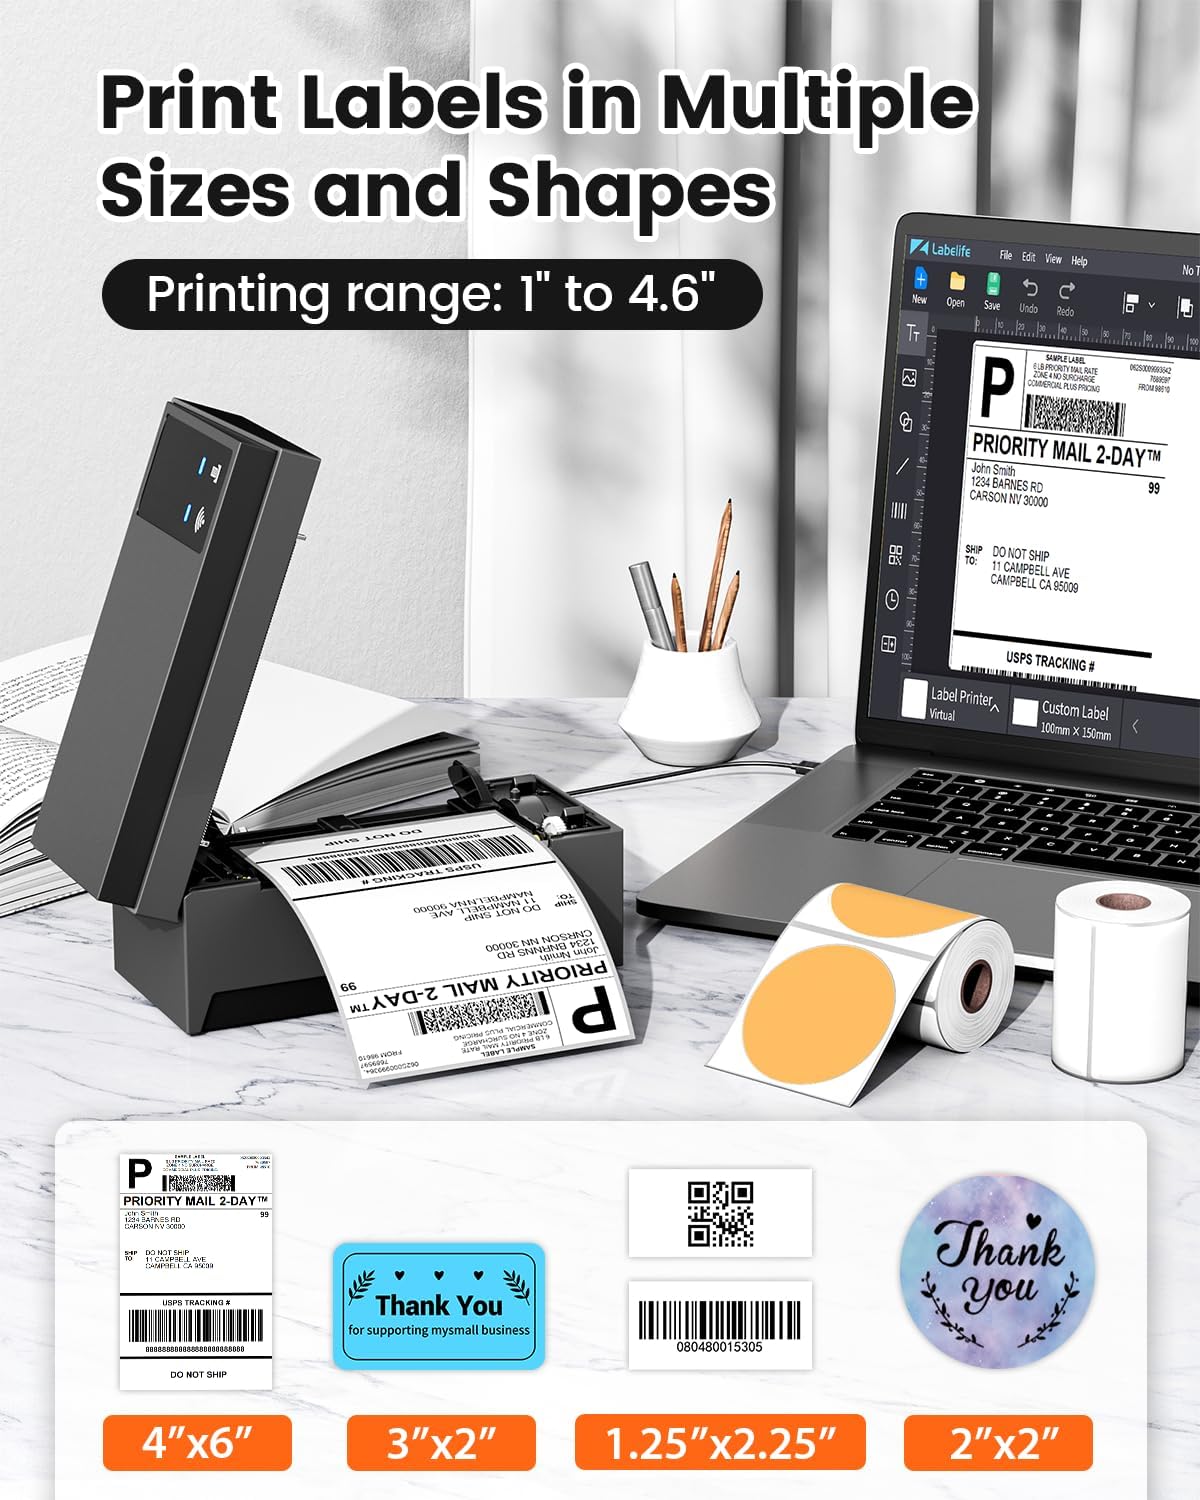
Image: A display of various label sizes and shapes, such as 4x6 inch, 3x2 inch, and round labels, demonstrating the printer's versatility.
5. การบำรุงรักษา
5.1 การทำความสะอาดหัวพิมพ์
เพื่อรักษาคุณภาพการพิมพ์ ควรทำความสะอาดหัวพิมพ์เป็นประจำ:
- ปิดเครื่องพิมพ์และถอดปลั๊กออกจากแหล่งจ่ายไฟ
- เปิดฝาครอบเครื่องพิมพ์
- ค่อยๆ เช็ดหัวพิมพ์ด้วยสำลีเบาๆampปิดท้ายด้วยแอลกอฮอล์ล้างจาน
- รอให้หัวพิมพ์แห้งสนิทก่อนปิดฝาและเปิดเครื่องพิมพ์อีกครั้ง
5.2 การดูแลทั่วไป
- เก็บเครื่องพิมพ์ไว้ในสภาพแวดล้อมที่สะอาดและปราศจากฝุ่นละออง
- ควรหลีกเลี่ยงการวางเครื่องพิมพ์ไว้ในที่ที่มีแสงแดดส่องโดยตรงหรืออุณหภูมิที่สูงหรือต่ำเกินไป
- Use only high-quality thermal labels to prevent damage to the print head.
6 การแก้ไขปัญหา
If you encounter issues with your Phomemo 249 printer, refer to the following common problems and solutions:
| ปัญหา | สาเหตุที่เป็นไปได้ | สารละลาย |
|---|---|---|
| Printer not connecting via WiFi | Incorrect WiFi password, printer not on the same network, Bluetooth not enabled (for app setup). | Ensure correct WiFi password. Verify printer and device are on the same 5GHz network. For app setup, enable Bluetooth. Re-run WiFi configuration via Labelife app or Printer Setting Tool. |
| Printer prints blank labels | Incorrect label loading, print head dirty, software settings. | Ensure labels are loaded with the printable side up. Clean the print head (refer to Section 5.1). Check print settings in your software (e.g., ensure image is not set to print in color if it's a monochrome thermal printer). Restart printer and device. |
| Labels are faded or unclear | Low quality labels, dirty print head, incorrect print density settings. | Use high-quality thermal labels. Clean the print head. Adjust print density settings in your printer driver or app. |
| Printer not detected by computer via USB | Faulty USB cable, driver not installed correctly, incorrect USB port. | Try a different USB cable or port. Reinstall the printer driver. Ensure the USB-C adapter is correctly used if needed. |
For further assistance, please contact customer support (refer to Section 8).
7. ข้อมูลจำเพาะ
Key technical specifications for the Phomemo WiFi Thermal Label Printer Model 249:
| คุณสมบัติ | ข้อมูลจำเพาะ |
|---|---|
| ชื่อรุ่น | 249 |
| ยี่ห้อ | โฟเมโม |
| เทคโนโลยีการเชื่อมต่อ | USB, Wi-Fi (5GHz) |
| เทคโนโลยีการพิมพ์ | เทอร์มอล |
| เอาท์พุตเครื่องพิมพ์ | เอกรงค์ |
| ความละเอียดการพิมพ์สูงสุด | 203 จุดต่อนิ้ว |
| ความเร็วในการพิมพ์สูงสุด (ขาวดำ) | 72 หน้าต่อนาที (ppm) |
| ขนาดสื่อสูงสุด | 4x6 นิ้ว |
| ขนาดแผ่น | 4x6 นิ้ว |
| ความจุแผ่นอินพุตสูงสุด | 100 |
| อุปกรณ์ที่รองรับ | แล็ปท็อป, คอมพิวเตอร์ส่วนบุคคล, สมาร์ทโฟน, แท็บเล็ต |
| ฮาร์ดแวร์อินเตอร์เฟซ | USB ประเภท C |
| ขนาดสินค้า | 9 x 14 x 19 นิ้ว |
| น้ำหนักสินค้า | 3.03 ปอนด์ |
| ประเภทหมึกพิมพ์ | No Ink (Thermal) |
| คุณสมบัติพิเศษ | Decal-Printing |
8. ข้อมูลการรับประกัน
The Phomemo WiFi Thermal Label Printer Model 249 comes with a การรับประกันแบบจำกัด. Please refer to the warranty card included in your package or contact customer support for specific terms and conditions.
9. การสนับสนุนลูกค้า
For any questions, technical assistance, or support, please contact the Phomemo professional support team:
- การสนับสนุนทางโทรศัพท์: Available 9:00 AM - 5:00 PM EST, Monday - Friday.
- การสนับสนุนทางอีเมล์: Available for inquiries.
- แชทสด: Available 7:30 PM - 4:30 AM EST, Monday - Friday.
- Remote Desktop Assistance: Offered for complex issues.
Detailed video tutorials and additional manuals are also available to assist with setup and operation.


