1. บทนำ
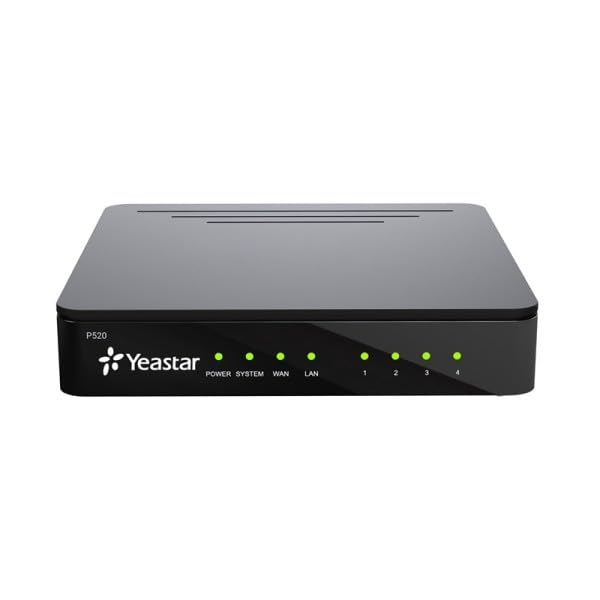
The YEASTAR P520 is a next-generation VoIP control unit designed for businesses and professional studios. It serves as a reliable and efficient communication solution for environments with up to 20 internal extensions across various locations. As the smallest model in the YEASTAR P-series, the P520 offers robust performance, supporting extensive software and third-party CRM integrations, alongside modern communication tools such as WhatsApp and WebRTC for internet calls.
This unit provides an intelligent, economical, and functional communication system for small to medium-sized enterprises. It is engineered to deliver powerful and reliable communication without the high initial investment or ongoing maintenance costs often associated with virtual solutions. The YEASTAR P520 ensures flexibility in communication methods, allowing users to connect via traditional landlines, wireless devices, Wi-Fi terminals, or softclients on PCs, laptops, and smartphones, ensuring constant availability and enhanced productivity.
This image displays the rear panel of the YEASTAR P520 VoIP Control Unit. It features several Ethernet ports for network and phone connections, a small reset button, and a power input jack on the far right. The design is compact and functional, indicating its role as a central communication hub.
2. คุณสมบัติของผลิตภัณฑ์
The YEASTAR P520 VoIP Control Unit offers a comprehensive suite of features to enhance business communication:
- WhatsApp message integration via SW client
- WebRTC call integration (e.g., from your webงาน)
- การส่งข้อความ SMS
- Configuration of Linkus access level
- Call switch/flip (switches calls between smartphone and desk phone)
- Interactive IVR (Interactive Voice Response)
- การโทรเป็นกลุ่ม
- Paging and intercom calls
- ห้องประชุม
- Detailed internal, inbound, and outbound traffic reports
Note: The YEASTAR P520 does not support API and PMS (hotel) integration, unlike models P550, P560, and P570.
3. คู่มือการติดตั้ง
Follow these steps to set up your YEASTAR P520 VoIP Control Unit:
- แกะกล่องอุปกรณ์: Carefully remove the P520 unit and the included power cable from its packaging. Inspect for any visible damage.
- การเชื่อมต่อไฟฟ้า: Connect the provided power cable to the power input port on the rear of the P520 unit. Plug the other end into a suitable power outlet. The unit should power on automatically, indicated by LED lights.
- การเชื่อมต่อเครือข่าย: Connect an Ethernet cable from your network router or switch to one of the LAN ports on the rear of the P520. Ensure a stable internet connection is available.
- Connect IP Phones/Devices: Connect your IP phones or other network-enabled communication devices to the available Ethernet ports on the P520 or your network infrastructure.
- การกำหนดค่าเริ่มต้น: Access the P520's web-based management interface from a computer connected to the same network. Refer to the quick start guide for the default IP address and login credentials. Follow the on-screen prompts to complete the initial network and system settings.
- การอัปเดตระบบ: After initial setup, check for and apply any available firmware updates to ensure optimal performance and security.
4. คู่มือการใช้งาน
The YEASTAR P520 provides a versatile platform for managing your business communications. Once configured, you can utilize its features through connected IP phones, softclients, or web อินเตอร์เฟซ
- โทรออกและรับสาย: Use your connected IP phones or softclients (e.g., Linkus) to make and receive internal and external calls. Dialing procedures will depend on your system's configuration.
- Using Softclients: Install the YEASTAR Linkus softclient on your PC, laptop, or smartphone. Configure it with your extension details to enable communication features, including calls, instant messaging, and presence status, from your device.
- WebRTC Integration: If configured, utilize WebRTC functionality to enable calls directly from your webไซต์หรืออื่น ๆ web-based applications, enhancing customer interaction.
- การประชุมทางโทรศัพท์: Access the conference room feature to host multi-party audio conferences. Refer to your system administrator for specific access codes and procedures.
- การจัดการการโทร: Utilize features like call transfer, call forwarding, call parking, and interactive voice response (IVR) to efficiently manage incoming and outgoing calls.
- การส่งข้อความ: Send and receive SMS messages through the system, and integrate WhatsApp messaging for enhanced communication capabilities.
5. การบำรุงรักษา
Regular maintenance ensures the longevity and optimal performance of your YEASTAR P520 unit:
- รักษาความสะอาด: Periodically clean the exterior of the unit with a soft, dry cloth. Avoid using liquid cleaners or aerosols directly on the device.
- ตรวจสอบให้แน่ใจว่ามีการระบายอากาศ: Place the unit in a location with adequate airflow to prevent overheating. Do not block ventilation openings.
- อัพเดตเฟิร์มแวร์: Regularly check for and install the latest firmware updates. These updates often include security patches, bug fixes, and new features. Access the web ส่วนติดต่อการจัดการเพื่อดำเนินการอัปเดต
- การกำหนดค่าการสำรองข้อมูล: Periodically back up your system configuration settings. This allows for quick restoration in case of data loss or system reset.
- วงจรไฟฟ้า: If the unit experiences minor issues, a simple power cycle (unplugging and replugging the power cable after 10 seconds) can often resolve them.
6 การแก้ไขปัญหา
If you encounter issues with your YEASTAR P520, consider the following troubleshooting steps:
- ไม่มีไฟฟ้า:
- ตรวจสอบให้แน่ใจว่าสายไฟเชื่อมต่อกับตัวเครื่องและเต้ารับไฟฟ้าที่ใช้งานได้แน่นหนาดีแล้ว
- ตรวจสอบว่าเต้ารับไฟฟ้าใช้งานได้หรือไม่โดยเสียบอุปกรณ์อื่นเข้าไป
- ไม่มีการเชื่อมต่อเครือข่าย:
- Verify that the Ethernet cable is properly connected to the P520's LAN port and your router/switch.
- Check the status of your router/switch and internet connection.
- Confirm that the network settings on the P520 are correct via the web อินเทอร์เฟซการจัดการ
- ไม่สามารถโทรออก/รับสายได้:
- Ensure your IP phones or softclients are registered with the P520.
- Check your internet connection and firewall settings, as they can affect VoIP traffic.
- Verify that the extensions are correctly configured and assigned.
- คุณภาพการโทรไม่ดี:
- Check your network bandwidth and ensure there is sufficient capacity for VoIP calls.
- Reduce network congestion by limiting other high-bandwidth activities.
- Ensure Quality of Service (QoS) settings are properly configured on your network.
- ลืมรหัสผ่านผู้ดูแลระบบ:
- Locate the reset button on the rear of the unit. Use a paperclip to press and hold the button for approximately 5-10 seconds until the unit restarts. This will typically reset the unit to factory default settings, including the default password. Note: This will erase all configurations, so use with caution.
If these steps do not resolve the issue, please contact YEASTAR technical support or your system administrator for further assistance.
7. ข้อมูลจำเพาะ
Key technical specifications for the YEASTAR P520 VoIP Control Unit:
| คุณลักษณะ | ค่า |
|---|---|
| ยี่ห้อ | เยสตาร์ |
| ผู้ผลิต | เยสตาร์ |
| แบบอย่าง | P520 |
| ส่วนประกอบที่รวมอยู่ | สายไฟ |
| ASIN | B0DGXPPDB5 |
| วันที่พร้อมใช้งานครั้งแรก | วันที่ 13 กันยายน 2024 |
8. การรับประกันและการสนับสนุน
The YEASTAR P520 VoIP Control Unit comes with a รับประกัน 3 ปี, protecting your investment and ensuring peace of mind. This warranty covers manufacturing defects and ensures the reliable operation of your device under normal usage conditions.
For technical support, warranty claims, or further assistance, please contact your authorized YEASTAR dealer or visit the official YEASTAR support website. Ensure you have your product model (P520) and purchase details available when seeking support.


