ข้อมูลด้านความปลอดภัยที่สำคัญ
Please read all instructions carefully before using this device. Failure to follow safety guidelines may result in injury or damage to the device.
- Do not insert the device too deeply into the ear canal.
- Always use the ear protection cover when operating the tweezers.
- Supervise children and pets during use.
- Do not use if you have an ear infection, ear drum perforation, or any other ear condition. Consult a medical professional if unsure.
- Clean the ear spoons and lenses thoroughly after each use with water or an alcohol cotton pad. Do not immerse the entire device in water.
- เก็บให้พ้นจากมือเด็ก
เนื้อหาแพ็คเกจ
- VITCOCO Visual Ear Wax Removal Tool (DQ-FRs3)
- Silicone Ear Spoons (various shapes)
- Ear Protection Cover
- สายชาร์จ USB
- คู่มือการใช้งาน
สินค้าเกินview
The VITCOCO Visual Ear Wax Removal Tool is an advanced ear cleaning device featuring an integrated HD camera and dual-mode functionality (tweezer and ear pick). It provides a clear view of the ear canal, enabling precise and safe ear wax removal.
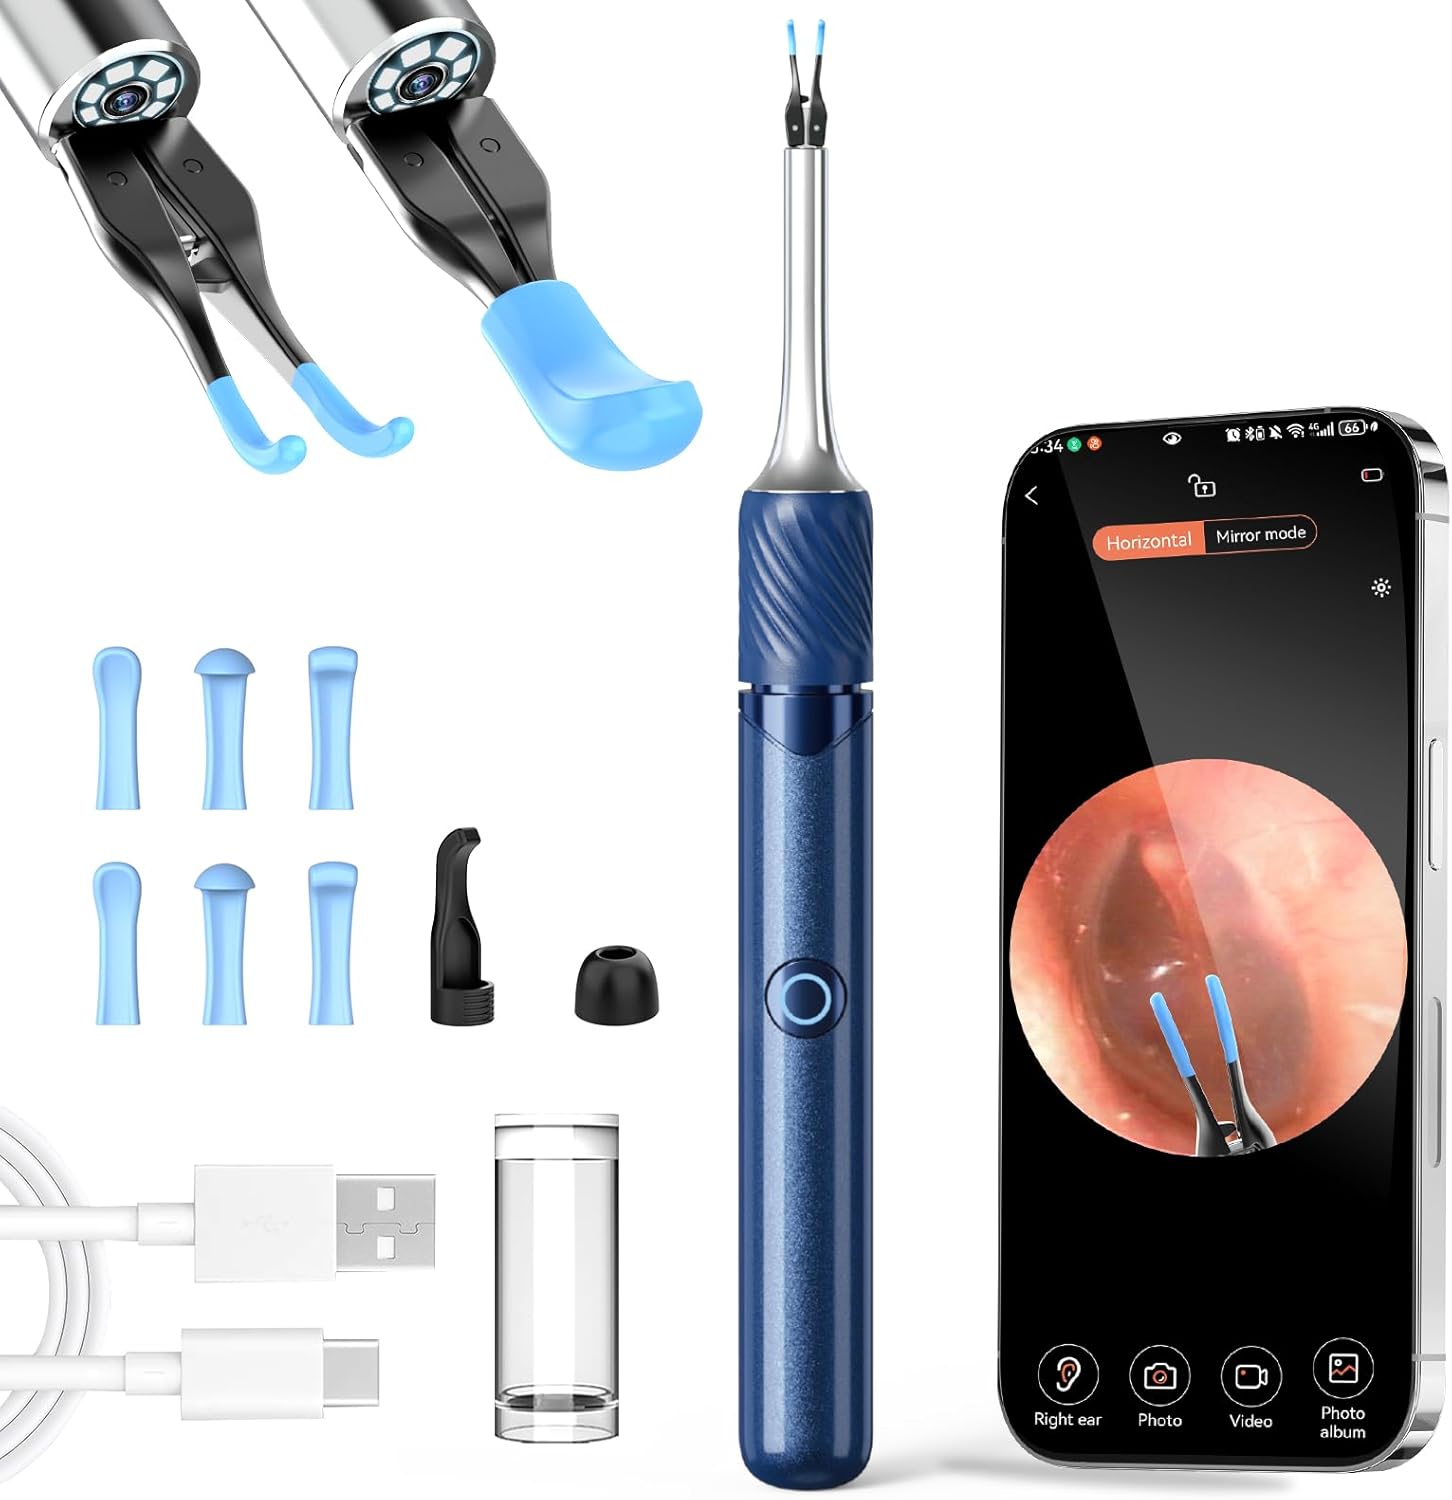
Image: The VITCOCO Visual Ear Wax Removal Tool, showing the main device, various ear spoons, a USB charging cable, and a smartphone displaying the ear canal view.
คุณสมบัติหลัก:
- Upgraded Tweezer Mode: Designed for sensitive ear canals with a 360° ring button for easy operation and precise control (0.05mm error).
- 3-in-1 Visual Otoscope: Combines ear tweezers, ear pick, and a visual camera for comprehensive ear canal inspection and cleaning.
- HD In-Ear Camera: Features a 360° wide-angle lens, 3.2mm diameter, 6-axis gyroscope for stable image transmission, and 1080p resolution.
- ความเข้ากันได้กว้าง: Compatible with Android and iOS devices via Wi-Fi connection.
- อายุการใช้งานแบตเตอรี่ยาวนาน: 60-minute charging time, 70 minutes of use, and up to 30 days standby time.
คู่มือการติดตั้ง
ขั้นตอนที่ 1: ชาร์จอุปกรณ์
Before first use, fully charge the device using the provided USB charging cable. Connect the cable to the device and a compatible USB power source. The indicator light will show charging status.
ขั้นตอนที่ 2: การติดตั้งแอป
Download the companion application to your smartphone or tablet. ค้นหา "Soulear" in the Apple App Store (for iOS devices) or Google Play Store (for Android devices).
Alternatively, scan the QR code below to directly access the app download page:

Image: A visual guide showing the four steps: 1. ค้นหา 'Soulear' app, 2. Long press button to turn on device, 3. Connect to device's Wi-Fi, 4. Return to app to start using.
For direct download, visit: https://qr19.cn/A0kiJ4
Step 3: Connecting to the Device
- Long press the power button on the device to turn it on. The indicator light will flash.
- On your smartphone/tablet, go to Wi-Fi settings.
- Locate and connect to the Wi-Fi network named "Soulear-xxxx" (where xxxx is a unique identifier).
- Return to the "Soulear" app. The device should now be connected, and you will see a live view จากกล้อง
คำแนะนำการใช้งาน
การทำงานพื้นฐาน
- เปิด/ปิดเครื่อง: Long press the power button on the device. The indicator light will illuminate when on.
- การสลับโหมด: The device supports both Tweezer and Ear Pick modes. Ensure the correct attachment is securely fitted before use.

Image: Illustration of the ear wax cleaning modes, demonstrating how the tweezers and ear pick are used within the ear canal.
Using the Tweezer Mode
Attach the tweezer head to the device. Ensure the ear protection cover is in place. Use the 360° ring switch to control the opening and closing of the tweezers. Carefully guide the tweezers into the ear canal while observing the live feed on your connected device. Gently grasp and remove larger pieces of earwax or foreign objects. Avoid excessive force.

ภาพ: รายละเอียด view of the high-precision tweezers and a user demonstrating its use with a smartphone for visual guidance.
Using the Ear Pick Mode
Attach a suitable silicone ear spoon to the device. Carefully insert the ear pick into the ear canal, using the live camera feed for guidance. Gently scoop out earwax. Do not scrape or push wax deeper into the ear canal.

Image: A visual comparison between the tweezer attachment and the ear pick attachment, highlighting their distinct designs.
การถ่ายภาพและวิดีโอ
While using the app, you can capture still images or record videos of the ear canal. Look for the camera and video icons within the app interface. These functions allow you to document the condition of the ear or track progress over time.

Image: A person using the device, emphasizing the high-definition camera's ability to provide clear images of the ear canal on a connected smartphone.
การใช้งานที่กว้างขวาง
Beyond ear wax removal, the visual otoscope can be used for inspecting other areas:
- หู: For ear wax removal and general ear canal inspection.
- จมูก: To inspect nasal passages.
- Mouth: For oral cavity examination.
- สัตว์เลี้ยง: Suitable for inspecting the ears of pets.

Image: Demonstrates the versatility of the tool for inspecting ears, nose, mouth, and even pets' ears.
การบำรุงรักษาและการทำความสะอาด
การบำรุงรักษาอย่างถูกต้องจะช่วยให้อุปกรณ์ของคุณมีอายุการใช้งานยาวนานและถูกสุขอนามัย
- After each use, remove the ear spoon or tweezer attachment.
- Rinse the ear spoons and the lens tip with water or wipe them thoroughly with an alcohol cotton pad.
- อย่าทำ immerse the entire device or the main lens body in water.
- Store the device in a clean, dry place away from direct sunlight.
การแก้ไขปัญหา
| ปัญหา | สาเหตุที่เป็นไปได้ | สารละลาย |
|---|---|---|
| อุปกรณ์ไม่เปิดเครื่อง | แบตเตอรี่อ่อน | ชาร์จอุปกรณ์ให้เต็มโดยใช้สาย USB ที่ให้มา |
| ไม่สามารถเชื่อมต่อ Wi-Fi ได้ | Device not turned on or Wi-Fi not enabled. Incorrect Wi-Fi selected. | Ensure the device is powered on. Go to your phone's Wi-Fi settings and select the "Soulear-xxxx" network. Restart both the device and your phone if necessary. |
| ไม่มีรูปภาพในแอป | Device not connected to app. App permissions not granted. | Verify Wi-Fi connection. Check app permissions (camera, storage) in your phone's settings. Restart the app. |
| ภาพไม่ชัดหรือไม่คมชัด | เลนส์สกปรก | Clean the camera lens gently with an alcohol cotton pad. |
ข้อมูลจำเพาะ
| คุณสมบัติ | รายละเอียด |
|---|---|
| แบบอย่าง | DQ-FRs3 |
| ยี่ห้อ | วิทโคโค่ |
| ความละเอียดของกล้อง | ความคมชัดระดับ HD 1080p |
| เส้นผ่านศูนย์กลางเลนส์ | 3.2 มม. |
| ไจโรสโคป | 6 แกน |
| การเชื่อมต่อ | ไวไฟ (2.4GHz) |
| ความเข้ากันได้ | ไอโอเอส, แอนดรอยด์ |
| เวลาในการชาร์จ | ประมาณ 60 นาที |
| ระยะเวลาการใช้งาน | ประมาณ 70 นาที |
| เวลาสแตนด์บาย | นานถึง 30 วัน |
| ขนาด | 18.6 x 7.9 x 1.9 ซม. |
| น้ำหนัก | 80 กรัม |
การรับประกันและการสนับสนุน
This VITCOCO product is covered by a standard manufacturer's warranty against defects in materials and workmanship. Please refer to the product packaging or the official VITCOCO webโปรดตรวจสอบเงื่อนไขและระยะเวลาการรับประกันโดยละเอียดได้ที่เว็บไซต์
For technical support, troubleshooting assistance, or warranty claims, please contact VITCOCO customer service through their official channels. Contact information can typically be found on the product packaging or the brand's official webเว็บไซต์.


