1. บทนำ
This manual provides detailed instructions for the installation, operation, and maintenance of the darkFlash Z4Pro Mist CPU Cooler. Designed for efficient heat dissipation, this single-tower air cooler features a 120mm ARGB PWM fan and four Φ6mm heat pipes. Please read this manual thoroughly before installation to ensure proper setup and optimal performance.

darkFlash Z4Pro Mist CPU Cooler with illuminated ARGB fan.
2. เนื้อหาบรรจุภัณฑ์
ตรวจสอบว่าส่วนประกอบทั้งหมดที่ระบุไว้ด้านล่างมีอยู่ในแพ็คเกจของคุณ:
- darkFlash Z4Pro Mist CPU Cooler (Heatsink and 120mm ARGB PWM Fan)
- ขายึดสำหรับติดตั้งของ Intel
- ขายึด AMD
- Backplate (Universal for Intel, AMD uses original motherboard backplate)
- สกรูยึดและตัวเว้นระยะ
- น้ำยาหล่อเย็น
- แฟนคลิป

เกิดการระเบิดขึ้น view of the darkFlash Z4Pro Mist CPU Cooler components.
3. ข้อมูลจำเพาะ
| หมายเลขรุ่น | Z4 Pro Mist |
| ขนาดสินค้า | ยาว 2.8 นิ้ว x กว้าง 4.7 นิ้ว x สูง 6.1 นิ้ว (72 มม. x 120 มม. x 155 มม.) |
| น้ำหนัก | 1.41 ปอนด์ |
| TDP (พลังการออกแบบเชิงความร้อน) | 200วัตต์ |
| ท่อระบายความร้อน | 4 x Φ6mm Copper Heat Pipes (HDT Technology) |
| วัสดุครีบ | อลูมิเนียม |
| ขนาดพัดลม | 120มม. |
| ความเร็วพัดลม | 800-1600 ±10% รอบต่อนาที (ควบคุมด้วย PWM) |
| Fan Air Capacity | 54.7 ลูกบาศก์ฟุตต่อนาที |
| แรงดันพัดลม | 1.5 MMH2O |
| ระดับเสียง | 24.3 เดซิเบลเอ |
| ขั้วต่อไฟฟ้า | 4-Pin (PWM) |
| เล่มที่tage | 12 โวลต์ (กระแสตรง) |
| วิธีการทำความเย็น | อากาศ |
| ซ็อกเก็ตที่เข้ากันได้ | Intel: LGA1700/115x/12xx; AMD: AM4/AM5 |

Dimensions of the darkFlash Z4Pro Mist CPU Cooler.
4. ความเข้ากันได้
The darkFlash Z4Pro Mist CPU Cooler is compatible with a wide range of Intel and AMD CPU sockets. Please ensure your motherboard socket is listed below and that your PC case has sufficient clearance (155mm height) for the cooler.
- ซ็อกเก็ต Intel: LGA1700, LGA1200, LGA1150, LGA1151, LGA1155, LGA1156
- ซ็อกเก็ต AMD: เอเอ็ม4,เอเอ็ม5
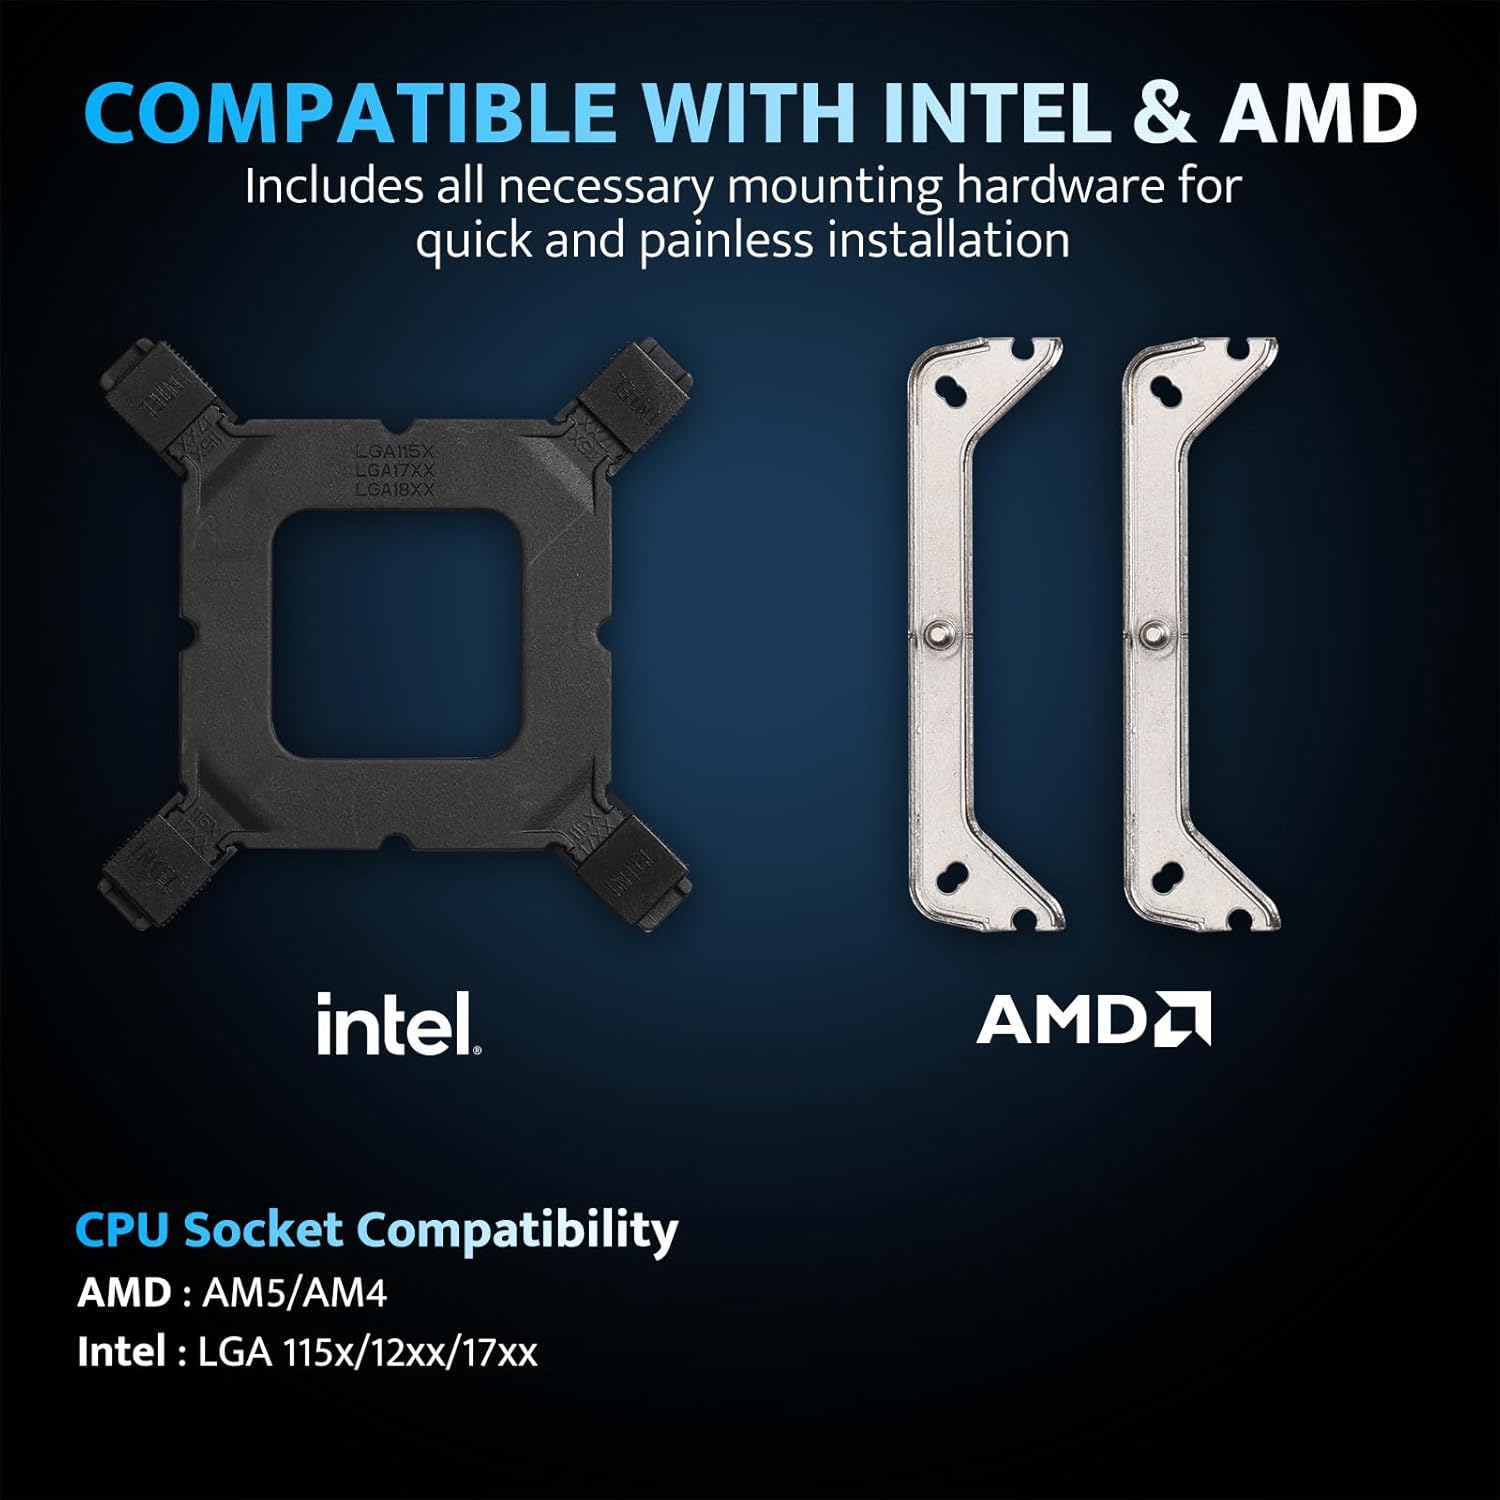
Intel and AMD mounting hardware and socket compatibility.
5. การตั้งค่าและการติดตั้ง
Before beginning installation, ensure your system is powered off and unplugged. Handle components with care to avoid damage.
5.1. เตรียมเมนบอร์ด
- Remove any existing CPU cooler and clean off old thermal paste from the CPU surface using isopropyl alcohol.
- สำหรับซ็อกเก็ต Intel: Attach the universal backplate to the rear of the motherboard, aligning the holes with the CPU socket. Secure it with the appropriate standoffs from the front side.
- สำหรับซ็อกเก็ต AMD: Retain the original AMD motherboard backplate. Remove the plastic retention clips from the front of the motherboard.
5.2. ทาซิลิโคนระบายความร้อน
Apply a small, pea-sized amount of thermal paste to the center of the CPU's integrated heat spreader (IHS). Do not spread it manually; the pressure from the cooler will distribute it evenly.
5.3. ติดตั้งขายึด
- Attach the correct Intel or AMD mounting brackets to the base of the cooler using the provided screws.
- Carefully place the cooler onto the CPU, aligning the screws on the mounting brackets with the standoffs (Intel) or the original backplate (AMD).
- Tighten the screws in a diagonal pattern until snug. Do not overtighten.
5.4. Attach the Fan
- Using the included fan clips, secure the 120mm ARGB PWM fan to the heatsink. Ensure the fan is oriented to blow air through the heatsink towards the rear or top of your PC case for optimal airflow.
- เชื่อมต่อสายพัดลม PWM แบบ 4 พินเข้ากับหัวต่อ CPU_FAN บนเมนบอร์ดของคุณ
- Connect the 3-pin ARGB cable to a compatible 5V Addressable RGB header on your motherboard. Ensure it is a 5V header, not a 12V RGB header, to prevent damage.

Example of the cooler installed with ARGB lighting.
6. คู่มือการใช้งาน
6.1. Fan Control (PWM)
The 120mm fan utilizes Pulse Width Modulation (PWM) technology, allowing your motherboard to automatically adjust fan speed based on CPU temperature. This ensures efficient cooling when needed and quiet operation during lighter loads. You can typically configure fan curves in your motherboard's BIOS/UEFI settings or through manufacturer-provided software.

Fan specifications and intelligent control.
6.2 การปรับแต่งแสงไฟ ARGB
The cooler features Addressable RGB (ARGB) lighting, which can be synchronized with your motherboard's RGB software. Connect the 3-pin ARGB cable to a compatible 5V ARGB header on your motherboard. Supported software includes:
- อาซูเซ่ ออร่า ซิงค์
- MSI Mystic Light ซิงค์
- GIGABYTE RGB Fusion 2.0
- ASRock โพลีโครมซิงค์
Use your motherboard's software to customize lighting effects, colors, and synchronization with other ARGB components in your system.
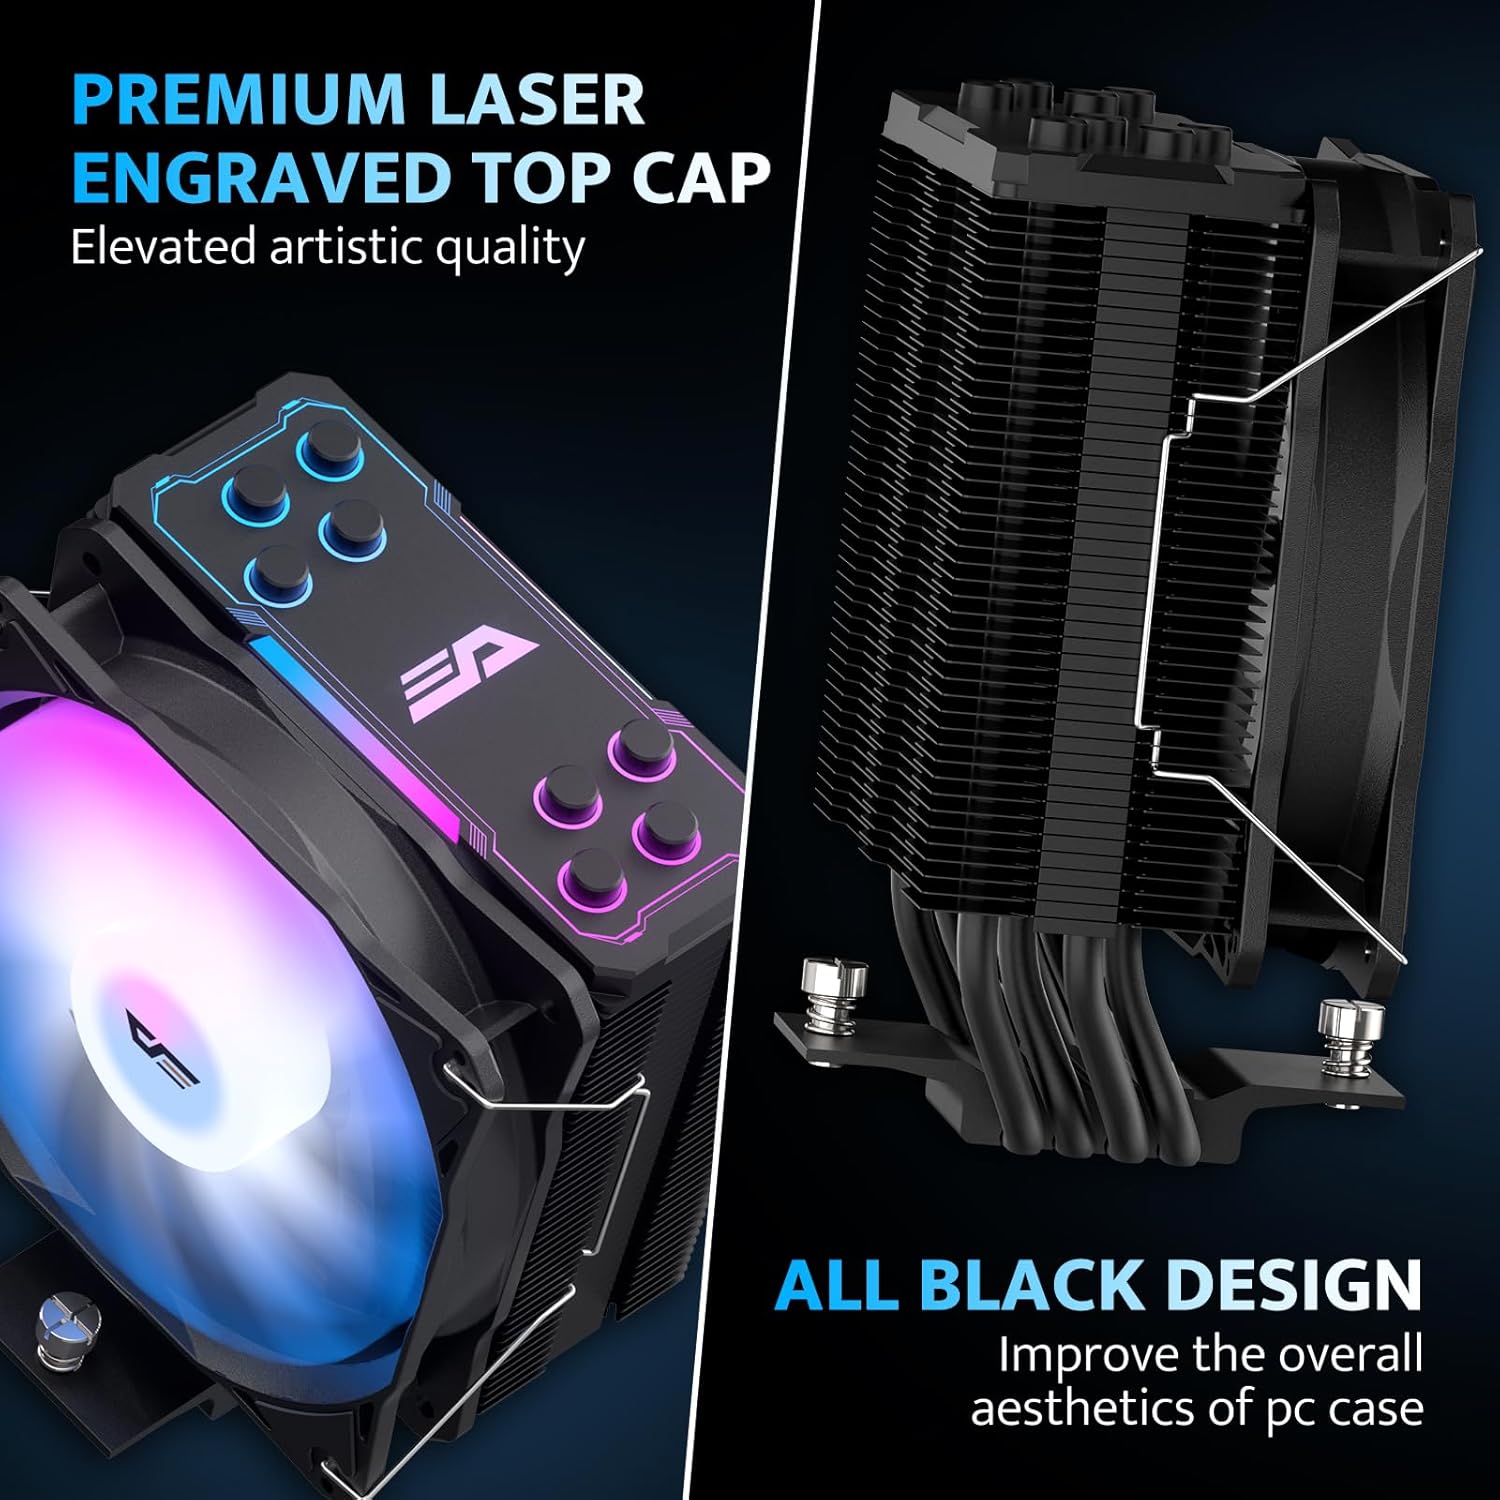
Aesthetic design with laser-engraved top cap and all-black finish.
7. การบำรุงรักษา
การบำรุงรักษาตามปกติจะช่วยให้มั่นใจได้ถึงอายุการใช้งานที่ยาวนานและประสิทธิภาพการทำงานของตัวระบายความร้อน CPU ของคุณอย่างเหมาะสมที่สุด
- การกำจัดฝุ่น: ควรทำความสะอาดฝุ่นจากครีบระบายความร้อนและใบพัดลมเป็นระยะ โดยใช้ลมเป่าหรือแปรงขนนุ่ม ตรวจสอบให้แน่ใจว่าพัดลมไม่หมุนขณะทำความสะอาด
- การตรวจสอบพัดลม: Check the fan for any obstructions or unusual noises. If the fan is removable, you may detach it for more thorough cleaning.
- น้ำยาระบายความร้อน: While not frequently required, if you remove the cooler for any reason, it is recommended to clean off the old thermal paste and apply new thermal paste before reinstallation.
8 การแก้ไขปัญหา
If you encounter issues with your darkFlash Z4Pro Mist CPU Cooler, refer to the following common problems and solutions:
| ปัญหา | สาเหตุที่เป็นไปได้ | สารละลาย |
| อุณหภูมิ CPU สูง | Improper cooler installation, insufficient thermal paste, poor airflow in case, fan not spinning. | Re-seat the cooler ensuring even pressure. Verify thermal paste application. Check fan connections and rotation. Improve case airflow. |
| พัดลมไม่หมุน | Fan cable disconnected, faulty fan header, fan failure. | Ensure 4-pin PWM cable is securely connected to the CPU_FAN header. Test fan on another header if available. Contact support if fan is faulty. |
| ไฟ ARGB ไม่ทำงาน | ARGB cable disconnected, incorrect ARGB header (e.g., 12V instead of 5V), software issue. | Verify 3-pin ARGB cable is connected to a 5V Addressable RGB header. Check motherboard software settings. Ensure motherboard ARGB header is enabled in BIOS. |
| เสียงดังเกินไป | Loose fan, dust buildup, fan bearing issue. | Check fan clips for secure attachment. Clean fan and heatsink. If noise persists, contact support. |
9. การรับประกันและการสนับสนุน
For warranty information and terms, please refer to the documentation included with your product or visit the official darkFlash website. For technical assistance or further inquiries, please contact darkFlash customer support through their official channels.


