1. บทนำ
ขอบคุณสำหรับการซื้อasing the ZDK GC06-B06 5G WiFi Full HD 1080P Projector. This manual provides essential information for the safe and efficient operation of your projector. Please read it thoroughly before use and retain it for future reference.
2. ข้อมูลด้านความปลอดภัย
คำเตือน: เพื่อป้องกันไฟไหม้หรือไฟฟ้าช็อต ห้ามวางเครื่องใช้ไฟฟ้านี้ไว้ในที่ที่มีฝนหรือความชื้น
- ห้ามเปิดโปรเจคเตอร์asinก. ส่งต่อการบริการทั้งหมดให้กับบุคลากรที่มีคุณสมบัติเหมาะสม
- ตรวจสอบให้แน่ใจว่ามีการระบายอากาศที่เหมาะสม อย่าปิดกั้นช่องระบายอากาศใดๆ
- หลีกเลี่ยงการสัมผัสเลนส์โปรเจ็กเตอร์โดยตรงกับดวงตาเมื่อลamp อยู่บนแล้ว
- วางโปรเจ็กเตอร์บนพื้นผิวที่ได้ระดับและมั่นคง
- ใช้เฉพาะอะแดปเตอร์ไฟฟ้าที่มาพร้อมกับโปรเจ็กเตอร์เท่านั้น
- ถอดปลั๊กโปรเจ็กเตอร์ในระหว่างที่มีพายุฝนฟ้าคะนองหรือเมื่อไม่ได้ใช้งานเป็นเวลานาน
3. เนื้อหาบรรจุภัณฑ์
กรุณาตรวจสอบว่ามีรายการทั้งหมดอยู่ในแพ็คเกจของคุณ:
- ZDK GC06-B06 Projector
- สายไฟ
- สาย HDMI
- รีโมทคอนโทรล (ไม่รวมแบตเตอรี่)
- คู่มือการใช้งาน
- ฝาปิดเลนส์
4. สินค้าหมดview
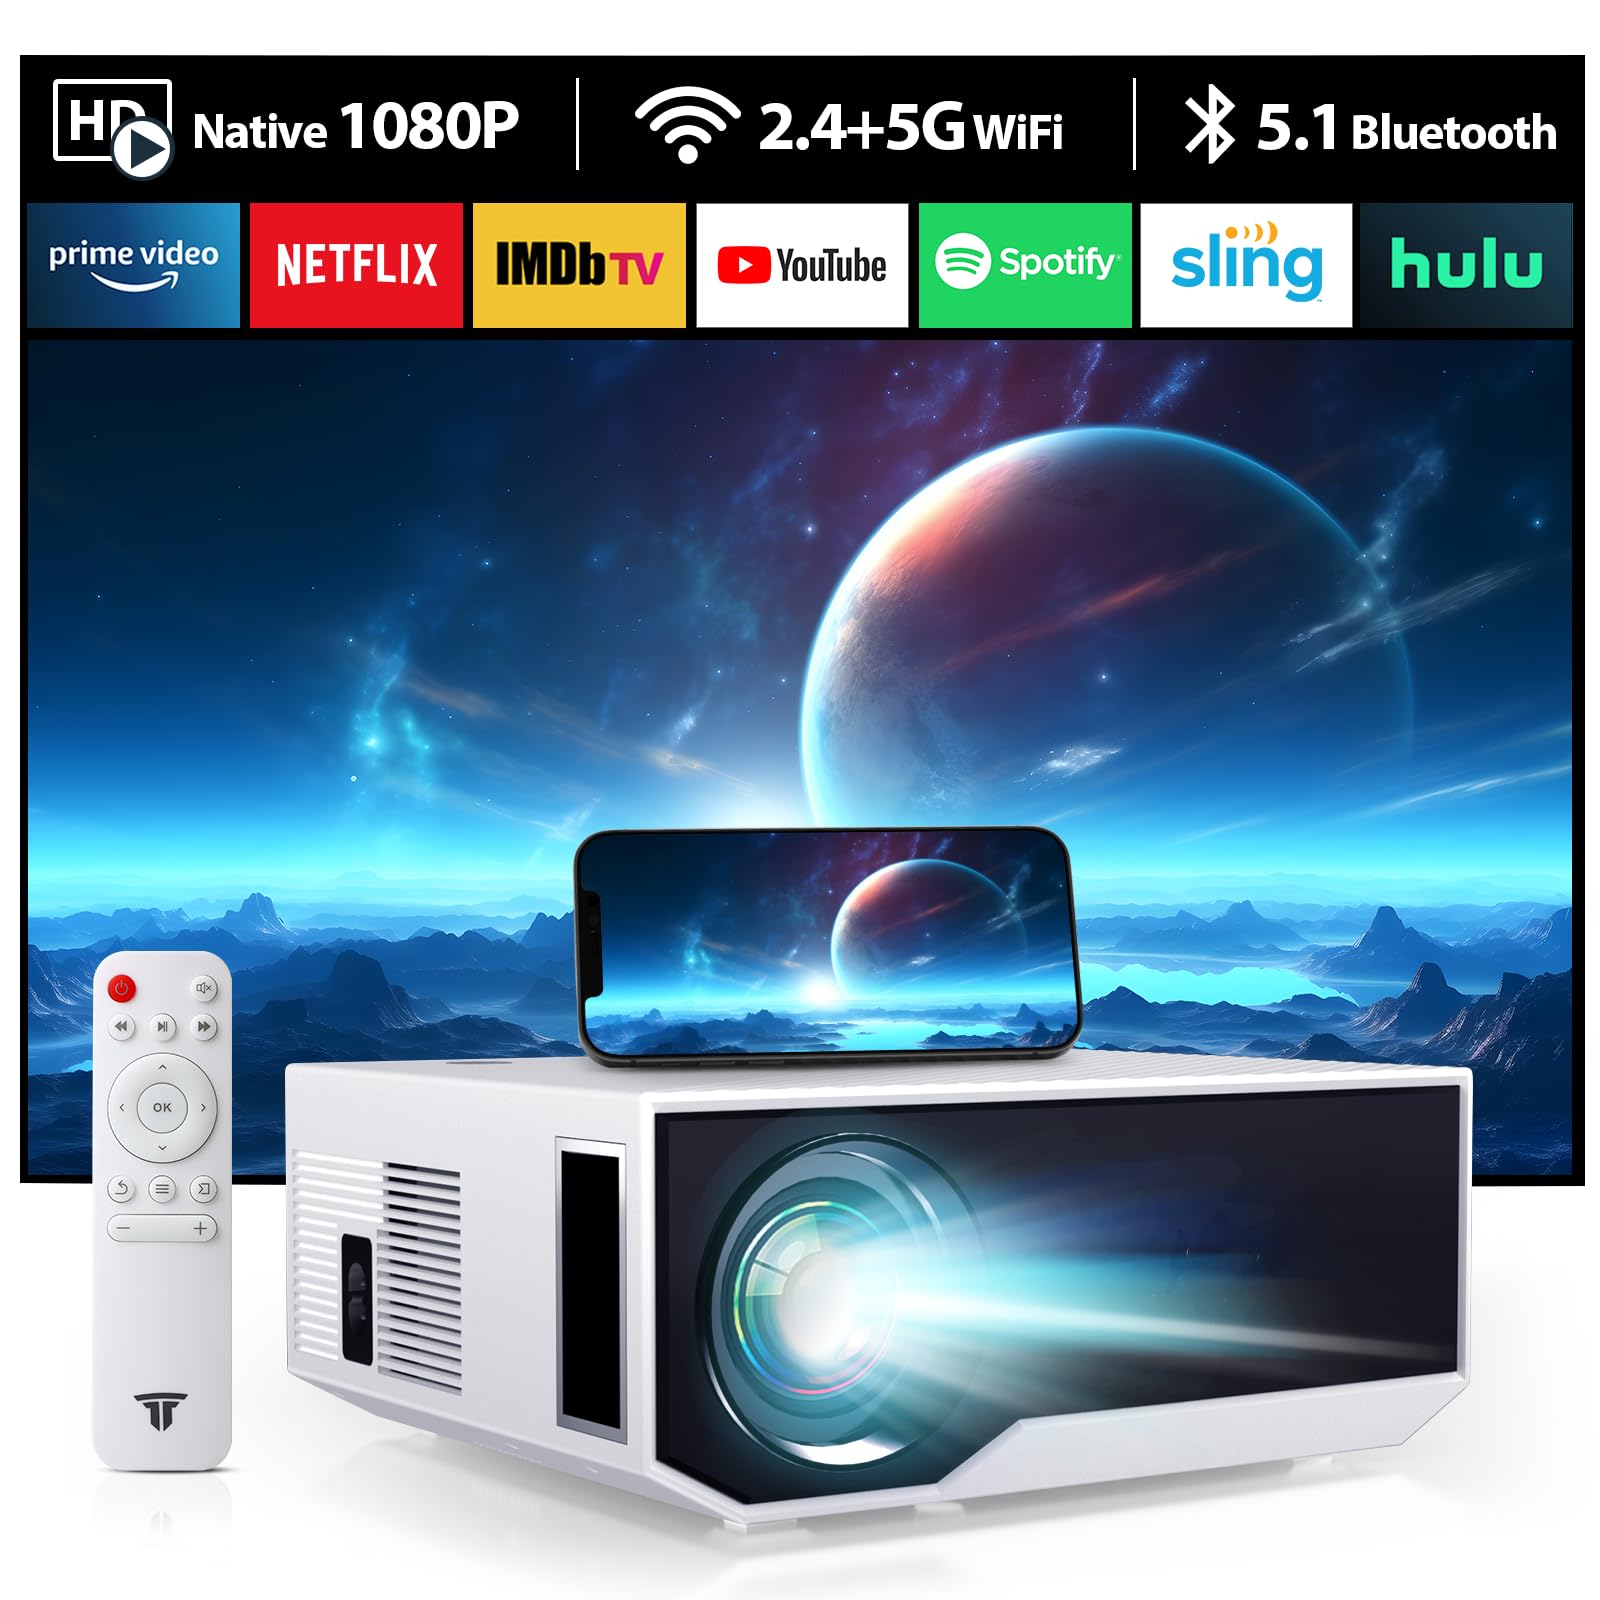
ภาพที่ 1: ด้านหน้า view of the ZDK GC06-B06 Projector, showing the lens and ventilation.
Projector Parts:
- เลนส์: ฉายภาพขึ้นบนจอภาพ
- วงแหวนโฟกัส: ปรับความคมชัดของภาพ
- การแก้ไขคีย์สโตน: Adjusts image shape.
- แผงควบคุม: Buttons for basic operation.
- พอร์ตอินพุต: HDMI, USB, ช่องต่อสัญญาณเสียงออก
- พอร์ตไฟ: เชื่อมต่อกับสายไฟ
5. การตั้งค่า
5.1 การจัดวาง
Place the projector on a flat, stable surface or mount it to a ceiling. Ensure the projector is perpendicular to the projection screen for optimal image quality. The ideal projection distance varies, typically between 1.5 to 5 meters.
5.2 การเชื่อมต่อสายไฟ
- เชื่อมต่อสายไฟเข้ากับพอร์ตไฟของโปรเจ็กเตอร์
- เสียบปลายอีกด้านหนึ่งของสายไฟเข้ากับเต้ารับไฟฟ้า
- ไฟแสดงสถานะเพาเวอร์จะสว่างขึ้น
5.3 การเชื่อมต่ออุปกรณ์
โปรเจ็กเตอร์รองรับแหล่งสัญญาณเข้าหลายประเภท:
- ช่องต่อ HDMI: Connect a TV stick, game console (PS5, XBOX), laptop, or Blu-ray player using an HDMI cable.
- ยูเอสบี: เสียบแฟลชไดรฟ์ USB เพื่อเล่นสื่อ fileโดยตรงเลย
- เสียงออก: Connect external speakers or headphones (3.5mm jack).
5.4 การปรับโฟกัสและคีย์สโตน
- เปิดโปรเจคเตอร์
- ปรับแต่ง วงแหวนโฟกัส on the lens until the image is clear and sharp.
- ถ้าภาพมีลักษณะเป็นรูปสี่เหลี่ยมคางหมู ให้ใช้ Keystone Correction dial or digital keystone function in the menu to adjust the image to a rectangular shape.
6. ปฏิบัติการ
6.1 การเปิด/ปิดเครื่อง
- เปิดเครื่อง: กดปุ่มเปิด/ปิดบนโปรเจคเตอร์หรือรีโมทคอนโทรล
- หมดแรง: กดปุ่มเปิด/ปิดอีกครั้ง โปรเจ็กเตอร์จะเข้าสู่โหมดสแตนด์บาย
6.2 การนำทางเมนู
Use the navigation buttons on the projector or remote control to browse the on-screen menu. Press 'OK' or 'Enter' to confirm selections and 'Back' or 'Exit' to return to the previous menu.
6.3 การเลือกแหล่งที่มาของอินพุต
Press the 'Source' button on the remote control or projector to select the desired input (e.g., HDMI1, HDMI2, USB, Screen Mirroring).
6.4 การเชื่อมต่อ WiFi
- Go to the 'Settings' menu and select 'Network' or 'WiFi'.
- เปิดใช้งาน WiFi และเลือกเครือข่ายที่คุณต้องการจากรายการ
- Enter the WiFi password using the on-screen keyboard.
- ยืนยันการเชื่อมต่อ
6.5 Screen Mirroring (Smartphone/Tablet)
The projector supports wireless screen mirroring for compatible smartphones and tablets (Android/iOS). Refer to your device's manual for specific mirroring instructions (e.g., Miracast, AirPlay).
- Select 'Screen Mirroring' as the input source on the projector.
- On your smartphone/tablet, enable screen mirroring/casting and select the projector from the available devices.
6.6 การตั้งค่าเสียง
Adjust volume levels using the remote control. You can also select audio output options (internal speaker, external speakers via 3.5mm jack) in the 'Sound' settings menu.
7. การบำรุงรักษา
7.1 การทำความสะอาดเลนส์
Use a soft, lint-free cloth or lens cleaning paper to gently wipe the lens. Do not use abrasive cleaners or excessive force, as this may scratch the lens.
7.2 Cleaning the Air Filter (if applicable)
Some projectors have an air filter that needs regular cleaning. If your model has one, locate it and gently remove any dust buildup using a soft brush or vacuum cleaner. Refer to the product diagram for filter location.
7.3 พื้นที่จัดเก็บ
เมื่อไม่ใช้งาน ให้เก็บโปรเจคเตอร์ไว้ในที่แห้งและเย็น หลีกเลี่ยงแสงแดดโดยตรงและอุณหภูมิที่สูงหรือต่ำเกินไป ใช้ฝาปิดเลนส์เพื่อป้องกันเลนส์จากฝุ่นและรอยขีดข่วน
8 การแก้ไขปัญหา
| ปัญหา | สาเหตุที่เป็นไปได้ | สารละลาย |
|---|---|---|
| ไม่มีภาพแสดง | Power not connected; Incorrect input source; Device not connected properly | Check power cable; Select correct input source; Reconnect device cables |
| ภาพเบลอ | Focus not adjusted; Projector too close/far from screen | Adjust focus ring; Adjust projection distance |
| รูปภาพเป็นรูปสี่เหลี่ยมคางหมู | ไม่ได้ปรับคีย์สโตน | Adjust keystone correction dial/setting |
| ไม่มีเสียง | ระดับเสียงต่ำเกินไป; ปิดเสียง; เอาต์พุตเสียงไม่ถูกต้อง; ปัญหาเสียงของอุปกรณ์ต้นทาง | Increase volume; Unmute; Check audio output settings; Check source device audio |
| รีโมตคอนโทรลไม่ทำงาน | Batteries low/dead; Obstruction; Remote not pointed at IR receiver | Replace batteries; Remove obstructions; Point remote directly at projector |
9. ข้อมูลจำเพาะ
- ยี่ห้อ: แซดเค
- แบบอย่าง: GC06-B06
- การเชื่อมต่อ: ไวไฟ 5G
- ปณิธาน: ฟูลเอชดี 1080P
- ความสว่าง: 16000 Lumens (manufacturer's rating)
- อุปกรณ์ที่รองรับ: Smartphone, TV Stick, TV Box, PS5, XBOX
- ประเภทการติดตั้ง: ติดตั้งบนโต๊ะ
- ยูพีซี: 085353592952
- ASIN: B0DBHMVCJM
10. การรับประกันและการสนับสนุน
This product comes with a standard manufacturer's warranty. Please refer to the warranty card included in your package for specific terms and conditions. For technical support or customer service inquiries, please contact your retailer or the manufacturer directly using the contact information provided with your purchase.


