การแนะนำ
ขอบคุณที่เลือกใช้บริการ Ourlife WiFi Extender. This device is designed to expand your existing Wi-Fi network coverage, eliminate dead spots, and provide a stable, high-speed internet connection throughout your home or office. With a data transfer rate of up to 300Mbps on the 2.4GHz band, it is ideal for streaming, online gaming, and general internet use. This manual provides detailed instructions for setup, operation, and troubleshooting.
ข้อมูลด้านความปลอดภัย
- อย่าให้เครื่องโดนน้ำหรือความชื้น
- อย่าพยายามถอดประกอบหรือซ่อมแซมอุปกรณ์ด้วยตัวเอง
- ใช้เฉพาะอะแดปเตอร์ไฟฟ้าที่ผู้ผลิตให้มาหรือแนะนำเท่านั้น
- เก็บอุปกรณ์ให้ห่างจากแหล่งความร้อนและแสงแดดโดยตรง
- ตรวจสอบให้แน่ใจว่ามีการระบายอากาศที่เหมาะสมรอบๆ อุปกรณ์เพื่อป้องกันความร้อนสูงเกินไป
เนื้อหาแพ็คเกจ
โปรดตรวจสอบสิ่งของภายในบรรจุภัณฑ์อย่างละเอียด หากสินค้าใดสูญหายหรือเสียหาย โปรดติดต่อผู้ค้าปลีกของคุณ
- Ourlife WiFi Extender (repeater body)
- คู่มือการใช้งาน
สินค้าเกินview
โอurlife WiFi Extender features a compact design with four high-gain external antennas for enhanced signal penetration and coverage. It includes an Ethernet port for wired connections.
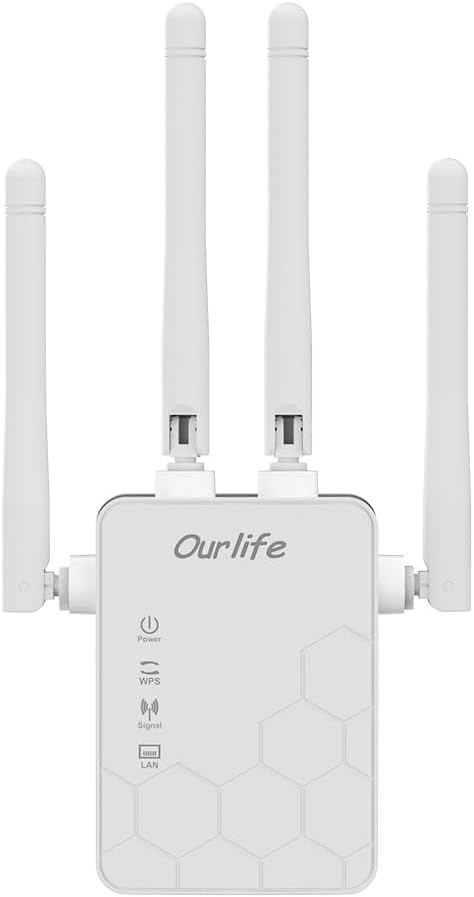
ภาพ: ด้านหน้า view ของ Ourlife WiFi Extender, showing the Ourlife logo, power indicator, WPS button, signal strength indicator, and LAN port indicator. Four external antennas are visible.
ส่วนประกอบหลัก:
- ไฟแสดงสถานะพลังงาน: ไฟจะสว่างขึ้นเมื่ออุปกรณ์เปิดอยู่
- ปุ่ม WPS: Used for quick, one-button setup with compatible routers.
- ตัวบ่งชี้สัญญาณ: Shows the strength of the Wi-Fi signal received from the main router.
- พอร์ต LAN: An Ethernet port for connecting wired devices or for setting up the extender in Access Point (AP) mode.
- เสาอากาศภายนอก: Four adjustable antennas to optimize signal reception and transmission.

ภาพ: ด้านข้าง view ของ Ourlife WiFi Extender with dimensions. The device measures approximately 17.2cm/6.8in in height, 5.4cm/2.1in in width, and 3.3cm/1.3in in depth.
การตั้งค่า
โอurlife WiFi Extender offers two primary setup methods: WPS (Wi-Fi Protected Setup) for quick connection, and manual setup via a web เบราว์เซอร์
Method 1: WPS Setup (Recommended for quick setup)
- เปิดเครื่อง: เสียบปลั๊ก Ourlife WiFi Extender into an electrical outlet near your main Wi-Fi router. Wait for the Power indicator to light up.
- กด WPS บน Extender: Press the WPS button on the Ourlife WiFi Extender. The WPS indicator light will start blinking.
- กด WPS บนเราเตอร์: Within 2 minutes, press the WPS button on your main Wi-Fi router.
- รอการเชื่อมต่อ: The WPS indicator on the extender will stop blinking and remain solid when the connection is established. The Signal indicator will also light up, indicating a successful connection.
- ย้ายตำแหน่งส่วนขยาย: Once connected, unplug the extender and move it to a location halfway between your router and the Wi-Fi dead zone. Ensure the Signal indicator shows a strong signal (usually green or multiple bars) for optimal performance.

Image: Visual representation of the four simple setup steps: 1. Unbox, 2. Plug it in, 3. Press the button (WPS), 4. And Pair (with router).
Method 2: Manual Setup via Web เบราว์เซอร์
- เปิดเครื่อง: เสียบปลั๊ก Ourlife WiFi Extender into an electrical outlet near your computer or mobile device.
- เชื่อมต่อกับ Wi-Fi ของ Extender: On your computer or mobile device, connect to the Wi-Fi network named "Ourlife_Extender" (or similar, check the label on the device). No password is required for the initial connection.
- เปิด Web เบราว์เซอร์: เปิด web browser (e.g., Chrome, Firefox, Safari) and enter the default IP address or domain name (e.g., 192.168.10.1 or reapeter.net) into the address bar. Refer to the device label or included mini-manual for the exact address.
- เข้าสู่ระบบ: ป้อนชื่อผู้ใช้และรหัสผ่านเริ่มต้น (โดยปกติ) แอดมิน/แอดมิน).
- เลือกโหมด: Choose "Repeater Mode" or "AP Mode" based on your needs.
- โหมดทวน: Extends your existing Wi-Fi network wirelessly.
- โหมด AP (Access Point): Converts a wired internet connection into a wireless Wi-Fi hotspot. Connect an Ethernet cable from your router to the extender's LAN port.
- กำหนดค่าเครือข่าย:
- For Repeater Mode: Select your main Wi-Fi network from the list, enter its password, and choose whether to keep the same SSID or create a new one for the extended network.
- For AP Mode: Set a new SSID (network name) and password for the Wi-Fi hotspot.
- ใช้การตั้งค่า: บันทึกการตั้งค่าและรอให้โปรแกรมขยายสัญญาณรีสตาร์ท
- ย้ายตำแหน่งส่วนขยาย: Once configured, unplug and relocate the extender to an optimal position.
การดำเนินงาน
After successful setup, the Ourlife WiFi Extender will operate automatically. The Signal indicator will provide visual feedback on the connection quality.
อุปกรณ์เชื่อมต่อ:
- อุปกรณ์ไร้สาย: Connect your smartphones, tablets, laptops, and other Wi-Fi enabled devices to the extended Wi-Fi network (the SSID you configured during setup).
- Wired Devices (via LAN Port): If you are using the extender in Repeater mode, you can connect a wired device (e.g., desktop PC, smart TV, game console) to the extender's LAN port using an Ethernet cable to provide it with network access.
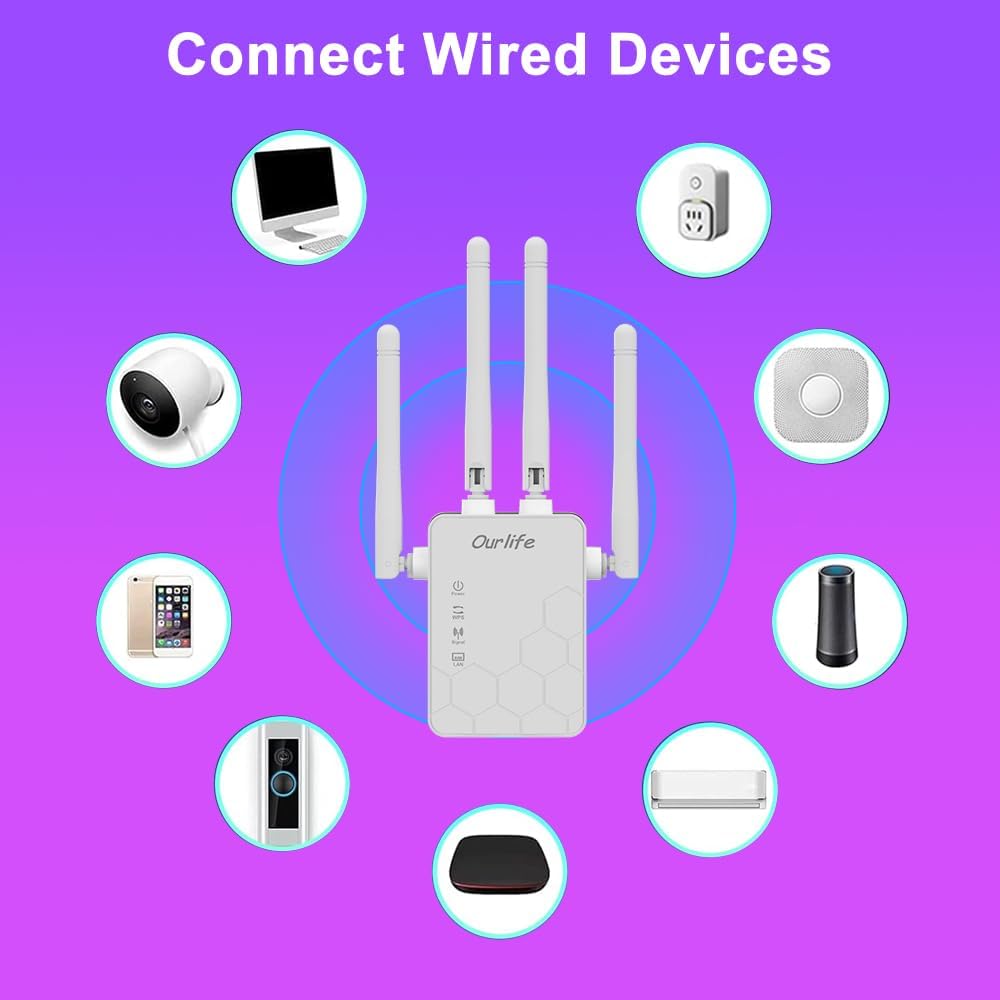
Image: Diagram showing various wired and wireless devices (e.g., desktop computer, smart plug, smart speaker, air conditioner, smart doorbell, security camera, smartphone) that can connect to the Ourlife WiFi Extender.

ภาพ: เดอะ โอurlife WiFi Extender plugged into a wall outlet, with an Ethernet cable connected to its LAN port, illustrating its capability to provide a wired connection.
การซ่อมบำรุง
Regular maintenance helps ensure the longevity and optimal performance of your Ourlife WiFi Extender.
- การทำความสะอาด: ใช้ผ้านุ่มและแห้งเช็ดทำความสะอาดอุปกรณ์ ห้ามใช้น้ำยาทำความสะอาดหรือสเปรย์
- อัพเดตเฟิร์มแวร์: ตรวจสอบผู้ผลิตเป็นระยะ website for firmware updates. Updating firmware can improve performance, add features, and fix bugs.
- การเริ่มต้นใหม่: หากคุณพบปัญหาเกี่ยวกับเครือข่าย ให้ลองรีสตาร์ทตัวขยายสัญญาณโดยถอดปลั๊กออกจากเต้าเสียบไฟเป็นเวลา 10 วินาที แล้วเสียบกลับเข้าไปใหม่
- ตำแหน่งที่เหมาะสมที่สุด: Ensure the extender is placed in an open area, away from large metal objects, concrete walls, and other electronic devices that may cause interference.
การแก้ไขปัญหา
If you encounter issues with your Ourlife WiFi Extender, refer to the following common problems and solutions:
| ปัญหา | วิธีแก้ปัญหาที่เป็นไปได้ |
|---|---|
| ตัวขยายสัญญาณไม่เปิดเครื่อง | ตรวจสอบให้แน่ใจว่าเสียบปลั๊กตัวขยายสัญญาณเข้ากับเต้ารับไฟฟ้าที่ใช้งานได้แน่นดีแล้ว ลองใช้เต้ารับอื่น |
| Cannot connect to the extender's Wi-Fi for setup. | Ensure you are connecting to the correct default SSID (e.g., "Ourlife_Extender"). Try restarting the extender and your device. |
| การตั้งค่า WPS ล้มเหลว | Ensure your router supports WPS. Press the WPS button on both devices within the 2-minute window. Try manual setup if WPS continues to fail. |
| No internet access after connecting to the extended network. | Check if your main router has internet access. Relocate the extender closer to your main router to ensure a strong signal (check Signal indicator). Reconfigure the extender. |
| Slow speeds on the extended network. | Relocate the extender to an optimal position where the Signal indicator shows a strong connection to the main router. Avoid placing it near interference sources. Ensure your main router is providing good speeds. |
| ลืมรหัสผ่านในการเข้าสู่ระบบสำหรับ web หน้าการจัดการ | Perform a factory reset on the extender (usually by pressing and holding a reset button for 5-10 seconds). This will revert all settings to default, including the login credentials. |
ข้อมูลจำเพาะ
| คุณสมบัติ | รายละเอียด |
|---|---|
| ยี่ห้อ | Ourlชีวิต |
| แบบอย่าง | Ourlife WiFi Extender 300Mbps |
| ASIN | B0D7HB4DBC |
| อัตราการถ่ายโอนข้อมูล | 300 เมกะบิตต่อวินาที (2.4 GHz) |
| เสาอากาศ | 4 High-Gain External Antennas |
| พอร์ตอีเทอร์เน็ต | พอร์ต LAN 1 พอร์ต |
| สี | สีขาว |
| การเชื่อมต่อ | Wireless-N (802.11n/g/b) |
| โปรโตคอลความปลอดภัย | Supports Wireless Security (WPA/WPA2) |
| ขนาด (โดยประมาณ) | 17.2ซม. (สูง) x 5.4ซม. (กว้าง) x 3.3ซม. (ลึก) |
การรับประกันและการสนับสนุน
For warranty information and technical support, please refer to the documentation included with your purchase or visit the official Ourlชีวิต website. You can also contact Ourlife customer service directly for assistance with product setup, troubleshooting, or warranty claims.
Ourlife Store Link: เยี่ยมชม Ourlร้าน Life Store บน Amazon


