1. บทนำ
This instruction manual provides essential information for the safe and effective operation of your Mastech MS2000G Digital Clamp Meter. Please read this manual thoroughly before use and retain it for future reference. This device is designed for measuring AC current, AC/DC voltage, resistance, continuity, diode, frequency, and temperature in various electrical applications.
2. ข้อมูลด้านความปลอดภัย
WARNING: To avoid electric shock or personal injury, always follow these safety precautions.
- Always disconnect measuring leads before removing the battery cover.
- ไม่ต้องสมัครวอลุ่มtage หรือกระแสไฟฟ้าที่เกินขีดจำกัดสูงสุดที่กำหนดไว้ในมิเตอร์
- Ensure the rotary switch is in the correct position for the desired measurement before connecting to the circuit.
- Inspect test leads for damaged insulation or exposed metal before each use. Replace if damaged.
- อย่าใช้มิเตอร์หากพบว่ามีความเสียหายหรือหากตัวเครื่องเปิดอยู่
- The Mastech MS2000G is rated for CAT II 1000V and CAT III 600V. Adhere to these category ratings for safe operation.
- ควรใช้ความระมัดระวังเป็นพิเศษเมื่อทำงานกับวงจรที่มีไฟฟ้าอยู่
For detailed safety guidelines, refer to relevant electrical safety standards.
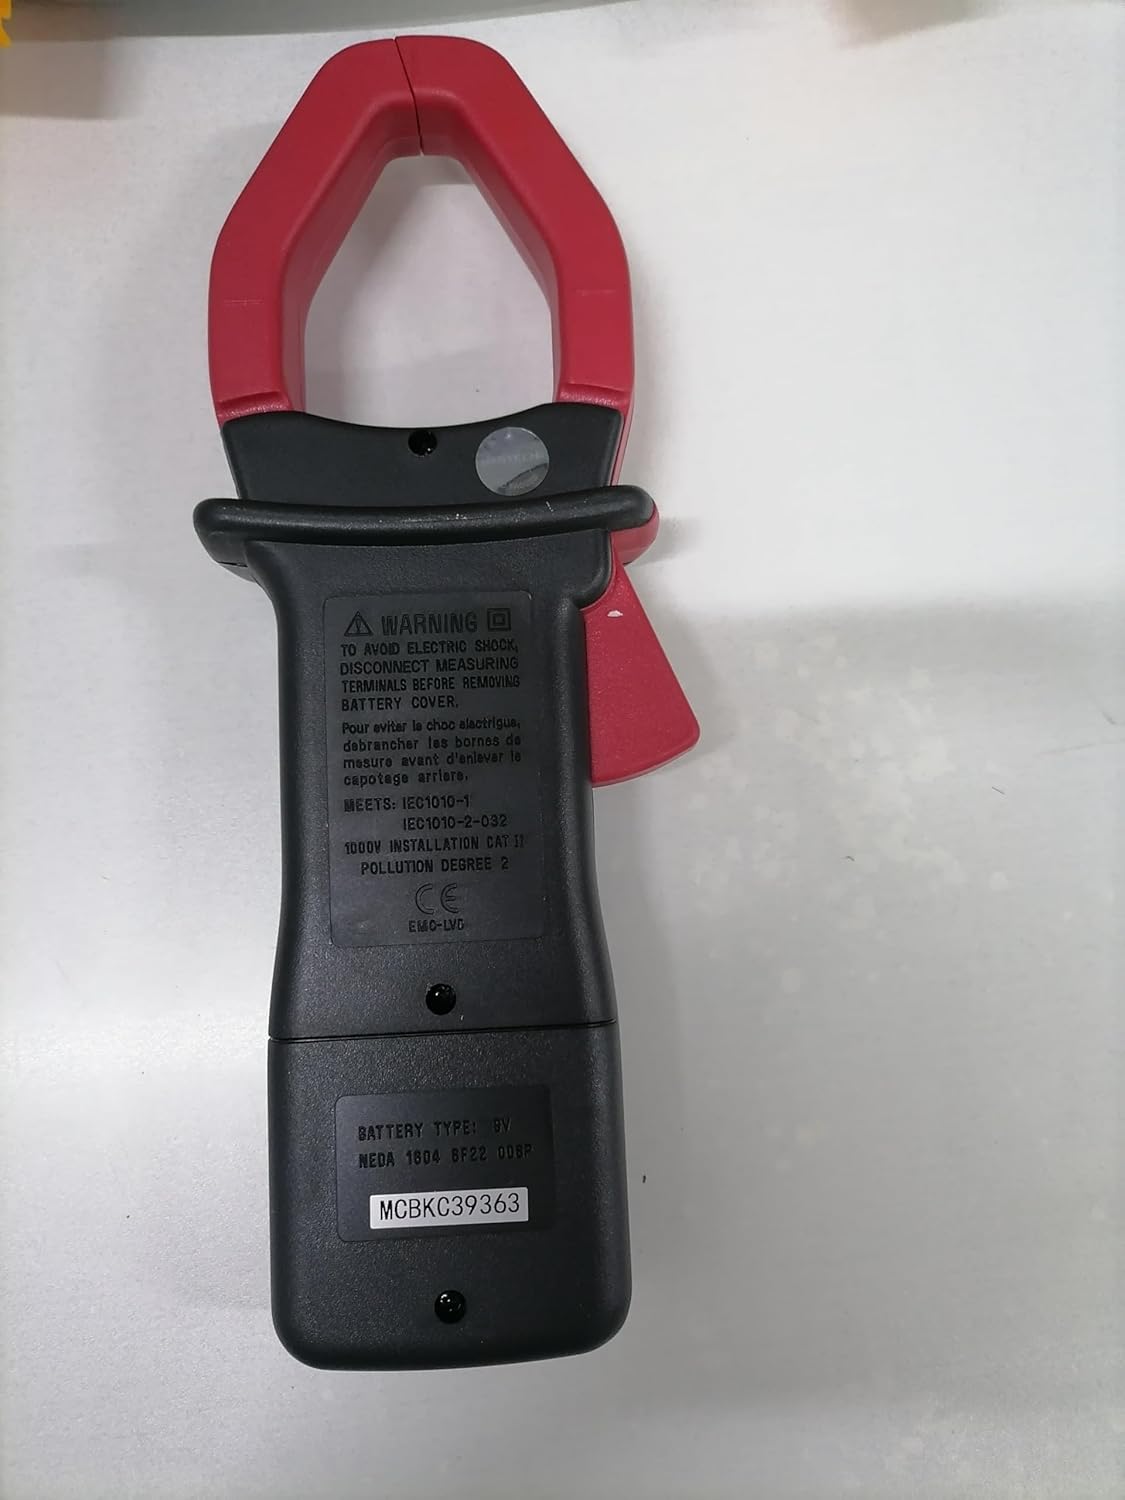
หลัง view of the Mastech MS2000G Digital Clamp Meter, showing the battery compartment and safety warnings, including instructions to disconnect leads before opening.
3. คุณสมบัติของผลิตภัณฑ์
- 2000 Counts Digital Display
- Jaw Opening: 55mm (2.2 inches)
- ไดโอดเปิดโวลต์tagอี: 3.0V
- Continuity Buzzer: Activates below 30Ω
- ฟังก์ชันเก็บข้อมูล
- Display Backlight for low-light conditions
- Low Battery Display Indicator
4. สินค้าหมดview
The Mastech MS2000G features a robust design for professional and home use. Key components include:
- Clamp ขากรรไกร: ใช้สำหรับการวัดกระแสไฟฟ้า AC แบบไม่สัมผัส
- สวิตช์โรตารี่: Selects measurement functions (AC Current, Voltagเช่น ความต้านทาน เป็นต้น)
- จอแสดงผล LCD: แสดงค่าการวัด หน่วย และตัวบ่งชี้
- แจ็คอินพุต: สำหรับเชื่อมต่อสายทดสอบสำหรับวัดระดับเสียงtage, resistance, continuity, diode, frequency, and temperature measurements.
- ปุ่มพักข้อมูล: หยุดการอ่านค่าปัจจุบันบนจอแสดงผล
- ปุ่มแบ็คไลท์: เพิ่มแสงสว่างให้กับจอแสดงผลเพื่อการมองเห็นที่ดีขึ้น

ด้านหน้า view of the Mastech MS2000G Digital Clamp Meter, highlighting the display, rotary switch, and clamp กราม.
5. การตั้งค่า
5.1 การติดตั้งแบตเตอรี่
- โปรดตรวจสอบให้แน่ใจว่ามิเตอร์ปิดอยู่และถอดสายวัดทั้งหมดออกแล้ว
- หาฝาปิดช่องใส่แบตเตอรี่ที่ด้านหลังของมิเตอร์
- ใช้ไขควงคลายสกรูที่ยึดฝาครอบแบตเตอรี่ออก
- ถอดฝาครอบออก
- ใส่แบตเตอรี่ 9V ก้อนใหม่ โดยสังเกตขั้วให้ถูกต้อง (+ และ -)
- ปิดฝาครอบแบตเตอรี่และขันสกรูให้แน่น
5.2 การเชื่อมต่อสายทดสอบ
For measurements requiring test leads (voltage, resistance, continuity, diode, frequency, temperature):
- Insert the red test lead into the VHzΩ input jack.
- ใส่สายวัดทดสอบสีดำลงในแจ็คอินพุต COM
- For temperature measurements, connect the K-type thermocouple to the designated input terminals, observing polarity.
6. คู่มือการใช้งาน
To operate the Mastech MS2000G, turn the rotary switch to the desired function. The display will show the measurement reading.
6.1 การวัดกระแสไฟฟ้าสลับ
- Turn the rotary switch to the 'A' (AC Current) range.
- เปิด clamp ขากรรไกรโดยการกดไกปืน
- Encircle only one conductor of the circuit with the clamp ขากรรไกร ตรวจสอบให้แน่ใจว่าขากรรไกรปิดสนิทแล้ว
- อ่านค่ากระแสไฟฟ้าสลับบนจอแสดงผล
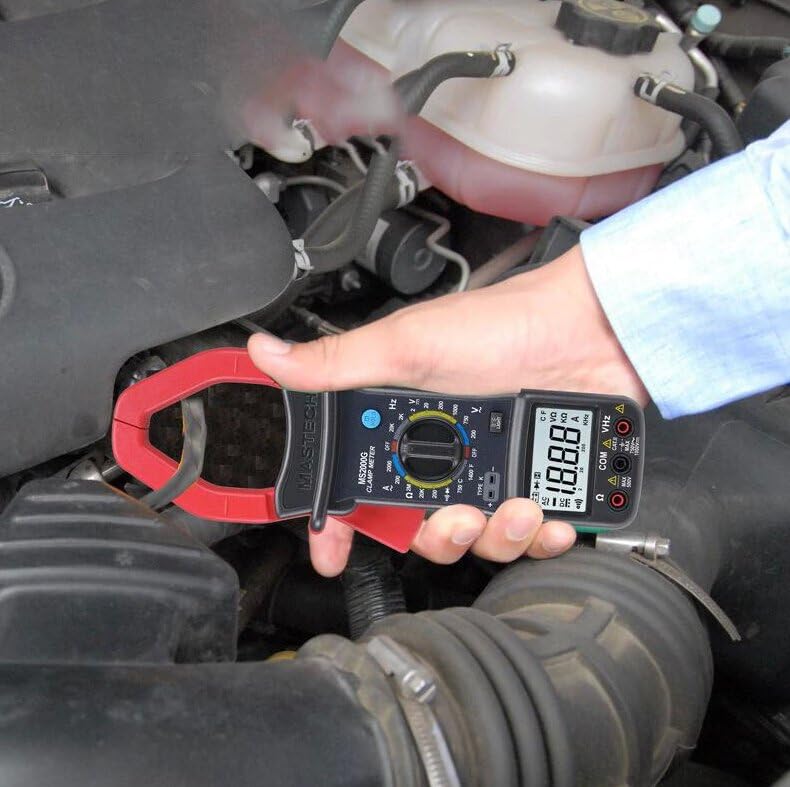
Demonstration of the Mastech MS2000G measuring AC current around a single conductor.
6.2 โวลต์ AC/DCtagอีการวัด
- เชื่อมต่อสายทดสอบตามที่อธิบายไว้ในหัวข้อ 5.2
- Turn the rotary switch to the 'V~' (AC Voltage) หรือ 'V=' (แรงดันไฟฟ้ากระแสตรง)tage) ช่วง
- เชื่อมต่อโพรบทดสอบแบบขนานเข้ากับวงจรหรือชิ้นส่วนที่ต้องการทดสอบ
- อ่านเล่มที่tagค่า e บนจอแสดงผล
6.3 การวัดความต้านทาน
- Connect the test leads.
- Turn the rotary switch to the 'Ω' (Resistance) range.
- Ensure the circuit or component is de-energized before connecting the probes.
- เชื่อมต่อหัววัดทดสอบเข้ากับส่วนประกอบนั้น
- อ่านค่าความต้านทานบนจอแสดงผล
6.4 การทดสอบความต่อเนื่อง
- Connect the test leads.
- Turn the rotary switch to the 'Ω' (Resistance) range and press the 'SELECT' button if necessary to choose continuity mode (indicated by a buzzer symbol).
- เชื่อมต่อหัววัดทดสอบเข้ากับวงจรหรือชิ้นส่วนนั้น
- ถ้าค่าความต้านทานต่ำกว่าประมาณ 30 โอห์ม เสียงกริ่งจะดังขึ้น ซึ่งแสดงว่ามีการเชื่อมต่อกัน
6.5 การทดสอบไดโอด
- Connect the test leads.
- Turn the rotary switch to the 'Ω' (Resistance) range and press 'SELECT' to choose diode mode (indicated by a diode symbol).
- เชื่อมต่อโพรบสีแดงเข้ากับขั้วบวก และโพรบสีดำเข้ากับขั้วลบของไดโอด
- จอแสดงผลจะแสดงปริมาตรไปข้างหน้าtage drop. Reverse the probes; the display should show 'OL' (Open Loop) for a good diode.
6.6 การวัดความถี่
- Connect the test leads.
- Turn the rotary switch to the 'Hz' (Frequency) range.
- Connect the test probes to the circuit where frequency is to be measured.
- อ่านค่าความถี่บนจอแสดงผล
6.7 การวัดอุณหภูมิ
- Connect the K-type thermocouple to the designated input terminals, observing polarity.
- Turn the rotary switch to the '°C' or '°F' (Temperature) range.
- วางหัววัดเทอร์โมคัปเปิลไว้บนหรือใกล้กับวัตถุที่ต้องการวัดอุณหภูมิ
- อ่านค่าอุณหภูมิบนจอแสดงผล
6.8 ฟังก์ชั่นการเก็บข้อมูล
กดปุ่ม 'HOLD' เพื่อหยุดค่าที่อ่านได้บนจอแสดงผล กดอีกครั้งเพื่อปล่อยและกลับสู่การวัดแบบเรียลไทม์
6.9 ไฟแบ็คไลท์ของจอแสดงผล
Press the 'LIGHT' button to turn on the display backlight for improved visibility in dimly lit environments. Press it again to turn off the backlight.
7. การบำรุงรักษา
7.1 การทำความสะอาด
เช็ดตัวเรือนมิเตอร์ด้วยน้ำยาทำความสะอาดamp ใช้ผ้าและผงซักฟอกอ่อนๆ เช็ดทำความสะอาด ห้ามใช้สารขัดถูหรือตัวทำละลาย ตรวจสอบให้แน่ใจว่ามิเตอร์แห้งสนิทก่อนใช้งาน
7.2 การเปลี่ยนแบตเตอรี่
When the 'Low Battery' indicator appears on the display, replace the 9V battery as described in Section 5.1. Prompt battery replacement ensures accurate readings.
7.3 พื้นที่จัดเก็บ
If the meter is not used for an extended period, remove the battery to prevent leakage and damage. Store the meter in a cool, dry place, away from direct sunlight and extreme temperatures.
8 การแก้ไขปัญหา
- ไม่มีจอแสดงผล/จอแสดงผลจาง: Check battery installation and replace the 9V battery if necessary.
- การอ่านไม่ถูกต้อง: Ensure the rotary switch is set to the correct function and range. Verify test lead connections. Check for damaged test leads.
- 'OL' จัดแสดง: Indicates an over-range condition or an open circuit. Select a higher range or check the circuit connection.
- Buzzer Not Sounding in Continuity Mode: The resistance may be above the continuity threshold (30Ω), or the circuit is open.
9. ข้อมูลจำเพาะ
| พารามิเตอร์ | ข้อมูลจำเพาะ |
|---|---|
| แสดง | 2000 นับ |
| การเปิดขากรรไกร | 55 มม. (2.2") |
| ฉบับ ACtage | 750โวลต์ |
| DC ฉบับที่tage | 1000โวลต์ |
| กระแสไฟ AC | 1000เอ |
| ความต้านทาน | 2เมกะโอห์ม |
| ความถี่ | 20kHz |
| ความต่อเนื่อง | <30Ω (Buzzer) |
| ไดโอดเปิดโวลต์tage | 3.0โวลต์ |
| อุณหภูมิ (ชนิด K) | -0°C ถึง 750°C (32°F ถึง 1382°F) |
| ระดับความปลอดภัย | CAT II 1000V, CAT III 600V |
| แหล่งพลังงาน | แบตเตอรี่ 9V (รวมอยู่ด้วย) |
| ขนาดสินค้า | 7.87 x 5.91 x 9.84 นิ้ว |
| น้ำหนักสินค้า | 1 กิโลกรัม (2.2 ปอนด์) |

Detailed specifications and features for the Mastech MS2000G and other models.
10. อะไรอยู่ในกล่อง
The Mastech MS2000G package typically includes:
- Mastech MS2000G Digital Clamp เมตร
- Test Leads (one pair)
- Wrapping Case
- เทอร์โมคัปเปิลชนิด K
- แบตเตอรี่ 9V
- ใบรับรองการสอบเทียบ
- คู่มือเริ่มต้นใช้งานฉบับย่อ / คู่มือผู้ใช้

Contents of the Mastech MS2000G package, including the clamp meter and accessories.
11. การรับประกันและการสนับสนุน
For warranty information and technical support, please refer to the documentation included with your product or contact the seller/manufacturer directly. Keep your purchase receipt as proof of purchase.


