1. บทนำ
This manual provides essential instructions for the safe and efficient operation, setup, and maintenance of your Monport 100W Fiber Laser Engraver with Rotary Axis. This MOPA laser marking machine is designed for precise engraving and marking on various materials, featuring an autofocus system and compatibility with LightBurn software. Please read this manual thoroughly before operating the device.

Figure 1.1: Monport 100W Fiber Laser Engraver with Rotary Axis.
2. ข้อมูลด้านความปลอดภัย
Operating a Class 4 laser device requires strict adherence to safety protocols to prevent injury. Failure to follow these guidelines can result in serious harm.
- การปกป้องดวงตา: Always wear certified laser safety goggles appropriate for the laser's wavelength (1064nm) when the laser is in operation.
- การปกป้องผิวหนัง: หลีกเลี่ยงการสัมผัสผิวหนังโดยตรงกับลำแสงเลเซอร์
- การระบายอากาศ : Ensure adequate ventilation to remove fumes and particles generated during engraving, especially when working with materials that produce hazardous byproducts.
- ความปลอดภัยจากอัคคีภัย: Keep a fire extinguisher nearby. Certain materials can ignite when exposed to laser energy. Never leave the machine unattended during operation.
- เอกสารแนบ: Operate the laser within a protective enclosure to contain the laser beam and debris.
- หยุดฉุกเฉิน: โปรดทำความคุ้นเคยกับตำแหน่งและการใช้งานของปุ่มหยุดฉุกเฉิน
- บุคลากรที่ได้รับอนุญาต: Only trained and authorized personnel should operate the laser engraver.
3. เนื้อหาบรรจุภัณฑ์
Verify that all items listed below are present in your package upon unboxing:
- Mopa Fiber Laser Engraver with Rotary Axis
- สายไฟ
- ประแจ
- Positioning Bar & Screw
- Steel Ruler
- คู่มือการใช้งาน (เอกสารฉบับนี้)
- แฟลชไดรฟ์ (บรรจุซอฟต์แวร์และไดรเวอร์)
- Marking Test Cards
- สายเคเบิลข้อมูล USB

Figure 3.1: Illustration of the Monport 100W Fiber Laser Engraver and its included accessories.
4. การตั้งค่า
The Monport 100W Fiber Laser Engraver is designed for quick and straightforward setup. The foldable vertical arm simplifies initial assembly.
4.1 การประกอบเบื้องต้น
- นำส่วนประกอบทั้งหมดออกจากบรรจุภัณฑ์อย่างระมัดระวัง
- Place the main unit on a stable, level surface.
- Unfold the vertical arm into its upright position.
- Secure the vertical arm by tightening the two designated screws using the provided wrench. Ensure the arm is firmly fixed to prevent movement during operation.
- Connect the power line to the machine and a suitable power outlet.
- Connect the USB data cable from the machine to your computer.
4.2 การติดตั้งซอฟต์แวร์
Insert the provided U Disk into your computer. Install the necessary drivers and software (BSL App or LightBurn) as instructed on the disk. Refer to the software-specific documentation for detailed installation and configuration steps.
5. คู่มือการใช้งาน
This section outlines the general steps for operating your laser engraver. Detailed operational procedures will be found within the specific software documentation (LightBurn or BSL App).
5.1 Power On and Connection
- ตรวจสอบให้แน่ใจว่าสายเคเบิลทั้งหมดเชื่อมต่ออย่างแน่นหนา
- Turn on the main power switch on the laser engraver.
- Launch your chosen laser control software (LightBurn or BSL App) on your computer.
- Verify that the software recognizes and connects to the laser engraver.
5.2 การจัดวางและการโฟกัสวัสดุ
- วางวัสดุที่ต้องการทำเครื่องหมายไว้บนแท่นทำงาน
- Utilize the autofocus feature or manual focus to set the correct focal distance (refer to Section 5.3).
5.3 Autofocus Feature
The Monport 100W Fiber Laser Engraver features proprietary autofocus technology for precise and efficient focusing. This system uses three red lights for guidance and achieves high precision with an error of less than ±1mm.
- Ensure the material is positioned correctly under the laser head.
- Press the dedicated autofocus button on the machine or activate it through the software interface.
- The laser head will automatically adjust its height until optimal focus is achieved.
- For manual focusing, adjust the vertical arm until the three red dot guides converge into a single point on the material surface.

Figure 5.3.1: Diagram illustrating the autofocus mechanism with red dot guides.

Figure 5.3.2: Control panel display for autofocus operation.
5.4 Vertical Arm Rotation
The vertical arm of the engraver offers an adjustable range of ±90° for increased versatility in marking applications.
- To adjust the arm angle, slightly loosen the screws securing the arm.
- Carefully rotate the arm to the desired angle within the ±90° range.
- Once the desired angle is set, re-tighten the screws to secure the arm in position.
5.5 Design and Engraving
- Create or import your design within the LightBurn or BSL App software.
- Configure laser parameters such as power, speed, frequency, and pulse width according to the material and desired effect.
- Perform a test mark on a scrap piece of the same material to verify settings.
- Initiate the engraving process from the software. Monitor the operation closely.
6. ความเข้ากันได้ของซอฟต์แวร์
The Monport 100W Fiber Laser Engraver is compatible with industry-standard laser control software.
- ไลท์เบิร์น: A powerful and widely used laser control software (paid license required).
- BSL App: Monport's free proprietary software.
Both software options allow for design editing, arrangement, and control of the laser marking process. Refer to the respective software documentation for detailed usage instructions.

Figure 6.1: Software compatibility with LightBurn and BSL App.
7. ความเข้ากันได้ของวัสดุ
This fiber laser engraver is capable of marking a wide range of materials, including but not limited to:
- Metals: Stainless Steel (including color marking), Aluminum (including anodized black engraving), Gold, Silver, Alloys, Copper, Brass, Titanium, etc.
- Plastics: Various types of plastics, including colored acrylics.
- Other Materials: Leather, Marble, Ceramic.
The adjustable frequency (1-3000kHz) and pulse width (2-500ns) allow for diverse applications such as vibrant stainless steel markings, precise cutting, drilling, and intricate designs.

Figure 7.1: Visual representation of various materials suitable for marking.
8. การบำรุงรักษา
การบำรุงรักษาอย่างสม่ำเสมอจะช่วยให้เครื่องแกะสลักเลเซอร์ของคุณมีอายุการใช้งานยาวนานและทำงานได้อย่างมีประสิทธิภาพสูงสุด
- การทำความสะอาดเลนส์: Periodically inspect and clean the laser lens using specialized lens cleaning solution and wipes. Avoid touching the lens with bare hands.
- การกำจัดฝุ่น: Keep the machine free of dust and debris. Use compressed air or a soft brush to clean vents and internal components. The machine includes dust shields at the back of the work area for enhanced service life.
- การตรวจสอบสายเคเบิล: ตรวจสอบสายเคเบิลทั้งหมดเป็นประจำเพื่อดูว่ามีร่องรอยการสึกหรอหรือความเสียหายหรือไม่ เปลี่ยนสายเคเบิลที่ชำรุดทันที
- การอัปเดตซอฟต์แวร์: Keep your laser control software updated to the latest version for improved performance and features.
9 การแก้ไขปัญหา
This section addresses common issues you might encounter. For more complex problems, contact Monport customer support.
9.1 ปัญหาทั่วไปและแนวทางแก้ไข
- เลเซอร์ไม่ยิง:
- ตรวจสอบการเชื่อมต่อสายไฟและตรวจสอบให้แน่ใจว่าเครื่องเปิดอยู่
- Verify software connection and ensure the laser is enabled in the software.
- Ensure the emergency stop button is not engaged.
- คุณภาพการแกะสลักไม่ดี:
- Check focal distance. Re-run autofocus or manually adjust.
- Verify laser parameters (power, speed, frequency, pulse width) are appropriate for the material.
- หากเลนส์เลเซอร์ดูสกปรก ให้ทำความสะอาด
- Software Not Connecting:
- Ensure USB cable is securely connected to both the machine and computer.
- รีสตาร์ททั้งเครื่องและคอมพิวเตอร์
- Reinstall drivers from the U Disk or Monport's official webเว็บไซต์.
- Rotary Axis Not Functioning:
- Ensure the rotary axis is properly connected to the machine.
- Check software settings for rotary axis activation and configuration.
10. ข้อมูลจำเพาะ
| คุณสมบัติ | ข้อมูลจำเพาะ |
|---|---|
| ยี่ห้อ | Monport |
| หมายเลขรุ่น | YXF100 |
| พลังงานเลเซอร์ | 100วัตต์ |
| ประเภทเลเซอร์ | MOPA Fiber Laser |
| คลาสเลเซอร์ | ชั้นประถมศึกษาปีที่ 4 |
| โหมดการทำงาน | อัตโนมัติ |
| วัสดุ | อลูมิเนียม ซีasing |
| สี | สีเทาเข้ม |
| ขนาดสินค้า (ยาว x กว้าง) | 6.9" x 6.9" (Working Area) |
| Autofocus Accuracy | < ±1mm |
| Vertical Arm Rotation | ±90° Adjustable |
| ความถี่เลเซอร์ | 1-3000กิโลเฮิรตซ์ |
| ความกว้างของพัลส์ | 2-500ns |
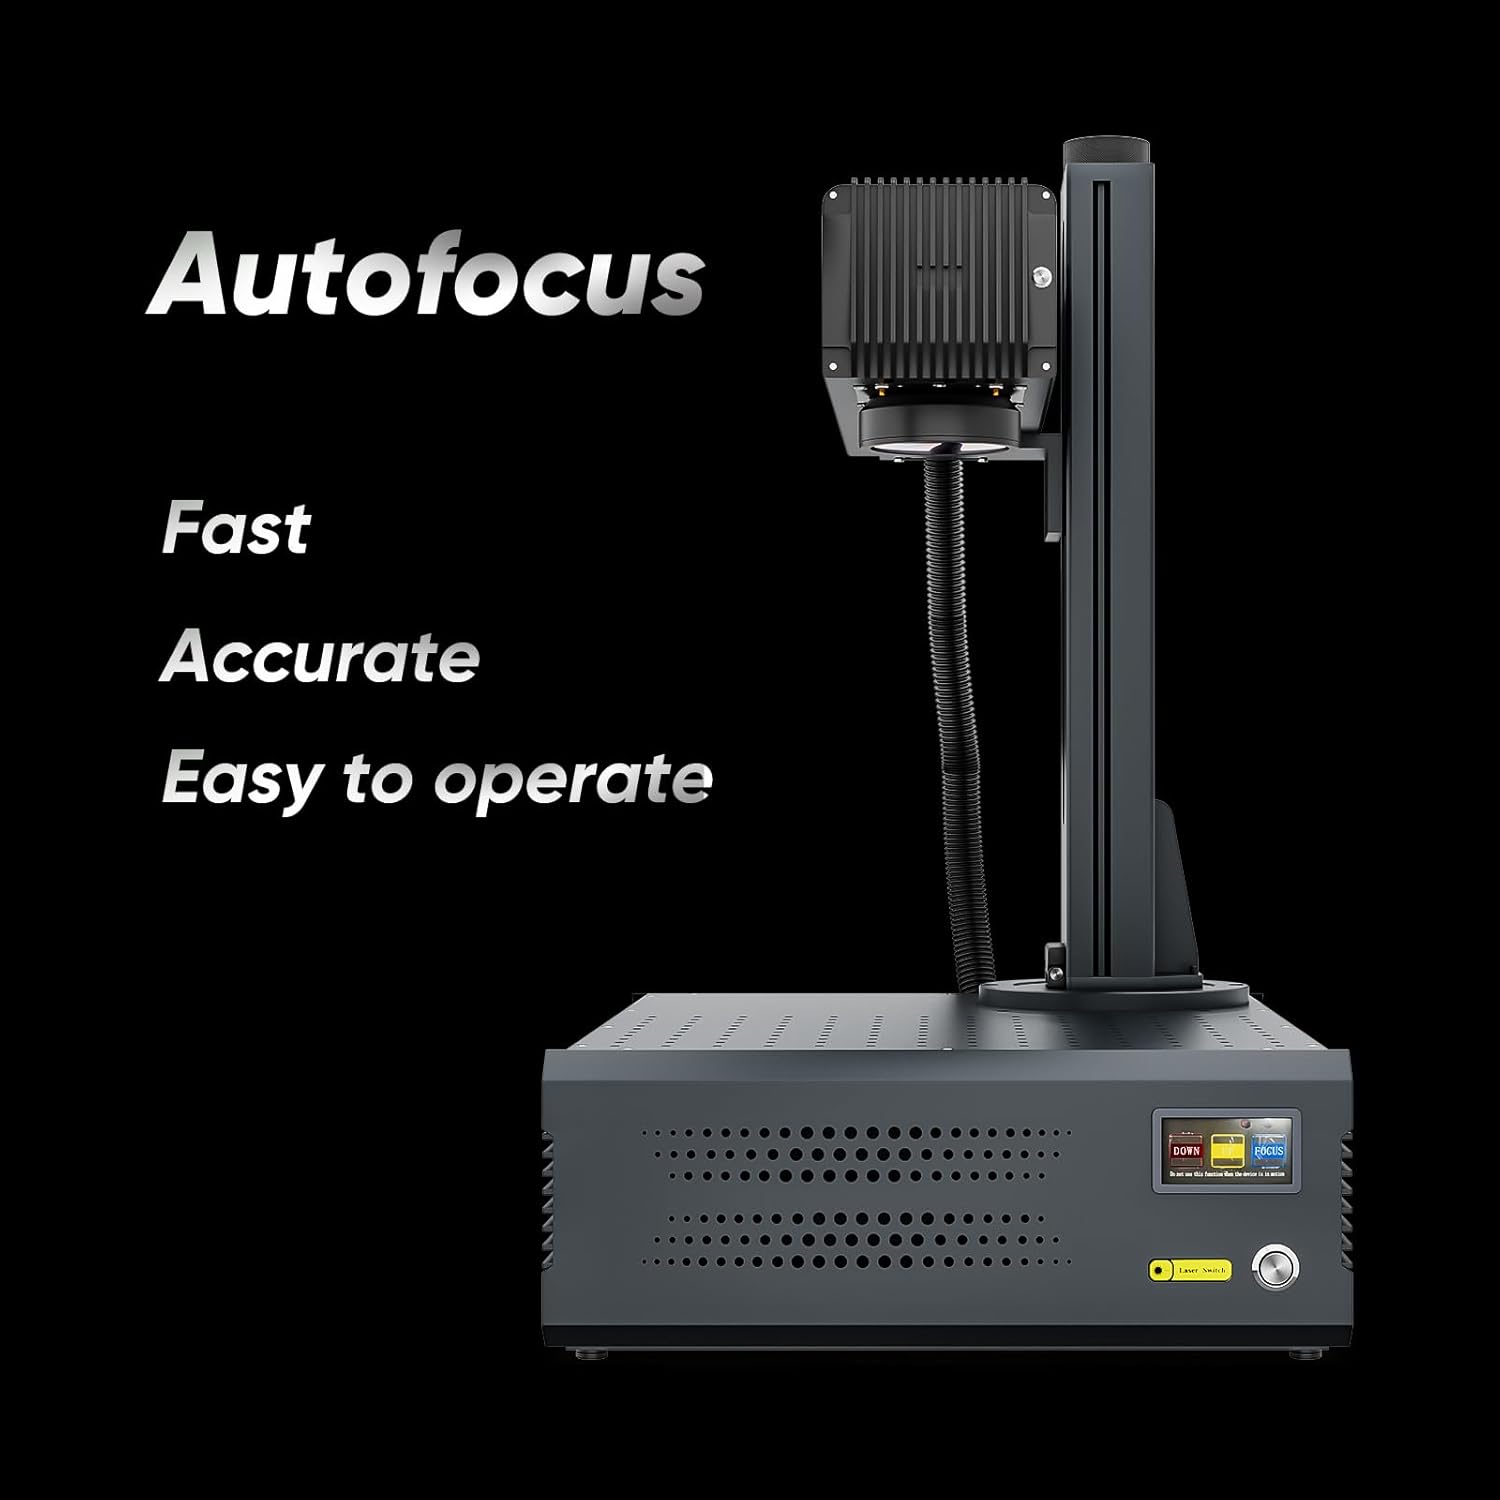
Figure 10.1: Overall dimensions of the Monport 100W Fiber Laser Engraver.
11. การรับประกันและการสนับสนุน
For warranty information, technical support, or service inquiries, please refer to the warranty card included with your product or visit the official Monport website. Contact Monport customer service for assistance with any issues not covered in this manual.


