การแนะนำ
This manual provides detailed instructions for the setup, operation, and maintenance of your Tacens NOVAX 2NOVAX Ultra-Compact Micro-ATX PC Case. Designed for efficiency and durability, this all-metal mini-tower case offers a compact footprint with ample internal capacity for your computing needs.
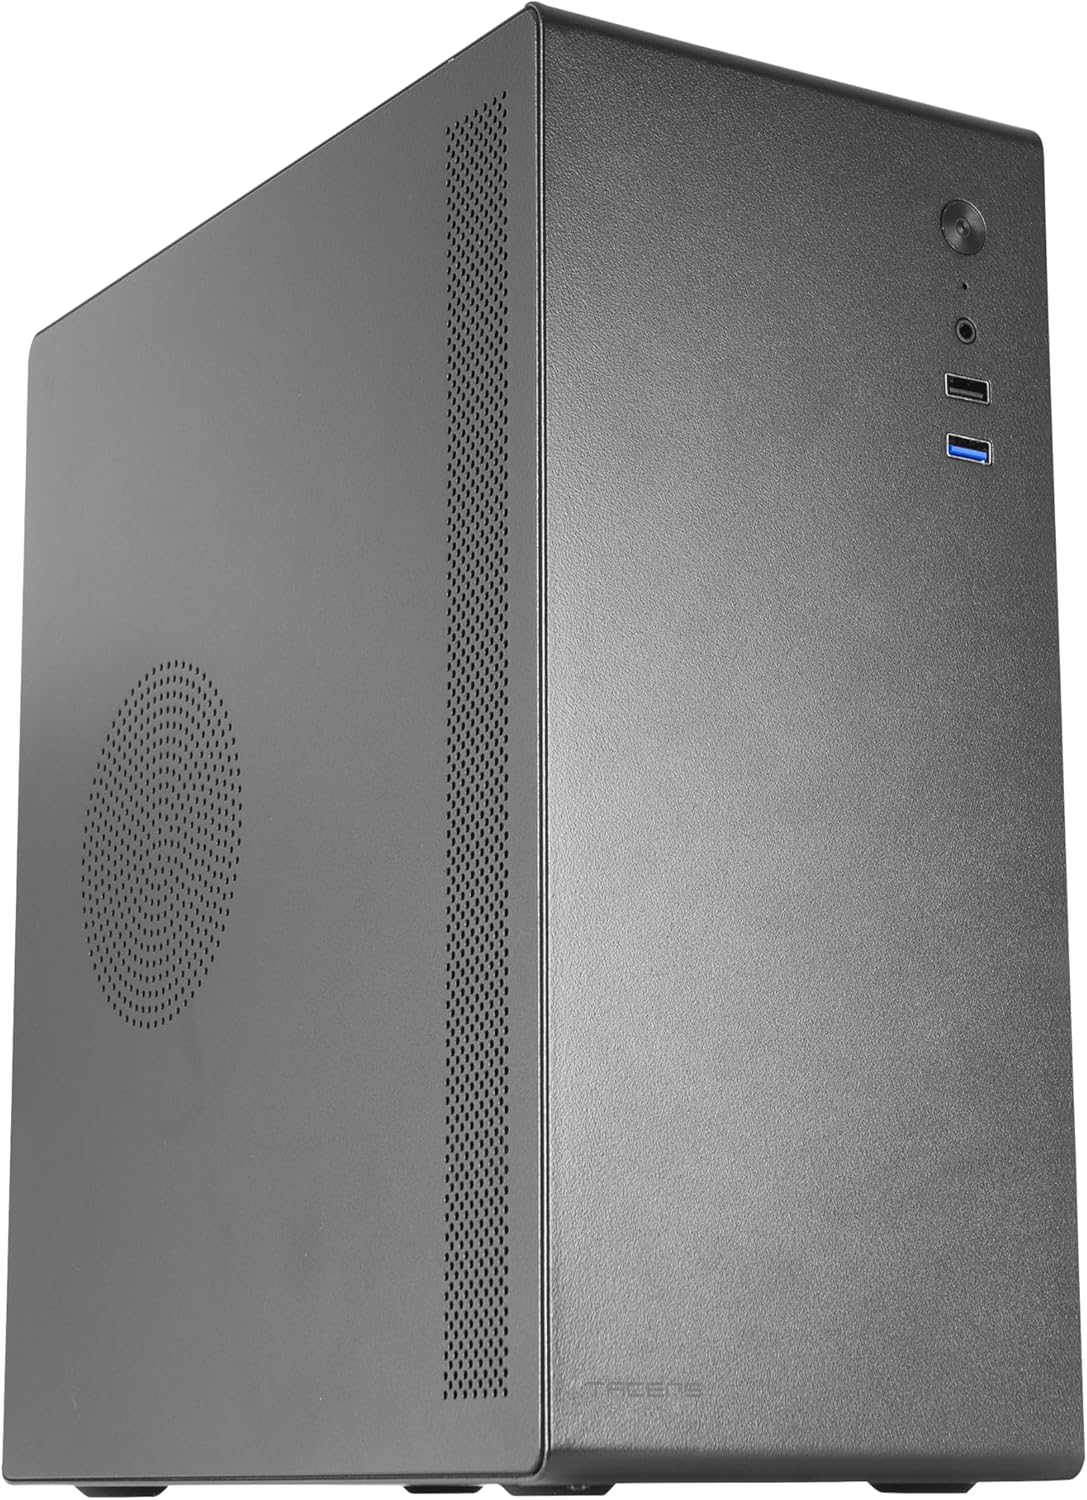
รูปที่ 1: ด้านหน้าซ้าย view of the Tacens NOVAX 2NOVAX PC Case.
คุณสมบัติหลัก
- Full Metallic Structure: The NOVAX compact case features a solid metal construction, ensuring continuous protection and robust security for your system.
- Optimized Cooling Capacity: An integrated 80mm fan at the rear ensures additional air circulation to keep components cool.
- Wide Internal Capacity: Supports MicroATX and Mini-ITX motherboards, accommodates up to two 3.5" HDDs and two 2.5" SSDs, and graphics cards up to 250mm wide. Features 4 expansion slots.
- การเชื่อมต่อสูงสุด: Includes one USB 3.0 port, one USB 2.0 port, and HD audio input combined with microphone on the front panel.
- การออกแบบที่กะทัดรัด: Sleek and minimalist mini-tower design, available in black.
การติดตั้งและการตั้งค่า
Follow these steps to install your PC components into the NOVAX 2NOVAX case.
1. การเตรียมคดี
Before installing components, ensure the case is placed on a stable, flat surface. Remove the side panels by unscrewing the thumb screws at the rear of the case and sliding the panels off.
รูปที่ 2: ด้านหลัง view of the case with the side panel removed, showing internal layout.
2. การติดตั้งเมนบอร์ด
The NOVAX case supports MicroATX and Mini-ITX motherboards. Align your motherboard with the pre-mounted standoffs inside the case. Secure the motherboard using the provided screws.
Video 1: This video demonstrates the installation process of a Micro-ATX motherboard and other components into a similar compact PC case. Note that specific component models may vary.
3. การติดตั้งการ์ดจอ (GPU)
Install your graphics card into the appropriate PCIe slot on your motherboard. The case can accommodate graphics cards up to 250mm in length. Secure the GPU with the provided screws.
4. การติดตั้งไดรฟ์
The case provides mounting points for two 3.5" HDDs and two 2.5" SSDs. Secure your storage drives using the designated bays and screws.

รูปที่ 3: ภายใน view highlighting the 80mm rear fan mount and potential drive installation areas.
5. การติดตั้งชุดจ่ายไฟ (PSU)
The case supports standard ATX power supplies, which are mounted at the bottom. Ensure proper cable management to maintain optimal airflow.
Video 2: This video illustrates the assembly of a mini PC case, including the installation of a power supply and other components. It provides a visual guide for component placement.
6. Fan Configuration
The case includes one 80mm rear fan for exhaust. Additional fan mounts are available for enhanced cooling. Ensure fans are oriented correctly for optimal airflow (intake/exhaust).

Figure 4: Top-down internal view of the case, showing the layout for components and potential fan placements.
7. การเชื่อมต่อแผงด้านหน้า
Connect the front panel cables (USB 3.0, USB 2.0, HD Audio, Power, Reset) to the corresponding headers on your motherboard. The front panel features:
- พอร์ต USB 1 3.0x
- พอร์ต USB 1 2.0x
- HD Audio (Headphone/Microphone combo jack)
- ปุ่มเปิดปิด
- ปุ่มรีเซ็ต

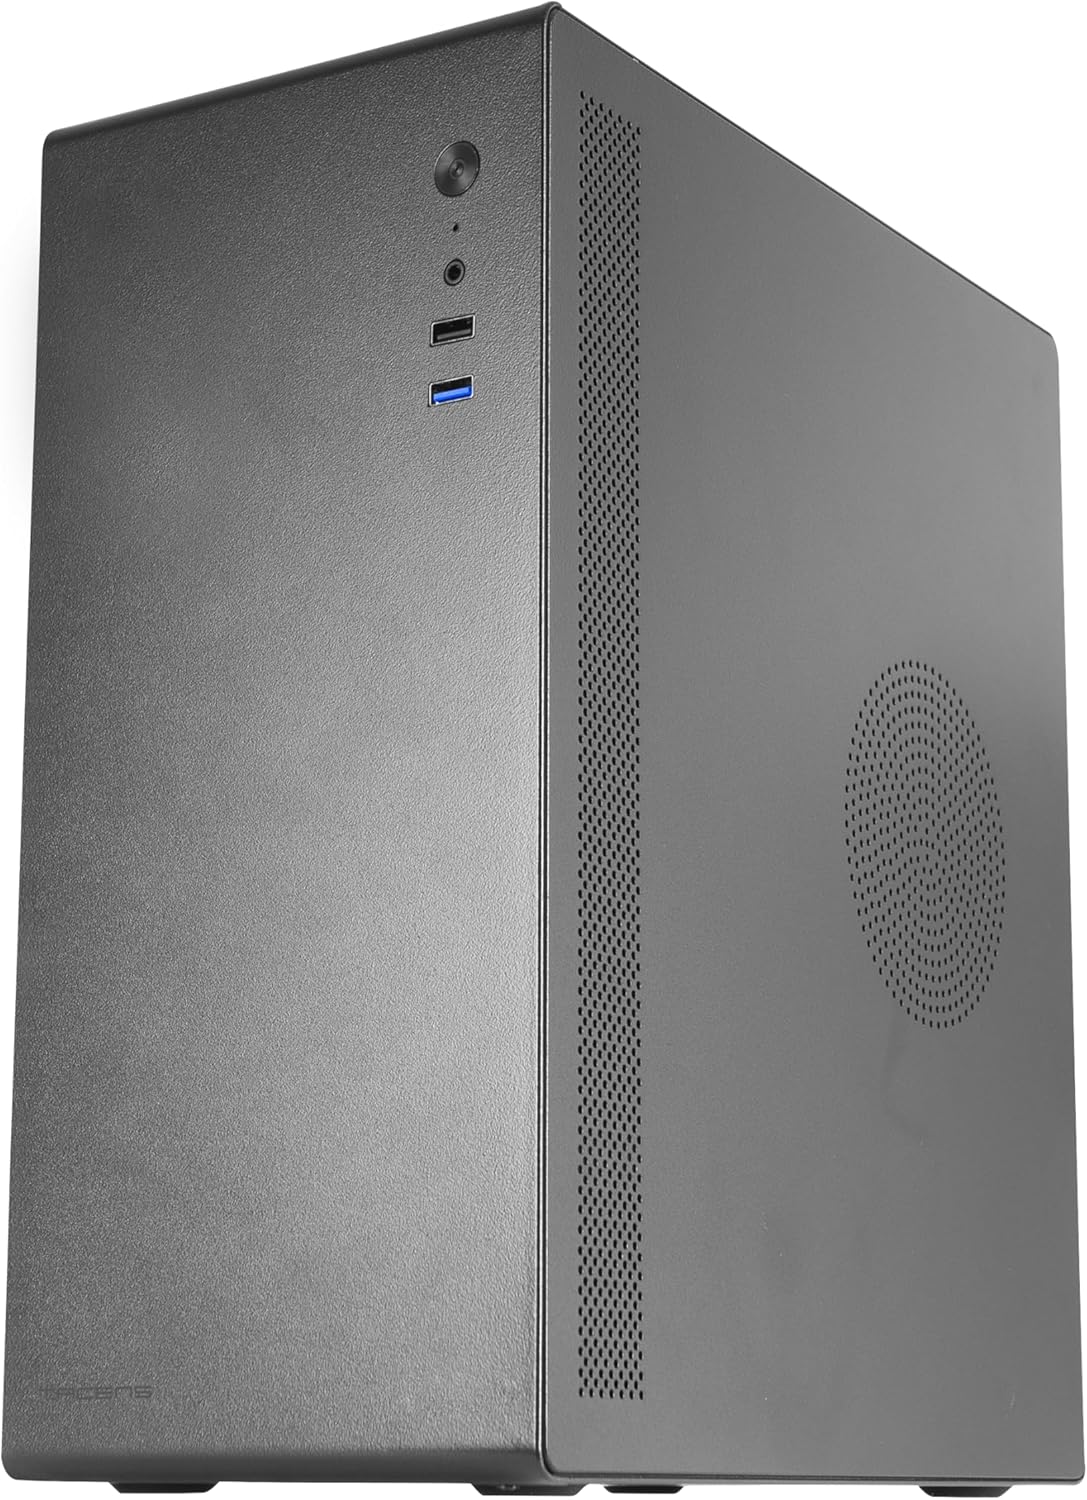
Figure 5: Close-up of the front I/O panel, showing USB ports, audio jacks, and power/reset buttons.
คำแนะนำการใช้งาน
Once all components are securely installed and connected, replace the side panels and connect your peripherals (monitor, keyboard, mouse) and power cable.
- เชื่อมต่อสายไฟเข้ากับแหล่งจ่ายไฟ (PSU) และเต้ารับที่ผนัง
- Press the power button on the front panel to turn on your PC.
- Use the front USB ports for convenient connection of external devices.
- The HD audio ports allow for easy connection of headphones and microphones.
การซ่อมบำรุง
การบำรุงรักษาตามปกติจะช่วยให้มั่นใจได้ถึงประสิทธิภาพสูงสุดและอายุการใช้งานที่ยาวนานของส่วนประกอบพีซีของคุณ
- การทำความสะอาดฝุ่น: Periodically clean dust from the case's ventilation areas and internal components using compressed air or a soft brush.
- การจัดการสายเคเบิล: ตรวจสอบให้แน่ใจว่าสายเคเบิลภายในถูกจัดวางอย่างเป็นระเบียบเพื่อป้องกันการกีดขวางการไหลเวียนของอากาศ
- เช็คพัดลม: Inspect the 80mm rear fan and any additional fans for dust buildup or unusual noises.
การแก้ไขปัญหา
หากคุณพบปัญหา โปรดพิจารณาขั้นตอนการแก้ไขปัญหาทั่วไปต่อไปนี้:
- ไม่มีไฟฟ้า: Check all power connections, including the PSU cable, motherboard power, and CPU power. Ensure the PSU switch is in the 'ON' position.
- ไม่มีจอแสดงผล: Verify that your monitor is correctly connected to the graphics card (or integrated graphics) and that the monitor is powered on. Reseat the graphics card if necessary.
- ความร้อนสูงเกินไป: Ensure all fans are spinning correctly and that there is no excessive dust buildup blocking airflow. Check CPU cooler installation.
- พอร์ต USB ไม่ทำงาน: Confirm that the front panel USB cables are securely connected to the motherboard headers.
ข้อมูลจำเพาะ
| คุณสมบัติ | รายละเอียด |
|---|---|
| ยี่ห้อ | Tacens |
| ชื่อรุ่น | 2NOVAX |
| ประเภทเคส | มินิทาวเวอร์ |
| ความเข้ากันได้ของเมนบอร์ด | ไมโคร ATX, มินิ ITX |
| วัสดุ | โลหะ |
| สี | สีดำ |
| น้ำหนักสินค้า | 4.62 ปอนด์ |
| ขนาดสินค้า (กxยxส) | 14.02 x 6.54 x 10.83 นิ้ว |
| จำนวนพอร์ต USB 3.0 | 1 |
| จำนวนพอร์ต USB 2.0 | 1 |
| Rear Fan Included | 1x 80มม. |
| ประเภทการติดตั้งแหล่งจ่ายไฟ | การติดตั้งด้านล่าง |
| วิธีการทำความเย็น | อากาศ |
| ความยาวสูงสุดของ GPU | 250มม. |
| ช่องไดรฟ์ | ฮาร์ดดิสก์ 3.5 นิ้ว 2 ตัว, SSD 2.5 นิ้ว 2 ตัว |
| ช่องเสียบขยาย | 4 |
การรับประกันและการสนับสนุน
For warranty information and technical support, please refer to the official Tacens webหรือติดต่อฝ่ายบริการลูกค้า เก็บหลักฐานการซื้อไว้เพื่อใช้ในการเคลมประกัน


