1. บทนำ
Thank you for choosing the DYONDER Wired PC Controller. This manual provides essential information for the proper setup, operation, and maintenance of your new game controller. Please read this manual thoroughly before use to ensure optimal performance and longevity of the product.

Image 1.1: Users enjoying the DYONDER Wired PC Controller.
2. สินค้าหมดview และความเข้ากันได้
The DYONDER Wired PC Controller is designed for a wide range of gaming platforms, offering a reliable and responsive gaming experience. Its plug-and-play functionality ensures quick setup across various systems.
2.1 ความเข้ากันได้กว้าง
This controller is compatible with Windows operating systems, Vista, PS3 consoles, Android TV boxes, and Tesla systems (Android 4.0 or above with OTG function required for Android devices). No additional drivers are typically needed for basic functionality.

ภาพที่ 2.1: จบแล้วview of controller compatibility and key features.
2.2 คุณสมบัติหลัก
- Dual Vibrators: Embedded motors provide distinct feedback, enhancing game immersion.
- การออกแบบตามหลักสรีรศาสตร์: Asymmetrical joystick layout for comfortable thumb positioning during extended play.
- Hall Trigger Buttons: Provides precise and durable trigger input.
- ฟังก์ชั่นเทอร์โบ: Customize any button for rapid-fire input.
- การเชื่อมต่อแบบมีสาย: 2-meter (6.5 feet) USB cable for stable, lag-free gaming.
Video 2.1: A brief demonstration of the Pink PC Game Controller's design and features.
3. คำแนะนำในการตั้งค่า
3.1 การเชื่อมต่อคอนโทรลเลอร์
- Locate an available USB port on your PC, PS3, Android TV Box, or Tesla system.
- Plug the USB connector of the DYONDER Wired PC Controller into the USB port.
- ระบบจะตรวจจับและติดตั้งไดรเวอร์ที่จำเป็นโดยอัตโนมัติ กระบวนการนี้อาจใช้เวลาสักครู่
- เมื่อการติดตั้งเสร็จสมบูรณ์ ตัวควบคุมก็พร้อมใช้งานได้ทันที
บันทึก: For Android TV Boxes or Tesla systems, ensure the device supports OTG (On-The-Go) functionality for USB peripheral connection.
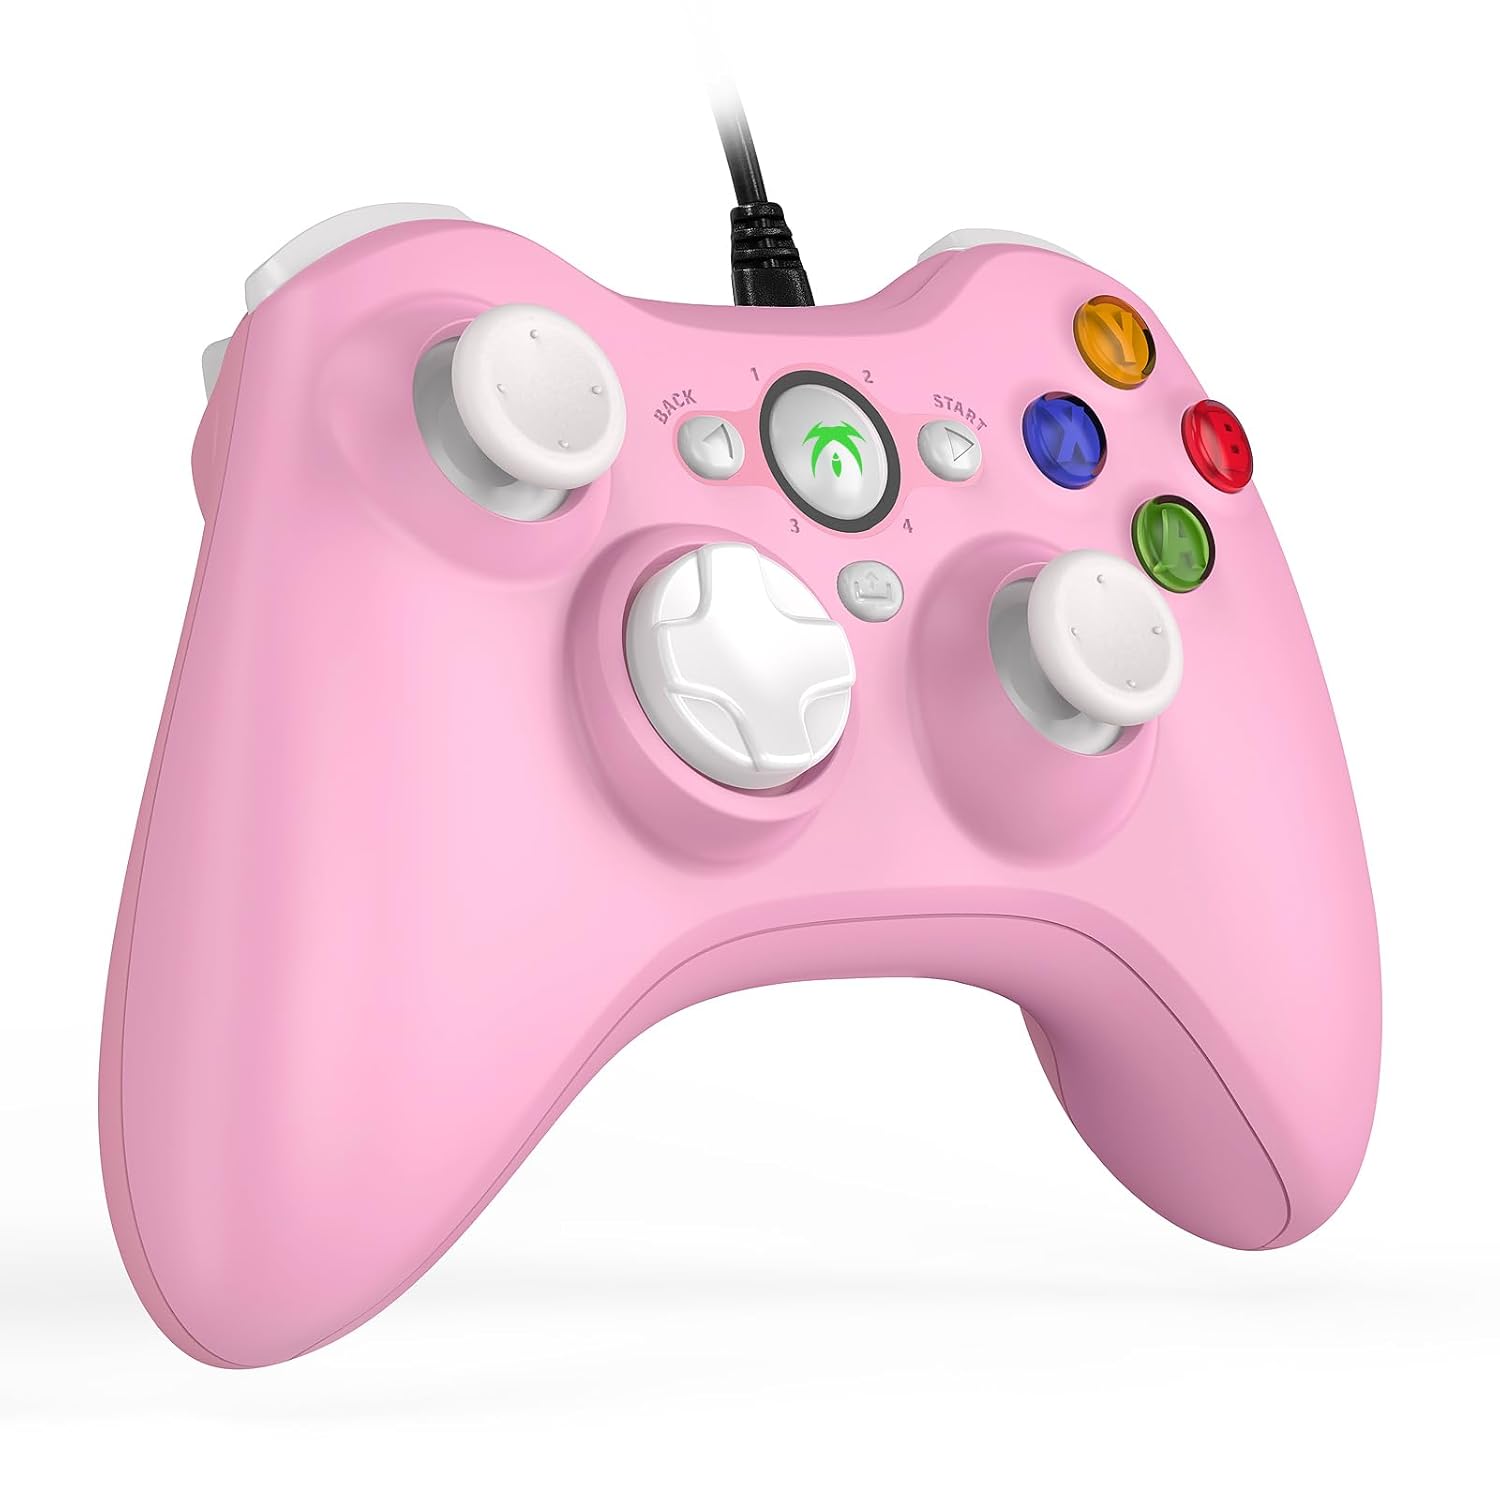
Image 3.1: The DYONDER Wired PC Controller with its USB cable.
4. คู่มือการใช้งาน
4.1 เค้าโครงปุ่ม
The controller features a standard layout including two analog sticks, a D-pad, action buttons (A, B, X, Y), shoulder buttons (LB, RB), and triggers (LT, RT), along with Start, Back, and Guide buttons.

ภาพที่ 4.1: ด้านหน้า view of the controller highlighting button placement.
4.2 การใช้ฟังก์ชันเทอร์โบ
The Turbo function allows for rapid, repeated input of a button press without continuous manual pressing. To activate:
- กดปุ่มค้างไว้ เทอร์โบ ปุ่ม.
- While holding Turbo, press the desired action button (e.g., A, B, X, Y, LB, RB, LT, RT) you wish to set for rapid fire.
- Release both buttons. The selected action button will now activate its Turbo function.
To deactivate the Turbo function for a specific button, repeat the steps above.

Image 4.2: Location of the Turbo button.
4.3 การตอบรับการสั่นสะเทือนแบบคู่
The controller features dual vibration motors that provide tactile feedback during gameplay. This enhances realism by simulating in-game events such as impacts, explosions, or engine rumble. Vibration intensity is typically controlled by the game itself.

Image 4.3: Illustration of the dual vibration mechanism.
4.4 Hall Trigger Buttons
The Hall Trigger buttons utilize magnetic sensors for input, offering greater precision and durability compared to traditional mechanical triggers. This results in smoother and more accurate control, especially in racing or shooting games.

Image 4.4: Detail of a Hall Trigger button.

Image 4.5: Hall Trigger vs. standard trigger comparison.
5. การบำรุงรักษา
5.1 การทำความสะอาด
- Regularly wipe the controller with a soft, dry cloth to remove dust and grime.
- สำหรับสิ่งสกปรกฝังแน่น ให้เช็ดออกเล็กน้อยampชุบผ้าด้วยน้ำหรือน้ำยาทำความสะอาดอ่อนๆ ที่ไม่กัดกร่อน หลีกเลี่ยงความชื้นที่มากเกินไป
- ห้ามใช้สารเคมีรุนแรง ตัวทำละลาย หรือวัสดุที่มีฤทธิ์กัดกร่อน เนื่องจากอาจทำให้พื้นผิวของตัวควบคุมเสียหายได้
5.2 พื้นที่จัดเก็บ
- เก็บตัวควบคุมไว้ในที่แห้งและเย็น ห่างจากแสงแดดโดยตรงและอุณหภูมิที่สูงหรือต่ำมาก
- Avoid wrapping the cable too tightly around the controller to prevent damage to the wire or connection points.
6 การแก้ไขปัญหา
If you encounter issues with your DYONDER Wired PC Controller, please refer to the following common solutions:
6.1 ตัวควบคุมไม่รู้จัก
- ตรวจสอบการเชื่อมต่อ USB: Ensure the USB cable is securely plugged into both the controller and the device. Try a different USB port.
- รีสตาร์ทอุปกรณ์: Sometimes, a simple restart of your PC, console, or TV box can resolve connection issues.
- ทดสอบบนอุปกรณ์อื่น: If possible, test the controller on another compatible device to determine if the issue is with the controller or the original device.
- อัปเดตไดรเวอร์: For PC, ensure your operating system's USB drivers are up to date. While typically plug-and-play, system updates can sometimes affect peripheral recognition.
6.2 ปุ่มหรือจอยสติ๊กไม่ตอบสนอง
- ตรวจสอบการตั้งค่าเกม: Verify that the game you are playing supports controllers and that the input settings are correctly configured.
- Recalibrate (PC): On Windows, you can recalibrate game controllers through the 'Set up USB game controllers' option in the Control Panel.
- ตรวจสอบความเสียหายทางกายภาพ: Check for any visible damage or debris obstructing the buttons or joysticks.
6.3 ระบบสั่นไม่ทำงาน
- การสนับสนุนเกม: ยืนยันว่าเกมที่คุณกำลังเล่นรองรับการตอบสนองการสั่นสะเทือน
- การตั้งค่าในเกม: Check the game's options menu to ensure vibration is enabled.
- การตั้งค่าระบบ: On some platforms, vibration can be disabled in system-level controller settings.
7. ข้อมูลจำเพาะ
| แบบอย่าง | B0CNSXM48W |
| ยี่ห้อ | ไดอันเดอร์ |
| การเชื่อมต่อ | สาย USB |
| ความยาวสายเคเบิล | 2 เมตร (6.5 ฟุต) |
| ความเข้ากันได้ | Windows, Vista, PS3, Android TV Box (Android 4.0+ with OTG), Tesla |
| คุณสมบัติ | Dual Vibration, Hall Trigger Buttons, Turbo Function, Ergonomic Design |
| น้ำหนักสินค้า | 8.8 ออนซ์ |
| ขนาดแพ็คเกจ | 6.5 x 5.04 x 2.83 นิ้ว |
8. การรับประกันและการสนับสนุน
8.1 ข้อมูลการรับประกัน
DYONDER products are manufactured with quality and care. For specific warranty details regarding your controller, please refer to the warranty card included with your purchase or visit the official DYONDER webไซต์นี้ โปรดเก็บหลักฐานการซื้อไว้เพื่อใช้ยืนยันการรับประกัน
8.2 การสนับสนุนลูกค้า
If you require further assistance, have questions, or encounter issues not covered in this manual, please contact DYONDER customer support. Contact information can typically be found on the product packaging, the official DYONDER webไซต์หรือผ่านผู้ค้าปลีกของคุณ
เรามุ่งมั่นที่จะมอบบริการและการสนับสนุนที่เป็นเลิศสำหรับผลิตภัณฑ์ของเรา
