1. บทนำ
ขอบคุณสำหรับการซื้อasing the Zenwire A10 Mini Portable Projector. This device is designed to provide a versatile and convenient projection experience, allowing you to display content from various sources, including smartphones, tablets, and computers. Please read this manual carefully before using the projector to ensure proper operation and to maximize its lifespan.
2. คำแนะนำด้านความปลอดภัยที่สำคัญ
- อย่ามองตรงเข้าไปในเลนส์โปรเจ็กเตอร์เมื่อลamp อยู่บนแล้ว
- ตรวจสอบให้แน่ใจว่ามีการระบายอากาศที่เหมาะสมรอบๆ โปรเจ็กเตอร์เพื่อป้องกันความร้อนสูงเกินไป อย่าปิดกั้นช่องระบายอากาศ
- ใช้เฉพาะอะแดปเตอร์ไฟฟ้าที่มาพร้อมกับโปรเจ็กเตอร์เท่านั้น
- ควรเก็บโปรเจคเตอร์ให้ห่างจากน้ำ ความชื้น และวัสดุที่ติดไฟได้ง่าย
- อย่าพยายามถอดประกอบหรือซ่อมแซมโปรเจ็กเตอร์ด้วยตนเอง โปรดติดต่อเจ้าหน้าที่บริการที่มีคุณสมบัติเหมาะสมเพื่อขอความช่วยเหลือ
- วางโปรเจ็กเตอร์บนพื้นผิวที่ได้ระดับและมั่นคง
- ถอดปลั๊กโปรเจ็กเตอร์ในระหว่างที่มีพายุฝนฟ้าคะนองหรือเมื่อไม่ได้ใช้งานเป็นเวลานาน
3. เนื้อหาบรรจุภัณฑ์
กรุณาตรวจสอบสิ่งของภายในกล่องเมื่อแกะกล่อง หากมีสินค้าใดสูญหายหรือเสียหาย โปรดติดต่อตัวแทนจำหน่ายของคุณ
- Zenwire A10 Mini Portable Projector
- รีโมทคอนโทรล
- อะแดปเตอร์แปลงไฟ
- คู่มือการใช้งาน
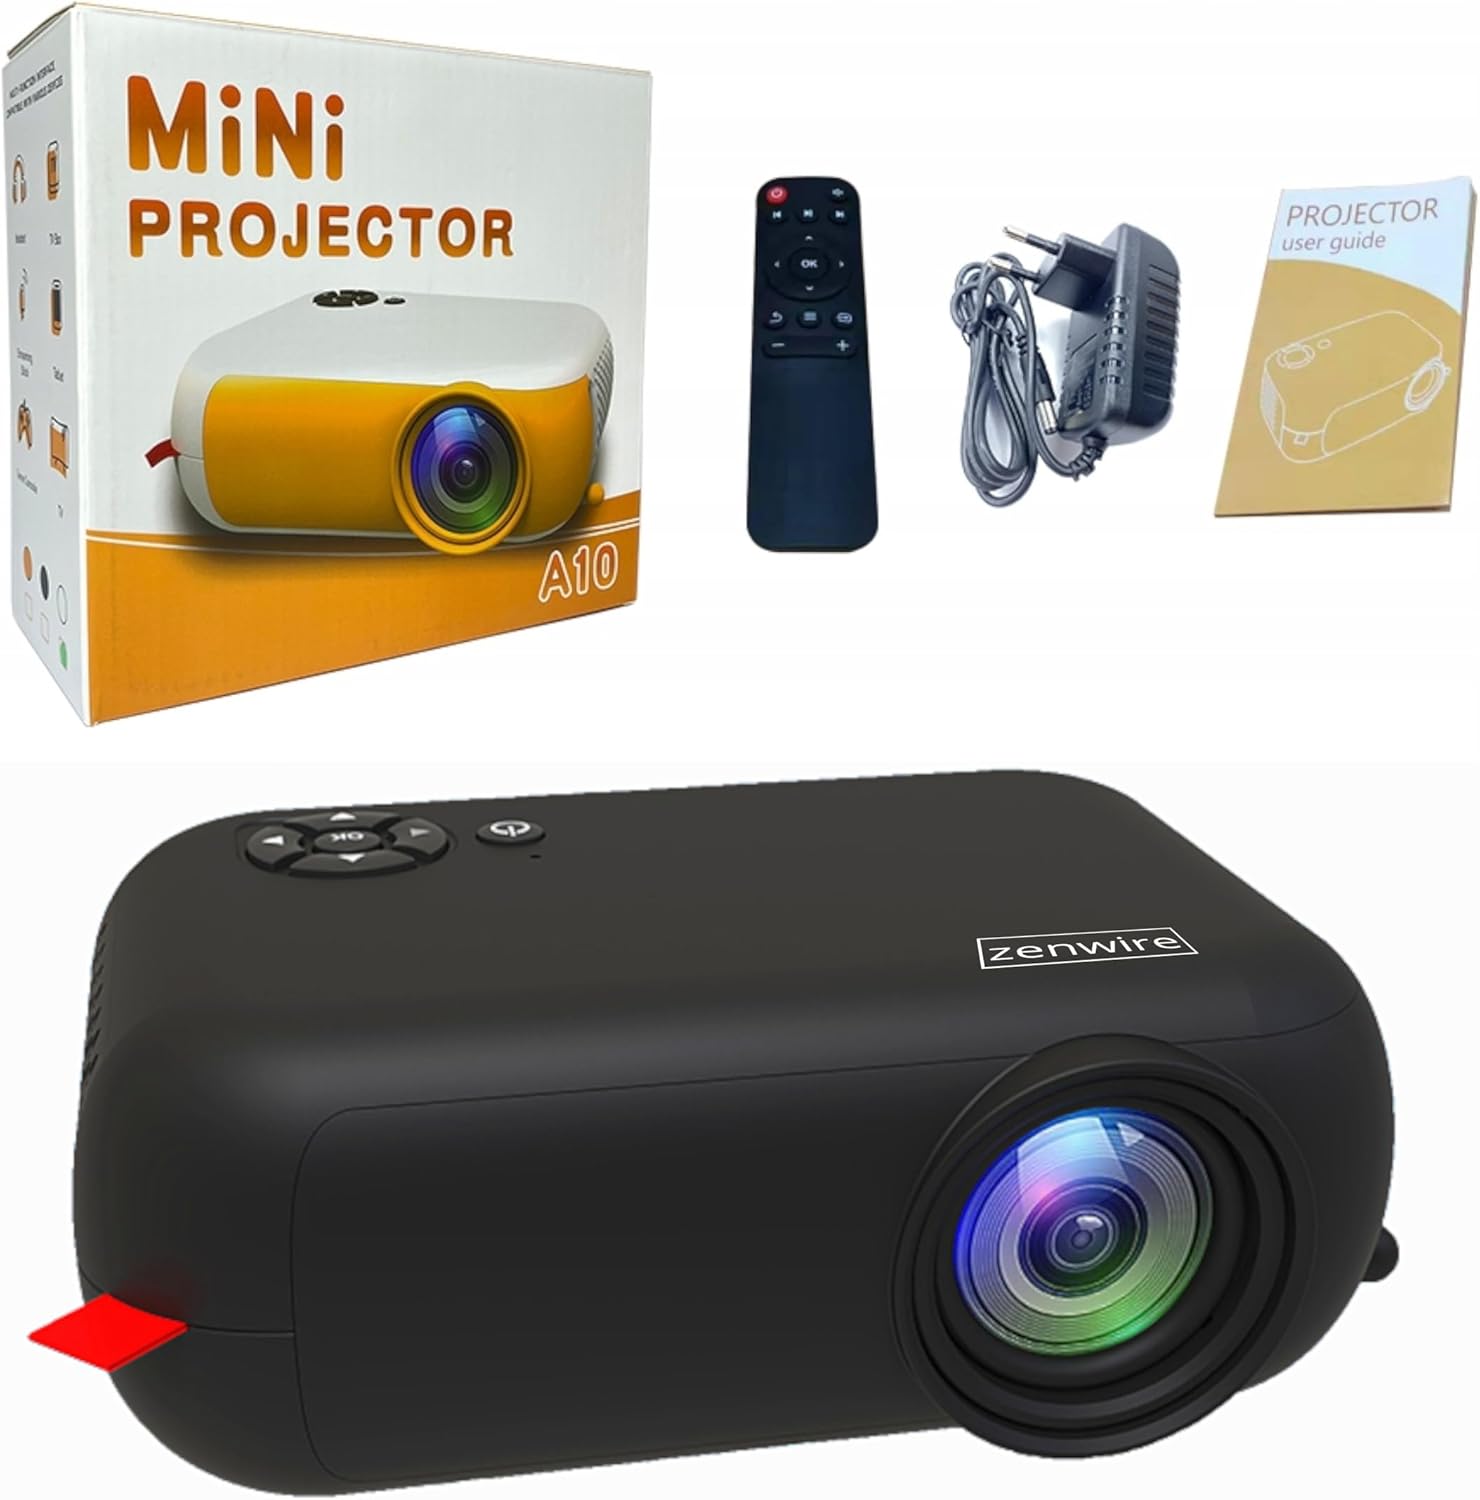
Image: Contents of the Zenwire A10 Mini Projector package, including the projector, remote control, power adapter, and user manual.
4. สินค้าหมดview
4.1 Projector Dimensions and Design
The Zenwire A10 is designed for portability, featuring a compact and lightweight form factor. Its dimensions are approximately 14cm x 10cm x 5.5cm, making it easy to carry and set up in various locations.

Image: The Zenwire A10 Mini Projector held in a hand, illustrating its compact size and portability.
4.2 พอร์ตและปุ่มควบคุม
The projector features a range of input and output ports for versatile connectivity, along with intuitive controls.

Image: Rear panel of the Zenwire A10 Mini Projector, showing the 5V-IN DC power input, IR receiver, USB port, 3.5mm audio jack, HDMI port, and SD card slot.
- 5V-IN DC: ช่องเสียบไฟสำหรับโปรเจ็กเตอร์
- ไออาร์: ตัวรับสัญญาณอินฟราเรดสำหรับรีโมทคอนโทรล
- ยูเอสบี: เชื่อมต่ออุปกรณ์จัดเก็บข้อมูล USB สำหรับการเล่นสื่อ
- แจ็คหูฟัง (3.5 มม.): เชื่อมต่อลำโพงภายนอกหรือหูฟัง
- ช่องต่อ HDMI: Connect devices such as laptops, gaming consoles, or streaming sticks.
- เอสดี: ใส่การ์ด Micro SD เพื่อเล่นสื่อ
- โฟกัสล้อ: Adjust image sharpness (located on the side).
- แผงควบคุม: Buttons on top for navigation and selection.
5. การตั้งค่า
5.1 การเชื่อมต่อสายไฟ
- เชื่อมต่ออะแดปเตอร์แปลงไฟที่ให้มากับ... 5V-IN DC พอร์ตบนโปรเจ็กเตอร์
- เสียบอะแดปเตอร์ไฟฟ้าเข้ากับเต้ารับไฟฟ้าที่ผนัง
- กดปุ่มเปิด/ปิดบนโปรเจ็กเตอร์หรือรีโมทคอนโทรลเพื่อเปิดเครื่อง
5.2 Placement and Focus Adjustment
- Place the projector on a stable surface or mount it according to your preference. Ensure the projector lens is facing the projection surface (wall or screen).
- Adjust the distance between the projector and the screen to achieve your desired image size. The projector supports screen sizes up to 100 inches.
- Rotate the focus wheel (typically located near the lens) until the projected image appears clear and sharp.

Image: Diagram illustrating the Zenwire A10 Mini Projector's capability to project various screen sizes, from 13 inches up to 100 inches, depending on the projection distance.
6. การใช้งานโปรเจ็กเตอร์
6.1 Wireless Connection (Miracast & Airplay)
The Zenwire A10 supports wireless screen mirroring via 2.4/5GHz WiFi, compatible with Android (Miracast) and iOS (Airplay) devices.
- ตรวจสอบให้แน่ใจว่าโปรเจ็กเตอร์และอุปกรณ์พกพาของคุณเชื่อมต่อกับเครือข่าย Wi-Fi เดียวกัน
- บนเมนูหลักของโปรเจ็กเตอร์ ให้เลือกตัวเลือก 'การมิเรอร์หน้าจอ' หรือ 'การแสดงผลแบบไร้สาย'
- สำหรับ Android: On your Android phone/tablet, enable 'Wireless Display', 'Screen Mirroring', 'Smart View', or similar function (names may vary by device). Select the projector from the list of available devices.
- สำหรับ iOS: On your iPhone/iPad, open Control Center and tap 'Screen Mirroring'. Select the projector from the list of available devices.
- The content from your mobile device should now be mirrored on the projector screen.
6.2 การเชื่อมต่อแบบมีสาย
The projector offers multiple wired input options for various devices.

Image: The Zenwire A10 Mini Projector connected to various devices such as smartphones, tablets, laptops, desktop computers, gaming consoles, and media players, highlighting its versatile connectivity.
- ช่องต่อ HDMI: Connect a laptop, PC, gaming console (e.g., Xbox, PlayStation), or streaming device (e.g., Amazon Fire TV Stick, Google Chromecast) using an HDMI cable. Select the HDMI input source on the projector.
- ยูเอสบี: Insert a USB flash drive or external hard drive into the USB port. The projector's media player will allow you to browse and play supported video, audio, and image files.
- ไมโคร SD: Insert a Micro SD card into the SD card slot. Similar to USB, you can access media files through the projector's interface.
- ช่องต่อสัญญาณเสียงออก (แจ็ค 3.5 มม.): Connect external speakers or headphones to enhance the audio experience.
6.3 การนำทางเมนู
Use the remote control or the buttons on the projector to navigate through the on-screen menu. Select input sources, adjust picture settings (brightness, contrast, color), sound settings, and other system preferences.
7. การบำรุงรักษา
- การทำความสะอาดเลนส์: ใช้ผ้าเนื้อนุ่ม ปราศจากขน ที่ออกแบบมาสำหรับเลนส์โดยเฉพาะ เช็ดเลนส์โปรเจคเตอร์เบาๆ หลีกเลี่ยงการใช้สารทำความสะอาดที่มีฤทธิ์กัดกร่อนหรือการออกแรงมากเกินไป
- การกำจัดฝุ่น: Regularly clean the projector's exterior with a soft, dry cloth. Use a small brush or compressed air to clear dust from the ventilation openings to ensure proper airflow.
- พื้นที่จัดเก็บ: เมื่อไม่ใช้งาน ควรเก็บโปรเจคเตอร์ไว้ในที่แห้งและเย็น หลีกเลี่ยงแสงแดดโดยตรงและอุณหภูมิที่สูงหรือต่ำเกินไป ควรใช้บรรจุภัณฑ์เดิมหรือกล่องป้องกันเพื่อป้องกันฝุ่นละอองและความเสียหาย
8 การแก้ไขปัญหา
If you encounter issues with your Zenwire A10 projector, refer to the following common problems and solutions:
| ปัญหา | สาเหตุที่เป็นไปได้ | สารละลาย |
|---|---|---|
| ไม่มีภาพบนหน้าจอ | ไม่ได้ต่อสายไฟ; แหล่งสัญญาณเข้าไม่ถูกต้อง; อุปกรณ์ไม่ได้เชื่อมต่ออย่างถูกต้อง | Check power cable; Select correct input source (HDMI, USB, etc.); Reconnect source device. |
| ภาพเบลอ | ไม่ได้ปรับโฟกัส โปรเจ็กเตอร์อยู่ใกล้/ไกลจากหน้าจอมากเกินไป | Adjust the focus wheel; Adjust projection distance. |
| ไม่มีเสียง | ระดับเสียงเบาเกินไป; ปิดเสียง; ไม่ได้เชื่อมต่อ/เลือกอุปกรณ์เสียงภายนอก | Increase volume; Unmute; Check external speaker connection or select internal speaker. |
| ปัญหาการเชื่อมต่อไร้สาย | Not on same Wi-Fi network; Device not compatible; Interference. | Ensure both devices are on the same Wi-Fi; Verify device compatibility; Try moving closer to Wi-Fi router. |
9. ข้อมูลจำเพาะ
| คุณสมบัติ | รายละเอียด |
|---|---|
| ยี่ห้อ | เซนไวร์ |
| หมายเลขรุ่น | เอ10 |
| ประเภทสินค้า | Compact and Portable Projector |
| ความละเอียดดั้งเดิม | 480x360p ความละเอียด |
| ความละเอียดการแสดงผลสูงสุด | 1920 x 1080 (ฟูลเอชดี) |
| ความสว่าง | 1800lm / 60 ANSI |
| อัตราส่วนคอนทราสต์ | 2000:1 น. |
| ประเภทจอภาพ | นำ |
| เทคโนโลยีการเชื่อมต่อ | Wi-Fi (2.4/5GHz), HDMI, USB, Micro SD, 3.5mm Audio Jack |
| คุณสมบัติไร้สาย | มิราแคสท์, แอร์เพลย์ |
| อุปกรณ์ที่รองรับ | Smartphones (Android, iOS), Tablets, Laptops, PCs, Gaming Consoles |
| การใช้ที่แนะนำ | โฮมซีเนม่า |
| ขนาด (โดยประมาณ) | 14ซม. x 10ซม. x 5.5ซม. |
10. การรับประกันและการสนับสนุน
The Zenwire A10 Mini Portable Projector comes with a standard manufacturer's warranty. For specific warranty terms and conditions, please refer to the documentation provided at the time of purchase or contact your retailer. For technical support or service inquiries, please reach out to Zenwire customer service through their official webไซต์หรือข้อมูลการติดต่อที่ให้มาพร้อมกับผลิตภัณฑ์ของคุณ


