1. บทนำ
This manual provides essential information for the safe and effective operation, maintenance, and troubleshooting of your Kegland Bucket Buddy w/Heating fermenter. Please read this manual thoroughly before using the product to ensure proper functionality and to prevent damage or injury.
The Bucket Buddy w/Heating is a 35L stainless steel fermenter featuring an integrated 36W heating element, designed to maintain optimal fermentation temperatures, particularly in colder environments. Its robust construction and thoughtful design facilitate ease of use and cleaning for home brewing and winemaking applications.
2. ข้อมูลด้านความปลอดภัย
Always adhere to the following safety guidelines to prevent personal injury or damage to the unit:
- ความปลอดภัยทางไฟฟ้า: Ensure the power outlet matches the specified voltage (110-120V). Do not operate the unit with a damaged cord or plug. Keep electrical components dry.
- อย่าแช่: The base of the unit containing the heating element and digital display must ไม่ be immersed in liquid.
- ห้ามต้มให้แห้ง: Never operate the heating element without liquid inside the fermenter. Doing so can cause severe damage to the element and the unit.
- พื้นผิวที่ร้อน: The fermenter and its contents will become hot during operation. Use caution when handling and allow to cool before cleaning or disassembling.
- ความดัน: Ensure the airlock is properly installed and functioning to release fermentation gases. Blocked airlocks can lead to pressure buildup.
- สารทำความสะอาด: Use only food-grade cleaning and sanitizing agents. Follow manufacturer instructions for chemical use and rinsing.
- การจัดวาง: Place the fermenter on a stable, level, heat-resistant surface away from flammable materials.
- เด็กและสัตว์เลี้ยง: เก็บเครื่องให้พ้นมือเด็กและสัตว์เลี้ยง
3. สินค้าหมดview
The Bucket Buddy w/Heating is constructed from high-quality 304-grade stainless steel, ensuring durability and hygiene. Key features include:
- ความจุ: 35 Liters (9.25 Gallons) brimful.
- Integrated Heating Element: Concealed 36W element for precise temperature control.
- จอแสดงผลอุณหภูมิแบบดิจิตอล: Allows for accurate monitoring and setting of fermentation temperature.
- Dome Base: Facilitates easy cleaning and complete drainage.
- Rotating Rack Arm: Ensures every last drop can be drained from the fermenter.
- Stainless Steel Ball Valve: Durable outlet valve with 1/2" thread for easy transfers.
- Airlock and Stopper: Included for fermentation gas release.
ส่วนประกอบไดอะแกรม
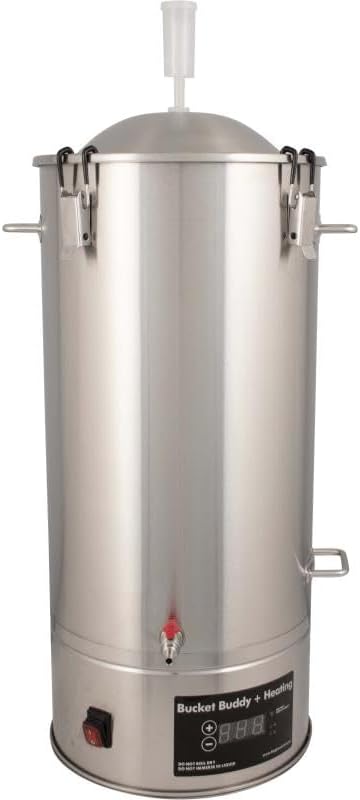
รูปที่ 3.1 : ด้านหน้า view of the Bucket Buddy w/Heating fermenter. This image shows the overall design, including the stainless steel body, lid with airlock, digital temperature display, power switch, and the ball valve spigot.

รูปที่ 3.2: มุม view of the Bucket Buddy w/Heating fermenter. This perspective highlights the side handles and the overall cylindrical shape of the unit.

รูปที่ 3.3: ด้านหลัง view of the Bucket Buddy w/Heating fermenter. This image displays the volume markings on the side of the fermenter, indicating capacity levels.
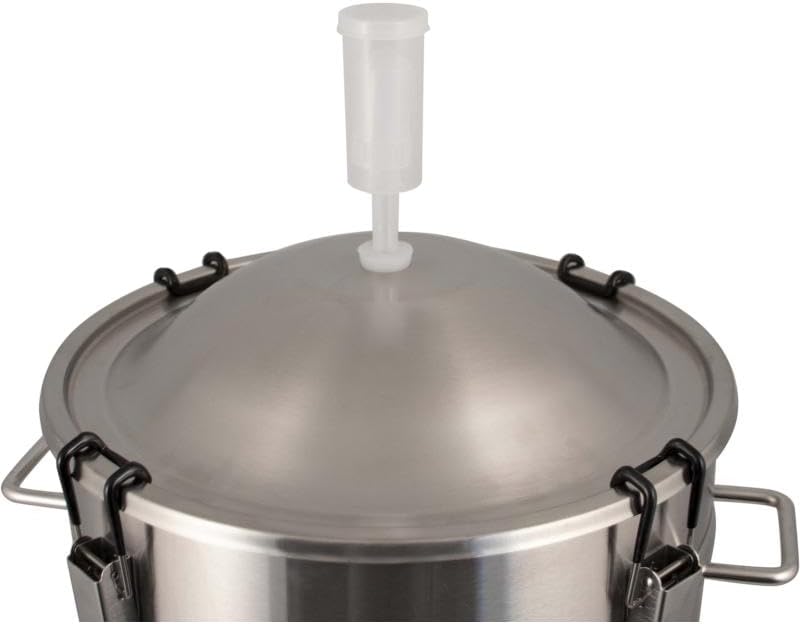
Figure 3.4: Close-up of the fermenter lid with the airlock properly installed in the stopper. This shows the domed lid design and the clamps securing it.

Figure 3.5: Close-up of the fermenter lid showing the hole for the stopper and airlock. This view is without the airlock installed, revealing the opening.
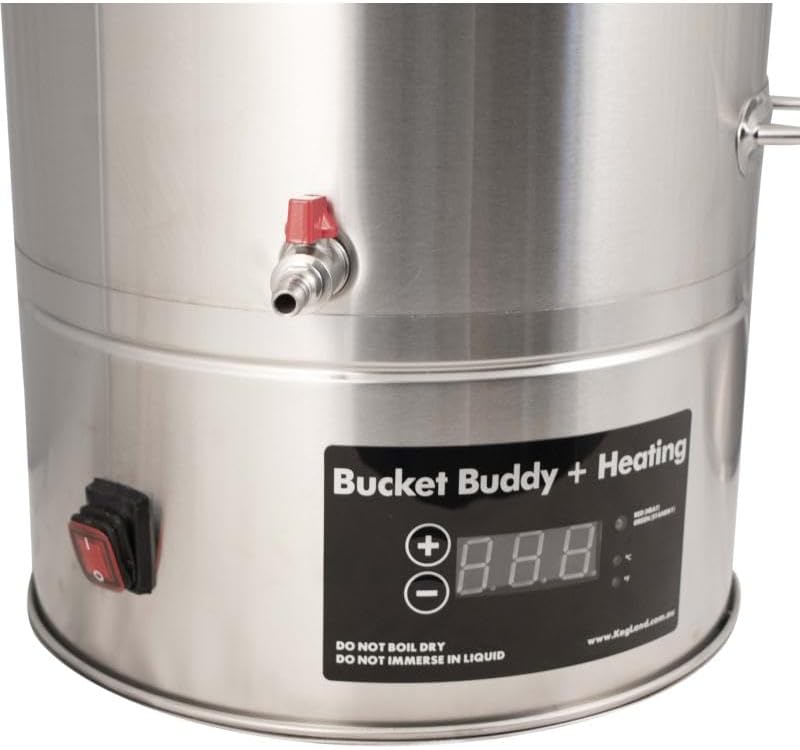
Figure 3.6: Close-up of the digital control panel and power switch located at the base of the fermenter. The display shows temperature readings and control buttons.

Figure 3.7: Close-up of the stainless steel ball valve spigot. This image details the valve mechanism and the barb fitting for tubing attachment.
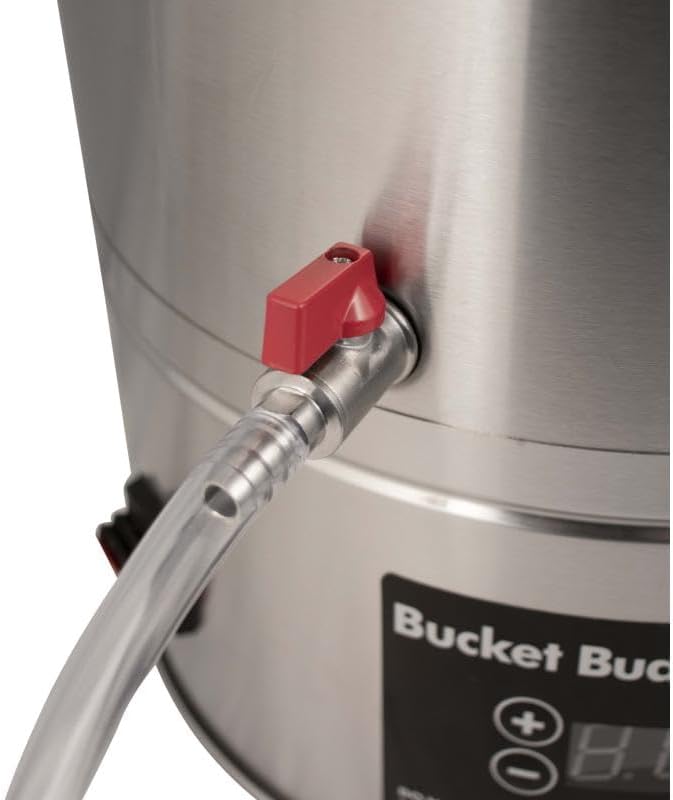
Figure 3.8: Stainless steel ball valve spigot with clear silicone tubing attached. This demonstrates how the tubing connects for liquid transfer.
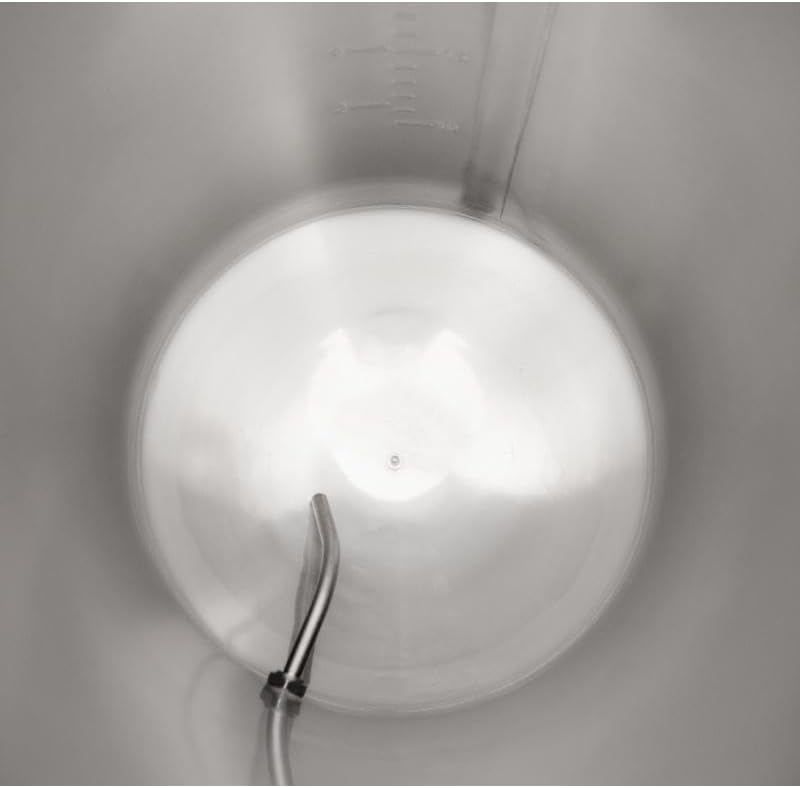
รูปที่ 3.9: ภายใน view of the fermenter. This image clearly shows the domed base for complete drainage and the rotating rack arm positioned near the outlet.
4. การตั้งค่า
- การแกะกล่อง: นำส่วนประกอบทั้งหมดออกจากบรรจุภัณฑ์อย่างระมัดระวัง ตรวจสอบความเสียหายระหว่างการขนส่ง
- การทำความสะอาดเบื้องต้น: Before first use, thoroughly clean and sanitize all parts that will come into contact with your fermentable liquid. Refer to Section 6 for detailed cleaning instructions.
- Airlock Assembly: Insert the rubber stopper firmly into the hole on the lid. Insert the airlock into the stopper. Fill the airlock with a small amount of sanitizing solution or clean water as per airlock instructions.
- Spigot Assembly: Ensure the stainless steel ball valve spigot is securely attached to the fermenter. The rotating rack arm should be positioned inside the fermenter, aligned with the spigot opening.
- การจัดวาง: Position the fermenter on a stable, level surface in your desired fermentation area. Ensure there is adequate space around the unit for air circulation and access.
5. คู่มือการใช้งาน
5.1. Filling the Fermenter
After cleaning and sanitizing, carefully transfer your wort or must into the fermenter. Do not overfill; leave adequate headspace for fermentation activity and krausen formation. Secure the lid using the clamps and ensure the airlock is properly installed.
5.2. การควบคุมอุณหภูมิ
- เปิดเครื่อง: Plug the fermenter into a grounded 110-120V electrical outlet. Flip the red power switch located at the base of the unit to the 'ON' position. The digital display will illuminate.
- ตั้งค่าอุณหภูมิ: Use the '+' and '-' buttons on the digital display to set your desired fermentation temperature. The display will show the current temperature inside the fermenter. The heating element will automatically activate when the internal temperature drops below your set point and deactivate when it reaches or exceeds it.
- การแปลงหน่วยอุณหภูมิ: To switch the temperature display between Celsius (°C) and Fahrenheit (°F), ensure the heating elements are turned off (power switch is OFF), then press and hold both the '+' and '-' buttons simultaneously until the unit changes.
- ประสิทธิภาพการทำความร้อน: The 36W heating element is designed for maintaining temperature and gently raising it. Heating capacity is influenced by ambient temperature and insulation. For optimal performance in very cold environments, consider adding external insulation around the fermenter.
5.3. Liquid Transfer / Draining
- Prepare for Transfer: Ensure your receiving vessel (bottles, kegs, etc.) is clean and sanitized. Attach the provided silicone tubing to the barb fitting on the ball valve spigot.
- Position Rack Arm: The internal rotating rack arm allows for draining liquid from above the sediment. Rotate the arm to the desired position to draw clear liquid.
- วาล์วเปิด: Slowly open the ball valve to begin the transfer. Monitor the flow and close the valve when the transfer is complete or if sediment begins to appear.
6. การบำรุงรักษาและการทำความสะอาด
Regular cleaning and maintenance are crucial for hygiene and the longevity of your fermenter.
- การทำความสะอาดทันที: Clean the fermenter immediately after emptying to prevent residue from drying and becoming difficult to remove.
- ถอดชิ้นส่วน: Disassemble the airlock, stopper, and ball valve for thorough cleaning. The ball valve can be unscrewed from the fermenter for complete access.
- การซักล้าง: Wash all stainless steel components with a soft cloth or sponge and a mild, non-abrasive, food-grade detergent. The dome base and brushed finish are designed for easy cleaning.
- การล้าง: Rinse all parts thoroughly with clean water to remove all detergent residue.
- การฆ่าเชื้อ: Sanitize all components that will contact your fermentable liquid using a food-grade sanitizer according to its instructions. Ensure proper contact time.
- การอบแห้งและการเก็บรักษา: Allow all parts to air dry completely before reassembling or storing. Store the fermenter in a clean, dry place.
- Do Not Immerse Base: Remember, the electrical base of the fermenter must never be immersed in water or other liquids. Clean the exterior of the base with a damp เฉพาะผ้าเท่านั้น
7 การแก้ไขปัญหา
| ปัญหา | สาเหตุที่เป็นไปได้ | สารละลาย |
|---|---|---|
| Fermenter not heating. | Power switch off; not plugged in; temperature set point too low; element failure. | Ensure power switch is ON and unit is plugged in. Increase set temperature above current liquid temperature. If problem persists, contact support. |
| การแสดงอุณหภูมิไม่แม่นยำ | Sensor issue; extreme ambient temperature fluctuations. | Ensure the fermenter is not in direct sunlight or a draft. If readings are consistently off, contact support. |
| Liquid not draining completely. | Rotating rack arm misaligned; sediment buildup. | Ensure the rotating rack arm is correctly positioned. Allow sediment to settle before draining. |
| Airlock not bubbling. | No fermentation activity; lid not sealed; airlock blocked. | Verify fermentation is active (e.g., gravity readings). Check lid clamps and stopper for a tight seal. Ensure airlock is not clogged. |
8. ข้อมูลจำเพาะ
- แบบอย่าง: เคแอล20695
- ความจุ: 35 Liters (9.25 Gallons) Brimful
- วัสดุตัวเครื่อง: สแตนเลสเกรด 304
- วัสดุฝาปิด: สแตนเลสเกรด 304
- องค์ประกอบความร้อน: Integrated 36 Watt Concealed Element
- เล่มที่tage: 110-120โวลต์
- วาล์วทางออก: Stainless Steel Ball Valve with Nylon Bushings, Silicone Seal, and Rotating Rack Arm (1/2" Thread)
- แสดง: Digital Temperature Display (°F / °C selectable)
- มิติภายนอก: 28" H x 15" W (including handles)
- ขนาดภายใน: สูง 22 นิ้ว x กว้าง 11.75 นิ้ว
9. การรับประกันและการสนับสนุน
For warranty information and customer support, please refer to the terms and conditions provided by your retailer or contact Kegland directly through their official webไซต์ เก็บหลักฐานการซื้อของคุณไว้เพื่อใช้ในกรณีเรียกร้องการรับประกัน
For technical assistance or inquiries not covered in this manual, please visit the Kegland webเว็บไซต์หรือติดต่อฝ่ายบริการลูกค้าของพวกเขา


