1. บทนำ
This manual provides detailed instructions for the installation, operation, and maintenance of your BrosTrend AX300 USB WiFi 6 Linux Compatible Adapter. The AX300 is designed to upgrade your Linux devices with WiFi 6 connectivity, offering enhanced wireless performance on the 2.4GHz band.

Image: The BrosTrend AX300 USB WiFi 6 Linux Adapter, a compact black USB dongle.
2. คุณสมบัติหลัก
- WiFi 6 Connectivity for Linux: Upgrades Linux devices with WiFi 6 technologies including OFDMA, Beamforming, and BSS Color for improved performance. Operates exclusively on the 2.4GHz band.
- Broad Linux Compatibility: Supports Kernels up to 6.14 and a wide range of Linux distributions such as Ubuntu (all flavors), Raspberry Pi OS 8-12, Debian 8-13, Linux Mint 18-22, LMDE 1-6, Zorin, MX Linux, Linux Lite, elementary OS, and more.
- Reliable 2.4GHz Performance: Delivers wireless speeds up to 286Mbps on the 2.4GHz band, suitable for browsing and video streaming. 5GHz band is not supported.
- Enhanced WiFi Range: Utilizes Beamforming technology to receive focused signals from compatible routers, providing broader and more consistent coverage.
- การออกแบบที่กะทัดรัดเป็นพิเศษ: Measures approximately 0.83 × 0.59 × 0.28 inches, ensuring it does not obstruct adjacent USB ports and is ideal for portability.
- WPA3 Encryption Support: Provides enhanced security for your wireless connection.
- การสนับสนุนฮาร์ดแวร์: Compatible with x86_64/x86_32 PCs and aarch64/armhf devices like Raspberry Pi 2+.
3. เนื้อหาบรรจุภัณฑ์
The BrosTrend AX300 package includes the following items:
- 1 x BrosTrend AX300 Nano Linux WiFi 6 USB Adapter
- 1 x Instruction Script for Linux OS
4. ข้อกำหนดของระบบและความเข้ากันได้
4.1 ระบบปฏิบัติการที่รองรับ
The BrosTrend AX300 is compatible with various Linux distributions and kernels:
- Linux Kernels up to 6.14
- Ubuntu 16.04 to 24.10 (all flavors including Kubuntu, Lubuntu, Xubuntu, Mate, GNOME, Studio, Budgie, Unity, Cinnamon, Kylin)
- Raspberry Pi OS 8 to 12
- Debian 8 to 13
- Linux Mint 18 to 22
- LMDE 1 to 6
- Zorin OS, MX Linux, Linux Lite, elementary OS, KDE neon, SparkyLinux, Peppermint OS, Q4OS, Parrot OS, Devuan, PureOS, Bodhi Linux

Image: Visual representation of various Linux distribution logos indicating compatibility.
4.2 ระบบปฏิบัติการที่ไม่รองรับ
The following distributions are currently ไม่เข้ากัน with the BrosTrend AX300:
- Arch Linux, Fedora Workstation, Kali Linux, deepin, Pop! OS, antiX, Manjaro, RHEL, CentOS, openSUSE Leap, OpenWrt, Guix, Puppy, Tails, Endless OS, LibreELEC, OSMC, SteamOS.
4.3 ความเข้ากันได้ของฮาร์ดแวร์
The adapter supports:
- x86_64/x86_32 architectures (e.g., standard PCs)
- aarch64/armhf architectures (e.g., Raspberry Pi 2 and newer models)
5. การตั้งค่าและการติดตั้งไดรเวอร์
Proper driver installation is essential for the BrosTrend AX300 to function correctly on your Linux system. Please follow these steps carefully:
- Do not plug in the WiFi adapter yet.
- Ensure an active internet connection: For initial driver installation, your Linux device must have an existing internet connection (e.g., via Ethernet or another working WiFi adapter).
- Locate the Linux Driver Installation Guide: Refer to the instruction script included in your product package for detailed steps on how to download and install the driver.
- Install the Linux driver: Follow the instructions provided in the guide to install the necessary drivers for your specific Linux distribution.
- Plug in the WiFi adapter: Once the driver installation is complete, insert the BrosTrend AX300 USB WiFi adapter into an available USB 2.0 port on your computer or Raspberry Pi.
- ตรวจสอบการเชื่อมต่อ: After plugging in, your system should detect the adapter, and you can then connect to a 2.4GHz WiFi network.
หมายเหตุสำคัญ:
- ⚠ Internet connection is required for the initial driver download.
- ⚠ Install the Linux driver BEFORE plugging in your WiFi adapter.
Video: An introductory video demonstrating the BrosTrend AX300 Linux WiFi 6 USB Adapter and its features.
6. คู่มือการใช้งาน
Once the driver is installed and the adapter is plugged in, your Linux system should recognize the BrosTrend AX300 as a network device.
- เชื่อมต่อกับเครือข่าย WiFi: Use your system's network manager to scan for available WiFi networks.
- Select 2.4GHz Network: Choose a 2.4GHz network from the list. The AX300 operates only on this frequency band.
- กรอกรหัสผ่าน: If prompted, enter the WiFi password for your chosen network.
- ตรวจสอบการเชื่อมต่อ: Confirm that your device is successfully connected to the internet.
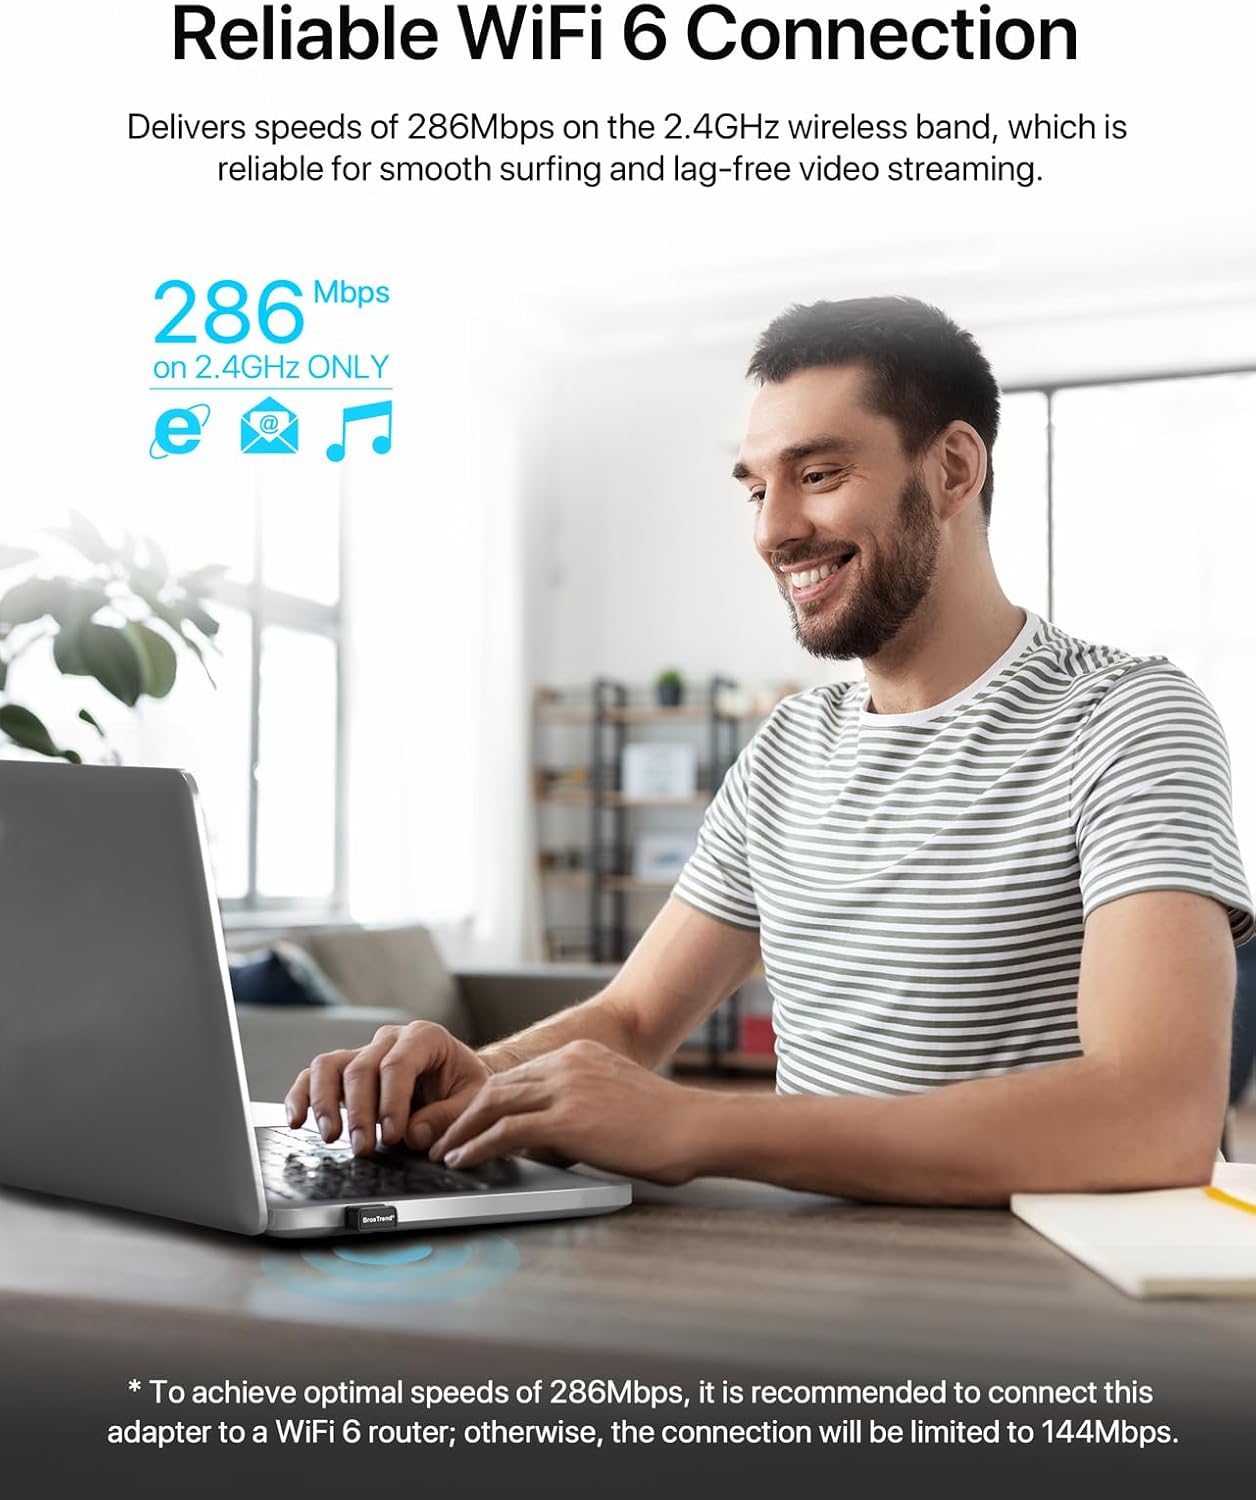
Image: A person using a laptop with the BrosTrend AX300 adapter, illustrating seamless WiFi connection.
6.1 การเพิ่มประสิทธิภาพ
- For optimal speeds of 286Mbps, connect the adapter to a WiFi 6 compatible router. Otherwise, the connection speed may be limited to 144Mbps.
- Position your device within a reasonable range of your WiFi router to benefit from Beamforming technology and maintain a strong signal.

Image: Diagram illustrating how Beamforming technology directs WiFi signals for better range and consistency.
7. การบำรุงรักษา
To ensure the longevity and optimal performance of your BrosTrend AX300 adapter:
- รักษาอะแดปเตอร์ให้สะอาดและปราศจากฝุ่น
- หลีกเลี่ยงการให้อะแดปเตอร์สัมผัสกับอุณหภูมิหรือความชื้นที่สูงเกินไป
- อย่าพยายามถอดประกอบหรือซ่อมแซมอุปกรณ์ด้วยตัวเอง
- Store in a safe place when not in use, especially given its ultra-small size.

Image: The BrosTrend AX300 adapter shown next to an SD card, highlighting its compact dimensions.
8 การแก้ไขปัญหา
8.1 Adapter Not Detected / No WiFi Connection
- การติดตั้งไดร์เวอร์: Ensure the Linux driver has been correctly installed as per Section 5. A common issue is plugging in the adapter before installing the driver.
- Internet Connection for Driver: Remember that an internet connection is required to download the driver initially. If you lack internet access, you may need to download the driver on another device and transfer it via USB.
- พอร์ต USB: ลองเสียบอะแดปเตอร์เข้ากับพอร์ต USB อื่น
- ระบบรีบูต: Sometimes a system reboot after driver installation can resolve detection issues.
- เวอร์ชันเคอร์เนล: Verify your Linux kernel version is supported (up to 6.14).
- ระบบปฏิบัติการที่ไม่รองรับ: Confirm your Linux distribution is listed as supported in Section 4.2.
8.2 ความเร็วในการเชื่อมต่อช้า
- ความเข้ากันได้ของเราเตอร์: For maximum speeds (286Mbps), ensure your router is WiFi 6 compatible. Otherwise, speeds may be capped at 144Mbps.
- ย่านความถี่ 2.4GHz: The AX300 operates only on the 2.4GHz band. Ensure you are connected to a 2.4GHz network and not a 5GHz network (if your router offers both).
- การรบกวน: Reduce interference from other electronic devices (microwaves, cordless phones) and physical obstructions (walls, large furniture).
- ระยะทางจากเราเตอร์: ขยับเข้าไปใกล้เราเตอร์ WiFi มากขึ้นเพื่อเพิ่มความแรงของสัญญาณ
9. ข้อมูลจำเพาะ
| ยี่ห้อ | บราเธอร์เทรนด์ |
| หมายเลขรุ่น | AX300 |
| ฮาร์ดแวร์อินเตอร์เฟซ | ยูเอสบี 2.0 |
| ไร้มาตรฐาน | ไวไฟ 6 (IEEE 802.11ax) |
| ย่านความถี่ | 2.4GHz (5GHz NOT supported) |
| อัตราการถ่ายโอนข้อมูล | Up to 286 Mbps (on 2.4GHz) |
| โปรโตคอลการเชื่อมโยงข้อมูล | IEEE 802.11a |
| ขนาดสินค้า | 0.83 x 0.59 x 0.28 นิ้ว (2.1 x 1.5 x 0.7 ซม.) |
| น้ำหนักสินค้า | 1.06 ออนซ์ (30 กรัม) |
| ความปลอดภัย | WPA3 encryption support |
| ตระกูลระบบปฏิบัติการที่เข้ากันได้ | Linux (specific distributions listed in Section 4) |
Note: The data link protocol listed as IEEE 802.11a in the source data typically refers to 5GHz operation, while this device operates on 2.4GHz and supports WiFi 6 (802.11ax).
10. การรับประกันและการสนับสนุน
BrosTrend products typically come with a manufacturer's warranty. Please refer to the warranty information provided in your product packaging or on the official BrosTrend website for details regarding warranty duration and terms.
For technical support, driver assistance, or any inquiries, please contact BrosTrend customer support. Contact information can usually be found on the BrosTrend webไซต์หรือในเอกสารที่รวมอยู่กับผลิตภัณฑ์ของคุณ
You can also visit the official BrosTrend store on Amazon for more information and support resources: BrosTrend Amazon Store


