การแนะนำ
This manual provides essential information for the safe and proper installation, operation, and maintenance of your Veepeak 30 Amp Flanged Outlet NEMA L14-30R Locking Receptacle. Please read all instructions carefully before installation and use. Retain this manual for future reference.
ข้อมูลด้านความปลอดภัย
คำเตือน: Electrical shock hazard. Improper installation or use can result in serious injury or death. Always follow local electrical codes and consult a qualified electrician if you are unsure about any part of the installation process.
- ควรตัดการเชื่อมต่อไฟฟ้าที่เบรกเกอร์หรือกล่องฟิวส์เสมอ ก่อนที่จะติดตั้งหรือซ่อมบำรุงอุปกรณ์นี้
- Ensure all wiring connections are secure and correct according to the wiring diagram and local codes.
- ห้ามใช้ไฟฟ้าเกินพิกัดที่กำหนดไว้สำหรับอุปกรณ์นั้นๆ
- This product is designed for use with NEMA L14-30P compatible plugs only.
- Keep the weatherproof cap closed when the outlet is not in use to protect against moisture and dust.
เนื้อหาแพ็คเกจ
- 1 x Veepeak 30 Amp NEMA L14-30R Flanged Outlet
- สกรูสำหรับติดตั้ง
ข้อมูลจำเพาะ
| ข้อมูลจำเพาะ | ค่า |
|---|---|
| Ampอีเรจ | 30 Amps |
| เล่มที่tage | ไฟฟ้ากระแสสลับ 125/250 โวลต์ |
| การกำหนดค่า NEMA | L14-30R |
| เสา / สายไฟ | 3 ขั้ว 4 สายกราวด์ |
| โหลดสูงสุด | 7500 วัตต์ |
| ขนาดเส้นลวดที่แนะนำ | 10 AWG/4C |
| วัสดุ | โพลีไวนิลคลอไรด์ (PVC) |
| การรับรอง | ETL Listed (Conforms to UL & CSA standards) |
| ขนาดรูที่ต้องการ | 2.5 นิ้ว |
การติดตั้งและการตั้งค่า
เครื่องมือที่จำเป็น: Screwdriver, wire strippers, drill (for mounting hole), appropriate drill bit.
- เตรียมสถานที่ติดตั้ง: Choose a suitable, dry location for installation. Drill a 2.5-inch diameter hole for the receptacle body. Ensure there is enough space behind the mounting surface for wiring connections.
- การเชื่อมต่อสายไฟ:
Refer to the wiring diagram below and the color-coded terminals on the back of the receptacle. Strip approximately 1/2 inch of insulation from each wire. Insert the wires into the corresponding terminals and tighten the screws securely. Ensure no bare wire strands are exposed outside the terminals.

ภาพ: ด้านหลัง view of the L14-30R outlet, displaying the four color-coded terminals for wiring connections (Green for Ground, White for Neutral, Red and Black for Hot).

Image: NEMA L14-30R configuration diagram. 'X' and 'Y' are hot lines (125V each to neutral, 250V between them), 'W' is neutral, and 'G' is ground.
- Green (G): สายดิน.
- สีขาว (W): ลวดเป็นกลาง
- Black (X): Hot wire (Line 1).
- Red (Y): Hot wire (Line 2).
- ติดตั้งอุปกรณ์รับ: Insert the receptacle body into the drilled hole. Secure the flanged outlet to the mounting surface using the provided screws. Ensure it is flush and stable.
- คืนค่าพลัง: เมื่อการติดตั้งเสร็จสมบูรณ์และตรวจสอบการเชื่อมต่อทั้งหมดแล้ว ให้เปิดไฟที่เบรกเกอร์อีกครั้ง
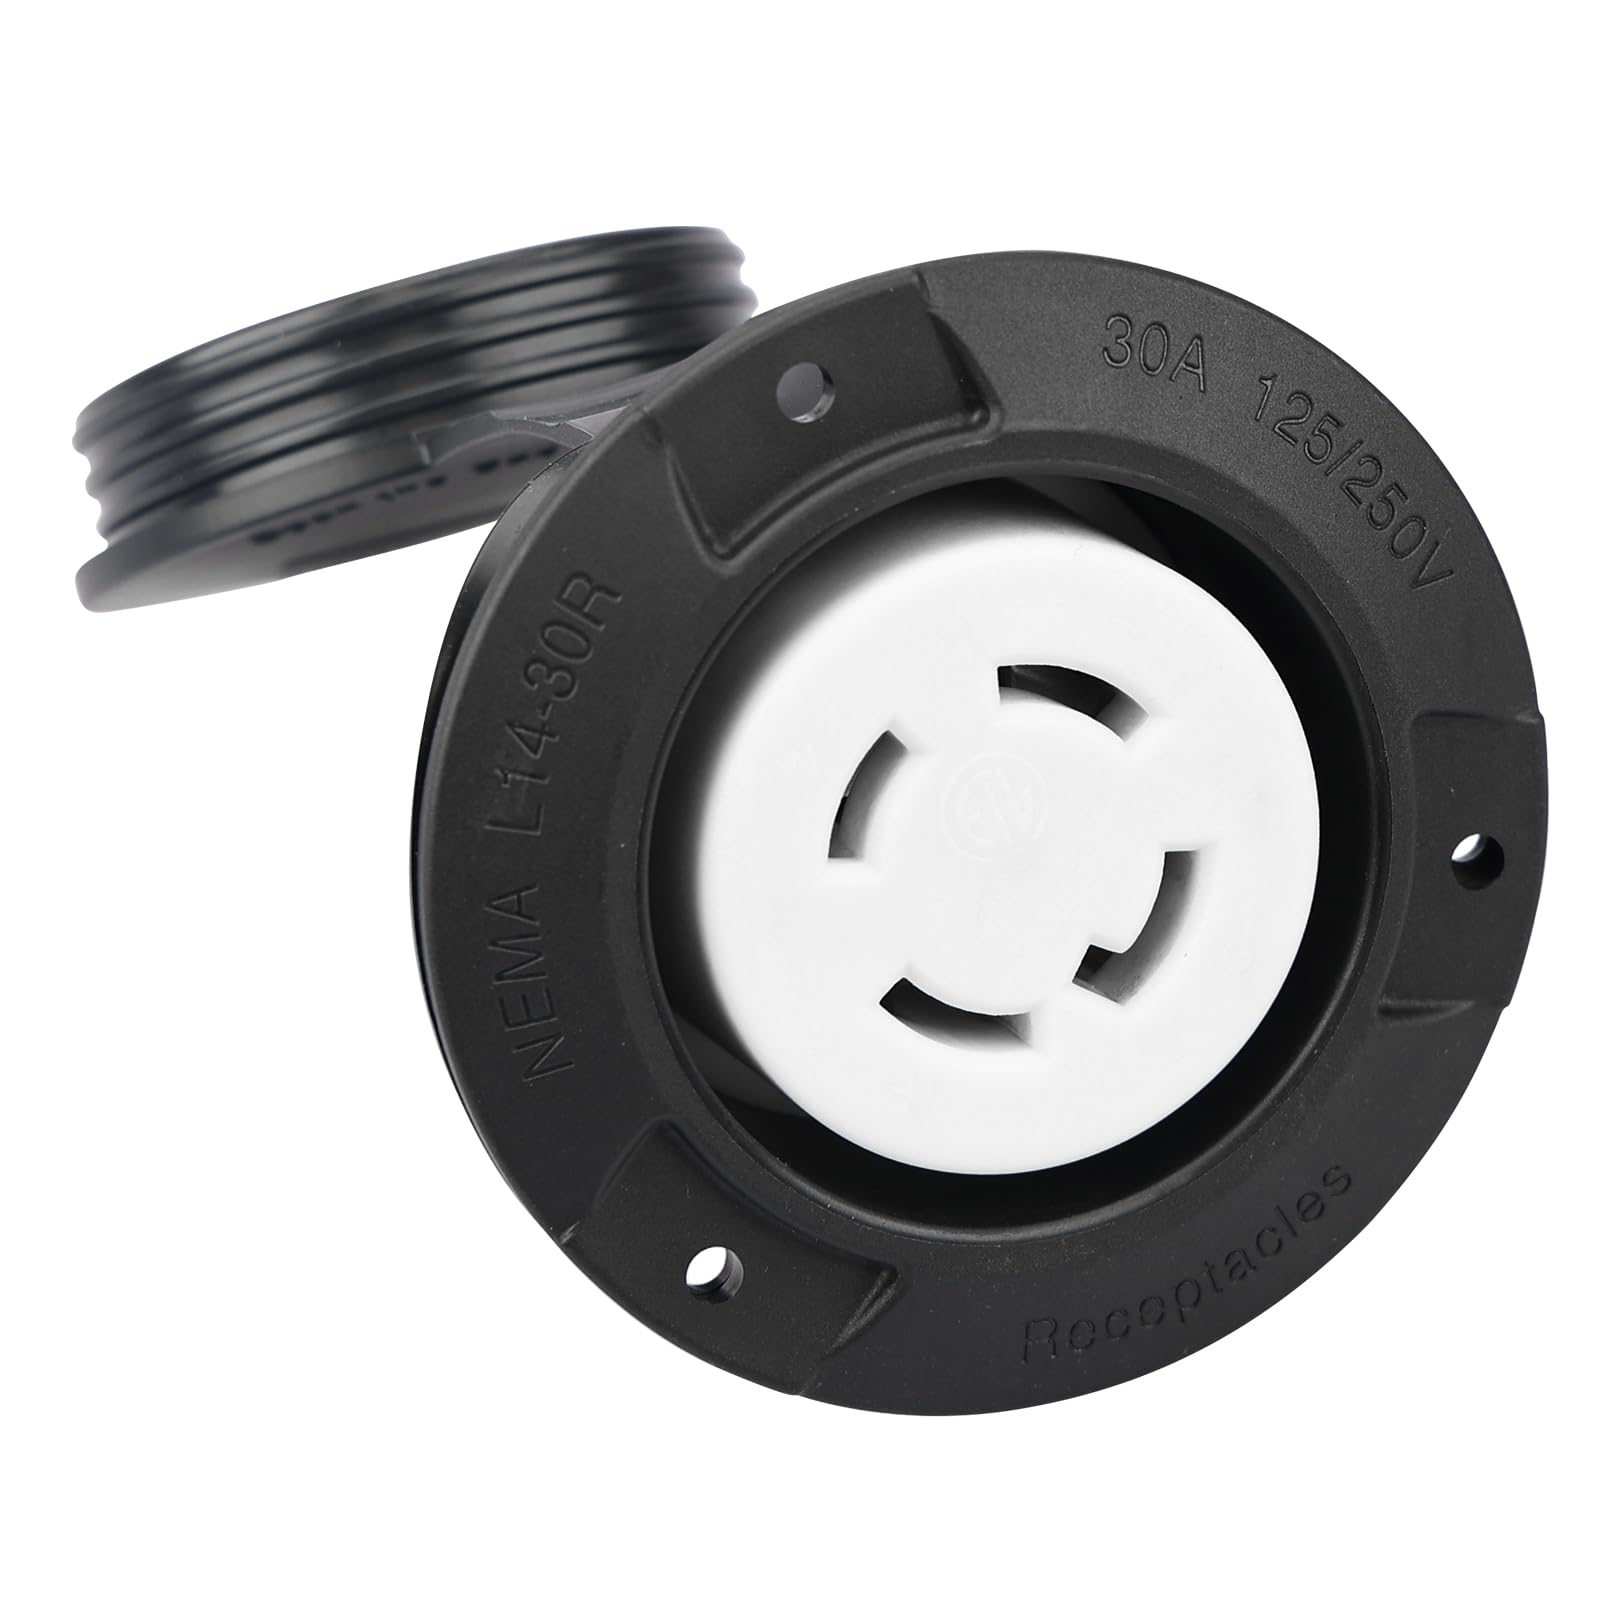
ภาพ: ด้านหน้า view of the Veepeak L14-30R flanged outlet with its weatherproof cap open, revealing the NEMA L14-30R locking receptacle.
คำแนะนำการใช้งาน
- Opening the Cap: Lift the weatherproof cap to access the receptacle.
- Connecting a Plug: Align the NEMA L14-30P plug with the receptacle. Insert the plug and twist clockwise to lock it into place. Ensure the plug is fully seated and locked.
- Disconnecting a Plug: Twist the plug counter-clockwise to unlock, then pull it straight out from the receptacle.
- Closing the Cap: When the outlet is not in use, ensure the weatherproof cap is securely closed over the receptacle to protect it from environmental elements like rain, snow, and dust.

ภาพ: ด้านหน้า view of the Veepeak L14-30R flanged outlet with its weatherproof cap securely closed, providing protection.
การซ่อมบำรุง
การบำรุงรักษาตามปกติจะช่วยให้ได้ประสิทธิภาพและความปลอดภัยที่เหมาะสมที่สุด
- การทำความสะอาด: Periodically clean the exterior of the outlet with a damp cloth. Do not use abrasive cleaners or solvents. Ensure the cap is closed during cleaning.
- การตรวจสอบ: Regularly inspect the outlet for any signs of damage, wear, or corrosion. Check the weatherproof cap for proper sealing.
- ตรวจสอบการเชื่อมต่อ: Annually, or if issues arise, disconnect power and check the wiring connections for tightness. Loose connections can cause overheating.
การแก้ไขปัญหา
- ไม่มีไฟฟ้า:
- ตรวจสอบเบรกเกอร์หรือฟิวส์ของวงจร หากเกิดการตัดวงจร ให้รีเซ็ต
- ตรวจสอบว่าแหล่งพลังงานกำลังทำงานอยู่
- Ensure the plug is fully inserted and locked into the receptacle.
- การเชื่อมต่อหลวม:
- If the plug feels loose or power is intermittent, disconnect power and inspect the wiring connections at the back of the receptacle for tightness.
- Inspect the plug on the appliance for damage.
- Damage to Outlet:
- If the outlet housing or terminals show signs of damage, cracking, or burning, discontinue use immediately and replace the unit.
หากขั้นตอนการแก้ไขปัญหาเบื้องต้นไม่สามารถแก้ปัญหาได้ โปรดปรึกษาช่างไฟฟ้าที่มีคุณสมบัติเหมาะสม
การรับประกันและการสนับสนุน
Veepeak provides a one-year hassle-free replacement warranty for this product. For warranty claims or customer service inquiries, please contact Veepeak customer support through the retailer where the product was purchased or visit the official Veepeak webเว็บไซต์.


