การแนะนำ
This manual provides detailed instructions for the safe and efficient operation, maintenance, and troubleshooting of your Mr. Coffee 4-Shot Steam Espresso, Cappuccino, and Latte Maker, model BVMC-ECM271. Please read all instructions carefully before first use and retain this manual for future reference.

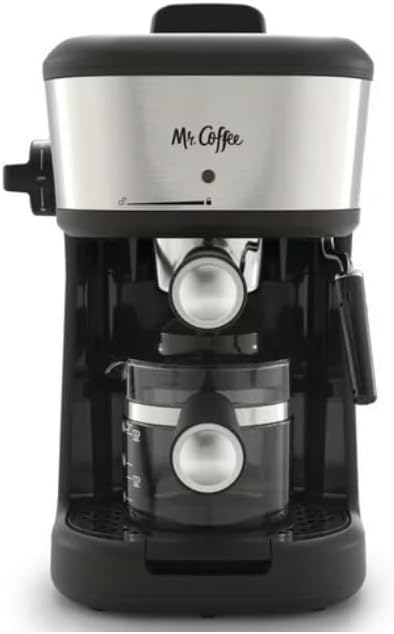
ภาพ: ด้านหน้า view of the Mr. Coffee 4-Shot Steam Espresso, Cappuccino, and Latte Maker. The machine is black with a stainless steel front panel, featuring a portafilter, steam wand, and glass carafe.
ข้อมูลด้านความปลอดภัยที่สำคัญ
ปฏิบัติตามข้อควรระวังด้านความปลอดภัยขั้นพื้นฐานเสมอเมื่อใช้เครื่องใช้ไฟฟ้า เพื่อลดความเสี่ยงต่อการเกิดไฟไหม้ ไฟฟ้าช็อต และ/หรือการบาดเจ็บต่อบุคคล
- อ่านคำแนะนำทั้งหมด
- อย่าสัมผัสพื้นผิวที่ร้อน ใช้ที่จับหรือลูกบิด
- เพื่อป้องกันไฟฟ้าช็อต ห้ามจุ่มสายไฟ ปลั๊ก หรือเครื่องใช้ไฟฟ้าลงในน้ำหรือของเหลวอื่นๆ
- จำเป็นต้องมีการดูแลอย่างใกล้ชิดเมื่อมีเด็กหรือใช้งานเครื่องใช้ไฟฟ้าใดๆ ใกล้เด็ก
- ถอดปลั๊กออกเมื่อไม่ได้ใช้งานและก่อนทำความสะอาด ปล่อยให้เย็นลงก่อนใส่หรือถอดชิ้นส่วน และก่อนทำความสะอาดเครื่องใช้ไฟฟ้า
- ห้ามใช้งานเครื่องใช้ไฟฟ้าที่มีสายไฟหรือปลั๊กชำรุด หรือหลังจากที่เครื่องใช้ไฟฟ้าทำงานผิดปกติ หรือได้รับความเสียหายในลักษณะใดๆ
- การใช้อุปกรณ์เสริมที่ไม่แนะนำโดยผู้ผลิตเครื่องใช้ไฟฟ้าอาจทำให้เกิดไฟไหม้ ไฟฟ้าช็อต หรือบาดเจ็บบุคคลได้
- ห้ามใช้กลางแจ้ง
- อย่าให้สายไฟห้อยออกจากขอบโต๊ะหรือเคาน์เตอร์ หรือสัมผัสพื้นผิวที่ร้อน
- ห้ามวางบนหรือใกล้เตาแก๊สหรือเตาไฟฟ้าที่ร้อน หรือในเตาอบที่อุ่น
- เสียบปลั๊กเข้ากับเครื่องใช้ไฟฟ้าก่อนเสมอ จากนั้นจึงเสียบสายไฟเข้ากับเต้ารับไฟฟ้าที่ผนัง หากต้องการตัดการเชื่อมต่อ ให้ปิดสวิตช์ควบคุมทั้งหมด จากนั้นถอดปลั๊กออกจากเต้ารับไฟฟ้าที่ผนัง
- ห้ามใช้เครื่องใช้ไฟฟ้าเพื่อวัตถุประสงค์อื่นนอกเหนือจากที่กำหนดไว้
- Scalding may occur if the reservoir cap is removed during the brewing cycle.
- เครื่องใช้ไฟฟ้าชิ้นนี้มีไว้สำหรับใช้ในครัวเรือนเท่านั้น
ส่วนประกอบและคุณสมบัติ
Familiarize yourself with the parts of your Mr. Coffee Espresso Maker.
- ฝาอ่างเก็บน้ำ
- ปุ่มควบคุมไอน้ำ
- สวิตช์เปิด/ปิดเครื่อง
- ไฟแสดงสถานะ
- ที่จับ Portafilter
- ตัวกรองพอร์ต
- Glass Carafe with Stay-Cool Handle and Measuring System
- ถาดรองน้ำหยด
- Steam Wand / Frothing Wand
- ช้อนตวง
ภาพ: ด้านหน้า view of the espresso maker highlighting various components such as the portafilter, steam wand, and control knob.
การตั้งค่าและการใช้งานครั้งแรก
การแกะกล่อง
- ถอดวัสดุบรรจุภัณฑ์ออกทั้งหมดอย่างระมัดระวัง
- Wash the portafilter, glass carafe, and measuring scoop in warm, soapy water. Rinse thoroughly and dry.
- Wipe the exterior of the espresso maker with a damp ผ้า.
Priming the Unit (Before First Use)
Before brewing coffee or frothing milk for the first time, it is essential to prime the unit to remove any manufacturing residues and ensure proper operation.
- Fill the glass carafe with cold water up to the 4-shot mark.
- Pour the water from the carafe into the water reservoir, located at the top of the machine. Securely close the water reservoir cap.
- วางเหยือกแก้วเปล่าบนถาดรองน้ำหยด
- Ensure the portafilter is securely locked into place (without coffee).
- Turn the Steam Control Knob to the "Brew" position.
- Plug the espresso maker into a standard electrical outlet.
- Press the Power On/Off switch to the "On" position. The indicator light will illuminate.
- Allow the water to heat and brew through the portafilter into the carafe.
- Once all water has brewed, turn the Power On/Off switch to "Off" and unplug the unit.
- Discard the water and rinse the carafe. The unit is now primed and ready for use.
คำแนะนำการใช้งาน
ชงเอสเพรสโซ่
- เตรียม Portafilter: Using the measuring scoop, add desired amount of finely ground espresso coffee into the portafilter. For a single shot, use one scoop; for a double shot, use two scoops. Gently tamp the coffee grounds evenly.
- ติดตั้ง Portafilter: Align the portafilter with the group head and twist firmly to the right until it is securely locked in place.
- เติมอ่างเก็บน้ำ: Fill the glass carafe with cold water to the desired level (2-shot or 4-shot mark). Pour this water into the water reservoir and close the cap.
- ตำแหน่งกาน้ำ: Place the empty glass carafe on the drip tray directly under the portafilter.
- เริ่มการต้มเบียร์:
- Ensure the Steam Control Knob is in the "Brew" position.
- Plug in the unit and press the Power On/Off switch to "On". The indicator light will illuminate.
- Allow the machine to heat up for approximately 2-3 minutes until the indicator light turns off, signaling it's ready to brew.
- Once the light is off, turn the Steam Control Knob to the "Brew" position. Hot water will begin to flow through the coffee grounds into the carafe.
- When the desired amount of espresso has been brewed, turn the Power On/Off switch to "Off".
- ให้บริการ: ค่อยๆ ยกเหยือกออก แล้วเสิร์ฟเอสเปรสโซสดใหม่ของคุณ
การตีฟองนมสำหรับคาปูชิโนและลาเต้
The integrated frothing wand allows you to create rich, frothy milk for your favorite specialty drinks.
- เตรียมนม: Fill a stainless steel frothing pitcher (not included, but recommended) with cold milk (dairy or non-dairy) up to one-third full.
- ปรับตำแหน่งหัวฉีดไอน้ำ: จุ่มปลายท่อไอน้ำลงไปใต้ผิวนมเล็กน้อย
- Generate Steam:
- Ensure the Power On/Off switch is "On" and the indicator light is off (meaning it's heated).
- Slowly turn the Steam Control Knob to the "Steam" position. Steam will begin to release from the wand.
- Hold the pitcher at a slight angle, moving it up and down gently to incorporate air and create foam.
- Continue until the milk reaches the desired temperature and froth consistency. Be careful not to overheat the milk.
- หยุดการนึ่ง: Turn the Steam Control Knob back to the "Off" position.
- ไม้กายสิทธิ์ทำความสะอาด: เช็ดก้านพ่นไอน้ำทันทีด้วยผ้าamp cloth to prevent milk residue from drying. Briefly turn the steam knob to "Steam" again to clear any milk from inside the wand, then turn it off.
- รวมกัน: เทนมที่ตีจนเป็นฟองแล้วลงบนเอสเปรสโซที่เพิ่งชงเสร็จ เพื่อทำเป็นคาปูชิโนหรือลาเต้
การดูแลรักษา
ทำความสะอาดทุกวัน
- หลังการใช้แต่ละครั้ง:
- ถอดปลั๊กเครื่องและปล่อยให้เย็นสนิท
- Remove the portafilter, discard used coffee grounds, and rinse the portafilter and filter basket under warm water.
- Wash the glass carafe and measuring scoop in warm, soapy water.
- เช็ดภายนอกเครื่องด้วยผ้าชุบน้ำหมาดๆamp ผ้า.
- Clean the drip tray and grid.
- Wipe the steam wand immediately after frothing.
Descaling (Every 2-3 Months or as Needed)
Mineral deposits from water can affect the performance of your espresso maker. Descaling helps maintain optimal function.
- Prepare a descaling solution by mixing equal parts white vinegar and water. Fill the water reservoir with this solution.
- Place the empty carafe on the drip tray.
- Turn the Steam Control Knob to "Brew".
- Plug in the unit and turn the Power On/Off switch to "On".
- Allow half of the solution to brew through the portafilter into the carafe.
- Turn the Power On/Off switch to "Off" and let the unit sit for 15-20 minutes.
- Turn the Power On/Off switch to "On" and brew the remaining solution.
- Once complete, turn the Power On/Off switch to "Off", discard the solution, and rinse the carafe.
- Run two full cycles of fresh, cold water through the machine to rinse thoroughly.
การแก้ไขปัญหา
| ปัญหา | สาเหตุที่เป็นไปได้ | สารละลาย |
|---|---|---|
| No coffee brews. |
|
|
| กาแฟเอสเปรสโซชงช้าเกินไปหรือไม่ชงเลย |
|
|
| Espresso is weak. |
|
|
| Steam wand not producing steam or producing weak steam. |
|
|
ข้อมูลจำเพาะ
| ยี่ห้อ: | มิสเตอร์คอฟฟี่ |
| ชื่อรุ่น : | BVMC-ECM271 |
| ขนาดสินค้า : | ลึก 10 นิ้ว x กว้าง 10 นิ้ว x สูง 12 นิ้ว |
| น้ำหนักสินค้า: | 6.44 ปอนด์ |
| สี: | สีดำ |
| เสร็จสิ้นภายนอก: | สแตนเลส |
| โหมดการทำงาน: | อัตโนมัติเต็มรูปแบบ |
| การใช้งานที่เฉพาะเจาะจง: | คาปูชิโน, เอสเพรสโซ, ลาเต้ |
| ยูพีซี: | 053891150118 |

Image: Diagram showing the dimensions of the Mr. Coffee 4-Shot Steam Espresso, Cappuccino, and Latte Maker, measuring 10 inches deep, 10 inches wide, and 12 inches high.
การรับประกันและการสนับสนุน
For warranty information, product registration, or customer support, please visit the official Mr. Coffee webเว็บไซต์หรือติดต่อฝ่ายบริการลูกค้าของพวกเขา
Official Mr. Coffee Webเว็บไซต์: www.mrcoffee.com
Please have your model number (BVMC-ECM271) and proof of purchase available when contacting support.


