1. บทนำ
This manual provides comprehensive instructions for the installation, operation, maintenance, and troubleshooting of the Vivotek FE9391-EHV-V2 12MP Outdoor Fisheye IR Illumination Camera. Please read this manual thoroughly before using the product to ensure proper setup and functionality. Retain this manual for future reference.
2. สินค้าหมดview
2.1 คุณสมบัติหลัก
- 12 Megapixel Effective Still Resolution for high-quality imaging.
- Fisheye Lens with 1.2mm focal length for wide-area surveillance.
- Integrated IR Illumination for clear night vision up to 20 meters.
- WDR Pro technology for optimal image visibility in high contrast lighting.
- H.265/H.264/MJPEG compression for efficient video streaming.
- IP66-rated weather-resistant enclosure for outdoor use.
- Motion-only alert type for event detection.
- Wi-Fi Connectivity Protocol for flexible network integration.
2.2 เนื้อหาบรรจุภัณฑ์
ตรวจสอบว่ามีรายการทั้งหมดอยู่ในแพ็คเกจ:
- Vivotek FE9391-EHV-V2 Camera Unit
- ชุดอุปกรณ์ติดตั้ง (สกรู, พุก)
- ขั้วต่อกันน้ำ
- คู่มือการติดตั้งแบบด่วน
- Software CD (or download link information)
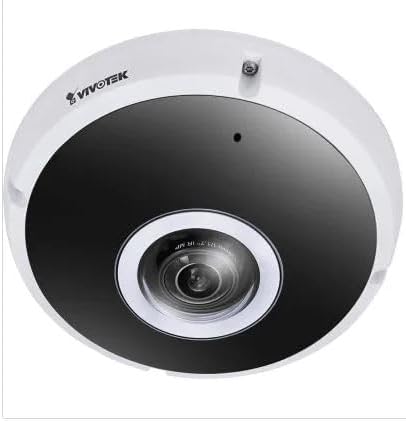
รูปที่ 2.1 : ด้านหน้า view of the Vivotek FE9391-EHV-V2 12MP Outdoor Fisheye IR Illumination Camera, showing the lens and IR illuminators.
3. ข้อมูลด้านความปลอดภัย
- อ่านคำแนะนำทั้งหมดอย่างละเอียดก่อนการติดตั้งและใช้งาน
- Ensure the power source matches the camera's requirements (Corded Electric).
- ห้ามถอดประกอบหรือดัดแปลงกล้องโดยเด็ดขาด การกระทำดังกล่าวจะทำให้การรับประกันเป็นโมฆะ
- Avoid pointing the camera directly at strong light sources for extended periods.
- การติดตั้งควรดำเนินการโดยบุคลากรที่มีคุณสมบัติเหมาะสมและเป็นไปตามข้อกำหนดด้านไฟฟ้าของท้องถิ่น
- ป้องกันสายเคเบิลจากการถูกเหยียบหรือถูกหนีบ
4. การตั้งค่าและการติดตั้ง
4.1 ตำแหน่งการติดตั้ง
Select a suitable outdoor location for mounting. Consider the desired surveillance area, proximity to power, and network connectivity (Wi-Fi or wired Ethernet). The camera is IP66 rated for outdoor use.

Figure 4.1: Dimensional drawing of the Vivotek FE9391-EHV-V2 camera, showing a diameter of 150mm and height of 68.2mm.
4.2 การติดตั้งทางกายภาพ
- เตรียมพื้นผิวการติดตั้ง: Use the provided mounting template (if included) to mark drill holes.
- เจาะรู: เจาะรูนำและใส่พุกยึดผนังหากจำเป็น
- รักษาความปลอดภัยกล้อง: Attach the camera base securely to the mounting surface using the provided screws.
- เชื่อมต่อสายเคเบิล:
- พลัง: ต่อสายไฟเข้ากับแหล่งพลังงานที่เหมาะสม
- เครือข่าย: Connect an Ethernet cable for wired network access, or ensure Wi-Fi signal strength is adequate for wireless connection. Use the waterproof connector for outdoor Ethernet connections.
- ปรับมุมกล้อง: Loosen the adjustment screws (if applicable) to position the fisheye lens for optimal coverage. Tighten screws once adjusted.

Figure 4.2: An Ethernet cable with an RJ45 connector, used for wired network connectivity.
4.3 การกำหนดค่าเครือข่ายเริ่มต้น
After physical installation and power-up, the camera needs to be configured on your network.
- ค้นพบกล้อง: Use the Vivotek IP Utility software (available on the manufacturer's website) to discover the camera on your network.
- กำหนดที่อยู่ IP: Assign a static IP address or ensure it obtains an IP address via DHCP.
- เข้าถึง Web อินเทอร์เฟซ: เปิด web เบราว์เซอร์และป้อนที่อยู่ IP ของกล้องเพื่อเข้าถึง webอินเทอร์เฟซการกำหนดค่าตาม
- เข้าสู่ระบบ: Enter the default username and password (refer to the Quick Installation Guide for defaults). Change the default password immediately for security.
- Wi-Fi Setup (if applicable): Navigate to the network settings and configure the Wi-Fi connection if you are using wireless connectivity.
5. คู่มือการใช้งาน
5.1 สด View
Once configured, you can access the live video feed through the web interface or compatible Vivotek surveillance software.
- Web เบราว์เซอร์: เข้าสู่ระบบกล้อง web interface and navigate to the "Live View" ส่วน.
- Surveillance Software: Add the camera to your Vivotek NVR or VMS (Video Management Software) for centralized monitoring.
- แอปมือถือ: Download the Vivotek mobile app and add your camera for remote viewการไอเอ็นจี

รูปที่ 5.1: อดีตample of surveillance footage from multiple cameras displayed on a tablet device, demonstrating remote monitoring capabilities.

Figure 5.2: A monitor displaying a split-screen view of four camera feeds, labeled CAM1 through CAM4, illustrating a typical surveillance setup.
5.2 การบันทึกและการเก็บรักษา
The camera supports various recording options:
- การจัดเก็บข้อมูลภายในเครื่อง: Insert a microSD card (not included) into the camera's slot for edge recording. Configure recording schedules and event triggers (e.g., motion detection).
- Network Video Recorder (NVR): Connect the camera to a compatible NVR for continuous or event-based recording.
- การเก็บข้อมูลบนคลาวด์: Some Vivotek models or third-party services may offer cloud storage integration. Refer to the camera's web interface for specific options.
5.3 การตรวจจับการเคลื่อนไหวและการแจ้งเตือน
Configure motion detection zones and sensitivity settings in the camera's web interface. When motion is detected, the camera can trigger actions such as:
- Recording video to local storage or NVR.
- ส่งอีเมลแจ้งเตือนพร้อมภาพหน้าจอ
- Uploading footage to an FTP server.
6. การบำรุงรักษา
- การทำความสะอาดเลนส์: Gently wipe the camera lens with a soft, clean cloth. For stubborn dirt, use a lens cleaning solution designed for optical surfaces. Do not use abrasive cleaners.
- การทำความสะอาดที่อยู่อาศัย: ทำความสะอาดตัวกล้องด้วยโฆษณาamp cloth. Avoid using strong detergents or solvents.
- อัพเดตเฟิร์มแวร์: Regularly check the Vivotek website for firmware updates. Updating firmware can improve performance, add features, and enhance security.
- การตรวจสอบสายเคเบิล: Periodically inspect all cables for signs of wear or damage, especially for outdoor installations.
- การตรวจสอบสิ่งแวดล้อม: ตรวจสอบให้แน่ใจว่าสภาพแวดล้อมการทำงานของกล้องอยู่ในช่วงอุณหภูมิและความชื้นที่กำหนดไว้
7 การแก้ไขปัญหา
7.1 ไม่มีสัญญาณวิดีโอ
- ตรวจสอบพลังงาน: Ensure the camera is receiving power. Verify power adapter and cable connections.
- การเชื่อมต่อเครือข่าย: Confirm the Ethernet cable is securely connected or that the Wi-Fi signal is strong and the camera is connected to the correct network.
- ที่อยู่ IP: Verify the camera's IP address and ensure it is not conflicting with another device on the network.
- ไฟร์วอลล์: Check if any firewall settings on your network or computer are blocking access to the camera.
7.2 คุณภาพของภาพไม่ดี
- ทำความสะอาดเลนส์: ตรวจสอบให้แน่ใจว่าเลนส์กล้องสะอาดและปราศจากฝุ่นหรือคราบสกปรก
- สภาพแสง: Adjust camera settings for optimal exposure in varying light conditions. Ensure IR illuminators are functioning at night.
- การตั้งค่าความละเอียด: Verify that the video resolution and quality settings are configured appropriately in the camera's web อินเทอร์เฟซ
- แบนด์วิธเครือข่าย: Insufficient network bandwidth can lead to choppy or low-quality video. Check network load.
7.3 การตรวจจับการเคลื่อนไหวไม่ทำงาน
- เปิดใช้งานการตรวจจับการเคลื่อนไหว: Ensure motion detection is enabled in the camera's settings.
- Sensitivity and Zones: Adjust motion detection sensitivity and define detection zones correctly.
- กำหนดการบันทึก: Verify that the recording schedule is active for motion-triggered events.
8. ข้อมูลจำเพาะ
| คุณสมบัติ | รายละเอียด |
|---|---|
| หมายเลขรุ่น | FE9391-EHV-V2 |
| ความละเอียดของภาพนิ่งที่มีประสิทธิภาพ | 12 MP |
| เลนส์ | 1.2mm Fisheye Lens |
| IR Illumination Range | 20ม. |
| เทคโนโลยี WDR | WDR โปร |
| การบีบอัดวิดีโอ | H.265 / H.264 / MJPEG |
| โปรโตคอลการเชื่อมต่อ | ไวไฟ |
| การให้คะแนนการคุ้มครองระหว่างประเทศ | IP66 |
| แหล่งพลังงาน | สายไฟ |
| ขนาดสินค้า (กว้าง x ยาว x สูง) | 5.9 x 5.9 x 2.68 นิ้ว (150 x 150 x 68.2 มม.) |
| ผู้ผลิต | วิโวเทค อิงค์ |
| การใช้ที่แนะนำ | การรักษาความปลอดภัยภายนอกอาคาร |
9. การรับประกันและการสนับสนุน
For warranty information, technical support, and additional resources, please visit the official Vivotek webเว็บไซต์หรือติดต่อฝ่ายบริการลูกค้าของพวกเขา
- ผู้ผลิต: วิโวเทค อิงค์
- Webเว็บไซต์: www.vivotek.com (อดีตampลิงค์จริงอาจแตกต่างกัน)
- ติดต่อ: อ้างถึง webเว็บไซต์นี้เป็นแหล่งรวบรวมข้อมูลการติดต่อฝ่ายสนับสนุนระดับภูมิภาค
Please have your model number (FE9391-EHV-V2) and purchase date available when contacting support.


