1. บทนำ
Thank you for choosing the COUGAR MX360 RGB Mid Tower Case. This manual provides essential information for the proper installation, operation, and maintenance of your new PC case. The MX360 RGB combines a sleek design with ARGB LED strips on the front panel, offering excellent cooling performance and support for a wide range of components, including up to a 360mm radiator, 315mm graphics cards, and 170mm CPU coolers. Its compact layout and full-length PSU shroud contribute to a clean and organized build.
2. ข้อมูลด้านความปลอดภัย
- ควรตัดการเชื่อมต่อแหล่งจ่ายไฟออกจากเต้ารับที่ผนังทุกครั้งก่อนติดตั้งหรือถอดส่วนประกอบใดๆ
- ควรจับต้องชิ้นส่วนต่างๆ อย่างระมัดระวังเพื่อหลีกเลี่ยงความเสียหายจากไฟฟ้าสถิต พิจารณาใช้สายรัดข้อมือป้องกันไฟฟ้าสถิต
- เก็บชิ้นส่วนเล็กๆ และสกรูให้ห่างจากเด็ก
- ตรวจสอบให้แน่ใจว่ามีการระบายอากาศที่เหมาะสมรอบเคสเพื่อป้องกันความร้อนสูงเกินไป
- ห้ามดัดแปลงเคสหรือส่วนประกอบใดๆ เนื่องจากอาจทำให้การรับประกันเป็นโมฆะและก่อให้เกิดความเสี่ยงด้านความปลอดภัย
3. เนื้อหาบรรจุภัณฑ์
โปรดตรวจสอบว่าแพ็คเกจของคุณมีรายการทั้งหมดต่อไปนี้:
- เคส COUGAR MX360 RGB Mid Tower
- กล่องอุปกรณ์เสริม (บรรจุ สกรู สแตนด์ออฟ สายรัด ฯลฯ)
- คู่มือการใช้งาน (เอกสารนี้)
4. สินค้าหมดview
The COUGAR MX360 RGB case features a minimalist design with integrated ARGB lighting and a tempered glass side panel for showcasing สร้างของคุณ

รูปที่ 4.1: ด้านหน้า view of the COUGAR MX360 RGB case, showing the interior and active RGB lighting.
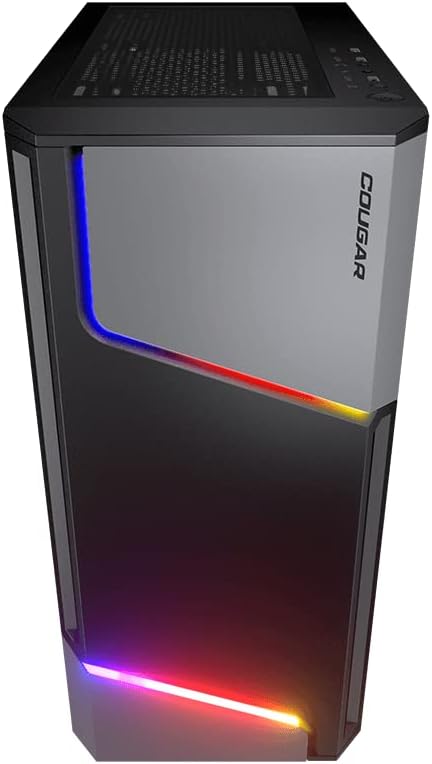
รูปที่ 4.2 : ด้านหน้า view of the COUGAR MX360 RGB case, highlighting the integrated ARGB LED strips.
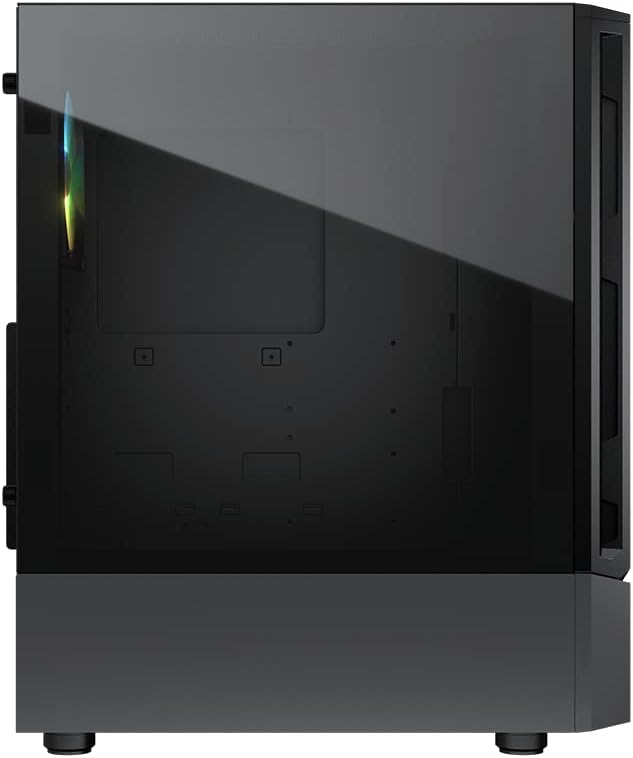
รูปที่ 4.3: ด้านข้าง view of the COUGAR MX360 RGB case, featuring the tempered glass panel.

รูปที่ 4.4: ด้านหน้าทำมุม view of the COUGAR MX360 RGB case, showcasing its design and ARGB elements.
5. การตั้งค่าและการติดตั้ง
Follow these steps to install your components into the COUGAR MX360 RGB case.
5.1 การเตรียมคดี
- วางกล่องบนพื้นผิวเรียบและมั่นคง
- Remove the tempered glass side panel by unscrewing the thumb screws at the rear of the case and carefully sliding the panel off.
- Remove the opposite metal side panel by unscrewing the thumb screws and sliding it off.
5.2 การติดตั้งเมนบอร์ด
- Install the I/O shield (if not pre-installed on your motherboard) into the rear opening of the case.
- Ensure the correct standoffs are installed for your motherboard form factor (ATX, Micro-ATX, Mini-ITX). Adjust or add standoffs as needed.
- วางเมนบอร์ดของคุณลงบนสแตนด์ออฟอย่างระมัดระวัง โดยจัดรูสกรูให้ตรงกัน
- ยึดเมนบอร์ดด้วยสกรูที่ให้มา
5.3 การติดตั้งหน่วยจ่ายไฟ (PSU)
- Locate the PSU shroud at the bottom of the case.
- เลื่อนพาวเวอร์ซัพพลาย (PSU) เข้าไปในช่องที่กำหนดจากด้านหลังของเคส
- ยึดพาวเวอร์ซัพพลายด้วยสกรูจากด้านหลังของเคส
- Route necessary cables through the cutouts in the PSU shroud for cable management.
5.4 การติดตั้งไดรฟ์จัดเก็บข้อมูล
The MX360 RGB supports various storage configurations.
- ฮาร์ดดิสก์ขนาด 3.5 นิ้ว: Install into the drive cage located under the PSU shroud.
- 2.5" SSDs/HDDs: Mount onto the dedicated trays or mounting points behind the motherboard tray.
5.5 การติดตั้งการ์ดจอ (GPU)
- ถอดฝาครอบสล็อต PCIe ที่จำเป็นออกจากด้านหลังของเคส
- ใส่การ์ดกราฟิกของคุณเข้าไปในสล็อต PCIe ที่เหมาะสมบนเมนบอร์ด
- Secure the graphics card with screws. The case supports graphics cards up to 315mm in length.
5.6 การติดตั้งระบบระบายความร้อน (พัดลม/หม้อน้ำ)
The case supports up to six fans and a 360mm water cooling radiator.
- ด้านหน้า: Supports up to 3 x 120mm or 2 x 140mm fans, or a 240/280/360mm radiator.
- สูงสุด: Supports up to 2 x 120mm or 2 x 140mm fans, or a 240/280mm radiator.
- หลัง: รองรับพัดลมขนาด 120 มม. 1 ตัว
Install fans or radiators using the provided screws, ensuring proper airflow direction.
5.7 การเชื่อมต่อแผงด้านหน้า
Connect the front panel cables (USB, Audio, Power, Reset, LED) to their corresponding headers on your motherboard. Refer to your motherboard manual for exact header locations.
5.8 ARGB Lighting Connection
The integrated ARGB LED strips on the front panel connect via a 5V/3Pin ARGB connector. Connect this cable to a compatible 5V/3Pin ARGB header on your motherboard to synchronize lighting effects with your system.
6. การใช้งานเคส
Once all components are installed and connected, replace the side panels. Power on your system using the power button on the top I/O panel. The ARGB lighting will illuminate, controlled by your motherboard's software or a dedicated ARGB controller if you have one installed.
7. การบำรุงรักษา
การบำรุงรักษาตามปกติจะช่วยให้มั่นใจได้ถึงประสิทธิภาพสูงสุดและอายุการใช้งานที่ยาวนานของส่วนประกอบพีซีของคุณ
- ตัวกรองฝุ่น: The MX360 RGB includes removable dust filters (e.g., top, bottom). Periodically remove and clean these filters with compressed air or water (ensure they are completely dry before reinstallation).
- การทำความสะอาดภายใน: Use compressed air to remove dust from internal components like fans, heatsinks, and the motherboard.
- การทำความสะอาดภายนอก: เช็ดพื้นผิวภายนอกด้วยผ้านุ่ม damp ผ้า. หลีกเลี่ยงน้ำยาทำความสะอาดที่มีฤทธิ์กัดกร่อน
8 การแก้ไขปัญหา
หากคุณพบปัญหา โปรดดูขั้นตอนการแก้ไขปัญหาทั่วไปต่อไปนี้:
- ไม่มีไฟฟ้า: Ensure all power cables (24-pin ATX, 8-pin CPU, GPU power) are securely connected. Check the PSU switch is in the 'ON' position. Verify front panel power button connection to the motherboard.
- แสง ARGB ไม่ทำงาน: Confirm the 5V/3Pin ARGB connector is correctly plugged into a compatible motherboard header. Check your motherboard's RGB software for control settings.
- ความร้อนสูงเกินไป: Ensure all case fans are spinning and oriented correctly for optimal airflow. Check for dust buildup on filters and components. Verify CPU cooler and GPU cooler are properly installed.
- การเชื่อมต่อหลวม: Re-seat all components (RAM, GPU, storage drives) and check all power and data cables.
9. ข้อมูลจำเพาะ
| คุณสมบัติ | ข้อมูลจำเพาะ |
|---|---|
| ยี่ห้อ | เสือภูเขา |
| ชื่อรุ่น | MX360 RGB |
| หมายเลขรุ่นสินค้า | CGR-5CC6G-RGB |
| ประเภทเคส | มิดทาวเวอร์ |
| ขนาด (กxยxส) | 14.88 x 8.27 x 18.11 นิ้ว (378 x 210 x 460 มม.) |
| น้ำหนักสินค้า | 10.56 ปอนด์ (4.8 กิโลกรัม) |
| วัสดุ | Tempered Glass, Fine Metal |
| สี | สีดำ |
| การรองรับเมนบอร์ด | มินิ ITX / ไมโคร ATX / ATX |
| แม็กซ์ ความยาวการ์ดจอ | 315 มม. |
| แม็กซ์ ความสูงของตัวทำความเย็นซีพียู | 170 มม. |
| การสนับสนุนแหล่งจ่ายไฟ | มาตรฐาน ATX PS2 |
| วิธีการทำความเย็น | อากาศ / น้ำ |
| ฐานรองหม้อน้ำ | Front: 360mm / 280mm / 240mm / 140mm / 120mm Top: 280mm / 240mm / 140mm / 120mm ด้านหลัง : 120มม. |
| การสนับสนุนแฟนๆ | ด้านหน้า: 3 x 120 มม. / 2 x 140 มม ด้านบน: 2 x 120 มม. / 2 x 140 มม ด้านหลัง: 1 x 120mm |
| ช่องไดรฟ์ | 3.5" HDD: 2 2.5" SSD: 2+2 (converted from 3.5" drive bays) |
| แผง I/O | พอร์ต USB 3.0 จำนวน 2 ช่อง, พอร์ต USB 2.0 จำนวน 1 ช่อง, ไมโครโฟน จำนวน 1 ช่อง, พอร์ตเสียง จำนวน 1 ช่อง, ปุ่ม RGB |
| คุณสมบัติพิเศษ | ARGB LED Strips, Full-length PSU Cover for Cable Hiding and Improved Airflow |
10. การรับประกันและการสนับสนุน
COUGAR products are designed and manufactured to the highest quality standards. For warranty information, please refer to the warranty card included with your product or visit the official COUGAR webไซต์นี้ โปรดเก็บหลักฐานการซื้อไว้เพื่อใช้ยืนยันการรับประกัน
For technical support or further assistance, please visit the official COUGAR webคุณสามารถค้นหาข้อมูลและแหล่งข้อมูลเพิ่มเติมได้ที่เว็บไซต์ หรือติดต่อฝ่ายบริการลูกค้าของพวกเขา COUGAR Store on Amazon.


