1. บทนำ
The AVer A30 All-in-One Camera is a versatile device designed for various communication and presentation needs. It integrates a 4K Ultra HD camera, a high-fidelity microphone, and a speaker system into a single unit. This manual provides detailed instructions for setting up, operating, and maintaining your AVer A30 camera.
2. สินค้าหมดview
2.1 คุณสมบัติหลัก
- กล้อง 4K Ultra HD: Supports high-resolution video capture and streaming.
- ระบบเสียงแบบครบวงจร: Premium onboard microphone and speaker for clear communication, with echo cancellation and background noise reduction.
- การออกแบบที่ยืดหยุ่น: Adjustable camera arm for document capture or face-to-face interaction.
- ซูมดิจิตอล 23 เท่า: ช่วยให้สามารถระบุรายละเอียดได้ viewไอเอ็นจีของวัตถุ
- ความเข้ากันได้ในวงกว้าง: Works with major conferencing platforms (Zoom, Google Hangouts, Microsoft Teams, Skype, OBS, SeeSaw) and operating systems (PC, Mac, Chromebooks).
- USB/HDMI Connectivity: ติดตั้งง่าย เพียงเสียบปลั๊กก็ใช้งานได้เลย
- Automatic Image Rotation: Ensures correct orientation regardless of camera angle.
2.2 ส่วนประกอบ
Familiarize yourself with the main components of your AVer A30 camera:
- หัวกล้อง: Contains the 4K lens.
- แขนปรับได้: Allows positioning of the camera head.
- Main Unit (Base): Houses the speaker, microphone, and control buttons.
- ปุ่มควบคุม: Located on the side of the main unit for various functions.
- พอร์ตการเชื่อมต่อ: USB and HDMI ports on the rear of the main unit.

รูปที่ 2.2.1 : ด้านหน้า view of the AVer A30 camera with the camera head extended upwards.
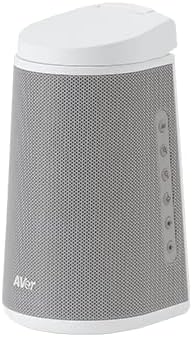
รูปที่ 2.2.2: ด้านข้าง view of the AVer A30 camera, highlighting the control buttons on the right side of the speaker grille.

รูปที่ 2.2.3: ด้านหลัง view of the AVer A30 camera, displaying the USB and HDMI connectivity ports.
3. การตั้งค่า
3.1 การแกะและการจัดวาง
- Carefully remove the AVer A30 camera from its packaging.
- Place the camera on a stable, flat surface. Ensure there is adequate space for the adjustable arm to extend and rotate.
3.2 การเชื่อมต่อกล้อง
The AVer A30 offers both USB and HDMI connectivity options.
3.2.1 USB Connection (for PC/Mac/Chromebook and Video Conferencing)
- Connect one end of the provided USB cable to the USB port on the rear of the AVer A30.
- เชื่อมต่อปลายอีกด้านหนึ่งของสาย USB เข้ากับพอร์ต USB ที่ว่างอยู่บนคอมพิวเตอร์ของคุณ
- The camera will be automatically detected by your operating system. No additional drivers are typically required.
- Open your preferred video conferencing software (e.g., Zoom, Microsoft Teams) or document camera application and select the AVer A30 as your camera, microphone, and speaker device.
3.2.2 HDMI Connection (for Display Output)
- Connect one end of an HDMI cable (not included) to the HDMI OUT port on the rear of the AVer A30.
- Connect the other end of the HDMI cable to an HDMI input port on your display device (monitor, projector, TV).
- The camera's output will be displayed directly on the connected screen. This mode is ideal for live presentations without a computer.
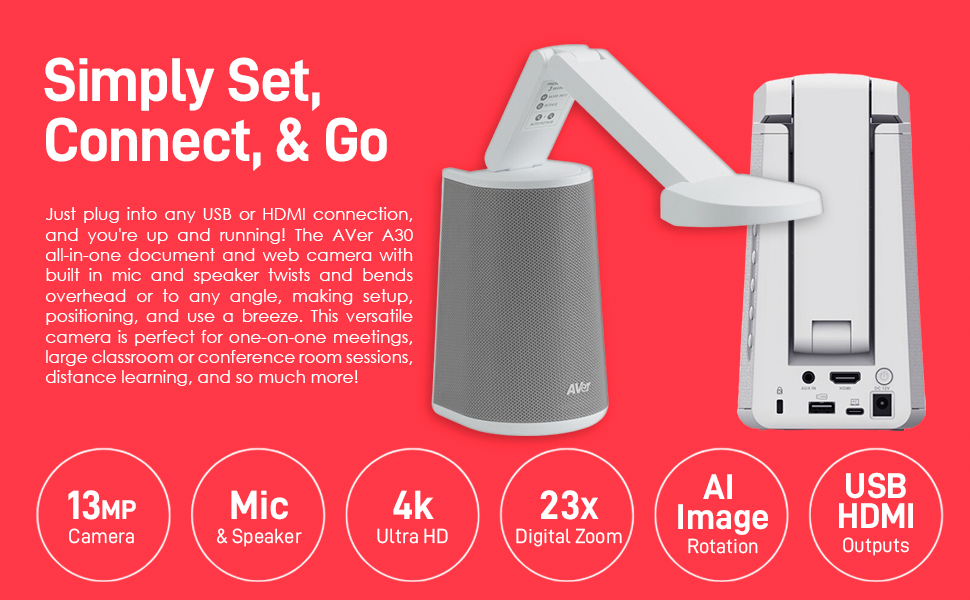
Figure 3.2.1: Illustration of connecting the AVer A30 via USB and HDMI ports to a computer and display.
4. คู่มือการใช้งาน
4.1 Adjusting the Camera Arm
The AVer A30 features a multi-jointed arm that allows for flexible positioning of the camera head. You can twist and bend the arm to achieve various angles for different applications:
- Document Camera Mode: Position the camera head directly above a document or object on your desk.
- Webโหมดแคม: Angle the camera head towards yourself for video conferencing.

Figure 4.1.1: The AVer A30 with its arm extended horizontally, suitable for capturing documents.
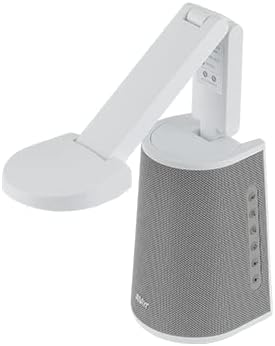
Figure 4.1.2: The AVer A30 with its arm angled, demonstrating flexibility for various uses.
4.2 Using as a Document Camera
- Position the camera arm so the camera head is directly above the document or object you wish to display.
- Ensure adequate lighting for clear image capture.
- If connected via USB, open your document camera software or video conferencing application and select the AVer A30.
- If connected via HDMI, the image will appear directly on your display.
- Use the digital zoom function (if available via software or physical controls) to magnify specific areas.
4.3 ใช้เป็น Webกล้องสำหรับการประชุมทางวิดีโอ
- Adjust the camera arm to point the camera head towards yourself.
- Open your video conferencing application (e.g., Zoom, Microsoft Teams).
- In the application's settings, select the AVer A30 as your primary camera, microphone, and speaker.
- The integrated microphone and speaker system will provide clear audio for your calls.

Figure 4.3.1: A user engaged in a video conference using the AVer A30 camera.

Figure 4.3.2: A user demonstrating remote work setup with the AVer A30 camera and an external monitor.
4.4 คุณสมบัติด้านเสียง
The AVer A30 features a high-fidelity microphone and speaker system:
- ไมโครโฟน: Designed to capture voices clearly while digitally removing echo and background noise.
- ผู้บรรยาย: Provides clear audio output, effective up to 20 feet away.
Ensure the AVer A30 is selected as the audio input and output device in your computer's sound settings or conferencing application for optimal performance.
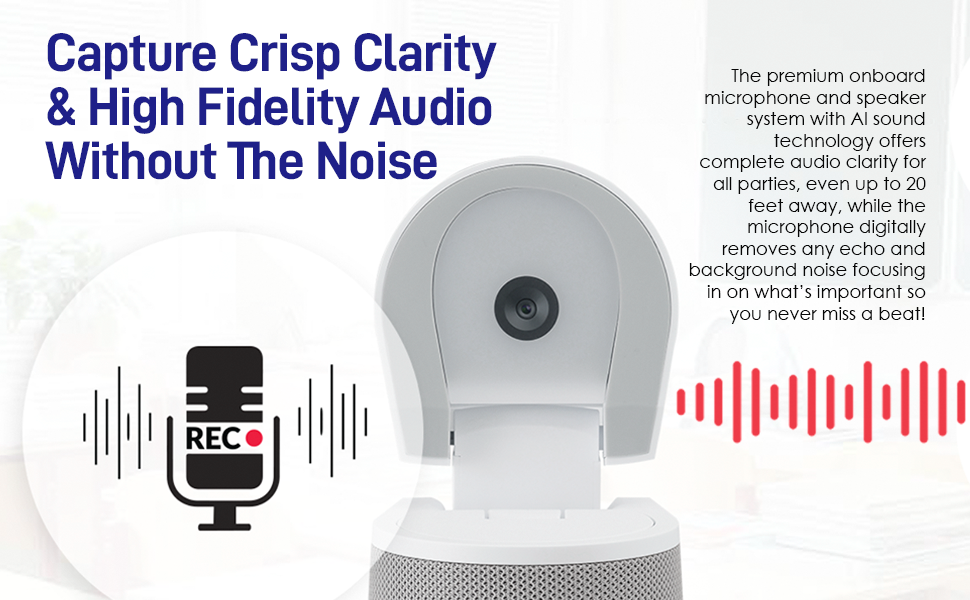
Figure 4.4.1: Visual representation of the AVer A30's microphone and speaker system for clear audio.
4.5 Automatic Image Rotation
The AVer A30 automatically adjusts the image orientation. This feature ensures that the displayed image is always right-side up, whether you are using it as a document camera or a webลูกเบี้ยว.
5. การบำรุงรักษา
5.1 การทำความสะอาด
- เลนส์กล้อง: Gently wipe the camera lens with a soft, lint-free cloth. For stubborn smudges, use a lens cleaning solution specifically designed for optical surfaces.
- ตัวอุปกรณ์: Use a soft, dry cloth to wipe the exterior of the camera. Avoid using harsh chemicals or abrasive cleaners.
5.2 พื้นที่จัดเก็บ
When not in use, store the AVer A30 in a cool, dry place, away from direct sunlight and extreme temperatures. Ensure the adjustable arm is folded into a compact position to prevent damage.
6 การแก้ไขปัญหา
| ปัญหา | สาเหตุที่เป็นไปได้ | สารละลาย |
|---|---|---|
| ไม่มีเอาต์พุตภาพ/วิดีโอ |
|
|
| No audio from speaker or microphone not working |
|
|
| ภาพเบลอหรือไม่ชัด |
|
|
| คอมพิวเตอร์ไม่รู้จักกล้อง |
|
|
7. ข้อมูลจำเพาะ
| คุณสมบัติ | รายละเอียด |
|---|---|
| ยี่ห้อ | ยืนยัน |
| หมายเลขรุ่น | VISIONA30 |
| ความละเอียดในการจับภาพวิดีโอ | 4K |
| เทคโนโลยีการเชื่อมต่อ | HDMI, ยูเอสบี |
| คุณสมบัติพิเศษ | ประสิทธิภาพในที่แสงน้อย |
| น้ำหนักสินค้า | 5 ปอนด์ |
| ขนาดแพ็คเกจ | 12 x 11 x 11 นิ้ว |
| Screen Size (Visible Diagonal) | 2.7 นิ้ว / 7 ซม. |
8. การรับประกันและการสนับสนุน
8.1 ข้อมูลการรับประกัน
For detailed warranty information, please refer to the warranty card included with your product or visit the official AVer webไซต์นี้ โปรดเก็บหลักฐานการซื้อไว้เพื่อใช้ยืนยันการรับประกัน
8.2 การสนับสนุนด้านเทคนิค
If you encounter any issues not covered in this manual or require further assistance, please contact AVer technical support. Support contact information can typically be found on the AVer webไซต์หรือในเอกสารผลิตภัณฑ์ของคุณ
แหล่งข้อมูลออนไลน์: For additional resources, FAQs, and software updates, please visit the official AVer support page: ฝ่ายสนับสนุน AVer


