การแนะนำ
The ASRock B650E PG-ITX WiFi motherboard is designed for AMD Ryzen 7000 Series processors, offering advanced features in a compact Mini-ITX form factor. This manual provides essential information for the proper installation, operation, and maintenance of your motherboard.
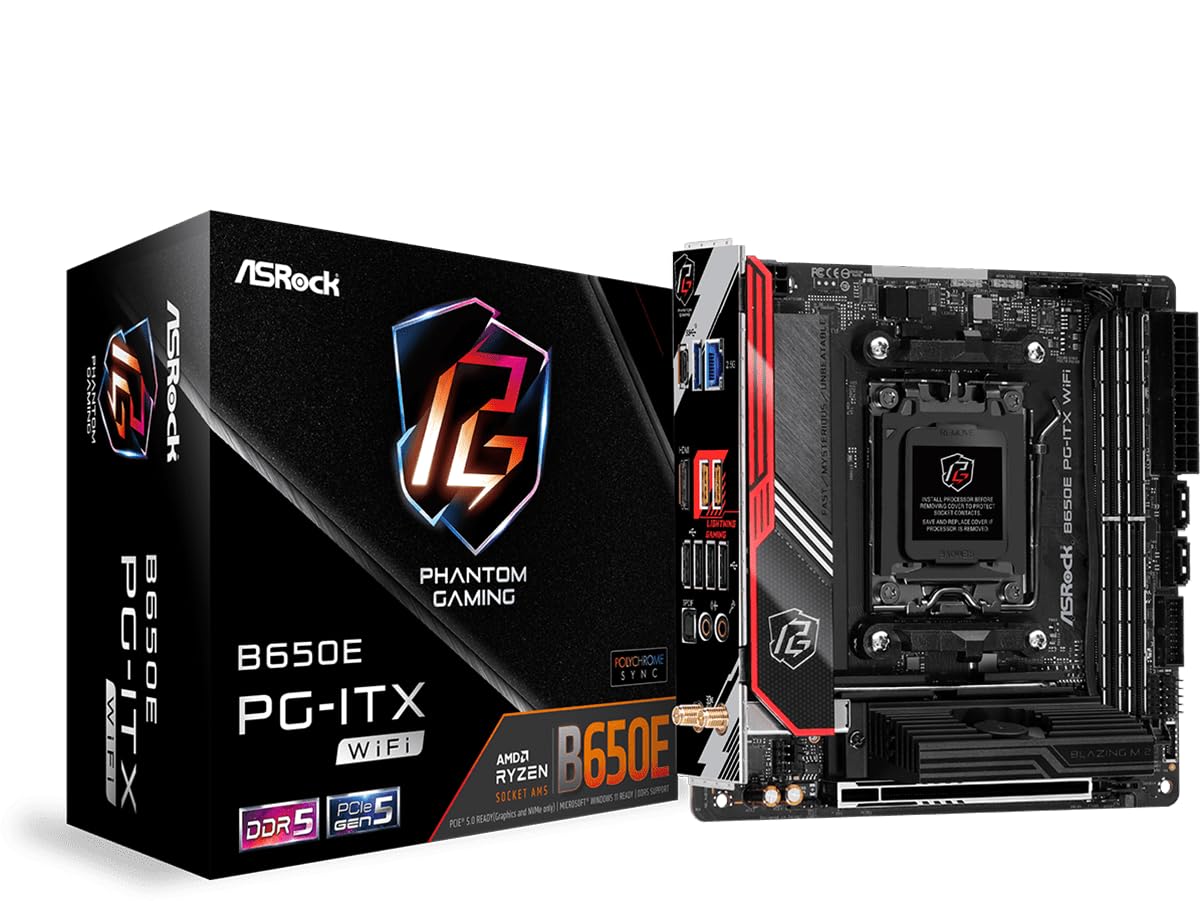
รูปที่ 1: จากบนลงล่าง view of the ASRock B650E PG-ITX WiFi Motherboard.
คุณสมบัติหลัก:
- Supports AMD Ryzen 7000 Series Processors (Socket AM5)
- 10+2+1 Phase Power Design with SPS
- 2 x DDR5 DIMM slots, supporting up to 6400+(OC) MHz
- 1 สล็อต PCIe 5.0 x16
- Graphics Output Options: 1 HDMI, eDP
- ระบบเสียง HD 7.1 แชนแนล (ตัวแปลงสัญญาณเสียง Realtek ALC1220), ระบบเสียง Nahimic
- 1 Blazing M.2 (PCIe Gen5x4), 1 Hyper M.2 (PCIe Gen4x4), 2 SATA3
- USB Connectivity: 1 USB 3.2 Gen2x2 Type-C (Front), 1 USB 3.2 Gen2 Type-C (Rear), 3 USB 3.2 Gen2 Type-A (Rear), 2 USB 3.2 Gen1 (Front), 6 USB 2.0 (4 Rear, 2 Front)
- Killer 2.5G LAN
- Killer 802.11ax Wi-Fi 6E + Bluetooth 5.3

Figure 2: Diagram highlighting key features and components of the motherboard.
การติดตั้งและการตั้งค่า
ส่วนนี้จะแนะนำขั้นตอนการติดตั้งเมนบอร์ดและส่วนประกอบหลักต่างๆ อย่างละเอียด
1. การเปิดออกและการตรวจสอบ
Carefully remove the motherboard from its packaging. Inspect for any visible damage. Ensure all accessories are present.
วิดีโอ 1: ผลิตภัณฑ์จบview and Unboxing. This video provides a visual overview of the ASRock B650E PG-ITX motherboard and its components, including the unboxing process.
2. การติดตั้งซีพียู
- ค้นหาซ็อกเก็ต CPU AM5 บนเมนบอร์ด
- ยกคันโยกโหลดขึ้นเบาๆ และเปิดฝาครอบซ็อกเก็ต CPU
- จัดตำแหน่งเครื่องหมายรูปสามเหลี่ยมบนซีพียูให้ตรงกับเครื่องหมายที่ตรงกันบนซ็อกเก็ต
- วางซีพียูลงในซ็อกเก็ตอย่างระมัดระวัง อย่าออกแรงดันมากเกินไป
- ปิดฝาครอบซ็อกเก็ตและกดคันโยกรับน้ำหนักลงจนล็อคเข้าที่

Figure 3: CPU socket with protective cover. Ensure to remove the cover before installing the processor.

Figure 4: CPU socket ready for processor installation.
3. การติดตั้ง RAM (หน่วยความจำ)
- เปิดคลิปที่ปลายทั้งสองด้านของสล็อต DIMM DDR5
- จัดตำแหน่งรอยบากบนโมดูล RAM ให้ตรงกับร่องในช่องเสียบ DIMM
- Insert the RAM module firmly into the slot until the clips snap into place.
4. การติดตั้ง M.2 SSD
- Locate the M.2 slots (Blazing M.2 and Hyper M.2).
- Remove the M.2 heatsink/cover if present.
- ใส่ M.2 SSD เข้าไปในช่องที่มุม
- ค่อยๆ กด SSD ลงไป แล้วยึดให้แน่นด้วยสกรูหรือตัวยึดที่ให้มา
- Reattach the M.2 heatsink/cover.
5. Motherboard Mounting and Connections
- Install the motherboard into your PC case, aligning it with the standoffs.
- ยึดเมนบอร์ดด้วยสกรู
- Connect the 24-pin ATX power connector and the 8-pin 12V CPU power connector from your power supply.
- เชื่อมต่อพอร์ตด้านหน้า (ปุ่มเปิด/ปิด, ปุ่มรีเซ็ต, USB, ช่องเสียบเสียง)
- Connect SATA devices to the SATA3 ports if applicable.
- Install your graphics card into the PCIe 5.0 x16 slot.
- Attach the Wi-Fi antennas to the rear I/O panel connectors.
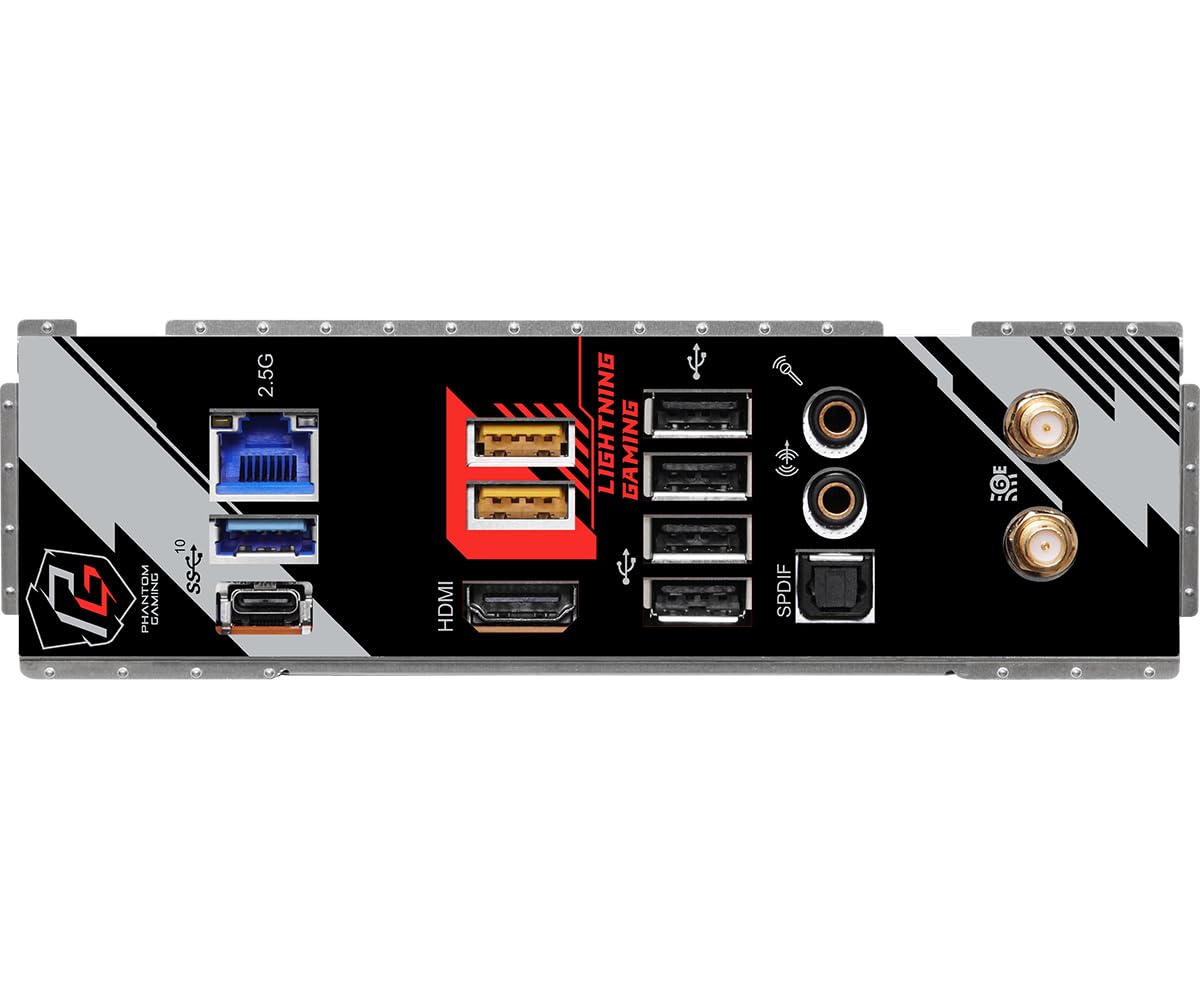
Figure 5: Rear I/O panel showing various ports including USB, HDMI, LAN, and Wi-Fi antenna connectors.
คำแนะนำการใช้งาน
After successful hardware installation, follow these steps to operate your system.
1. การบูตเริ่มต้นและการตั้งค่า BIOS
- เชื่อมต่อจอภาพ คีย์บอร์ด และเมาส์ของคุณ
- Power on your system. Press เดล or F2 during startup to enter the BIOS/UEFI setup utility.
- In the BIOS, verify that all installed components (CPU, RAM, SSDs) are detected correctly.
- Configure boot order to install your operating system from a USB drive or other media.
- บันทึกการเปลี่ยนแปลงและออกจาก BIOS
2. การติดตั้งระบบปฏิบัติการ
ทำตามคำแนะนำบนหน้าจอของระบบปฏิบัติการที่คุณเลือก (เช่น Windows, Linux) เพื่อดำเนินการติดตั้งให้เสร็จสมบูรณ์
3. การติดตั้งไดร์เวอร์
After OS installation, install the necessary drivers for your motherboard components (chipset, LAN, Wi-Fi, audio, etc.). These can typically be found on the ASRock support webไซต์สำหรับรุ่นเฉพาะของคุณ
4. การอัปเดต BIOS
Regularly check the ASRock website for BIOS updates. BIOS updates can improve compatibility, stability, and performance. Refer to the ASRock website for detailed instructions on how to update the BIOS safely.
การซ่อมบำรุง
การบำรุงรักษาอย่างถูกต้องจะช่วยให้เมนบอร์ดของคุณมีอายุการใช้งานยาวนานและมีประสิทธิภาพเหมาะสมที่สุด
- การกำจัดฝุ่น: Periodically clean dust from the motherboard and case using compressed air. Ensure the system is powered off and unplugged before cleaning.
- การจัดการสายเคเบิล: Ensure all cables are neatly routed to promote good airflow and prevent interference.
- การอัปเดตซอฟต์แวร์: Keep your operating system, drivers, and BIOS updated to the latest versions.
- สภาพแวดล้อม : ควรใช้งานเมนบอร์ดในบริเวณที่มีอากาศถ่ายเทสะดวก หลีกเลี่ยงแสงแดดโดยตรง ความร้อนสูง และความชื้น
การแก้ไขปัญหา
หัวข้อนี้จะกล่าวถึงปัญหาทั่วไปที่คุณอาจพบเจอ
1. ระบบไม่เปิดเครื่อง
- ตรวจสอบการเชื่อมต่อสายไฟทั้งหมด: ขั้วต่อ ATX 24 พิน, ขั้วต่อ CPU 8 พิน และสายไฟของแหล่งจ่ายไฟที่เสียบเข้ากับเต้ารับที่ผนัง
- ตรวจสอบให้แน่ใจว่าสวิตช์แหล่งจ่ายไฟอยู่ในตำแหน่งเปิด
- ตรวจสอบการเชื่อมต่อของปุ่มเปิด/ปิดเครื่องที่แผงด้านหน้ากับเมนบอร์ด
- ทดสอบด้วยแหล่งจ่ายไฟอื่นถ้าเป็นไปได้
2. No Display Output (No POST)
- Ensure the monitor is connected to the correct graphics output (either integrated graphics or discrete GPU).
- Reseat the RAM modules. Try booting with only one RAM stick.
- ใส่การ์ดจอกลับเข้าไปใหม่
- Clear CMOS: Locate the CLRCMOS jumper on the motherboard (refer to the full manual for exact location) and short it for a few seconds with the system powered off and unplugged.
- BIOS Compatibility: If using a newer AMD Ryzen 7000 series CPU, ensure your BIOS version supports it. An older BIOS might require an older compatible CPU for an initial update.
3. ความไม่เสถียรของระบบหรือความผิดพลาด
- ตรวจสอบอุณหภูมิ CPU และ GPU ตรวจสอบให้แน่ใจว่าระบบระบายความร้อนติดตั้งอย่างถูกต้อง
- ตรวจสอบความเสถียรของ RAM เรียกใช้เครื่องมือวินิจฉัยหน่วยความจำ
- ตรวจสอบให้แน่ใจว่าไดร์เวอร์ทั้งหมดได้รับการอัปเดตแล้ว
- ตรวจสอบการเชื่อมต่อที่หลวมหรือชิ้นส่วนที่ติดตั้งไม่แน่น
ข้อมูลจำเพาะ
| คุณสมบัติ | รายละเอียด |
|---|---|
| ยี่ห้อ | เอเอสร็อค |
| ชื่อรุ่น | B650E PG-ITX WIFI |
| ซ็อคเก็ตซีพียู | ซ็อคเก็ต AM5 |
| โปรเซสเซอร์ที่เข้ากันได้ | โปรเซสเซอร์ AMD Ryzen 7000 ซีรีส์ |
| ประเภทชิปเซ็ต | เอเอ็มดี B650 |
| เทคโนโลยีหน่วยความจำ RAM | DDR5 |
| ความเร็วหน่วยความจำ | Up to 6400+(OC) MHz |
| ประเภทไร้สาย | 802.11ax (Wi-Fi 6E) + Bluetooth 5.3 |
| แลน | Killer 2.5G LAN |
| สล็อต PCIe | 1 x PCIe5.0x16 XNUMX ช่อง |
| สล็อต M.2 | 1 x Blazing M.2 (PCIe Gen5x4), 1 x Hyper M.2 (PCIe Gen4x4) |
| พอร์ต SATA | 2 x SATA3 |
| พอร์ต USB (ด้านหลัง) | 1 x USB 3.2 Gen2 Type-C, 3 x USB 3.2 Gen2 Type-A, 4 x USB 2.0 |
| พอร์ต USB (ด้านหน้า) | 1 x USB 3.2 Gen2x2 Type-C, 2 x USB 3.2 Gen1, 2 x USB 2.0 |
| เอาต์พุตกราฟิก | 1 x HDMI, eDP |
| เสียง | 7.1 CH HD Audio (Realtek ALC1220), Nahimic Audio |
| ฟอร์มแฟกเตอร์ | มินิ-ITX |
| ขนาดสินค้า | 19.69 x 19.69 x 11.02 นิ้ว |
| น้ำหนักสินค้า | 2.2 ปอนด์ |
การรับประกันและการสนับสนุน
The ASRock B650E PG-ITX WiFi Motherboard comes with a รับประกัน 3 ปี from ASRock, covering defects in materials and workmanship under normal use.
For technical support, driver downloads, BIOS updates, and further information, please visit the official ASRock support website. You can also refer to the full product manual available on their website for more detailed instructions and diagrams.
For warranty claims or service, please contact ASRock customer support directly or the retailer from whom you purchased the product.


