1. บทนำ
The AeroCool Blade is an ATX semi-tower PC case designed for optimal airflow and aesthetic appeal. It features an RGB front panel with preset lighting modes, a full tempered glass side window, and ample space for component installation. This manual provides essential information for the proper setup, operation, and maintenance of your PC case.
ข้อมูลด้านความปลอดภัย: Always disconnect power from your system before performing any installation or maintenance. Handle components with care to avoid damage. Refer to individual component manuals for specific installation instructions.
2. เนื้อหาบรรจุภัณฑ์
- AeroCool Blade ATX Semi-Tower PC Case
- 1 x 120mm RGB Rear Fan (pre-installed)
- 3 x 120mm Front Fans (pre-installed)
- ชุดอุปกรณ์เสริม (สกรู, ตัวยึด, เคเบิลไทร์)
3. การตั้งค่าและการติดตั้ง
3.1 การเตรียมคดี
Carefully remove the case from its packaging. Place it on a stable, flat surface. Remove the tempered glass side panel by unscrewing the thumb screws at the rear of the case and gently pulling the panel away.

รูปที่ 3.1: ภายใน view of the AeroCool Blade PC case, illustrating the layout for component installation.
3.2 การติดตั้งเมนบอร์ด
- Install the necessary motherboard standoffs into the motherboard tray according to your motherboard's form factor (ATX, Micro-ATX, Mini-ITX).
- ติดตั้งแผงป้องกัน I/O ลงในช่องเปิดด้านหลังของเคส
- วางเมนบอร์ดของคุณลงบนสแตนด์ออฟอย่างระมัดระวัง โดยจัดรูสกรูให้ตรงกัน
- ยึดเมนบอร์ดด้วยสกรูที่ให้มา
3.3 การติดตั้งหน่วยจ่ายไฟ (PSU)
The AeroCool Blade supports bottom-mounted PSUs. Slide your PSU into the dedicated compartment at the bottom rear of the case. Secure it with screws from the rear of the case.
3.4 การติดตั้งไดรฟ์จัดเก็บข้อมูล
- ฮาร์ดดิสก์ขนาด 3.5 นิ้ว: Install 3.5" hard drives into the drive cage located beneath the PSU shroud.
- 2.5" SSDs/HDDs: Install 2.5" drives onto the dedicated mounting points on the motherboard tray or behind it.

รูปที่ 3.2: ด้านหลังภายใน view, highlighting cable management routes and 2.5-inch drive mounting locations.
3.5 Expansion Card (GPU) Installation
Remove the necessary expansion slot covers from the rear of the case. Insert your graphics card or other expansion cards into the PCIe slots on your motherboard and secure them with screws.
3.6 การติดตั้งพัดลมและระบบระบายความร้อน
The case comes with one 120mm RGB fan pre-installed at the rear and three 120mm fans pre-installed at the front. Ensure all fan cables are connected to appropriate headers on your motherboard or fan controller.

Figure 3.3: A 120mm RGB fan, similar to those pre-installed in the AeroCool Blade case.
3.7 Front Panel I/O Connections
Connect the front panel cables (USB 3.0, USB 2.0, HD Audio, Power Switch, Reset Switch, LED Switch, Power LED, HDD LED) to the corresponding headers on your motherboard. Refer to your motherboard manual for exact pin configurations.
4. คู่มือการใช้งาน
4.1 การเปิดเครื่อง
Once all components are installed and connected, replace the side panel. Connect your monitor, keyboard, mouse, and power cable to the PSU. Press the Power button located on the top panel of the case to turn on your system.

รูปที่ 4.1: ด้านบนด้านหน้า view of the case, indicating the location of the power button and front I/O ports.
4.2 การควบคุมแสง RGB
The AeroCool Blade features an RGB front panel. Use the dedicated LED button on the top panel to cycle through various preset lighting modes and effects. Pressing the button will change the lighting pattern or color.

รูปที่ 4.2 : ด้านหน้า view of the AeroCool Blade case with its distinctive RGB lighting.
4.3 พอร์ตแผงด้านหน้า
The top panel provides convenient access to:
- พอร์ต USB 1 3.0 พอร์ต
- พอร์ต USB 2 จำนวน 2.0 พอร์ต
- HD Audio output
- อินพุตไมโครโฟน
Connect your USB devices, headphones, and microphone to these ports as needed.
5. การบำรุงรักษา
5.1 การทำความสะอาดตัวกรองฝุ่น
Regularly check and clean the dust filters to maintain optimal airflow and prevent dust buildup inside the case. Dust filters are typically located at the top, front, and bottom (under the PSU). Gently remove them and clean with compressed air or rinse with water (ensure they are completely dry before re-installation).
5.2 การทำความสะอาดภายนอก
เช็ดพื้นผิวด้านนอกของเคสด้วยผ้าเนื้อนุ่มและแห้งamp เช็ดด้วยผ้า หลีกเลี่ยงการใช้สารเคมีรุนแรงหรือวัสดุขัดถูที่อาจทำให้พื้นผิวหรือกระจกนิรภัยเสียหายได้
6 การแก้ไขปัญหา
- ระบบไม่เปิดใช้งาน:
Ensure the PSU is switched on and properly connected to the wall outlet. Verify all power cables from the PSU are correctly connected to the motherboard and components. Check the front panel power switch connection to the motherboard. - ไฟ RGB ไม่ทำงาน:
Ensure the RGB controller (if applicable) and fan RGB cables are securely connected. Press the LED button on the top panel to cycle through modes. If connected to a motherboard header, check motherboard software settings. - พัดลมไม่หมุน:
Verify that all fan power cables are securely connected to the motherboard fan headers or a fan controller. Check BIOS/UEFI settings for fan speed control. - พอร์ต USB/เสียงด้านหน้าใช้งานไม่ได้:
Ensure the USB and HD Audio cables from the front panel are correctly connected to the corresponding headers on your motherboard.
7. ข้อมูลจำเพาะ
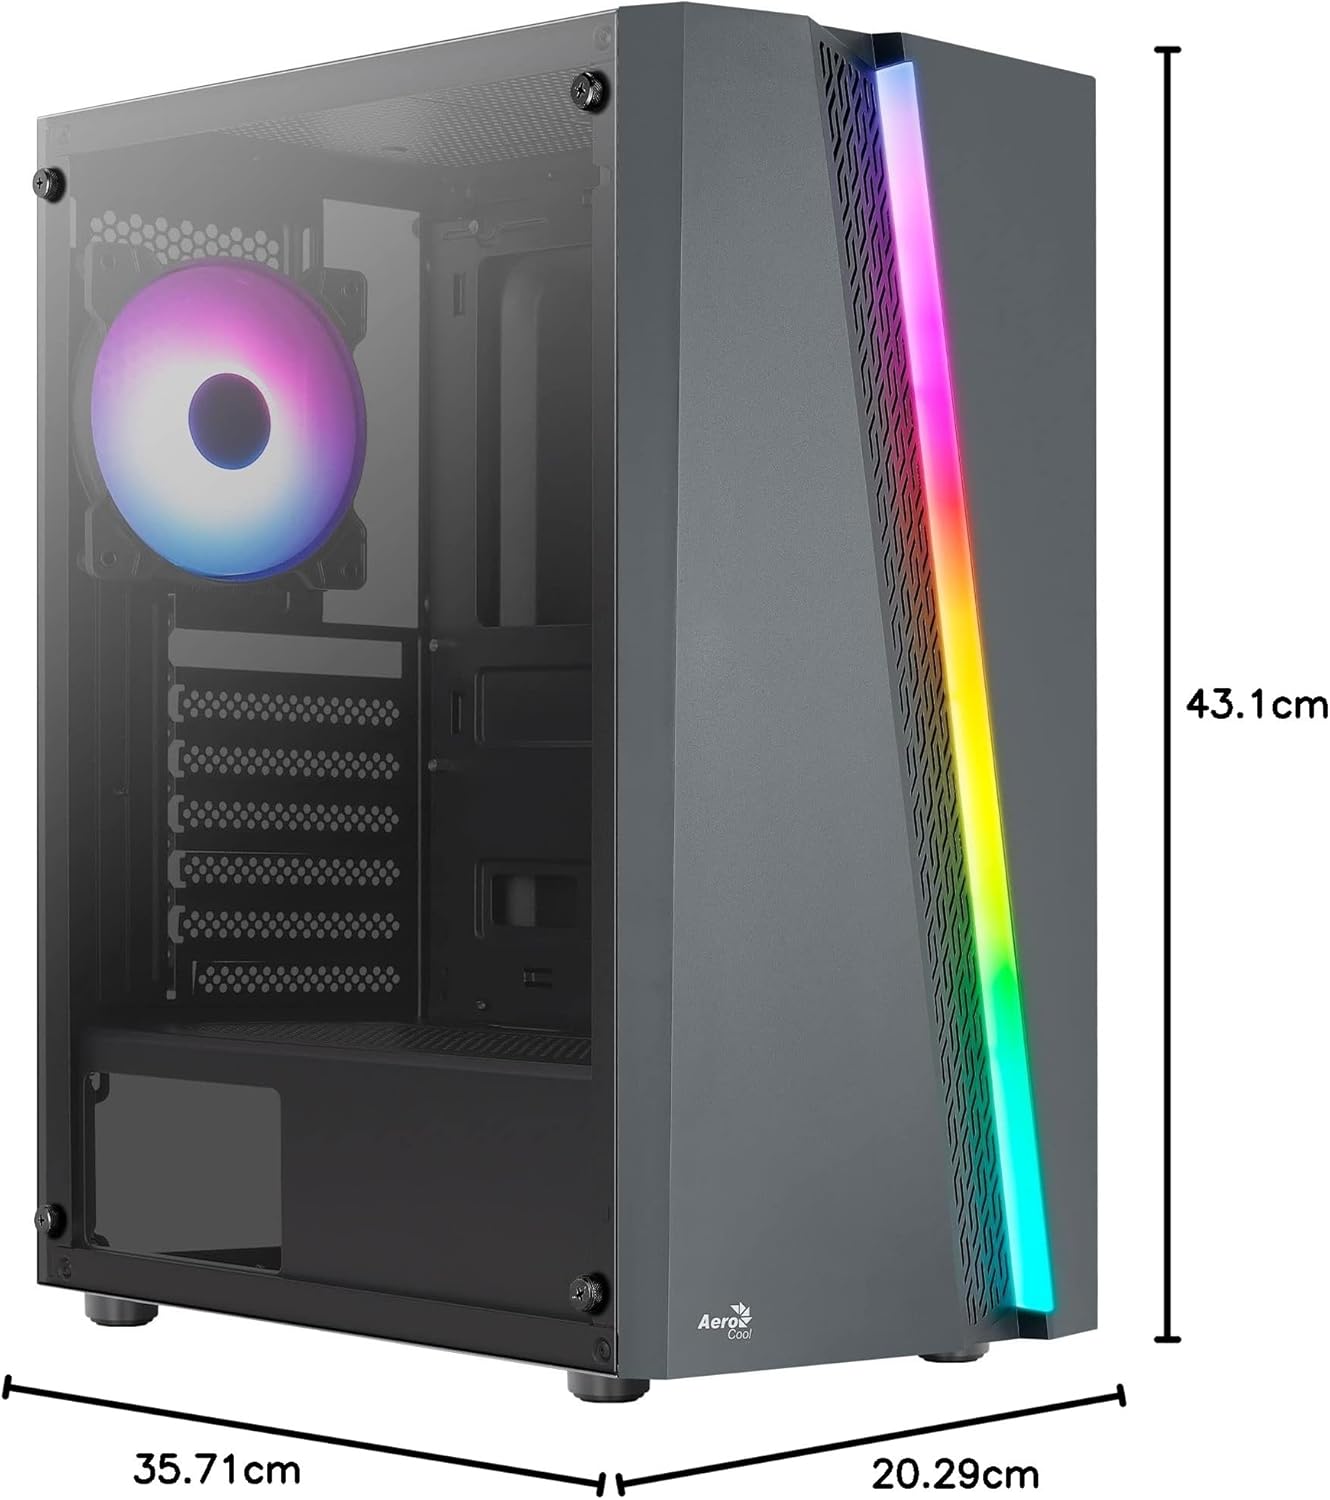
Figure 7.1: Dimensions of the AeroCool Blade PC Case.
| คุณสมบัติ | ข้อมูลจำเพาะ |
|---|---|
| ยี่ห้อ | แอร์โรคูล |
| ชื่อรุ่น | BLADEBK |
| ประเภทเคส | Semi-Tower |
| ความเข้ากันได้ของเมนบอร์ด | ATX, ไมโคร-ATX, มินิ-ITX |
| วัสดุ | กระจกนิรภัย (แผงด้านข้าง) |
| ขนาดสินค้า (กว้าง x ยาว x สูง) | 43.1 x 20.3 x 35.7 ซม. |
| น้ำหนักสินค้า | 4 กก. |
| ช่องไดรฟ์ | 2 x 3.5 นิ้ว, 2 x 2.5 นิ้ว |
| การกวาดล้าง GPU | สูงถึง 307มม. |
| ความสูงของ CPU Cooler | สูงถึง 155มม. |
| พอร์ต I / O ด้านหน้า | 1 x USB 3.0, 2 x USB 2.0, HD Audio, Mic, LED Control, Power |
| พัดลมที่ติดตั้งล่วงหน้า | 1 x 120mm RGB Rear, 3 x 120mm Front |
| วิธีการทำความเย็น | อากาศ |
8. การรับประกันและการสนับสนุน
สำหรับข้อมูลการรับประกันและการสนับสนุนทางเทคนิค โปรดดูที่เว็บไซต์อย่างเป็นทางการของ AeroCool webหรือติดต่อตัวแทนจำหน่ายในพื้นที่ของคุณ เก็บหลักฐานการซื้อไว้เพื่อใช้ในการเคลมประกัน
ข้อมูลติดต่อ: หากต้องการความช่วยเหลือเพิ่มเติม โปรดไปที่ www.aerocool.io.


