1. บทนำ
This manual provides detailed instructions for the setup, operation, and maintenance of your KECAG 10.1 Inch Digital Picture Frame. Please read this manual thoroughly before using the device to ensure proper functionality and to maximize your user experience. Keep this manual for future reference.
2. สินค้าหมดview
2.1 คุณสมบัติหลัก
- 10.1 Inch 1080P HD IPS Screen: Features a 1920x1080 resolution with a 180° wide-angle IPS display for clear viewจากหลายมุม
- การเล่นมัลติมีเดีย: Supports photo slideshows, video playback, and music playback.
- เซ็นเซอร์ตรวจจับการเคลื่อนไหว: Automatically turns the frame on/off based on detected movement to conserve energy.
- Timing On/Off Function: Allows scheduled power on and off times.
- Versatile Media Support: Compatible with SD cards and USB flash drives.
- อินเทอร์เฟซที่เป็นมิตรกับผู้ใช้: Simple main menu for easy navigation.
- รีโมทคอนโทรล: ช่วยให้ใช้งานได้สะดวกจากระยะไกล
- ฟังก์ชั่นเพิ่มเติม: Includes calendar and alarm features.
2.2 เนื้อหาบรรจุภัณฑ์
- KECAG 10.1 Inch Digital Picture Frame
- แฟลชไดรฟ์ USB 32GB
- รีโมทคอนโทรล
- อะแดปเตอร์แปลงไฟ
- คู่มือการใช้งาน

รูปที่ 2.2.1: The KECAG 10.1 Inch Digital Picture Frame displaying a family photo, accompanied by its remote control.
3. การตั้งค่า
3.1 การเชื่อมต่อสายไฟ
- Locate the power adapter included in the package.
- Connect the small end of the power adapter cable to the DC IN port on the back of the digital picture frame.
- เสียบปลายอีกด้านของอะแดปเตอร์แปลงไฟเข้ากับเต้ารับไฟฟ้าทั่วไป
- The frame will automatically power on or enter standby mode.
3.2 Inserting Media (USB Drive or SD Card)
The digital picture frame supports both USB flash drives and SD cards for media playback.
- Identify the USB port and SD card slot on the side or back of the frame.
- For a USB drive: Carefully insert the USB flash drive into the USB port.
- For an SD card: Insert the SD card into the SD card slot with the metal contacts facing down, until it clicks into place.
- Ensure the media is inserted correctly to avoid damage.

รูปที่ 3.2.1: Illustrated steps for connecting media (USB/SD card) and power to the digital picture frame.
3.3 Initial Power On and Language Settings
- Once powered on, the frame may display a language selection screen.
- Use the remote control's navigation buttons (Up/Down/Left/Right) to select your preferred language.
- กดปุ่ม เข้า ปุ่มเพื่อยืนยันการเลือกของคุณ
4. คู่มือการใช้งาน
4.1 ฟังก์ชั่นการควบคุมระยะไกล
The remote control allows for convenient navigation and setting adjustments. Ensure the remote is aligned with the infrared sensor on the frame during use.
- เมนู: Access the main menu or return to the previous menu.
- รูปถ่าย: Directly enter photo playback mode.
- ดนตรี: Directly enter music playback mode.
- ภาพยนตร์: Directly enter video playback mode.
- EXIT: Exit current function or menu.
- เข้า: Confirm selection or play/pause media.
- ติดตั้ง: เข้าถึงการตั้งค่าระบบ
- ปุ่มนำทาง (ขึ้น/ลง/ซ้าย/ขวา): นำทางผ่านเมนูและตัวเลือก
- ฉบับ+/ฉบับ-: Adjust volume during video or music playback.
4.2 การนำทางเมนูหลัก
From the main menu, you can select different functions:
- รูปภาพ: View photos in a slideshow.
- ดนตรี: เล่นเสียง files.
- ปฏิทิน: Display calendar and set alarms.
- การตั้งค่า: ตั้งค่ากำหนดการใช้งานอุปกรณ์

รูปที่ 4.2.1: The digital picture frame's interface showing options for Calendar, Photo/Video, and Music playback.
4.3 Photo Playback
- จากเมนูหลัก เลือก รูปภาพ หรือกดปุ่ม รูปถ่าย ปุ่มบนรีโมต
- The frame will automatically start a slideshow of photos found on the inserted media.
- ลำดับการเล่น: In settings, you can choose between Shuffle, Sequential, or Repeat All.
- เอฟเฟกต์การเปลี่ยนผ่าน: Select from various effects like Up/Down, Mosaic, Left/Right, or Random.
- ภาพก่อนหน้าview: Access a thumbnail view of your photos.
- การหมุนภาพ: Adjust the orientation of images (vertical/horizontal).
- ความสว่างหน้าจอ: Adjust the display brightness in the settings menu.
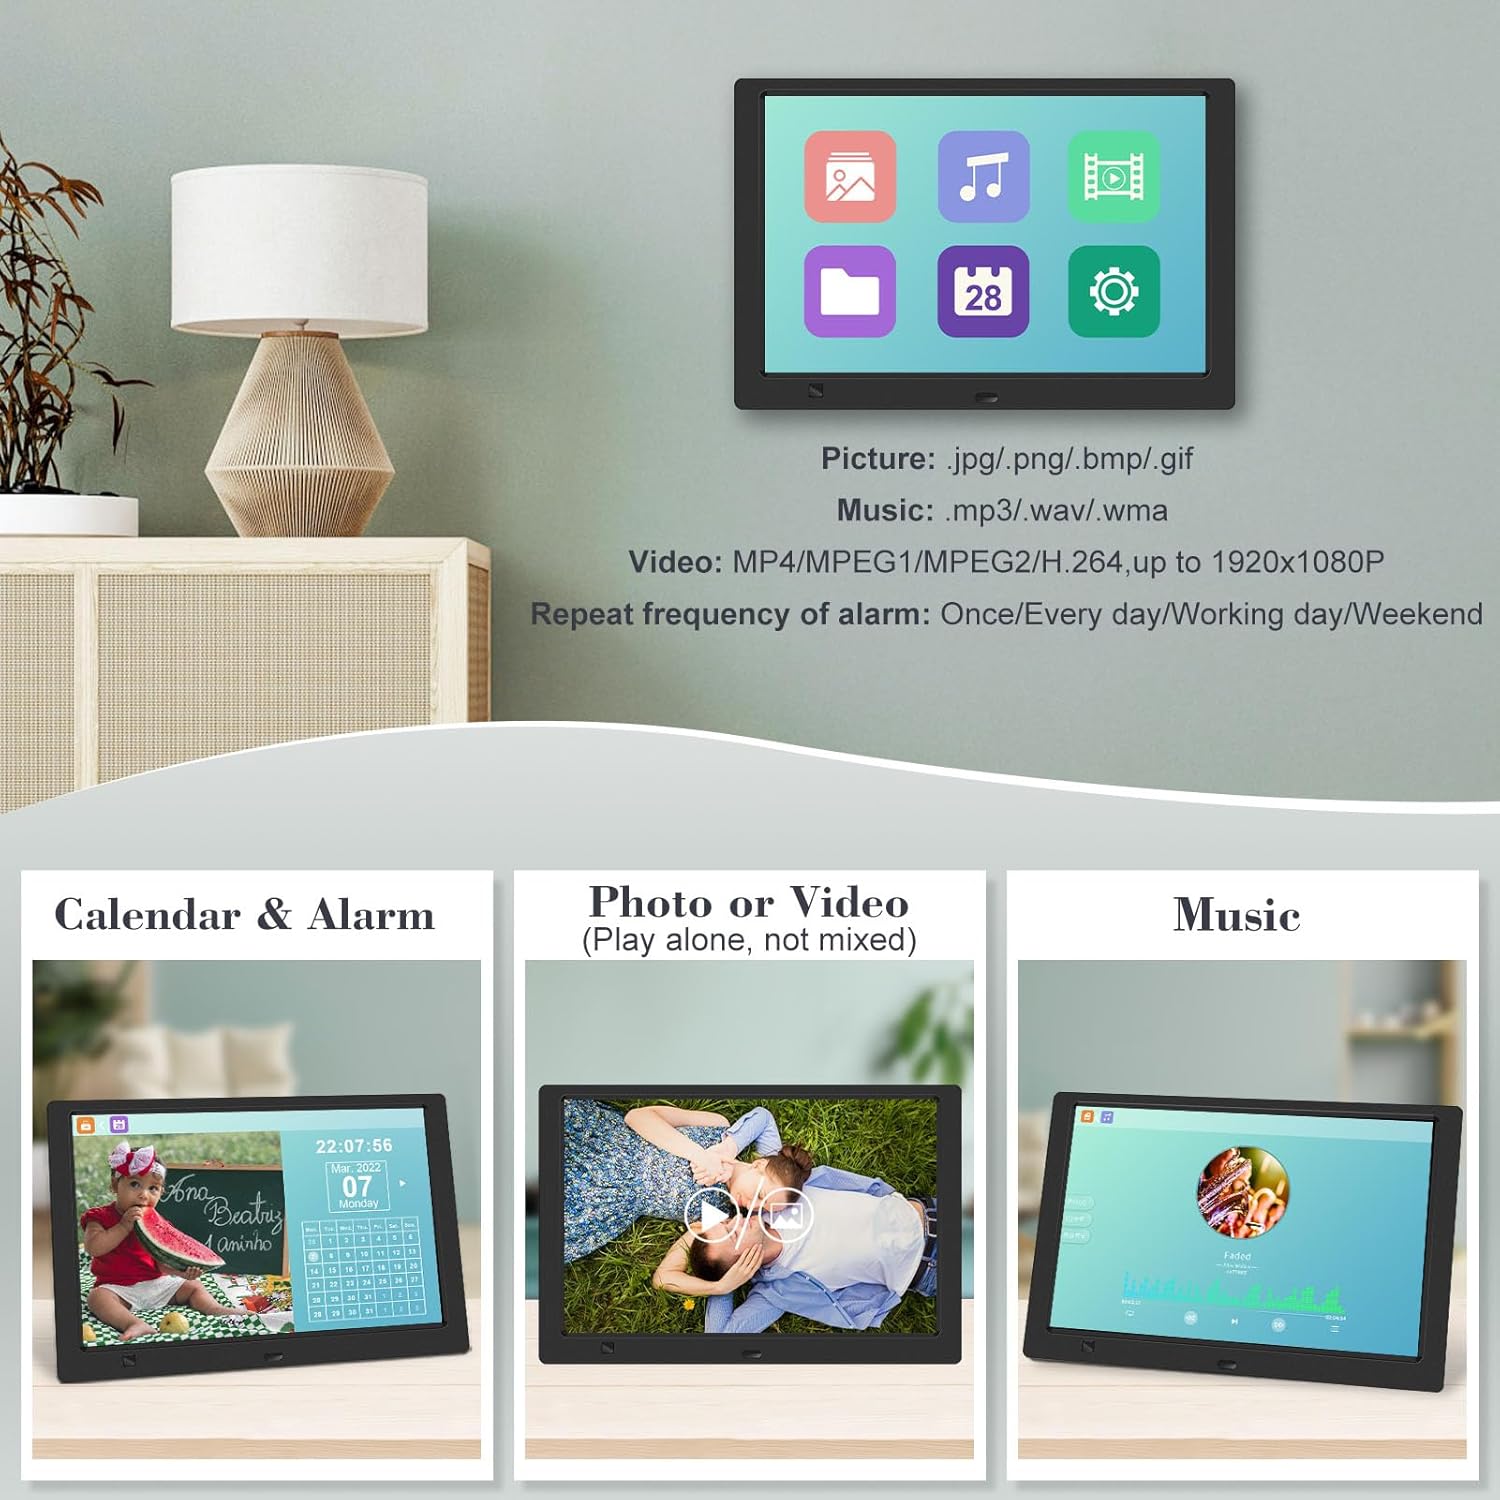
รูปที่ 4.3.1: The digital picture frame displaying a photo slideshow with background music and various image transition options.

รูปที่ 4.3.2: Visual representation of slideshow and image preview options, including settings for playback order, display scale, picture rotation, time window, and screen brightness adjustment.
4.4 Video and Music Playback
- จากเมนูหลัก เลือก ภาพยนตร์ or ดนตรี, or use the corresponding buttons on the remote.
- นำทางไปยังที่ต้องการ file using the remote control and press เข้า ที่จะเล่น
- Supported video formats: MP4/MPEG1/MPEG2/H.264 up to 1920x1080.
- Supported music formats: MP3/WAV/WMA.
4.5 Motion Sensor Function
The motion sensor helps save energy by automatically turning the frame on or off.
- To enable/disable the motion sensor, go to the การตั้งค่า เมนู.
- Select the motion sensor option and toggle it On or Off.
- When enabled, the frame will power on when movement is detected and turn off after a period of inactivity.
4.6 Timing On/Off Function
Set specific times for the frame to automatically power on and off.
- เข้าถึง การตั้งค่า เมนู.
- Locate the Timing On/Off function.
- Set your desired power-on time and power-off time. You can also configure this for specific days (e.g., weekdays, weekends, every day).

รูปที่ 4.6.1: Demonstrates the smart motion sensor turning on the frame when movement is detected and the timing on/off function for scheduled operation.
5. การบำรุงรักษา
5.1 การทำความสะอาดหน้าจอ
ในการทำความสะอาดหน้าจอ ให้เช็ดเบาๆ ด้วยผ้านุ่ม แห้ง และไม่เป็นขุย สำหรับรอยฝังแน่น ให้เช็ดเบาๆampชุบผ้าด้วยน้ำหรือน้ำยาทำความสะอาดหน้าจอ หลีกเลี่ยงการใช้สารเคมีรุนแรงหรือวัสดุที่มีฤทธิ์กัดกร่อน
5.2 การดูแลทั่วไป
- Keep the frame away from direct sunlight, heat sources, and excessive moisture.
- หลีกเลี่ยงการทำอุปกรณ์หล่นหรือกระแทกอย่างรุนแรง
- ห้ามถอดชิ้นส่วนโครงโดยเด็ดขาด การกระทำดังกล่าวจะทำให้การรับประกันเป็นโมฆะ
- ตรวจสอบให้แน่ใจว่ามีการระบายอากาศที่เหมาะสมรอบๆ อุปกรณ์
6 การแก้ไขปัญหา
If you encounter issues with your digital picture frame, please refer to the following common problems and solutions:
| ปัญหา | สาเหตุที่เป็นไปได้ | สารละลาย |
|---|---|---|
| เฟรมไม่สามารถเปิดเครื่องได้ | ไม่ได้เชื่อมต่ออะแดปเตอร์ไฟหรือเต้ารับไฟฟ้าชำรุด | ตรวจสอบให้แน่ใจว่าอะแดปเตอร์แปลงไฟเชื่อมต่อกับโครงและเต้ารับไฟฟ้าที่ใช้งานได้แน่นหนาแล้ว ลองเสียบกับเต้ารับอื่นดู |
| No photos/videos/music displayed. | No media inserted, media not recognized, or unsupported file รูปแบบ | Ensure a USB drive or SD card is properly inserted. Check if files are in supported formats (JPG/PNG/BMP/GIF for photos; MP4/MPEG1/MPEG2/H.264 for video; MP3/WAV/WMA for music). Try reformatting the media (backup data first). |
| รีโมทคอนโทรลไม่ทำงาน | Battery depleted, remote not aimed correctly, or sensor obstructed. | Replace the remote control battery. Ensure the remote is pointed directly at the frame's infrared sensor. Remove any obstructions between the remote and the frame. |
| หน้าจอว่างเปล่าหรือค้าง | ซอฟต์แวร์มีปัญหาชั่วคราว | ถอดปลั๊กอะแดปเตอร์ไฟ รอ 10 วินาที แล้วเสียบกลับเข้าไปใหม่เพื่อรีสตาร์ทเครื่อง |
7. ข้อมูลจำเพาะ
| คุณสมบัติ | ข้อมูลจำเพาะ |
|---|---|
| ขนาดหน้าจอ | 10.1 นิ้ว |
| ปณิธาน | 1920 x 1080 (1080p HD IPS) |
| อัตราส่วนภาพ | 16:9 น. |
| Viewอิงแองเกิล | 180° |
| อุปกรณ์ที่รองรับ | SD Card, USB Drive |
| รูปแบบภาพถ่ายที่รองรับ | JPG, PNG, BMP, GIF |
| รูปแบบวิดีโอที่รองรับ | MP4, MPEG1, MPEG2, H.264 (up to 1920x1080) |
| ฟอร์แมตเพลงที่รองรับ | MP3, WAV, WMA |
| เซ็นเซอร์ตรวจจับความเคลื่อนไหว | ใช่ |
| หมายเลขรุ่นสินค้า | KECAG-CA-001 |
| ขนาดสินค้า | 6.4 x 9.7 x 0.99 นิ้ว |
| น้ำหนักสินค้า | 1.59 ปอนด์ |
| แบตเตอรี่ (รีโมท) | แบตเตอรี่ลิเธียมโลหะ 1 ก้อน (รวมอยู่ด้วย) |
| ผู้ผลิต | เคแคก |
8. การรับประกันและการสนับสนุน
For warranty information, please refer to the documentation included with your product packaging. KECAG provides 24-hour customer service to assist with any issues or questions you may have regarding your digital picture frame. Please contact customer support for assistance.


