1. บทนำ
This manual provides detailed instructions for the setup, operation, and maintenance of your AWOW AK41 Mini PC. The AK41 is a compact and powerful desktop computer featuring an Intel Celeron J4125 processor, 8GB DDR4 RAM, and a 128GB NVMe M.2 SSD, pre-installed with Windows 11 Pro. It is designed for various applications including office work, home theater, study, and security monitoring.
2. เนื้อหาบรรจุภัณฑ์
โปรดตรวจสอบว่าสินค้าทั้งหมดมีอยู่ในแพ็คเกจของคุณ:
- AWOW AK41 Mini PC
- อะแดปเตอร์แปลงไฟ
- สาย HDMI
- Mounting Bracket with Screws (for VESA mounting)
- คู่มือการใช้งาน

Image 2.1: AWOW AK41 Mini PC with included accessories.
3. สินค้าหมดview
The AWOW AK41 Mini PC is engineered for efficiency and versatility. Below is an overview of its key components and ports.
3.1 Front and Side Panel

ภาพที่ 3.1: ด้านหน้าและด้านข้าง view of the AWOW AK41 Mini PC, highlighting the USB 3.0 ports, audio jack, and power button.
- ปุ่มเปิด/ปิด: กดเพื่อเปิดหรือปิดอุปกรณ์
- พอร์ต USB 3.0 (x2): สำหรับเชื่อมต่ออุปกรณ์ USB ความเร็วสูง
- แจ็คเสียง (3.5 มม.): สำหรับหูฟังหรือลำโพงภายนอก
3.2 แผงด้านหลัง

ภาพที่ 3.2: ด้านหลัง view of the AWOW AK41 Mini PC, illustrating the DC power input, HDMI ports, Gigabit Ethernet, USB 2.0 ports, and Type-C port.
- อินพุตไฟ DC: เชื่อมต่ออะแดปเตอร์ไฟฟ้าที่ให้มาด้วย
- พอร์ต HDMI 2.0 (x2): Connect to displays for 4K@60Hz output.
- พอร์ตกิกะบิตอีเทอร์เน็ต: สำหรับการเชื่อมต่อเครือข่ายแบบใช้สาย
- พอร์ต USB 2.0 (x2): สำหรับเชื่อมต่ออุปกรณ์ USB มาตรฐาน
- Full-Function Type-C Port (x1): Supports data transfer, video output (4K), and PD fast charging.
- ช่องเสียบการ์ด Micro SD: สำหรับเพิ่มพื้นที่จัดเก็บข้อมูลเพิ่มเติม
4. คู่มือการติดตั้ง
Follow these steps to set up your AWOW AK41 Mini PC:
- เชื่อมต่อกับจอแสดงผล: Connect your monitor(s) to the Mini PC using the HDMI ports or the Type-C port. The device supports up to three displays simultaneously.
- เชื่อมต่ออุปกรณ์ต่อพ่วง: เสียบแป้นพิมพ์ เมาส์ และอุปกรณ์ USB อื่นๆ เข้ากับพอร์ต USB 2.0 หรือ USB 3.0 ที่ว่างอยู่
- การเชื่อมต่อเครือข่าย: For a wired connection, connect an Ethernet cable to the Gigabit Ethernet port. For wireless, the device supports 2.4G/5G dual-band WiFi.
- เปิดเครื่อง: Connect the power adapter to the DC power input on the Mini PC, then plug the adapter into a power outlet. Press the power button on the front panel to turn on the device.
- ตั้งค่าเริ่มต้น: Upon first boot, follow the on-screen instructions to complete the Windows 11 Pro setup, including language, region, and network configuration.
5. คู่มือการใช้งาน
5.1 Windows 11 Pro
Your AWOW AK41 Mini PC comes pre-installed with Windows 11 Pro 64-bit. Familiarize yourself with the Windows 11 interface for optimal use.
- เมนูเริ่มต้น: เข้าถึงแอปพลิเคชัน การตั้งค่า และตัวเลือกด้านพลังงาน
- แถบงาน: Pin frequently used applications and manage open windows.
- การตั้งค่า: Customize system preferences, network settings, and display options.
5.2 การตั้งค่าจอแสดงผลหลายจอ
The AK41 supports connecting up to three displays simultaneously at 4K@60Hz. This can be achieved using the two HDMI 2.0 ports and the full-function Type-C port.

Image 5.1: The AWOW AK41 Mini PC supporting multiple 4K displays for enhanced productivity.
วิธีการตั้งค่าจอแสดงผลหลายจอใน Windows 11:
- คลิกขวาบนเดสก์ท็อป แล้วเลือก "การตั้งค่าการแสดงผล"
- Windows will detect the connected displays. You can arrange them, choose display modes (Extend, Duplicate, Show only on 1/2/3), and adjust resolution.
6. การขยายพื้นที่เก็บข้อมูล
The AWOW AK41 Mini PC offers flexible storage expansion options:

Image 6.1: Visual guide for expanding storage on the AWOW AK41 Mini PC.
- ฮาร์ดดิสก์/SSD SATA ขนาด 2.5 นิ้ว: You can add a 2.5-inch SATA hard drive or SSD (up to 2TB, not included) into the dedicated bay.
- M.2 SATA SSD: An additional M.2 SATA SSD (up to 2TB, not included) can be installed. Note that the M.2 port supports PCIe X2, and compatibility with PCIe X4 might vary.
- หน่วยความจำภายนอก: Utilize the USB 3.0 and USB 2.0 ports to connect external hard drives or USB flash drives.
- การ์ด Micro SD: Insert a Micro SD card into the dedicated slot for portable storage.
7. การเชื่อมต่อ
7.1ไวไฟ
The AK41 supports dual-band 2.4G/5G Wi-Fi (802.11a/b/g/n/ac) for robust wireless connectivity.
- คลิกไอคอน Wi-Fi ในแถบงาน Windows
- เลือกเครือข่ายที่คุณต้องการจากรายการ
- Enter the network password if prompted and click "Connect."
7.2 อีเทอร์เน็ต
For a stable and high-speed internet connection, use the Gigabit Ethernet port.
- Connect one end of an Ethernet cable to the Gigabit Ethernet port on the Mini PC.
- เชื่อมต่อปลายอีกด้านของสาย Ethernet กับเราเตอร์หรือโมเด็มของคุณ
- The system will automatically detect and connect to the wired network.
7.3 บลูทู ธ
The Mini PC includes Bluetooth 4.2 for connecting wireless peripherals.
- ไปที่ การตั้งค่า Windows > บลูทูธและอุปกรณ์
- ตรวจสอบว่าบลูทู ธ เปิดอยู่
- Click "Add device" and select "Bluetooth."
- Select your Bluetooth device from the list and follow the pairing instructions.
8. การบำรุงรักษา
การบำรุงรักษาอย่างถูกวิธีจะช่วยให้มินิพีซีของคุณมีอายุการใช้งานยาวนานและทำงานได้อย่างมีประสิทธิภาพสูงสุด
- การทำความสะอาด: Use a soft, dry cloth to clean the exterior. For dust accumulation in vents, use compressed air. Ensure the device is powered off and unplugged before cleaning.
- การระบายอากาศ : Do not block the ventilation holes. Ensure adequate airflow around the device to prevent overheating. The AK41 features a built-in quiet fan for efficient heat dissipation.
- การอัปเดตซอฟต์แวร์: Regularly update Windows 11 and device drivers to maintain security and performance.
- สภาพแวดล้อม : Operate the Mini PC in a clean, dry environment, away from direct sunlight, extreme temperatures, and excessive humidity.

Image 8.1: The AWOW AK41 Mini PC's internal cooling system with a quiet large fan for effective heat dissipation.
9 การแก้ไขปัญหา
If you encounter issues with your AWOW AK41 Mini PC, refer to the following common solutions:
- ไม่มีไฟฟ้า:
- ตรวจสอบให้แน่ใจว่าอะแดปเตอร์ไฟฟ้าเชื่อมต่อกับมินิพีซีและเต้ารับไฟฟ้าที่ใช้งานได้แน่นหนา
- ลองใช้เต้ารับไฟอื่น
- ไม่มีจอแสดงผล:
- Verify that the HDMI or Type-C cable is firmly connected to both the Mini PC and the monitor.
- ตรวจสอบให้แน่ใจว่าจอภาพเปิดอยู่และตั้งค่าแหล่งอินพุตที่ถูกต้อง
- Test with a different cable or monitor if possible.
- ไม่มีการเชื่อมต่ออินเทอร์เน็ต:
- For Wi-Fi, check if the Wi-Fi adapter is enabled in Windows settings and if you are connected to the correct network with the right password.
- For Ethernet, ensure the cable is properly connected and your router/modem is functioning.
- รีสตาร์ทเราเตอร์/โมเด็มและมินิพีซีของคุณ
- ประสิทธิภาพการทำงานช้า:
- ปิดแอปพลิเคชันที่ไม่จำเป็นซึ่งทำงานอยู่เบื้องหลัง
- ตรวจสอบและติดตั้งการอัปเดต Windows ที่รอดำเนินการอยู่
- ตรวจสอบให้แน่ใจว่ามีพื้นที่ว่างบน SSD ของคุณเพียงพอ
10. ข้อมูลจำเพาะ
| คุณสมบัติ | ข้อมูลจำเพาะ |
|---|---|
| ยี่ห้อ | โอ้โห |
| หมายเลขรุ่น | เอเค41 |
| ระบบปฏิบัติการ | วินโดวส์ 11 โปร |
| โปรเซสเซอร์ | Intel Celeron J4125 Quad-Core (2.0 GHz base, up to 2.7 GHz burst) |
| แรม | แรม 8GB DDR4 |
| การจัดเก็บข้อมูลภายใน | 128 GB NVMe M.2 SSD (PCIe x2) |
| กราฟฟิก | กราฟิก Intel UHD 600 |
| การแสดงผลเอาท์พุต | 2x HDMI 2.0, 1x Full-Function Type-C (supports 4K@60Hz, triple display) |
| ปณิธาน | Up to 4096 x 2304 (4K) |
| การเชื่อมต่อแบบไร้สาย | Dual-band Wi-Fi (802.11a/b/g/n/ac), Bluetooth 4.2 |
| การเชื่อมต่อแบบมีสาย | 1x กิกะบิตอีเทอร์เน็ต |
| พอร์ต USB | พอร์ต USB 2 จำนวน 3.0 พอร์ต, พอร์ต USB 2 จำนวน 2.0 พอร์ต |
| พอร์ตอื่น ๆ | 1x 3.5mm Audio Jack, 1x Micro SD Card Slot, 1x DC Power Input |
| ขนาด (กว้าง x ยาว x สูง) | 12.5 x 11 x 4 ซม. |
| น้ำหนัก | 710 กรัม |
| ประเภทพลังงาน | DC |
| การใช้งานเฉพาะ | Multimedia, Personal, Professional |
11. การรับประกันและการสนับสนุน
AWOW is committed to providing reliable products and customer satisfaction.
- การรับประกัน: Your AWOW AK41 Mini PC comes with a 1-year warranty.
- การส่งคืน: Enjoy a 1-month free return period.
- การสนับสนุนด้านเทคนิค: AWOW offers lifetime technical consulting services and 24-hour customer support.
If you encounter any issues or have questions, please contact AWOW customer service for assistance.
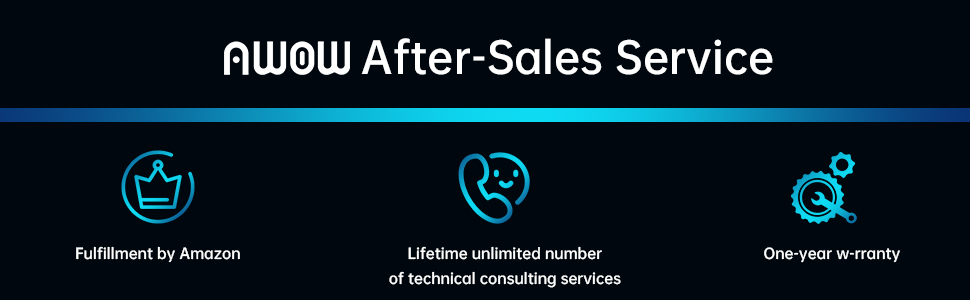
ภาพที่ 11.1: จบแล้วview of AWOW's after-sales service commitments.


