1. บทนำ
Thank you for choosing the Davitu NEO COOLCAM Smart WiFi Light Touch Switch. This device is designed to provide convenient control over your lighting through touch, a mobile application, or voice commands via smart assistants like Amazon Alexa and Google Home. This manual provides essential information for the safe installation, operation, and maintenance of your smart switch.
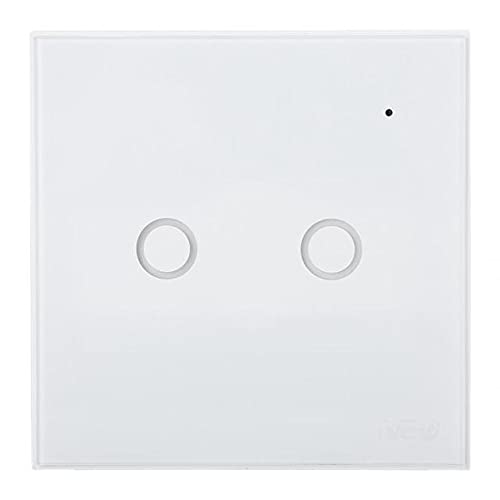
รูปที่ 1.1 : ด้านหน้า view of the Davitu NEO COOLCAM Smart WiFi Light Touch Switch (2-gang version).
2. ข้อมูลด้านความปลอดภัย
โปรดอ่านคำเตือนและคำแนะนำด้านความปลอดภัยทั้งหมดอย่างละเอียดก่อนการติดตั้งและใช้งาน การไม่ปฏิบัติตามคำแนะนำเหล่านี้อาจส่งผลให้เกิดไฟฟ้าช็อต ไฟไหม้ หรือบาดเจ็บสาหัสได้
- การติดตั้งระบบไฟฟ้า: Installation should only be performed by a qualified electrician or a person with thorough knowledge of electrical systems.
- การตัดการเชื่อมต่อไฟฟ้า: ควรตัดการเชื่อมต่อไฟฟ้าที่เบรกเกอร์เสมอ ก่อนที่จะติดตั้ง ถอด หรือซ่อมบำรุงสวิตช์
- เล่มที่tagความเข้ากันได้: ตรวจสอบปริมาณการใช้งานtage of your electrical system matches the specifications of the switch (AC 85-250V).
- สำหรับใช้ภายในอาคารเท่านั้น: This device is intended for indoor use in dry locations. Do not expose to water or excessive humidity.
- ระบบป้องกันการโอเวอร์โหลด: ห้ามใช้กระแสไฟฟ้าเกินพิกัดสูงสุด 5 แอมป์ Amps per gang or 15 Amps total for multi-gang switches.
- ความปลอดภัยของเด็ก: เก็บให้พ้นจากมือเด็ก
3. เนื้อหาบรรจุภัณฑ์
ตรวจสอบว่ามีรายการทั้งหมดอยู่ในแพ็คเกจของคุณ:
- Davitu NEO COOLCAM Smart WiFi Light Touch Switch (1, 2, or 3 gang, depending on purchase)
- คู่มือผู้ใช้ (เอกสารนี้)
- สกรูยึด
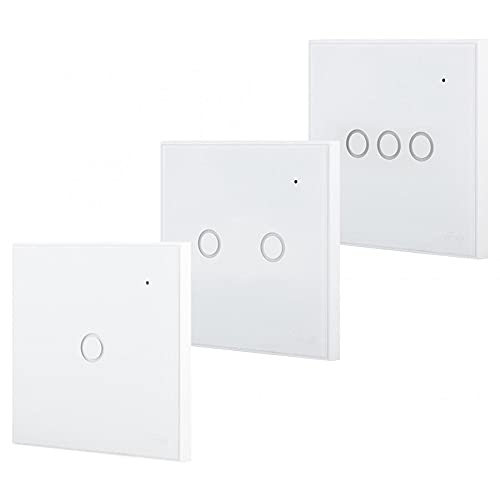
Figure 3.1: Different gang options for the Davitu NEO COOLCAM Smart WiFi Light Touch Switch.
4. ข้อมูลจำเพาะ
| คุณสมบัติ | ข้อมูลจำเพาะ |
|---|---|
| ยี่ห้อ | ดาวิตู |
| ปฏิบัติการฉบับที่tage | ไฟฟ้ากระแสสลับ 85-250 โวลต์ |
| คะแนนปัจจุบัน | 5 Amps (per gang), Max 15 Ampรวมทั้งหมด |
| โปรโตคอลการเชื่อมต่อ | Wi-Fi (2.4GHz เท่านั้น) |
| ประเภทตัวควบคุม | Amazon Alexa, Android, iOS (Google Home compatible) |
| วิธีการควบคุม | App, Remote (via app/voice), Touch |
| ประเภทการติดตั้ง | ติดผนัง |
| ประเภทตัวกระตุ้น | สัมผัส |
| การให้คะแนนการคุ้มครองระหว่างประเทศ | IP85 |
| โหมดการทำงาน | Off (Default state after power loss) |
5. การตั้งค่าและการติดตั้ง
5.1 แผนผังการเดินสายไฟ
Before starting, ensure the power is OFF at the circuit breaker. Incorrect wiring can damage the switch or cause electric shock.
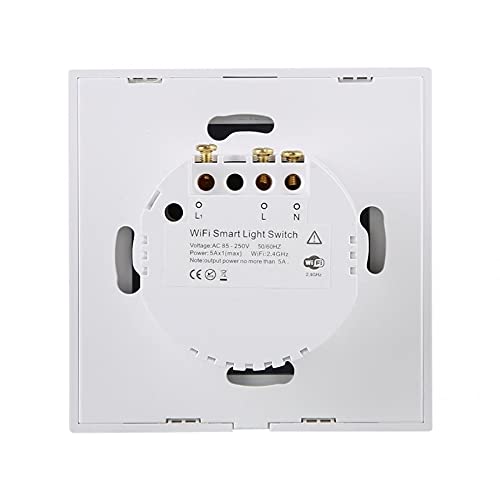
Figure 5.1: Wiring terminals on the back of the smart switch.
- ตัดการเชื่อมต่อไฟฟ้า: Turn off the power to the light switch at the circuit breaker.
- ถอดสวิตช์เก่าออก: Carefully remove your existing light switch from the wall box.
- ระบุสายไฟ: Identify the Live (L), Neutral (N), and Load (L1, L2, L3) wires. A Neutral wire is required for this smart switch.
- เชื่อมต่อสายไฟ: Connect the wires to the corresponding terminals on the Davitu Smart Switch:
- ต่อสายไฟ (Live wire) เข้ากับขั้ว 'L'
- ต่อสายกลาง (Neutral) เข้ากับขั้ว 'N'
- Connect the Load wire(s) for your light(s) to the 'L1', 'L2', or 'L3' terminals as appropriate for your switch gang configuration.
- สวิตช์ติดตั้ง: Gently push the switch into the wall box and secure it with the provided mounting screws. Attach the glass panel.
- คืนค่าพลัง: Turn the power back on at the circuit breaker. The indicator light on the switch should illuminate.
5.2 การจับคู่แอพ
To control your smart switch via your smartphone, you need to download and pair it with a compatible app (e.g., Smart Life or Tuya Smart app).
- ดาวน์โหลดแอพ: ค้นหา 'Smart Life' or 'Tuya Smart' in your mobile app store (App Store for iOS, Google Play for Android) and install it.
- ลงทะเบียน/เข้าสู่ระบบ: เปิดแอปและลงทะเบียนบัญชีใหม่หรือเข้าสู่ระบบหากคุณมีบัญชีอยู่แล้ว
- เพิ่มอุปกรณ์: Tap the '+' icon in the top right corner of the app to add a device. Select 'Electrical Switch' or 'Light Switch' from the device list.
- เข้าสู่โหมดจับคู่: On the smart switch, press and hold any touch button for approximately 5-10 seconds until the Wi-Fi indicator light starts blinking rapidly. This indicates it's in pairing mode.
- เชื่อมต่อกับ Wi-Fi: In the app, confirm the indicator is blinking rapidly. Enter your 2.4GHz Wi-Fi network password (5GHz networks are not supported).
- การจับคู่: The app will begin searching for and connecting to the switch. Once connected, you can rename the switch and assign it to a room.
5.3 การบูรณาการผู้ช่วยเสียง (Alexa/Google Home)
To enable voice control, link your Smart Life/Tuya Smart account with your preferred voice assistant.
- เปิดแอปผู้ช่วยเสียง: เปิดแอป Amazon Alexa หรือแอป Google Home
- เปิดใช้งานทักษะ/การกระทำ:
- For Alexa: Go to 'Skills & Games', search for 'Smart Life' or 'Tuya Smart', and enable the skill.
- For Google Home: Go to 'Set up device' > 'Works with Google', search for 'Smart Life' or 'Tuya Smart'.
- เชื่อมโยงบัญชี: You will be prompted to link your Smart Life/Tuya Smart account. Enter your credentials.
- ค้นพบอุปกรณ์: Once linked, ask your voice assistant to
เอกสารที่เกี่ยวข้อง - NEO COOLCAM Smart WiFi Light Touch Switch

Motive NEO-WiFi: ใช้งานร่วมกันได้ตั้งแต่ต้นจนจบ
คุณสามารถเลือกใช้งาน Motive NEO-WiFi, bao gồm thông số kỹ thuaguet, hớng dẫn lắp đặt, lùp trình và มีให้เลือกมากมาย NEO-WiFi-3, -4, -5.5, -11, และ -22.
Smart M-Air Kullanım Kılavuzu: Mobil Uygulama ile Klima Kontrolü
Mitsubishi Heavy Industries Smart M-Air klima sisteminiz için kapsamlı kullanım kılavuzu. Mobil uygulama kurulumu, uzaktan kontrol, işletim modları ve sorun giderme hakkında detaylı bilgi edinin.
แรงจูงใจ NEO-WIFI Teknik Klavuz: มอเตอร์ควบคุมและพลังงาน Tasarrufu
Motive NEO-WIFI teknik kılavuzu, endüstriyel motorlar için entegre motor-inverter çözümlerini, kablosuz kontrolü, IP65 korumasını ve enerji tasarrufu özelliklerini detaylandırır. Kurulum โปรแกรมลามา ve kullanım bilgileri içerir
มอเตอร์อินเวอร์เตอร์ Teknis แบบแมนนวล Motive NEO-WiFi
สิ่งสำคัญสำหรับมอเตอร์อินเวอร์เตอร์ Motive NEO-WiFi, การติดตั้ง, พารามิเตอร์พื้นฐาน, พารามิเตอร์พื้นฐาน, และคุณสมบัติพิเศษ มีความสำคัญอย่างยิ่งต่อการควบคุมอุตสาหกรรมยานยนต์อันดา
คู่มือผู้ใช้ Grenton 2: คู่มือการกำหนดค่าระบบอาคารอัจฉริยะ
คู่มือผู้ใช้ที่ครอบคลุมสำหรับระบบอาคารอัจฉริยะ Grenton 2.0 ซึ่งมีรายละเอียดเกี่ยวกับสถาปัตยกรรมระบบ อินเทอร์เฟซเชิงตรรกะ การเตรียมโครงการ ขั้นตอนการกำหนดค่าโดยใช้ซอฟต์แวร์ Object Manager แอปพลิเคชันมือถือ และโมดูลบ้านอัจฉริยะต่างๆ
NEO Coolcam Z-Wave Light Switch User Manual
User manual for the NEO Coolcam Z-Wave Light Switch, detailing its features, technical specifications, and installation for smart home automation using Z-Wave technology.