1. คำแนะนำด้านความปลอดภัยที่สำคัญ
ปฏิบัติตามข้อควรระวังด้านความปลอดภัยขั้นพื้นฐานอยู่เสมอ เพื่อลดความเสี่ยงจากไฟไหม้ ไฟฟ้าช็อต และการบาดเจ็บส่วนบุคคลขณะใช้งานเครื่องมือไฟฟ้า อ่านคำแนะนำทั้งหมดอย่างละเอียดก่อนใช้งาน
- ความปลอดภัยในพื้นที่ทำงาน: รักษาพื้นที่ทำงานให้สะอาดและมีแสงสว่างเพียงพอ พื้นที่ที่รกหรือมืดอาจก่อให้เกิดอุบัติเหตุได้ ห้ามใช้เครื่องมือไฟฟ้าในสภาพแวดล้อมที่อาจเกิดการระเบิด เช่น ในบริเวณที่มีของเหลวไวไฟ ก๊าซ หรือฝุ่น
- ความปลอดภัยทางไฟฟ้า: ปลั๊กไฟของเครื่องมือไฟฟ้าต้องตรงกับเต้ารับ ห้ามดัดแปลงปลั๊กไฟไม่ว่ากรณีใดๆ ทั้งสิ้น หลีกเลี่ยงการสัมผัสร่างกายกับพื้นผิวที่ต่อสายดิน เช่น ท่อ หม้อน้ำ เตา และตู้เย็น
- ความปลอดภัยส่วนบุคคล: สวมอุปกรณ์ป้องกันดวงตาทุกครั้ง ใช้อุปกรณ์ป้องกันหูเมื่อต้องปฏิบัติงานเป็นเวลานาน แต่งกายให้เหมาะสม หลีกเลี่ยงการสวมเสื้อผ้าหลวมๆ หรือเครื่องประดับ ระวังอย่าให้เส้นผม เสื้อผ้า และถุงมือสัมผัสถูกชิ้นส่วนที่กำลังเคลื่อนที่
- การใช้และการดูแลเครื่องมือ: อย่าฝืนใช้เครื่องมือไฟฟ้า ใช้เครื่องมือไฟฟ้าที่ถูกต้องตามการใช้งาน ถอดปลั๊กออกจากแหล่งจ่ายไฟก่อนทำการปรับแต่ง เปลี่ยนอุปกรณ์เสริม หรือจัดเก็บเครื่องมือไฟฟ้า
- การซ่อมบำรุง: บำรุงรักษาเครื่องมือไฟฟ้า ตรวจสอบการจัดแนวหรือการยึดติดของชิ้นส่วนที่เคลื่อนไหวการแตกหักของชิ้นส่วนและสภาพอื่น ๆ ที่อาจส่งผลต่อการทำงานของเครื่องมือไฟฟ้า หากได้รับความเสียหายให้ซ่อมแซมเครื่องมือไฟฟ้าก่อนใช้งาน
2. สินค้าหมดview และส่วนประกอบ
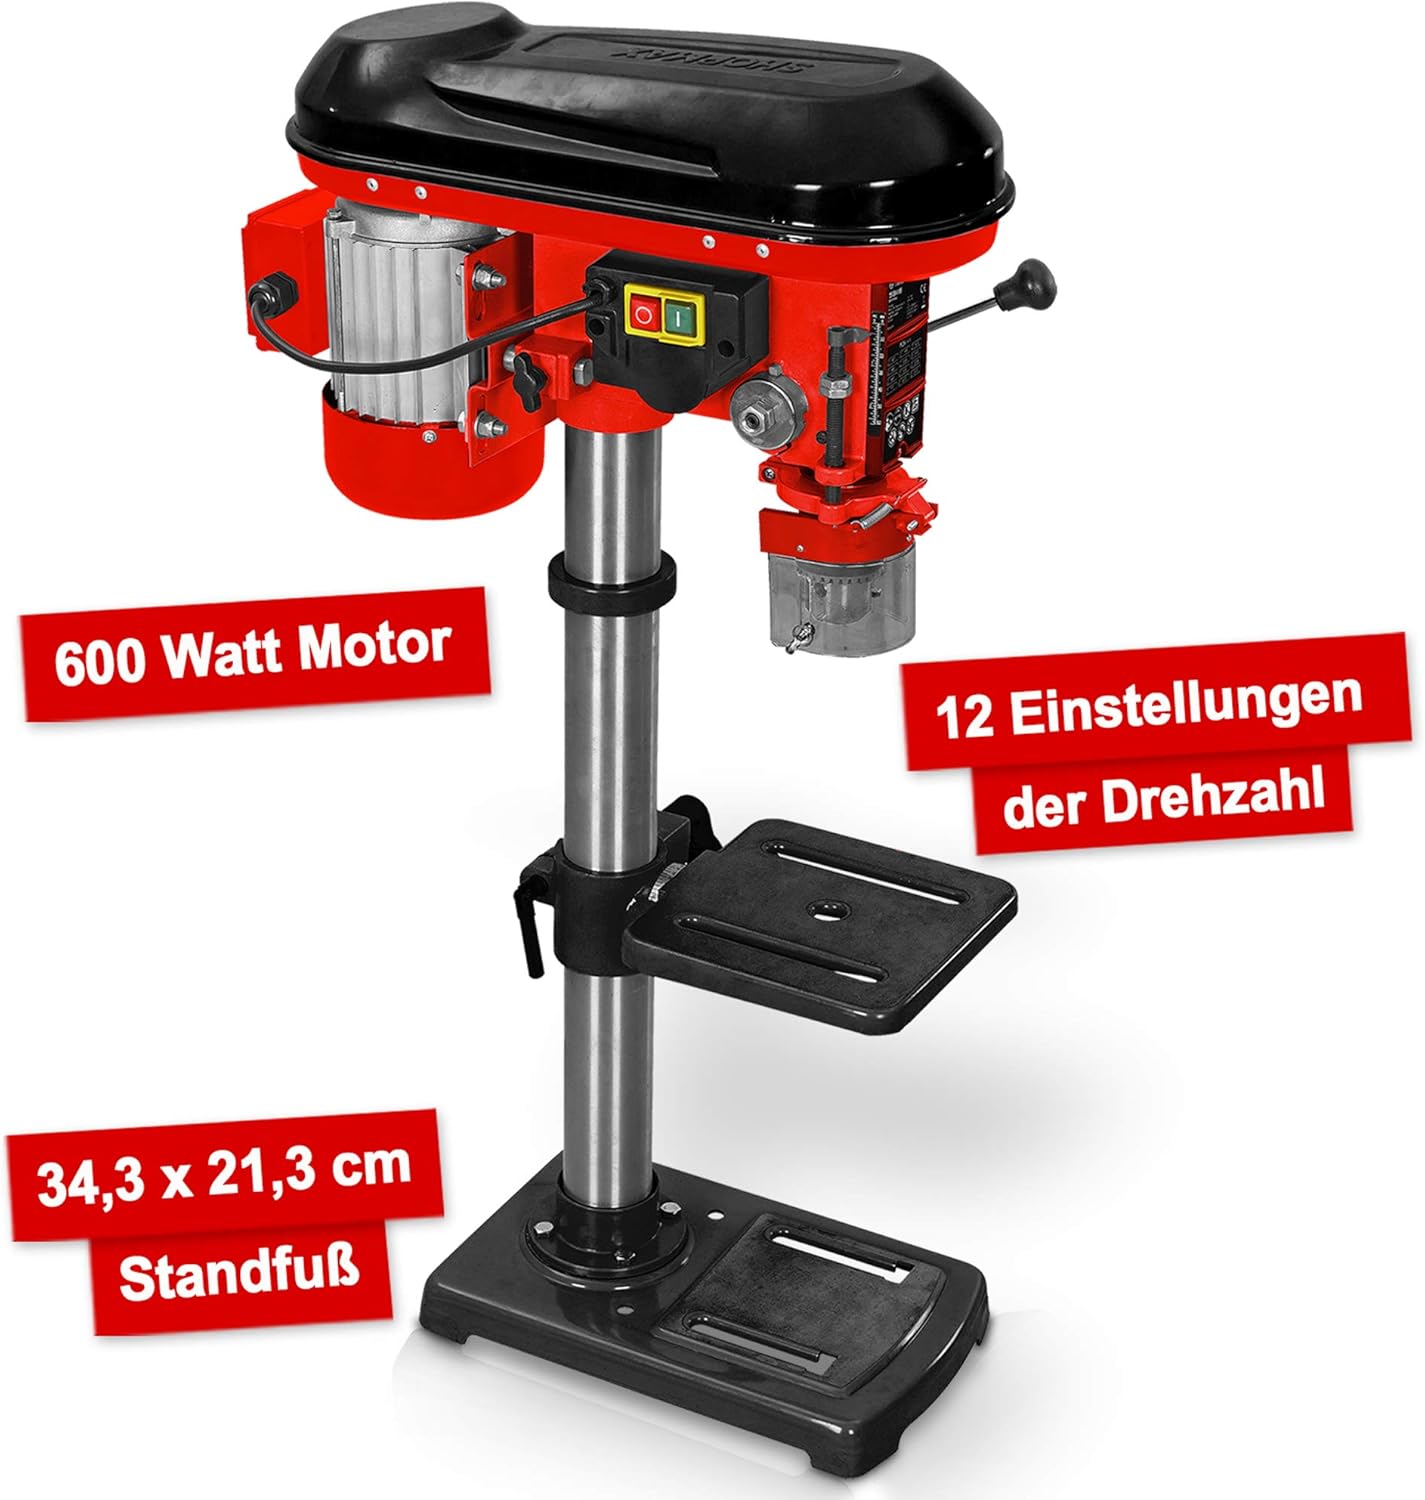
The Hecht Professional Pillar Drill is designed for precise drilling operations. Familiarize yourself with its main components for safe and effective use.

- ที่อยู่อาศัยมอเตอร์: Contains the 600W motor and belt drive system.
- หัวหน้าสภา: Includes the chuck, spindle, and depth stop.
- คอลัมน์: The main support structure for the head assembly and drilling table.
- Drilling Table: Adjustable in height and angle for versatile drilling.
- แผ่นฐาน: Provides stability and features mounting slots for securing to a workbench.
- เชย: Holds the drill bits securely (3-16 mm capacity).
- Speed Adjustment Lever: Used to change the drilling speed.
- ด้ามจับสำหรับป้อนอาหาร: Used to lower the chuck and drill bit into the workpiece.
- สวิตช์เปิด/ปิด: Power control for the drill.
- Chip Protection Guard: Transparent guard for safety during operation.
3. การติดตั้งและการประกอบ
Follow these steps to assemble and set up your pillar drill before initial use.
- การแกะกล่อง: นำชิ้นส่วนทั้งหมดออกจากบรรจุภัณฑ์อย่างระมัดระวัง ตรวจสอบดูว่ามีชิ้นส่วนใดเสียหายหรือขาดหายไปหรือไม่
- การติดตั้งแผ่นฐาน: Place the base plate on a stable, level workbench. Secure it using appropriate bolts through the elongated slots on the base.
- การประกอบเสา: Mount the column securely onto the base plate according to the provided hardware.
- Drilling Table Attachment: Slide the drilling table assembly onto the column. Adjust its height and secure it with the locking handle.
- Head Assembly Mounting: Carefully place the head assembly onto the top of the column and secure it.
- ขั้นตอนการติดตั้งหัวจับ: Insert the chuck onto the spindle taper. Use a rubber mallet to gently tap it into place, ensuring a firm fit.
- Chip Guard: Attach the transparent chip protection guard around the chuck area.

4. คู่มือการใช้งาน
Understand how to properly operate your pillar drill for optimal performance and safety.
4.1 Selecting Drill Bits
Choose the appropriate drill bit for the material and desired hole size. The chuck accommodates bits from 3 mm to 16 mm. Ensure the drill bit is sharp and free from damage.
4.2 การติดตั้งดอกสว่าน
- Ensure the drill is unplugged.
- Open the chuck jaws using the chuck key.
- Insert the drill bit into the chuck, ensuring it is centered and seated firmly.
- Tighten the chuck jaws securely with the chuck key. Remove the chuck key immediately after tightening.
4.3 การปรับความเร็ว
The drill features 12 speed settings, adjustable via a belt drive system. Select the speed appropriate for your material and drill bit size. Lower speeds are generally for larger bits and harder materials, while higher speeds are for smaller bits and softer materials.


4.4 Adjusting Drilling Table
The drilling table can be adjusted in height and tilted up to +/- 45 degrees. Loosen the locking handle, position the table as required, and then securely tighten the handle.

4.5 การกำหนดความลึกในการเจาะ
Use the depth stop mechanism to set the desired drilling depth. This ensures consistent hole depths for repetitive tasks.
4.6 ขั้นตอนการเจาะ
- Secure the workpiece firmly to the drilling table using clamps or a vise. Never hold the workpiece by hand.
- Adjust the table height and angle, and set the drilling depth.
- เลือกความเร็วที่เหมาะสม
- Turn on the drill using the On/Off switch.
- Slowly lower the drill bit into the workpiece using the feed handles, applying steady, even pressure.
- Once the desired depth is reached, retract the drill bit from the workpiece.
- Turn off the drill.
5. การบำรุงรักษา
การบำรุงรักษาอย่างสม่ำเสมอจะช่วยให้สว่านเสาของคุณมีอายุการใช้งานยาวนานและใช้งานได้อย่างปลอดภัย
- การทำความสะอาด: After each use, clean the drill of dust and chips. Use a brush or compressed air. Do not use solvents that may damage plastic parts.
- การหล่อลื่น: Periodically lubricate moving parts such as the column, spindle, and depth stop mechanism with light machine oil.
- ความตึงของสายพาน: Check the tension of the drive belt regularly. Adjust if necessary to prevent slippage and ensure proper power transmission. Refer to the belt diagram inside the motor housing cover.
- การบำรุงรักษาชัค: Keep the chuck jaws clean and free of debris. If the chuck becomes stiff, clean and lightly lubricate it.
- สายไฟ: Inspect the power cord for any damage. Replace if frayed or cut.
6 การแก้ไขปัญหา
ส่วนนี้จะกล่าวถึงปัญหาทั่วไปที่คุณอาจพบเจอขณะใช้งานสว่านเสา
| ปัญหา | สาเหตุที่เป็นไปได้ | สารละลาย |
|---|---|---|
| สว่านไม่เริ่มทำงาน | ไม่มีไฟเลี้ยง; สวิตช์เสีย; มอเตอร์มีปัญหา | Check power connection and circuit breaker; Inspect switch for damage; Consult qualified service personnel. |
| แรงสั่นสะเทือนมากเกินไป | Loose mounting; Unbalanced drill bit; Worn bearings | Tighten mounting bolts; Replace or re-center drill bit; Consult service personnel for bearing replacement. |
| สว่านลื่นในหัวจับ | Chuck not tightened sufficiently; Oily chuck jaws; Damaged chuck jaws | Tighten chuck firmly with key; Clean chuck jaws; Replace chuck if damaged. |
| มอเตอร์ร้อนเกินไป | Overloading; Insufficient ventilation; Prolonged use | Reduce load; Ensure clear ventilation; Allow motor to cool down. |
| การเจาะที่ไม่แม่นยำ | Loose workpiece; Worn drill bit; Misaligned table | Secure workpiece firmly; Replace drill bit; Check and adjust table alignment. |
7. ข้อมูลจำเพาะ
Technical data for the Hecht Professional Pillar Drill.
| คุณสมบัติ | ข้อมูลจำเพาะ |
|---|---|
| ผู้ผลิต | เฮชท์ |
| หมายเลขรุ่นสินค้า | Standbohrmaschine Hecht |
| แหล่งพลังงาน | สายไฟ |
| เล่มที่tage | 230 โวลต์ |
| พลังสูงสุด | 600 วัตต์ |
| ความเร็วในการหมุนสูงสุด | 2700 รอบต่อนาที |
| จำนวนความเร็ว | 12 |
| ขนาดหัวจับสูงสุด | 16 มม. |
| วัสดุ | โลหะ |
| สี | Red Pillar Drill |
| ขนาดแพ็คเกจ | 71 x 45 x 27 ซม. |
| น้ำหนัก | 23 kilograms (approx.) |
| สภาพแวดล้อมการใช้งาน | ในร่ม |
| หมายเลขอ้างอิง | 8595614925655 |
8. การรับประกันและการสนับสนุน
For warranty information, please refer to the documentation provided with your purchase or contact the retailer. For technical support or spare parts inquiries, please contact Hecht customer service or your authorized dealer.
Please have your model number (Standbohrmaschine Hecht) and reference number (8595614925655) available when contacting support.


