1. บทนำ
This user manual provides detailed instructions for the safe installation, operation, and maintenance of your ASD LED 32 Inch Oval Flush Mount Light Fixture. Please read this manual thoroughly before installation and retain it for future reference.
ข้อมูลด้านความปลอดภัยที่สำคัญ
- ควรปิดสวิตช์ไฟที่ตัวตัดวงจรทุกครั้งก่อนเริ่มการติดตั้ง
- ปรึกษาช่างไฟฟ้าที่มีคุณสมบัติเหมาะสมหากคุณไม่แน่ใจเกี่ยวกับกระบวนการติดตั้ง
- ตรวจสอบให้แน่ใจว่าการเชื่อมต่อไฟฟ้าทั้งหมดเป็นไปตามกฎหมายและข้อบังคับท้องถิ่น
- Do not install this fixture in wet locations. It is rated for dry and damp สถานที่เท่านั้น
- ห้ามพยายามดัดแปลงอุปกรณ์ติดตั้ง การดัดแปลงใดๆ อาจทำให้การรับประกันเป็นโมฆะและก่อให้เกิดอันตรายด้านความปลอดภัย
2. อะไรอยู่ในกล่อง
Carefully unpack the contents and ensure all items are present and undamaged:
- โคมไฟ
- แผ่นยึด
- Screws, Anchors
- ลวดถั่ว

Image: The ASD LED 32 Inch Oval Flush Mount Light Fixture shown with its product packaging.
3. ข้อมูลจำเพาะผลิตภัณฑ์
| ข้อมูลจำเพาะ | รายละเอียด |
|---|---|
| ชื่อรุ่น | LED วงแหวนคู่ Flushmount |
| หมายเลขรุ่น | A-LFMOV-M32D45C-N |
| ขนาด (กว้าง x ยาว x สูง) | 32.44" x 18.13" x 4.81" (824 มม. x 460 มม. x 122 มม.) |
| วัดtage | 45วัตต์ |
| ความสว่าง | 3750 ลูเมน |
| อุณหภูมิสี (CCT) | 3000K (Warm White), 4000K (Cool White), 5000K (Daylight) - Selectable |
| เล่มที่tage | 100-277โวลต์ |
| หรี่แสงได้ | Yes, with compatible Triac dimmer switch (10% to 100%) |
| วัสดุ | Durable Alloy Steel Housing, Frosted Acrylic Shade, Matte White Diffuser Cover, Solid Metal Base |
| ประเภทการเสร็จสิ้น | นิกเกิลขัดเงา |
| การรับรอง | ETL Listed, Energy Star Certified |
| อายุการใช้งาน | 50,000 ชั่วโมง |
| สภาพแวดล้อมการใช้งาน | Indoor, Dry and Damp ตำแหน่งที่ตั้ง |
| น้ำหนักสินค้า | 7.8 ปอนด์ |

Image: Detailed product specifications including dimensions and electrical ratings.
4. คำแนะนำในการติดตั้ง
Follow these steps for proper installation of your flush mount light fixture. Ensure power is OFF at the circuit breaker before starting.
- เตรียมอุปกรณ์: Unscrew the cap nuts counter-clockwise and carefully remove the metal ring and the lens from the fixture.
- ติดตั้งแผ่นยึด: Attach the mounting plate to the outlet box using two screws. Use the mounting plate as a template to mark the location for wall anchors if needed. Drill appropriate sized holes for anchors, insert anchors, and twist self-tapping screws into them.
- การเชื่อมต่อสายไฟ: Connect the electrical wires: Black to Black (Live), White to White (Neutral), and Ground to Ground. Secure connections with wire nuts. Carefully tuck all wires back into the outlet box.
- การแข่งขันที่ปลอดภัย: Attach the back plate to the ceiling by feeding self-tapping screws through the keyhole slots and then tightening them. Secure the fixture to the mounting plate using two screws.
- เลือกอุณหภูมิสี: Before reattaching the lens, choose your desired color temperature (3000K, 4000K, or 5000K) using the switch located on the fixture.
- ติดเลนส์กลับเข้าไปใหม่: Secure the lens and metal ring to the fixture pan using the cap nuts.
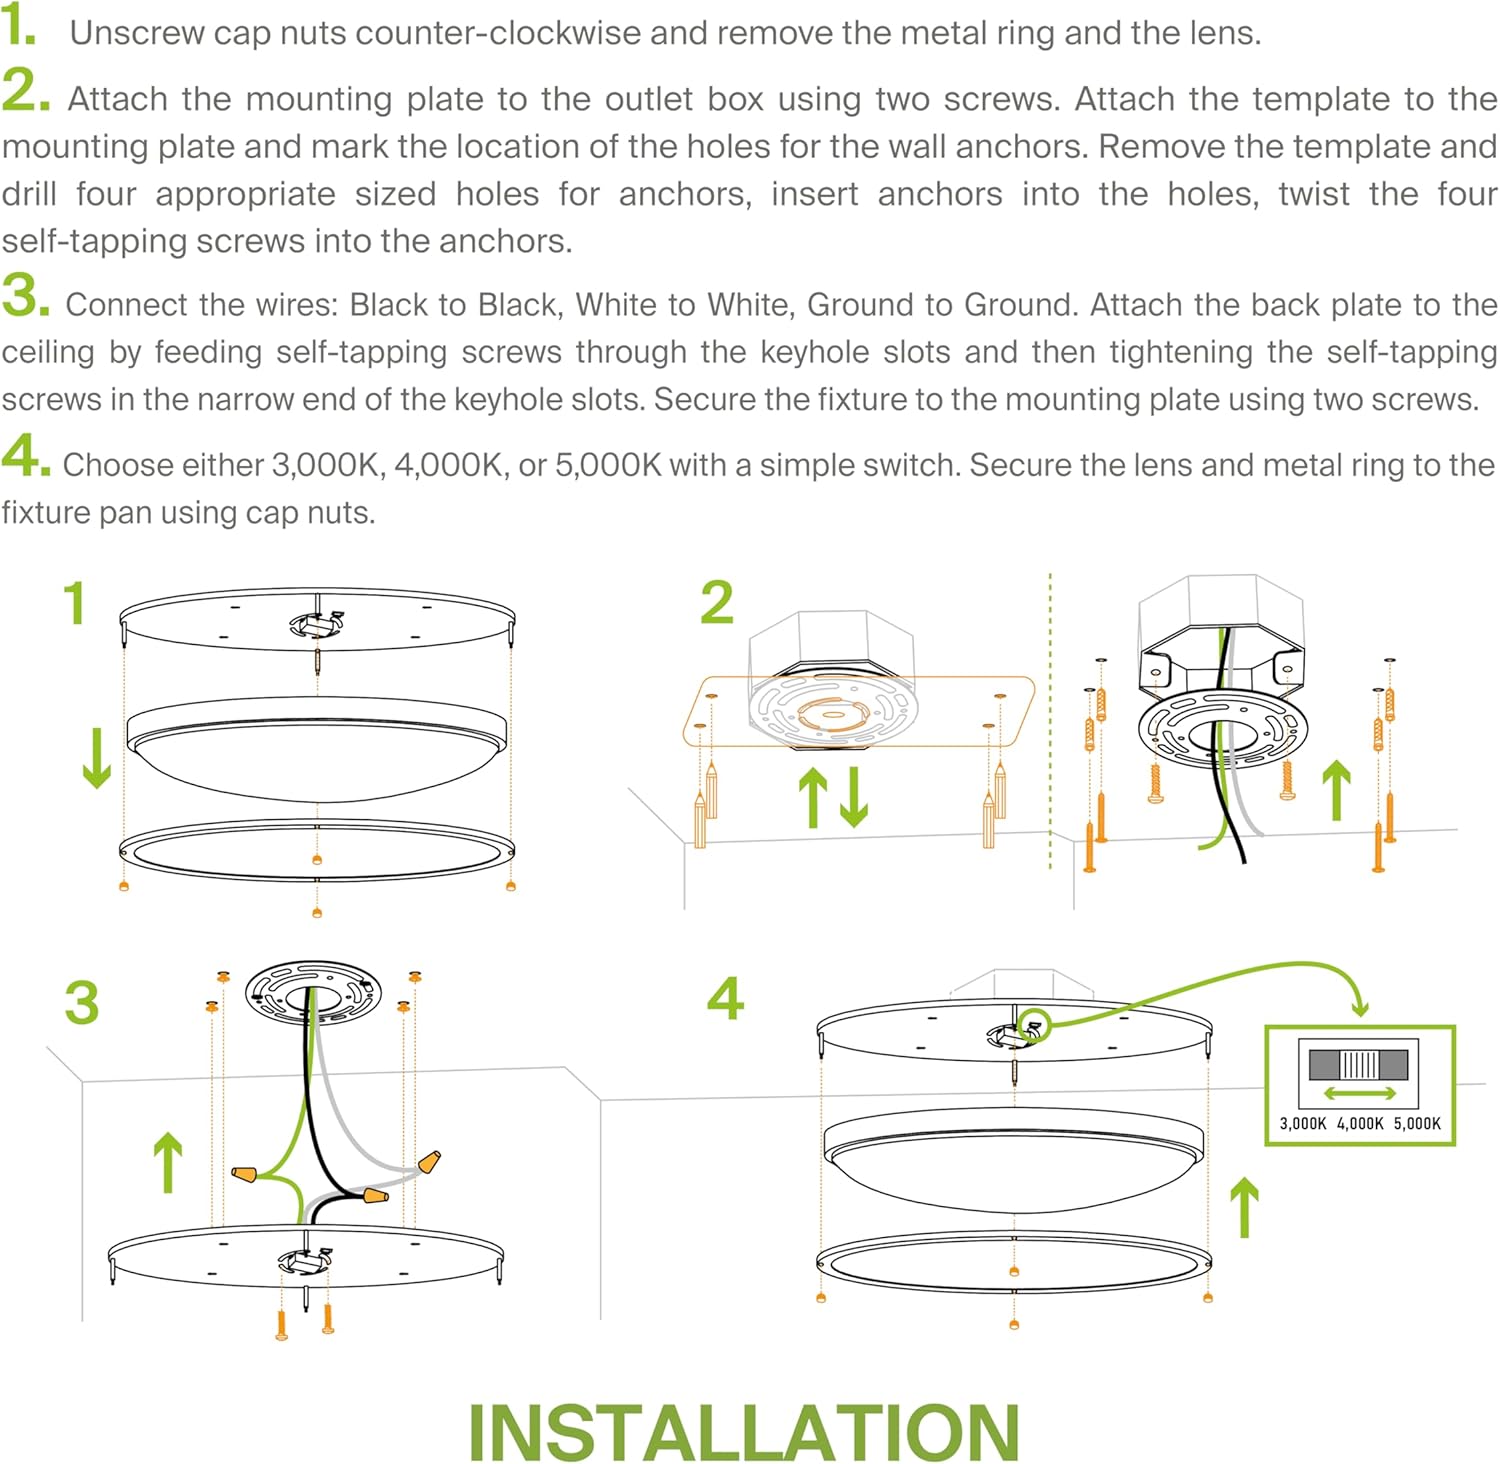
Image: Visual guide for the installation process, from preparing the fixture to securing the lens.

Image: Another detailed diagram illustrating the mounting and wiring steps.
For a full cut sheet and detailed instructions, you can refer to the official user manual PDF: ดาวน์โหลดคู่มือผู้ใช้ (PDF)
5. คู่มือการใช้งาน
Color Temperature Selection (3CCT)
Your fixture features a selectable color temperature switch, allowing you to choose between 3000K (Warm White), 4000K (Cool White), and 5000K (Daylight). This switch is located on the fixture body and should be set during installation before the lens is secured.

Image: Illustration of the three selectable color temperature options: 3000K, 4000K, and 5000K.
ฟังก์ชั่นลดแสง
This fixture supports smooth, flicker-free Triac dimming. To utilize the dimming feature, ensure you have a compatible dimmer switch installed. The brightness can be adjusted from 10% to 100%.
6. การบำรุงรักษา
The ASD LED Flush Mount Light Fixture requires minimal maintenance. Follow these guidelines to ensure its longevity and optimal performance:
- การทำความสะอาด: Before cleaning, ensure the power to the fixture is turned off. Use a soft, dry or slightly damp cloth to wipe the exterior surfaces. Do not use abrasive cleaners, solvents, or polishes as they may damage the finish or acrylic lens.
- การตรวจสอบ: Periodically inspect the fixture for any signs of damage, loose connections, or wear. If any issues are found, consult a qualified electrician.
- ไฟ LED: แหล่งกำเนิดแสง LED ในตัวได้รับการออกแบบให้มีอายุการใช้งานยาวนาน (50,000 ชั่วโมง) และผู้ใช้ไม่สามารถเปลี่ยนเองได้
7 การแก้ไขปัญหา
หากคุณพบปัญหาเกี่ยวกับโคมไฟ โปรดดูปัญหาและวิธีแก้ไขที่พบบ่อยต่อไปนี้:
| ปัญหา | สาเหตุที่เป็นไปได้ | สารละลาย |
|---|---|---|
| ไฟไม่ติด | No power to the fixture, loose wiring, faulty switch, incorrect installation. | Check circuit breaker. Verify all wire connections are secure. Test the switch. Re-check installation steps. |
| ไฟกระพริบหรือหรี่ลงไม่สม่ำเสมอ | Incompatible dimmer switch, loose wiring, voltagความผันผวนของอี | Ensure you are using a compatible Triac dimmer. Check wire connections. The fixture is designed for 100-277V to handle fluctuations, but extreme voltage issues may require professional assessment. |
| อุณหภูมิสีไม่ถูกต้อง | ตั้งค่าสวิตช์ CCT ไม่ถูกต้อง | Turn off power, remove lens, and adjust the CCT switch to your desired setting (3000K, 4000K, or 5000K). Reattach lens. |
| เสียงหึ่งๆ จากโคมไฟ | Incompatible dimmer, loose wiring, internal component issue. | Try a different compatible dimmer. Check wiring. If the issue persists, contact customer support. |
8. การรับประกันและการสนับสนุน
ASD products are covered by a รับประกัน 5 ปี ตั้งแต่วันที่ซื้อ การรับประกันนี้ครอบคลุมถึงข้อบกพร่องในวัสดุและฝีมือการผลิตภายใต้การใช้งานปกติ
For warranty claims, technical assistance, or any other inquiries, please contact ASD Customer Support. Ensure you have your proof of purchase and model number ready.
- ผู้ผลิต: บริษัท เอเอสดี ไลท์ติ้ง คอร์ป
- ยี่ห้อ: เอเอสดี
- หมายเลขรุ่น: A-LFMOV-M32D45C-N
- ยูพีซี: 810050732055
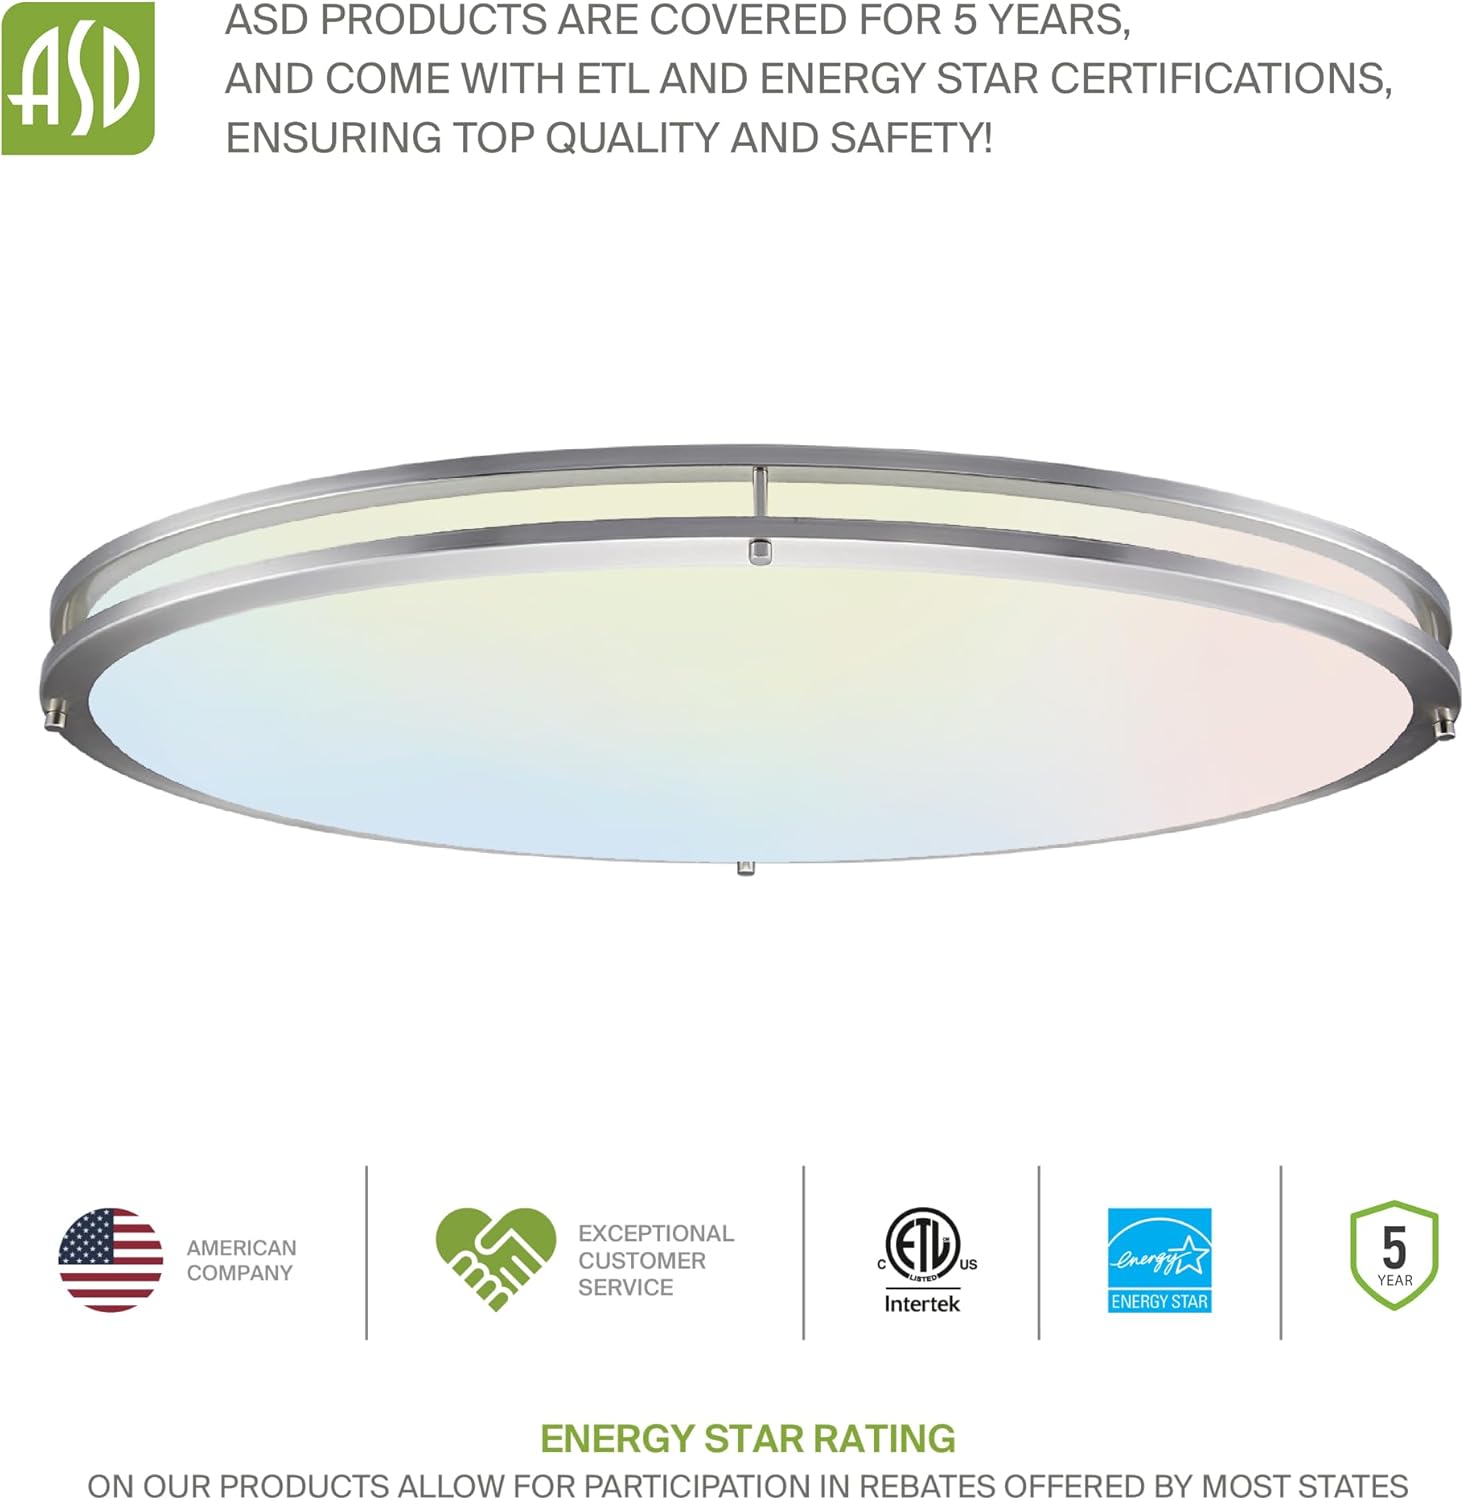
Image: ASD's commitment to quality, safety, and certifications like ETL and Energy Star.