1. บทนำ
ขอบคุณสำหรับการซื้อasing the ELEPHAS Mini Portable Projector. This compact and versatile projector is designed to provide an immersive viewing experience for movies, videos, and games, whether at home or on the go. Its small size and multiple connectivity options make it an ideal entertainment solution for various environments. Please read this manual thoroughly before using the projector to ensure proper operation and to maximize its lifespan.
อะไรอยู่ในกล่อง:
- โปรเจ็กเตอร์พกพาขนาดเล็ก ELEPHAS
- สาย HDMI
- เคเบิ้ล AV
- รีโมทคอนโทรล
- สายไฟ
- คู่มือการใช้งาน (เอกสารนี้)
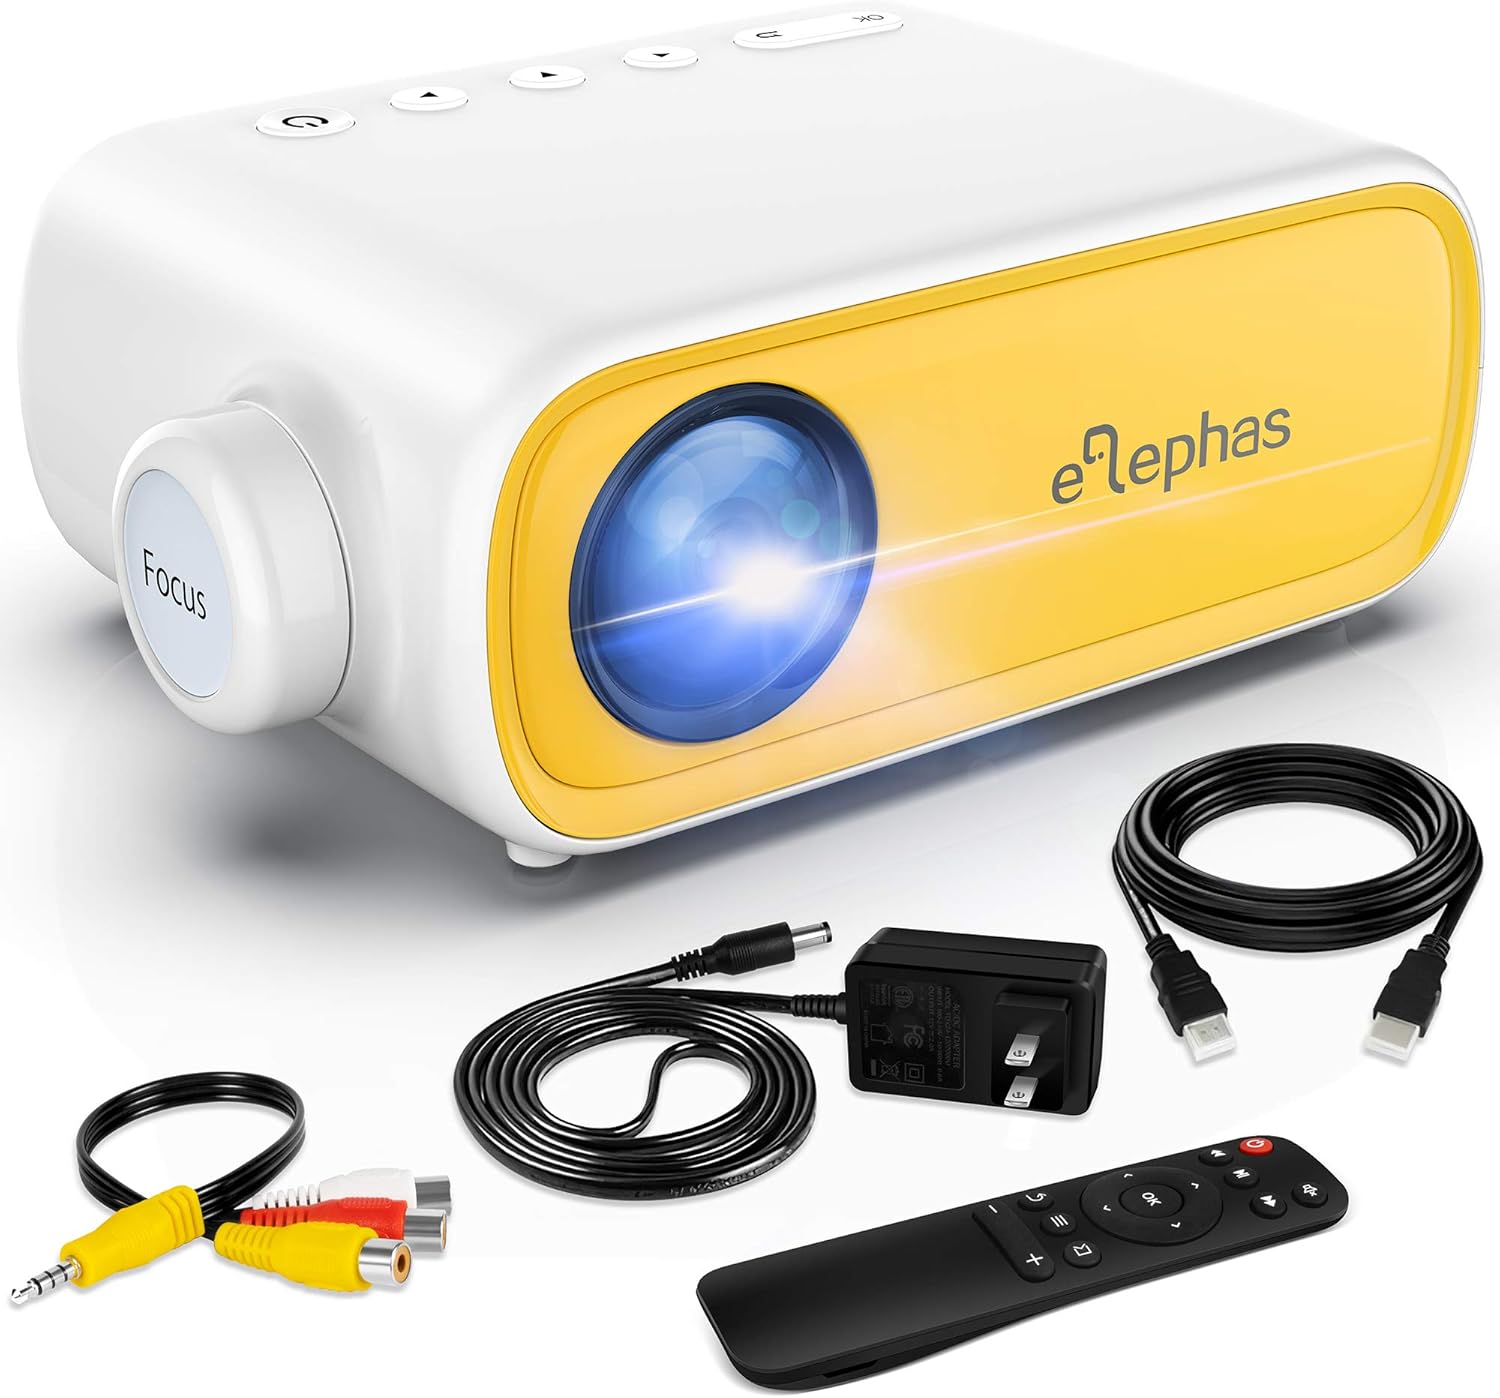
Figure 1.1: ELEPHAS Mini Portable Projector with its accessories including HDMI cable, AV cable, remote control, and power cord.
2. ข้อมูลด้านความปลอดภัย
To ensure safe and optimal operation of your projector, please observe the following safety precautions:
- แหล่งจ่ายไฟ: Use only the original power adapter and cord provided with the projector. Ensure the power outlet matches the voltagข้อกำหนดอี
- การระบายอากาศ : Do not block the ventilation openings on the projector. Ensure adequate airflow around the device to prevent overheating.
- การจัดวาง: Place the projector on a stable, flat surface. Avoid placing it in direct sunlight, near heat sources, or in environments with high humidity or dust.
- ความปลอดภัยของดวงตา: อย่ามองตรงเข้าไปในเลนส์โปรเจ็กเตอร์เมื่อลamp เปิดอยู่ แสงสว่างจ้าอาจทำให้ปวดตาหรือเกิดความเสียหายต่อดวงตาได้
- การทำความสะอาด: ถอดปลั๊กไฟก่อนทำความสะอาด ใช้ผ้าแห้งนุ่มๆ เช็ดทำความสะอาดภายนอก ส่วนเลนส์ ให้ใช้ผ้าเช็ดเลนส์โดยเฉพาะ
- เด็ก: Keep the projector and its accessories out of reach of small children. Adult supervision is recommended when children are using the device.
- ถอดชิ้นส่วน: อย่าพยายามถอดประกอบหรือซ่อมแซมโปรเจ็กเตอร์ด้วยตนเอง โปรดติดต่อช่างผู้ชำนาญเพื่อขอรับบริการ
3. สินค้าหมดview และส่วนประกอบ
Familiarize yourself with the various parts and interfaces of your ELEPHAS Mini Portable Projector.

รูปที่ 3.1: ด้านหลังและด้านข้าง view of the projector highlighting its input/output ports.
ส่วนประกอบหลัก:
- เลนส์: ฉายภาพขึ้นบนจอภาพ
- วงแหวนโฟกัส: ปรับความคมชัดของภาพที่ฉาย
- พอร์ต DC-IN: สำหรับการเชื่อมต่ออะแดปเตอร์ไฟฟ้า
- พอร์ต AV: For connecting devices using the included AV cable.
- พอร์ต HDMI: For connecting devices with HDMI output (e.g., laptops, game consoles, TV boxes).
- พอร์ต USB: สำหรับเชื่อมต่อไดรฟ์ USB เพื่อเล่นสื่อ files.
- พอร์ตเอาต์พุตเสียง (3.5 มม.): สำหรับเชื่อมต่อลำโพงภายนอกหรือหูฟัง
- Micro SD/TF Card Slot: สำหรับการเล่นสื่อ fileถ่ายโอนข้อมูลโดยตรงจาก Micro SD การ์ด
- ลำโพงในตัว: ให้เอาต์พุตเสียง
- ปุ่มควบคุม: Power, navigation, and input selection buttons on top of the projector.
- รีโมทคอนโทรล เซนเซอร์: รับสัญญาณจากรีโมทคอนโทรล
4. การตั้งค่า
4.1 การเชื่อมต่อสายไฟ:
- เชื่อมต่อสายไฟเข้ากับอะแดปเตอร์ไฟ
- Plug the power adapter into the DC-IN port on the projector.
- เสียบปลายสายไฟอีกด้านเข้ากับเต้ารับที่ผนัง
4.2 Placement and Projection Distance:
Place the projector on a stable surface. The optimal projection distance ranges from 0.8 to 2 meters (approximately 31 to 79 inches) for a screen size of 24 to 60 inches. Adjust the distance to achieve your desired screen size.

Figure 4.1: Recommended projection distances and screen sizes.
4.3 การปรับโฟกัส:
After powering on the projector, rotate the focus ring on the front of the projector until the image appears clear and sharp on the projection surface.
5. คู่มือการใช้งาน
5.1 การเปิด/ปิดเครื่อง:
- การเปิดเครื่อง: กดปุ่มเปิด/ปิดบนโปรเจคเตอร์หรือรีโมทคอนโทรล ไฟแสดงสถานะจะสว่างขึ้น
- วิธีปิดเครื่อง: กดปุ่มเปิด/ปิดอีกครั้ง โปรเจ็กเตอร์จะปิดลง
5.2 Input Source Selection:
After connecting your device, press the "Source" button on the projector or remote control to select the correct input source (e.g., HDMI, AV, USB, Micro SD).
5.3 การควบคุมระดับเสียง:
Use the volume buttons on the remote control to adjust the audio output level. You can also connect external speakers or headphones to the 3.5mm audio out port for enhanced sound.
6. การเชื่อมต่อ
6.1 Connecting to Laptops/PCs/Game Consoles (HDMI):
- Connect one end of the HDMI cable to the HDMI port on your device.
- Connect the other end of the HDMI cable to the HDMI port on the projector.
- Select "HDMI" as the input source on the projector.
6.2 Connecting to USB Drives/Micro SD Cards:
- Insert your USB drive into the USB port or your Micro SD card into the TF card slot.
- Select "USB" or "Micro SD" as the input source.
- นำทางผ่านสื่อ fileใช้รีโมทคอนโทรลและเลือกเนื้อหาที่ต้องการเล่น
6.3 Connecting to Smartphones/Tablets:
To connect your smartphone or tablet, you will need an appropriate adapter (not included):
- For iOS devices (iPhone/iPad): A Lightning to HDMI adapter is required.
- For Android devices: A Micro USB to HDMI or Type-C to HDMI adapter is required.
- For wireless connection: A Wi-Fi network adapter (dongle) is needed.
Once connected via the adapter, select "HDMI" as the input source.

Figure 6.1: Smartphone connectivity options using HDMI adapters (adapters not included).
6.4 Streaming Services Note:
Due to HDCP copyright restrictions, this mini projector does not directly support streaming from apps like Netflix, Amazon Prime Video, or Hulu when connected via smartphone mirroring. To watch content from these services, you can use an external streaming device such as an Amazon Fire Stick or Roku Stick, connected to the projector's HDMI port.
7. การบำรุงรักษา
- การทำความสะอาดเลนส์: Gently wipe the projector lens with a soft, lint-free cloth specifically designed for optical lenses. Do not use abrasive cleaners or harsh chemicals.
- การทำความสะอาดภายนอก: ใช้ผ้าแห้งนุ่มเช็ดทำความสะอาดภายนอกของโปรเจคเตอร์ สำหรับคราบฝังแน่น ให้ใช้ผ้าชุบน้ำหมาดๆ เช็ดเบาๆamp สามารถใช้ผ้าเช็ดทำความสะอาดได้ จากนั้นเช็ดซ้ำด้วยผ้าแห้ง
- การระบายอากาศ : Regularly check that the ventilation openings are free from dust and debris to ensure proper heat dissipation.
- พื้นที่จัดเก็บ: When not in use for extended periods, store the projector in a cool, dry place, away from direct sunlight and extreme temperatures. It is recommended to use the original packaging for storage.
8 การแก้ไขปัญหา
| ปัญหา | สาเหตุที่เป็นไปได้ | สารละลาย |
|---|---|---|
| ไม่มีไฟฟ้า | สายไฟไม่ได้เชื่อมต่อ มีปัญหากับเต้ารับไฟฟ้า | ตรวจสอบให้แน่ใจว่าสายไฟเสียบแน่นดีแล้ว ลองเสียบกับปลั๊กไฟอื่นดู |
| ไม่มีรูปภาพ | เลือกแหล่งสัญญาณเข้าไม่ถูกต้อง อุปกรณ์ไม่ได้เชื่อมต่ออย่างถูกต้อง | Select the correct input source (HDMI, AV, USB). Check all cable connections. |
| ภาพเบลอ | Focus not adjusted; projection distance incorrect. | Rotate the focus ring until the image is clear. Adjust the projector's distance from the screen. |
| ไม่มีเสียง | Volume too low; external speakers not connected; audio format not supported. | Increase volume. Ensure external speakers are connected correctly or disconnect them to use built-in speaker. Check audio format compatibility. |
| รีโมตคอนโทรลไม่ทำงาน | Batteries low/dead; sensor blocked. | Replace batteries. Ensure no obstructions between remote and projector sensor. |
9. ข้อมูลจำเพาะ
| คุณสมบัติ | รายละเอียด |
|---|---|
| หมายเลขรุ่น | JingHuier |
| ยี่ห้อ | ช้าง |
| ขนาดสินค้า | 5 x 3.6 x 2.16 นิ้ว |
| น้ำหนักสินค้า | 10.4 ออนซ์ |
| ความละเอียดการแสดงผล | 1920 x 1080 (รองรับ) |
| เทคโนโลยีการเชื่อมต่อ | HDMI, USB, AV, 3.5mm Audio, Micro SD/TF |
| คุณสมบัติพิเศษ | ลำโพงในตัว พกพาสะดวก |
| ผู้ผลิต | ช้าง |
| วันที่พร้อมใช้งานครั้งแรก | 28 ตุลาคม 2020 |

Figure 9.1: The compact dimensions of the projector, emphasizing its portability.
10. การรับประกันและการสนับสนุน
ELEPHAS products are manufactured to the highest quality standards. For information regarding warranty coverage, please refer to the warranty card included with your product or visit the official ELEPHAS webเว็บไซต์.
If you encounter any issues or have questions about your ELEPHAS Mini Portable Projector, please contact our customer support team. Provide your model number (JingHuier) and a detailed description of the issue for prompt assistance.
หากต้องการความช่วยเหลือเพิ่มเติม คุณสามารถไปที่ ELEPHAS Store on Amazon.


