1. บทนำ
Thank you for choosing the USX MOUNT UL Listed Heavy Duty TV Wall Mount. This product is engineered for secure and versatile mounting of televisions ranging from 32 to 90 inches and weighing up to 150 lbs. It features a full-motion design with swivel, tilt, and leveling adjustments, along with an 8-inch horizontal sliding function for optimal TV positioning. Please read this manual thoroughly before installation and retain it for future reference.

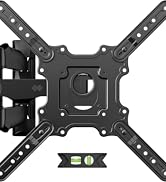
รูปที่ 1: USX MOUNT Heavy Duty TV Wall Mount with bubble level and cable ties.
2. ข้อมูลด้านความปลอดภัยที่สำคัญ
- คำเตือน: This product is designed for use in wood stud, solid concrete, or brick walls only. ห้ามติดตั้งบนผนัง drywall เพียงอย่างเดียว
- โปรดตรวจสอบให้แน่ใจว่าน้ำหนักและรูปแบบ VESA ของทีวีของคุณอยู่ในขอบเขตที่กำหนดสำหรับขาตั้งนี้
- ควรใช้เครื่องตรวจหาโครงไม้เพื่อระบุตำแหน่งโครงไม้ให้แม่นยำเสมอ
- If mounting to concrete or brick, appropriate concrete anchors are required. Contact USX MOUNT if you need these anchors.
- Installation should be performed by at least two people due to the weight and size of the TV and mount.
- Do not overtighten screws, as this may damage the wall or TV.
- เก็บให้ห่างจากเด็กและสัตว์เลี้ยงในระหว่างการติดตั้ง
3. เนื้อหาบรรจุภัณฑ์
Verify that all components are present and undamaged before beginning installation. If any parts are missing or defective, please contact USX MOUNT customer support.
- ชุดติดตั้งทีวีติดผนัง
- ขาตั้งทีวี (2 ชิ้น)
- แผ่นติดผนัง
- ระดับน้ำ
- เคเบิลไทร์ (3 ชิ้น)
- Standard Mounting Hardware (various screws, washers, spacers for different TV types)
รูปที่ 2: มีส่วนประกอบทั้งหมดรวมอยู่ในแพ็คเกจ
4. เครื่องมือที่จำเป็น (ไม่รวมอยู่ด้วย)
- เครื่องมือค้นหาสตั๊ด
- สว่านไฟฟ้า
- Level (a small one is included, but a larger one may be helpful)
- ดินสอ
- สายวัด
- ไขควงหัวแฉก
- Socket Wrench (e.g., 13mm)
- ค้อน (สำหรับยึดพุกคอนกรีต)
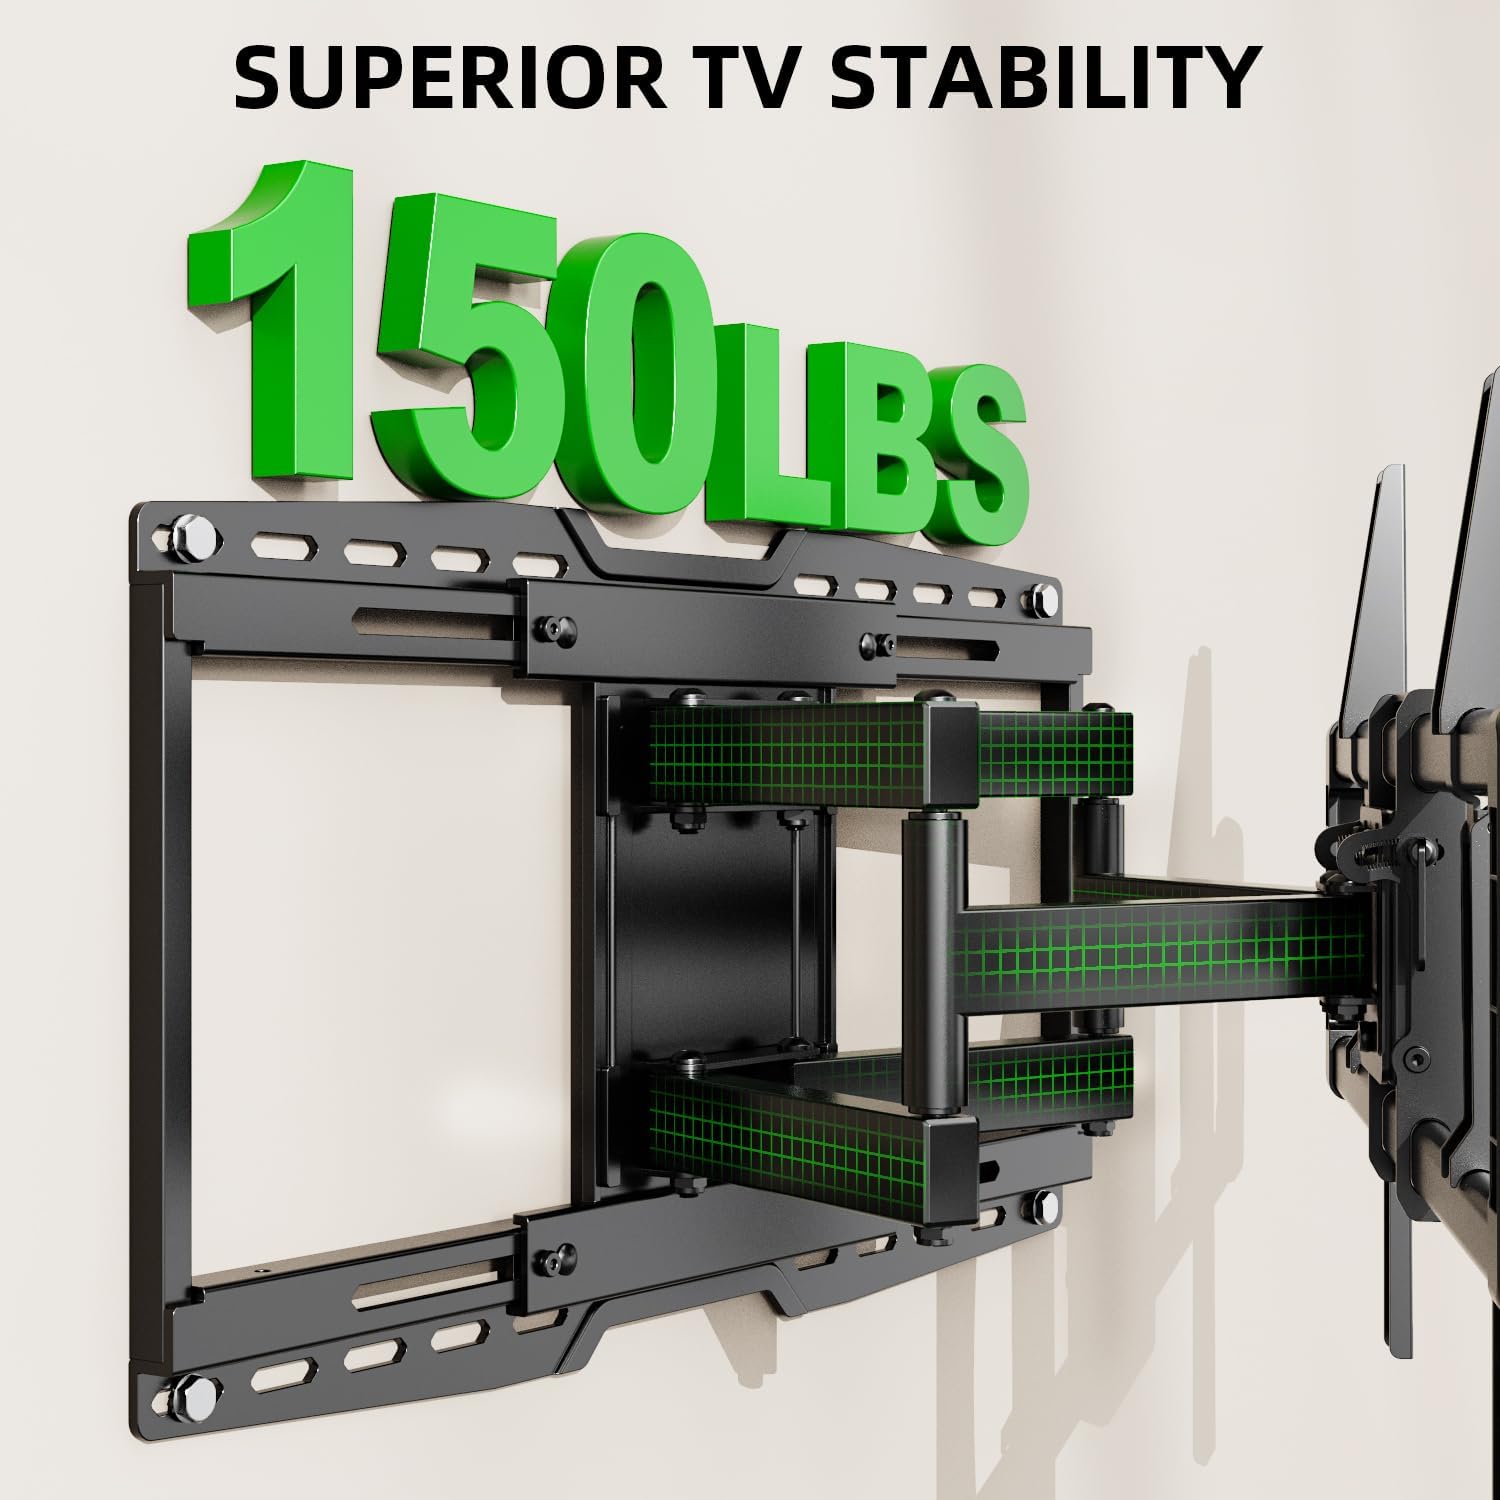
5. ข้อมูลจำเพาะผลิตภัณฑ์
| คุณสมบัติ | ข้อมูลจำเพาะ |
|---|---|
| หมายเลขรุ่น | เอ็กซ์เอ็มแอล018-1 |
| ขนาดทีวีที่เข้ากันได้ | 32 - 90 นิ้ว |
| ความจุในการรับน้ำหนักสูงสุด | 150 ปอนด์ (68.2 กก.) |
| ความเข้ากันได้ของ VESA | Max 600x400mm, Min 200x100mm |
| ประเภทการเคลื่อนไหว | ปรับมุมได้ หมุนได้ เอียงได้ |
| มุมเอียง | +5° / -15° |
| มุมหมุน | +/-45° |
| ระยะห่างจากผนัง | 3.35 - 19.09 นิ้ว |
| Horizontal Sliding | 8 inches (left or right) |
| ประเภทผนังที่เข้ากันได้ | Wood studs (8", 12", 16", 18", 24"), Solid concrete wall, Brick wall |
| วัสดุ | เหล็กอัลลอยด์ |

รูปที่ 3: Available VESA patterns and how to measure your TV's VESA.
6. คู่มือการติดตั้ง
6.1. รายการตรวจสอบก่อนการติดตั้ง
- Confirm your TV's size and weight are within the mount's specifications.
- Verify your TV's VESA mounting pattern.
- Identify your wall type (wood studs, concrete, or brick).
- Gather all necessary tools and included hardware.
รูปที่ 4: Confirm TV and wall compatibility before installation.
6.2. การติดตั้งแบบทีละขั้นตอน
ขั้นตอนที่ 1: ติดขายึดทีวีเข้ากับทีวี
- วางทีวีคว่ำหน้าลงบนพื้นผิวที่นุ่มและสะอาดอย่างระมัดระวัง
- Align the TV brackets with the mounting holes on the back of your TV.
- Select the appropriate screws, washers, and spacers from the hardware kit. For flat TV backs, spacers may not be needed. For irregular or curved TV backs, use spacers to ensure a secure fit without damaging the TV.
- Secure the brackets to the TV using a screwdriver. Do not overtighten.
รูปที่ 5: TV brackets attached to the back of the television.
1 วิดีโอ: This video demonstrates the process of attaching the TV brackets to the television, including considerations for different TV back types.
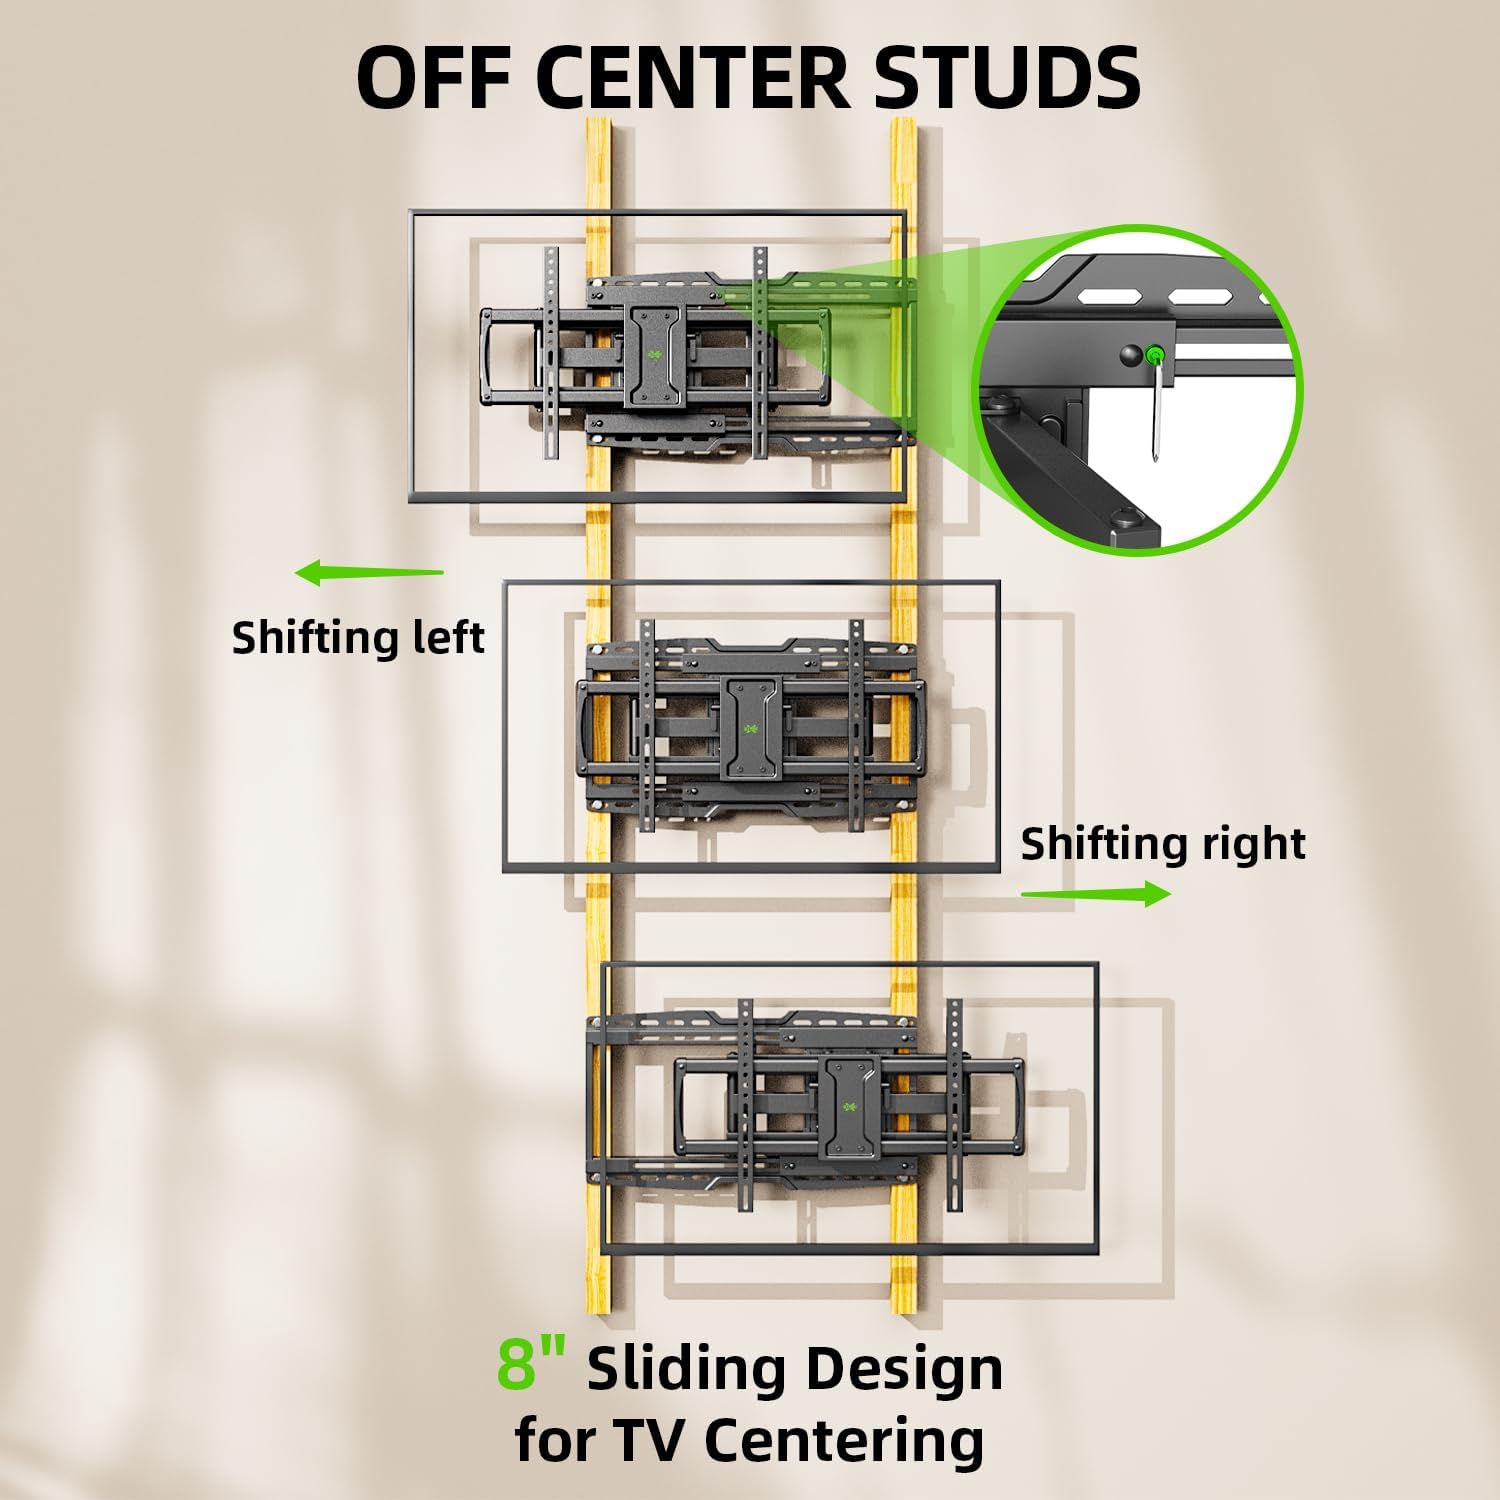
ขั้นตอนที่ 2: หาตำแหน่งโครงไม้ผนังและทำเครื่องหมายจุดเจาะ
- Use a stud finder to locate the edges and center of two adjacent wood studs. Mark the center of each stud.
- Hold the wall plate against the wall at your desired height and use a level to ensure it is perfectly horizontal. Mark the drilling points through the wall plate's holes onto the wall.
- The mount features an 8-inch horizontal sliding design, allowing you to center your TV even if your studs are off-center. Plan your wall plate placement accordingly.

รูปที่ 6: The 8-inch sliding design allows for TV centering even with off-center studs.
ขั้นตอนที่ 3: ติดแผ่นผนังกับ Wall
สำหรับผนังโครงไม้:
- Drill pilot holes at the marked locations using a 7/32 inch (5.5 mm) drill bit. Ensure the depth is sufficient for the lag bolts.
- Attach the wall plate to the wall using the provided lag bolts and washers. Tighten securely with a socket wrench.
For Solid Concrete or Brick Walls:
- Drill pilot holes at the marked locations using a 3/8 inch (10 mm) drill bit. Ensure the depth is sufficient for the concrete anchors.
- Insert the concrete anchors into the pilot holes, tapping gently with a hammer if necessary until flush with the wall surface.
- Attach the wall plate to the wall using the provided lag bolts and washers, screwing them into the anchors. Tighten securely.

รูปที่ 7: Compatible wall types for installation. Do not install on drywall alone.
2 วิดีโอ: This installation video demonstrates locating studs, drilling, and securing the wall plate for various wall types.
ขั้นตอนที่ 4: แขวนทีวีเข้ากับแผ่นยึดผนัง
- With assistance, carefully lift the TV and hook the attached TV brackets onto the wall plate.
- ตรวจสอบให้แน่ใจว่าทีวีติดตั้งบนแผ่นยึดผนังอย่างแน่นหนาแล้ว
- Engage the safety screws or locking mechanisms on the TV brackets to prevent accidental dislodging.

รูปที่ 8: เกินview of the TV mounting process, including hanging and securing the TV.
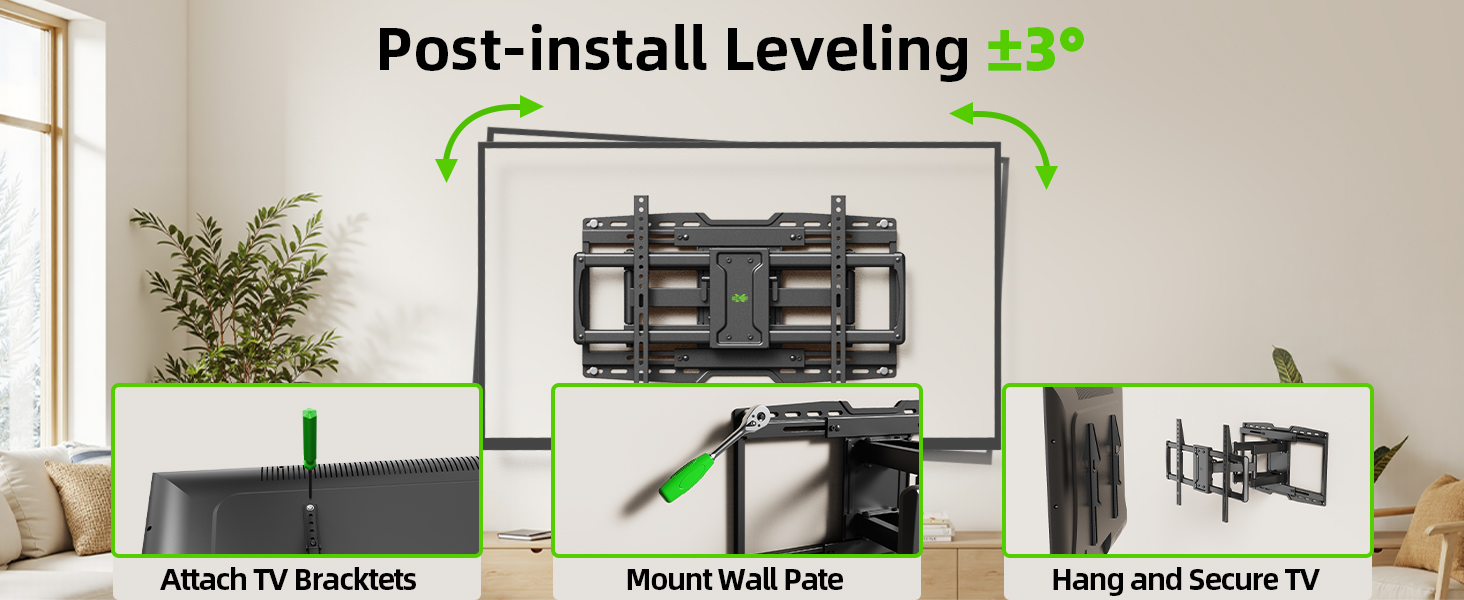
Step 5: Leveling Adjustment
- After hanging the TV, use the horizontal post-installation leveling screws to fine-tune the TV's level. This allows for a +/-3° adjustment.
- Use the included bubble level or a larger level to achieve perfect horizontal alignment.
รูปที่ 9: Post-installation leveling screws for precise alignment.
7. คู่มือการใช้งาน
7.1. การปรับเอียง
The mount allows for a tilt range of +5° (upward) to -15° (downward). This feature is useful for reducing glare and optimizing viewมุมการเอียง
- Locate the tilt handles on the TV brackets.
- Loosen the tilt handles to adjust the TV to your desired vertical angle.
- Tighten the tilt handles to secure the TV in position.

รูปที่ 10: Adjusting the TV tilt for comfortable viewการไอเอ็นจี
7.2. Swivel and Extension/Retraction
The full-motion arms allow the TV to swivel up to +/-45° and extend from 3.35 inches to 19.09 inches from the wall.
- Gently pull the TV away from the wall to extend the articulating arms.
- Carefully pivot the TV left or right to achieve the desired swivel angle.
- To retract, push the TV back towards the wall until it is in the desired position.

รูปที่ 11: ยืดหยุ่นได้ viewing with extension, retraction, and swivel capabilities.
7.3. Horizontal Sliding
The mount features an 8-inch horizontal sliding function on the wall plate, allowing you to shift the TV left or right by up to 8 inches after installation, ensuring perfect centering.
- Gently slide the TV along the wall plate to adjust its horizontal position.
- Ensure the TV is securely positioned after adjustment.
8. การบำรุงรักษา
- ตรวจสอบสกรูและการเชื่อมต่อทั้งหมดเป็นระยะๆ เพื่อให้แน่ใจว่าแน่นหนาและปลอดภัย
- ทำความสะอาดฐานยึดด้วยผ้าแห้งเนื้อนุ่ม หลีกเลี่ยงการใช้สารทำความสะอาดที่มีฤทธิ์กัดกร่อนหรือตัวทำละลาย
- If the articulating arms become stiff, a small amount of silicone-based lubricant can be applied to the pivot points.
9 การแก้ไขปัญหา
9.1. TV is not level after installation
- Use the horizontal post-installation leveling screws (as described in Section 6.2, Step 5) to adjust the TV's angle by +/-3°.
9.2. Difficulty moving the TV (stiff arms)
- ตรวจสอบให้แน่ใจว่าไม่มีสายเคเบิลใดเกี่ยวหรือกีดขวางการเคลื่อนไหว
- Apply a small amount of silicone-based lubricant to the articulating joints if movement remains stiff.
9.3. TV is not centered on the wall
- Utilize the 8-inch horizontal sliding feature of the mount to reposition the TV left or right on the wall plate.
10. การรับประกันและการสนับสนุน
This USX MOUNT product is manufactured by X-MOUNT LIMITED. For specific warranty details, please refer to the product packaging or visit the official USX MOUNT website. If you require concrete anchors not included in your package, or have any questions or concerns regarding installation or operation, please contact USX MOUNT customer support.


