1. บทนำ
This manual provides comprehensive instructions for the installation, operation, and maintenance of your ErGear Single Monitor Mount, Model EGSS7. This monitor arm is designed to enhance your workspace ergonomics by providing adjustable positioning for a single monitor. Please read this manual thoroughly before installation and retain it for future reference.

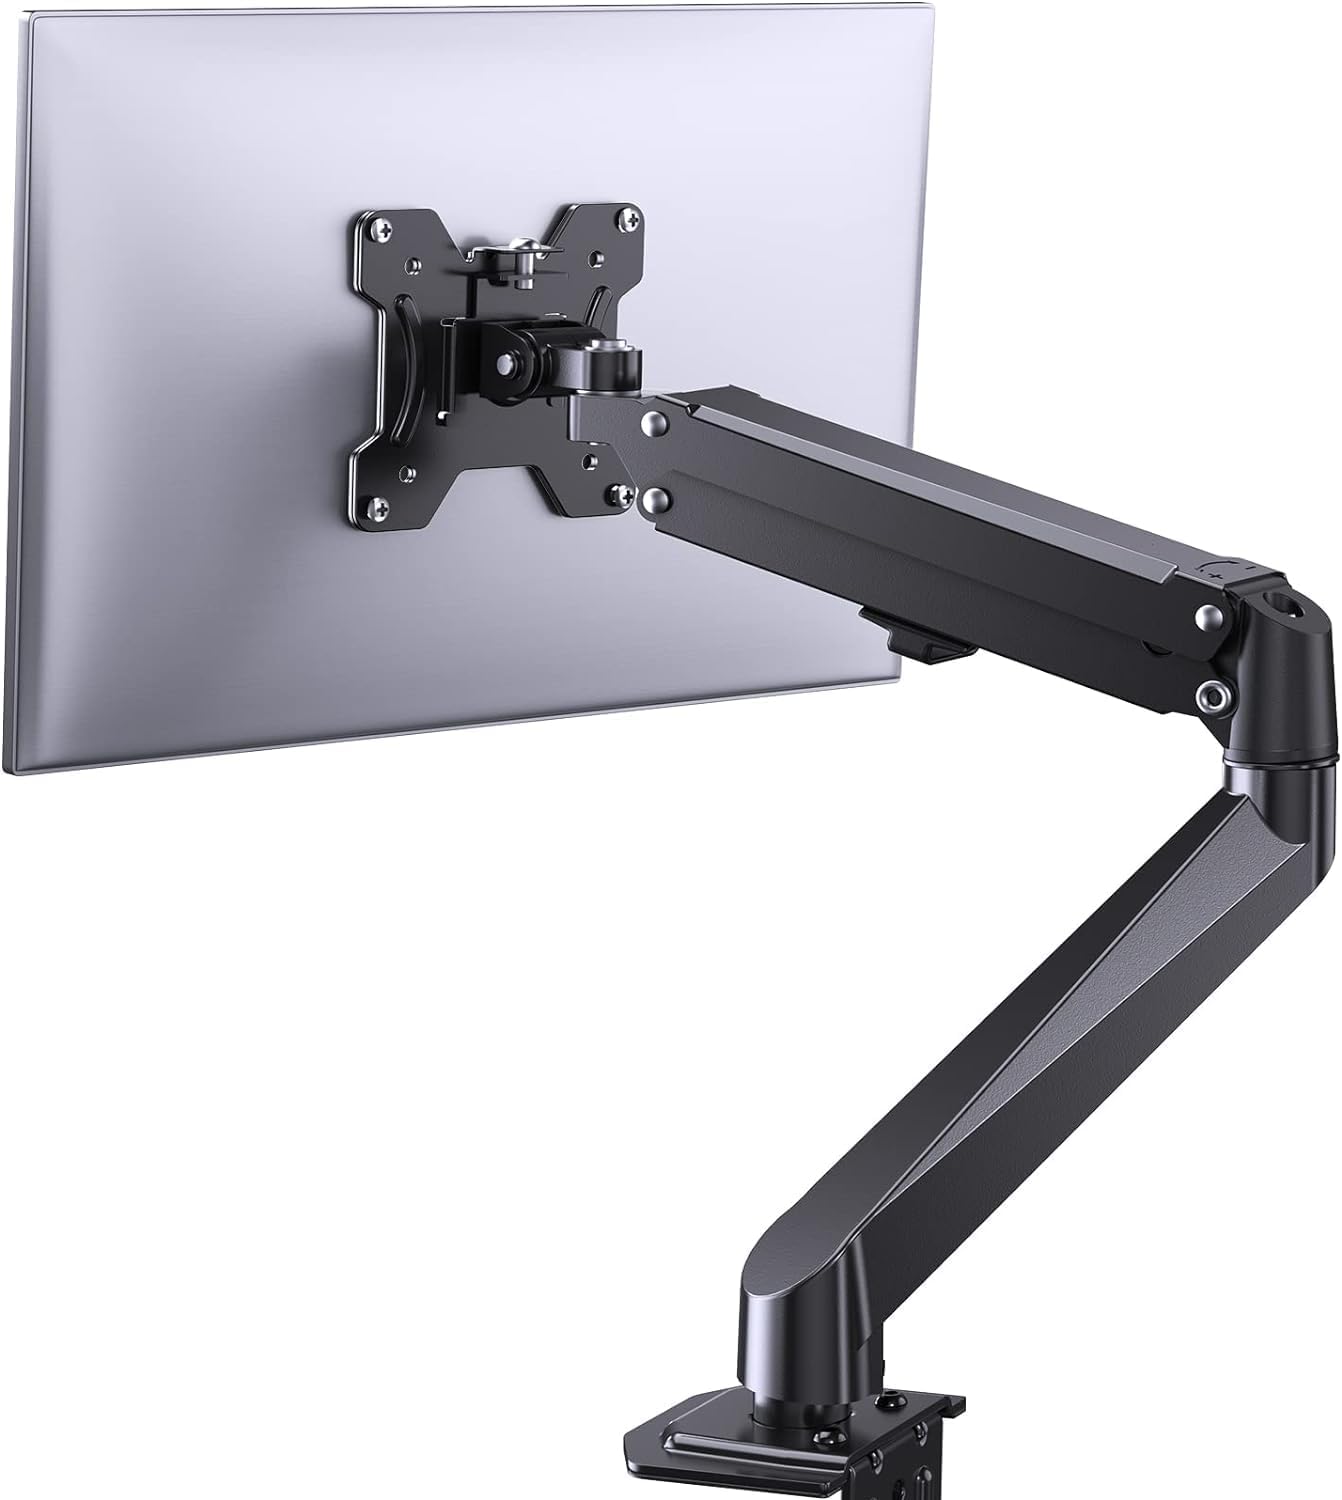
Image 1.1: The ErGear Single Monitor Arm (Model EGSS7) in a typical office setup.
2. ข้อมูลด้านความปลอดภัย
Please observe the following safety precautions to prevent injury or damage to your equipment:
- ห้ามเกินขีดจำกัดน้ำหนักสูงสุดที่สามารถรองรับได้ 14.3 ปอนด์ (6.5 กก.)
- Ensure your monitor is between 17 and 27 inches in size.
- Verify that your monitor is VESA compatible (75x75mm or 100x100mm).
- Install the mount on a sturdy desk surface that can support the combined weight of the mount and your monitor.
- Follow all installation steps carefully. Improper installation may result in equipment damage or personal injury.
- เก็บชิ้นส่วนเล็ก ๆ ให้ห่างจากมือเด็ก
3. เนื้อหาบรรจุภัณฑ์
Before proceeding with installation, please ensure all components are present and undamaged. Refer to the included parts list for detailed identification.
ภาพที่ 3.1: จบแล้วview of the ErGear Single Monitor Mount components.
4. ข้อมูลจำเพาะ
| คุณสมบัติ | ข้อมูลจำเพาะ |
|---|---|
| ยี่ห้อ | Ergear |
| แบบอย่าง | อีจีเอสเอส7 |
| ขนาดจอภาพที่เข้ากันได้ | 17 - 27 นิ้ว |
| ความจุน้ำหนัก | มากถึง 14.3 ปอนด์ (6.5 กก.) |
| ความเข้ากันได้ของ VESA | 75x75มม., 100x100มม. |
| ประเภทการติดตั้ง | ซี-ซีแอลamp หรือ รูร้อยเชือก |
| วัสดุ | เหล็กอัลลอยด์ |
| สี | สีดำ |
| ช่วงความเอียง | -35° ถึง +50° |
| ช่วงหมุน | -90° ถึง +90° |
| การหมุน | 360° |
| ขนาดสินค้า | 41.2 x 30.4 x 10 ซม. |

Image 4.1: Monitor size and weight capacity details.
5. คำแนะนำในการตั้งค่า
The ErGear Single Monitor Mount offers two installation options: C-clamp or Grommet mounting. Choose the option best suited for your desk.

Image 5.1: C-clamp and Grommet mounting options with desk thickness ranges.
5.1 ซี-ซีแอลamp การติดตั้ง
- ติด C-clamp to the base of the monitor arm.
- จัดตำแหน่ง C-clamp on the edge of your desk. Ensure the desk thickness is between 0.4 and 3.3 inches.
- ขันสกรูให้แน่นamp securely using the provided knob until the mount is stable.
5.2 การติดตั้งห่วงยาง
- If your desk has a grommet hole, insert the grommet bolt through the base of the monitor arm and the desk hole. Ensure the desk thickness is between 0.4 and 3.1 inches.
- Secure the mount from underneath the desk using the provided plate and nut.
5.3 การเชื่อมต่อจอภาพ
- Carefully attach your VESA-compatible monitor to the VESA plate on the arm using the appropriate screws.
- Ensure the screws are tightened firmly but do not overtighten.
5.4 การปรับความตึง
The gas spring arm requires tension adjustment to properly support your monitor's weight. Use the included Allen key to adjust the tension screw located on the arm. Turn clockwise to increase tension for heavier monitors, and counter-clockwise to decrease tension for lighter monitors. Adjust until the monitor stays in position when moved.

ภาพที่ 5.2: ภายใน view of the flexible gas spring arm.
6. คู่มือการใช้งาน
Once installed, your ErGear monitor mount allows for flexible positioning of your monitor.
6.1 การปรับตำแหน่งจอภาพ
- การปรับความสูง: Gently push or pull the monitor to the desired height. The gas spring mechanism will hold it in place.
- เอียง: The monitor can be tilted from -35° to +50° to reduce glare and optimize viewมุมการเอียง
- หมุน: Swivel the monitor from -90° to +90° for collaborative work or to view content from different angles.
- การหมุน: หมุนจอภาพ 360° เพื่อสลับระหว่างโหมดแนวนอนและแนวตั้ง

Image 6.1: Monitor height adjustment.

Image 6.2: Full motion range capabilities of the monitor arm.
6.2 การจัดการสายเคเบิล
The monitor arm features an integrated cable management system to keep your workspace tidy. Route your monitor cables through the designated channels on the arm to conceal them.

Image 6.3: Integrated cable management system.
7. การบำรุงรักษา
Regular maintenance ensures the longevity and optimal performance of your monitor mount.
- ตรวจสอบสกรูและข้อต่อทั้งหมดเป็นระยะ เพื่อให้แน่ใจว่าแน่นสนิทดี
- Clean the surface of the mount with a soft, damp ผ้า. หลีกเลี่ยงน้ำยาทำความสะอาดที่มีฤทธิ์กัดกร่อน
- Re-adjust the gas spring tension if your monitor feels too loose or too stiff when moving.
8 การแก้ไขปัญหา
| ปัญหา | สาเหตุที่เป็นไปได้ | สารละลาย |
|---|---|---|
| Monitor sags or does not stay in position. | Gas spring tension is too low. | Increase gas spring tension using the Allen key (clockwise). |
| Monitor is difficult to move. | แรงตึงของสปริงแก๊สสูงเกินไป | Decrease gas spring tension using the Allen key (counter-clockwise). |
| ฐานยึดดูไม่มั่นคง | ซี-ซีแอลamp or grommet connection is loose. | กระชับ C-clamp knob or grommet nut. |
| จอภาพไม่พอดีกับแผ่นยึด VESA | รูปแบบ VESA ไม่ถูกต้อง | Ensure your monitor has a 75x75mm or 100x100mm VESA pattern. |
9. การรับประกันและการสนับสนุน
For warranty information or technical support, please refer to the contact details provided with your purchase or visit the official ErGear website. Please have your model number (EGSS7) and purchase date available when contacting support.


