1. บทนำ
The JBL Club A600 is a mono subwoofer amplifier designed to deliver 600 Watts RMS of power. Utilizing a Class D amplifier design, it ensures high output with minimal current draw. This amplifier is engineered for seamless integration into various car audio systems, including those with factory radios, thanks to its speaker-level inputs. Advanced features such as a low-pass filter, variable bass boost, and phase control allow for precise tuning to optimize subwoofer performance and blend with full-range speakers.
คุณสมบัติหลัก:
- 600W x 1 RMS output for powerful bass.
- Compact size for flexible installation.
- High and low-level inputs for broad compatibility.
- Variable crossover and bass boost for audio customization.
- Wired remote bass control for convenient adjustment.
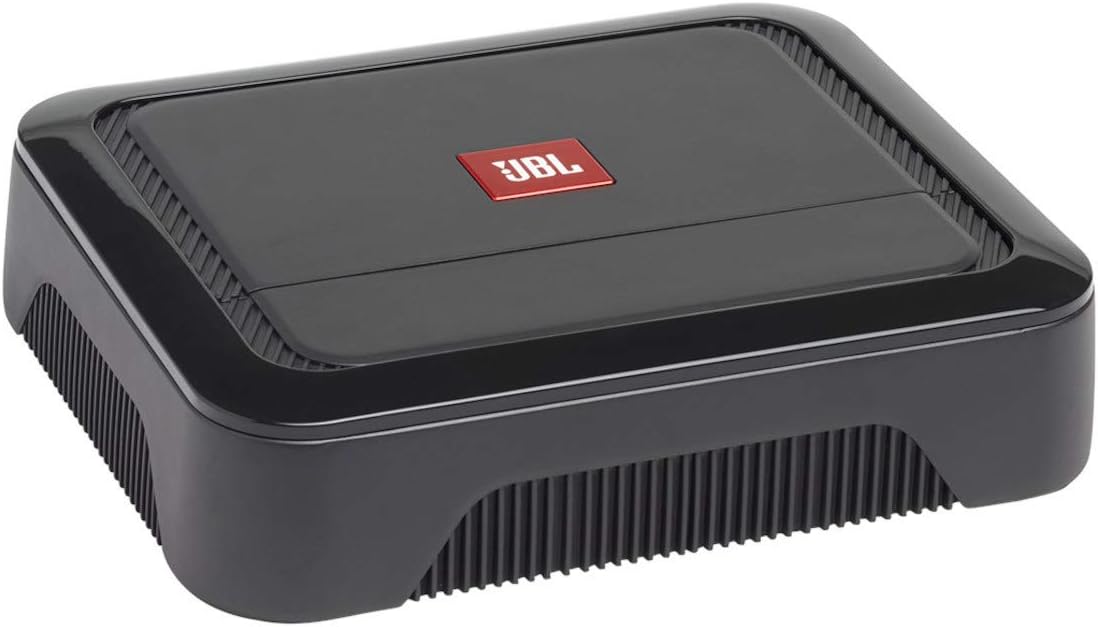
รูปที่ 1 : ด้านหน้า view of the JBL Club A600 Mono Ampชีวิต.
2. อะไรอยู่ในกล่อง
Upon unpacking your JBL Club A600 ampเครื่องขยายเสียง โปรดตรวจสอบว่ามีส่วนประกอบครบถ้วนหรือไม่:
- รถซับวูฟเฟอร์โมโน Club A600 หนึ่งคัน ampชีวิต
- Four 30A ATO fuses
3. สินค้าหมดview
The JBL Club A600 features a sleek, low-profile design with controls discreetly located under a removable panel for a clean aesthetic. The rear panel provides all necessary connections for power, signal input, and speaker output.

รูปที่ 2: ด้านบน view of the JBL Club A600 Mono Amplifier, showing the removable panel.
Control Panel and Connections:

Figure 3: Rear panel of the JBL Club A600, detailing controls and connection terminals.
Controls (under panel):
- ได้รับ: Adjusts the input sensitivity to match the output of your source unit.
- FREQ (ความถี่): Sets the low-pass filter crossover point (32Hz - 320Hz).
- เพิ่มเสียงเบส: Provides adjustable bass equalization (0dB - 12dB).
- เฟส: Selects the phase of the subwoofer output (0° or 180°).
- TURN-ON MODE: กำหนดค่า amplifier's turn-on behavior (DC offset or Remote).
การเชื่อมต่อ:
- อินพุต (อาร์ซีเอ): Low-level signal input from your source unit.
- รีโมทคอนโทรล: Port for connecting the wired remote bass control.
- เอาต์พุตลำโพง: Terminals for connecting your subwoofer(s).
- ฟิวส์: Two 30A ATO fuses for circuit protection.
- +12V: Positive power input terminal.
- เรม: ขั้วต่ออินพุตสำหรับเปิด/ปิดระยะไกล
- จีเอ็นดี: Ground connection terminal.
4. การตั้งค่าและการติดตั้ง
Proper installation is crucial for optimal performance and safety. It is recommended to have this ampลิไฟเออร์ติดตั้งโดยช่างผู้ชำนาญการ
แนวทางการติดตั้งทั่วไป:
- ถอดแบตเตอรี่: Before starting any wiring, disconnect the vehicle's negative battery terminal to prevent electrical shorts.
- ตำแหน่งการติดตั้ง: เลือกสถานที่แห้งและมีอากาศถ่ายเทสะดวกสำหรับการติดตั้ง amplifier, away from heat sources and moisture. Ensure adequate airflow around the ampไลเออร์สำหรับระบายความร้อน
- การเดินสายไฟ: Connect a heavy-gauge power cable (typically 8-gauge or larger, depending on cable length) from the vehicle's positive battery terminal to the amplifier's +12V terminal. Install an appropriate fuse (not supplied, typically 60A) within 18 inches (45 cm) of the battery.
- Ground Wiring: เชื่อมต่อสายดินขนาดหนา (ขนาดเดียวกับสายไฟ) จาก ampต่อขั้ว GND ของแอมพลิฟายเออร์เข้ากับจุดโลหะที่สะอาดและไม่มีสีบนตัวถังรถ ตรวจสอบให้แน่ใจว่ามีการเชื่อมต่อทางไฟฟ้าที่แน่นหนา
- เปิดเครื่องระยะไกล: Connect a remote turn-on wire from your source unit's remote output to the amplifier's REM terminal. If using speaker-level inputs without a remote output, set the TURN-ON MODE switch to 'DC'.
- อินพุตสัญญาณ:
- อินพุตระดับต่ำ (RCA): Connect RCA cables from your source unit's subwoofer output to the amplifier's INPUT terminals.
- อินพุตระดับสูง (ระดับลำโพง): If your source unit does not have RCA outputs, connect the speaker wires directly to the amplifier's high-level input terminals (often integrated with the RCA inputs or via an adapter, refer to specific wiring diagram in full manual).
- เอาท์พุตลำโพง: เชื่อมต่อซับวูฟเฟอร์ของคุณเข้ากับ amplifier's SPEAKER OUTPUT terminals. Ensure correct polarity (+ to + and - to -).
- การควบคุมเสียงเบสระยะไกล: Connect the wired remote bass control to the 'REMOTE CONTROL' port for convenient bass level adjustment.
- เชื่อมต่อแบตเตอรี่อีกครั้ง: Once all wiring is complete and secured, reconnect the vehicle's negative battery terminal.
5. การดำเนินการ
หลังการติดตั้ง ให้ปรับแต่ง amplifier settings to achieve optimal audio performance. All adjustment controls are located under the removable top panel.
การปรับแต่ง Ampการตั้งค่าไลเออร์:
- ได้รับ: Start with the GAIN control at minimum. Play a dynamic piece of music and slowly increase the GAIN until you hear distortion, then back off slightly. This matches the amplifier's input to your source unit's output.
- FREQ (Low-Pass Filter): Adjust the FREQ knob to set the upper frequency limit for your subwoofer. A common starting point is between 80Hz and 120Hz, but this may vary based on your subwoofer and full-range speakers.
- เพิ่มเสียงเบส: Use the BASS BOOST control to enhance low-frequency output. Start at 0dB and increase gradually if more bass is desired. Excessive bass boost can lead to distortion.
- เฟส: Experiment with the PHASE switch (0° or 180°) to determine which setting provides the most cohesive bass response with your other speakers. This often involves listening from the driver's seat.
- TURN-ON MODE: Set to 'REM' if using a remote turn-on wire from your head unit. Set to 'DC' if using speaker-level inputs and your head unit provides a DC offset on its speaker outputs when turned on.
- การควบคุมเสียงเบสระยะไกล: The wired remote allows for convenient, real-time adjustment of the bass level from the driver's seat without needing to access the amplifier โดยตรง
6. การบำรุงรักษา
Regular maintenance helps ensure the longevity and consistent performance of your JBL Club A600 ampชีวิต.
- การทำความสะอาด: เช็ดทำความสะอาดเป็นระยะ ampเช็ดทำความสะอาดภายนอกของเครื่องขยายเสียงด้วยผ้าแห้งเนื้อนุ่ม หลีกเลี่ยงการใช้สารเคมีรุนแรงหรือน้ำยาทำความสะอาดที่มีฤทธิ์กัดกร่อน
- การระบายอากาศ : ให้แน่ใจว่า ampครีบระบายความร้อนของเครื่องขยายเสียงต้องปราศจากฝุ่นและสิ่งสกปรก เพื่อรักษาประสิทธิภาพการระบายความร้อนที่เหมาะสม
- การเชื่อมต่อ: Occasionally check all power, ground, signal, and speaker connections to ensure they are secure and free from corrosion.
- ฟิวส์: การ amplifier uses two 30A ATO fuses. If a fuse blows, replace it only with a fuse of the same type and rating. Never use a higher-rated fuse.
7 การแก้ไขปัญหา
ส่วนนี้จะกล่าวถึงปัญหาทั่วไปที่คุณอาจพบเจอเกี่ยวกับ... ampชีวิต.
| ปัญหา | สาเหตุที่เป็นไปได้ | สารละลาย |
|---|---|---|
| ไม่มีไฟ/ไม่มีเสียง | Blown fuse; Loose power/ground/remote connection; Amplifier ในโหมดการป้องกัน | Check and replace fuses; Verify all connections are secure; Check for shorts in speaker wiring. |
| เสียงเพี้ยน | Gain set too high; Improper crossover settings; Speaker impedance mismatch. | Reduce gain; Adjust FREQ and BASS BOOST settings; Verify speaker impedance is compatible. |
| No bass output | Subwoofer not connected; Low-pass filter set too high/low; Phase incorrect. | Check subwoofer connections; Adjust FREQ setting; Toggle PHASE switch. |
| Ampเครื่องขยายเสียงร้อนขึ้น | Inadequate ventilation; Overdriving amplifier; Low impedance load. | Ensure proper airflow; Reduce volume/gain; Verify speaker impedance. |
8. ข้อมูลจำเพาะ
| คุณสมบัติ | รายละเอียด |
|---|---|
| ยี่ห้อ | เจบีแอล |
| หมายเลขรุ่น | AMPCBA600AM |
| จำนวนช่องสัญญาณ | 1 (ขาวดำ) |
| กำลังขับ | 600 วัตต์ |
| ขนาดสินค้า (กว้าง x ยาว x สูง) | 8.94 x 11.02 x 4.45 นิ้ว |
| น้ำหนักสินค้า | 6.67 ปอนด์ |
| ประเภทการติดตั้ง | การติดตั้งบนพื้นผิว |
| ยูพีซี | 050036369176 |
| วันที่พร้อมใช้งานครั้งแรก | 27 พฤษภาคม 2020 |
9. การรับประกันและการสนับสนุน
JBL products are designed for durability and performance. For specific warranty information, including terms and conditions, please refer to the warranty card included with your product or visit the official JBL website. For technical support, service, or additional product information, please contact JBL customer service or visit their support portal online.


