1. ยินดีต้อนรับ
ขอบคุณสำหรับการซื้อasing the Korg i3 61-Key Synthesizer Music Workstation. This instrument is designed to help you easily realize your musical ideas, offering a versatile range of sounds, styles, and recording capabilities. Please read this manual thoroughly to ensure proper use and to maximize your enjoyment of the i3.
2. ข้อมูลด้านความปลอดภัย
เพื่อป้องกันไฟฟ้าช็อต ห้ามเปิดฝาครอบasing. Refer servicing to qualified personnel only. Do not expose this appliance to rain or moisture. Avoid placing the unit near heat sources or in direct sunlight. Ensure proper ventilation. Use only the specified power adapter or batteries. Keep out of reach of children.
3. เนื้อหาบรรจุภัณฑ์
- Korg i3 61-Key Synthesizer Music Workstation
- อะแดปเตอร์ AC
- คู่มือเริ่มต้นอย่างรวดเร็ว
- ข้อควรระวังเพื่อความปลอดภัย
4. การตั้งค่า
4.1 การเปิด/ปิดเครื่อง
Connect the supplied AC adapter to the DC 12V input jack on the rear panel and plug it into a power outlet. Alternatively, the i3 supports battery operation for portability. To power on, press the power button. To power off, press and hold the power button until the unit shuts down.
4.2 การเชื่อมต่ออุปกรณ์ต่อพ่วง
The Korg i3 offers various connectivity options on its rear panel:
- หูฟัง: Connect standard 3.5mm headphones to the PHONES jack for private practice.
- ยูเอสบี: Use the USB Type A port for connecting to a computer (TO HOST) or external storage devices (TO DEVICE).
- มิดี้: Connect external MIDI devices using the MIDI IN/OUT ports.
- เสียงเข้า/ออก: Connect external audio sources to the AUDIO IN jack or output audio to external speakers/amplifiers via the OUTPUT L/MONO and R jacks.
- ตัวควบคุมเท้า: Connect a foot controller (e.g., sustain pedal) to the FOOT CONTROLLER jack for expressive control.

Image: Rear panel connections, showing various input and output ports including USB, MIDI, Audio, and Foot Controller.

ภาพ: รายละเอียด view of the rear panel, highlighting the DC 12V power input, USB TO HOST/DEVICE, MIDI OUT, FOOT CONTROLLER, OUTPUT L/MONO and R, and AUDIO IN ports.
5. คู่มือการใช้งาน
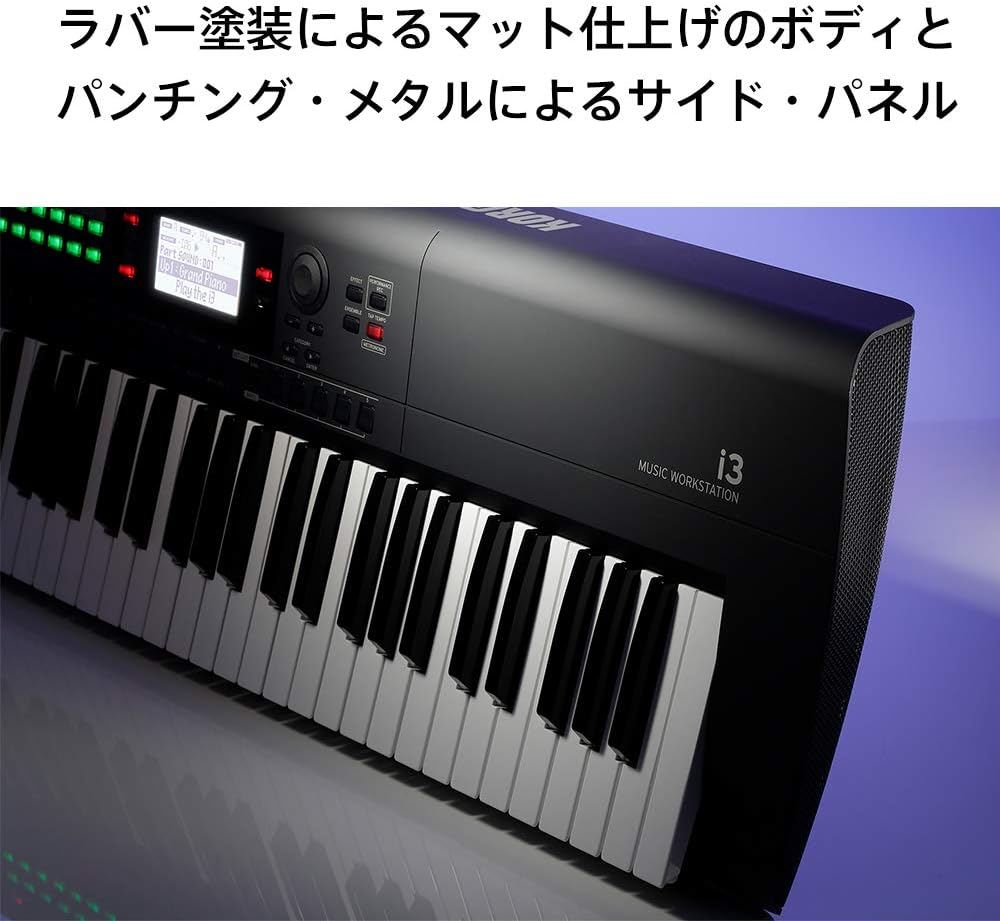
5.1 การใช้งานพื้นฐานและการแสดงผล
The i3 features a backlit LCD panel that displays current settings, sound names, and sequencer information. Use the navigation buttons and data entry dial to browse menus and adjust parameters.

Image: A close-up of the Korg i3's central control panel, featuring a backlit LCD screen displaying 'Grand Piano' and 'Play the i3', surrounded by various buttons and a data entry dial for navigation and selection.
5.2 การเลือกเสียง
The i3 offers a wide variety of sound sets and styles. Use the dedicated buttons and the data entry dial to select different instrument sounds such as Grand Piano, Organ, Brass, Drums, Guitar, and more. The keyboard features touch-sensitive keys for expressive performance.

Image: A close-up of the Korg i3's control surface, showing buttons for sound sets (Upper 1, Upper 2, Upper 3, Lower/Split), instrument categories (Bass, Drum, Percussion, Chord 1-8), and Style Performance controls, indicating the wide range of sound options available.
5.3 Using the Sequencer
The built-in sequencer allows you to record, save, and play back both MIDI and audio files. Refer to the detailed sequencer section in the full manual for advanced recording and editing techniques.
6. คุณสมบัติมากกว่าview
The Korg i3 is a versatile music workstation designed for various musical situations, from live performances to home studio use. Key features include:
- 61-Key touch-sensitive keyboard.
- Extensive sound sets and backing styles.
- Built-in MIDI and audio sequencer.
- Lightweight and portable design, supporting battery operation.
- Diverse connectivity options including USB, MIDI, and audio I/O.

ภาพ: ด้านหน้า view of the Korg i3 61-Key Synthesizer Music Workstation, showcasing its full keyboard, control panel, and display.

Image: An angled perspective of the Korg i3, highlighting its sleek design and compact form factor.
ภาพ: ไซด์โปรfile of the Korg i3, illustrating its slim and lightweight construction, ideal for portability.
7. การบำรุงรักษา
7.1 การทำความสะอาด
เช็ดทำความสะอาดตัวเครื่องด้วยผ้าแห้งนุ่มๆ สำหรับคราบสกปรกฝังแน่น ให้ใช้ผ้าที่ชุบน้ำยาเล็กน้อยเช็ดamp cloth and then dry thoroughly. Avoid using abrasive cleaners, waxes, or solvents.
7.2 พื้นที่จัดเก็บ
When not in use for extended periods, store the i3 in a cool, dry place away from direct sunlight and extreme temperatures. If using batteries, remove them before long-term storage to prevent leakage.
8 การแก้ไขปัญหา
- ไม่มีเสียง: Check volume levels on the i3 and any connected audio equipment. Ensure cables are securely connected.
- ปัญหาเรื่องพลังงาน: Verify AC adapter connection or check battery levels.
- คีย์ไม่ตอบสนอง: Ensure the unit is powered on and not in a frozen state. Try restarting the unit.
For further assistance, please refer to the full user manual or contact KORG customer support.
9. ข้อมูลจำเพาะ
- จำนวนคีย์: 61
- ประเภทคีย์: ไวต่อการสัมผัส
- ขนาด : 11.65 x 40.83 x 3.15 นิ้ว (29.6 ซม. x 103.7 ซม. x 8 ซม.)
- น้ำหนักสินค้า: 0.203 ounces (approximately 5.75 grams, note: this weight seems unusually low and may be a data entry error, typical keyboard weight is several pounds/kg)
- แหล่งพลังงาน: Battery Powered (also AC adapter)
- การเชื่อมต่อ: USB Type A (TO HOST, TO DEVICE), MIDI IN/OUT, Audio IN, OUTPUT L/MONO, R, 3.5mm Headphones Jack, Foot Controller
- ประเภทวัสดุ : พลาสติก
- สี: สีดำ, สีเทา, สีขาว
- ชื่อรุ่น : i3 Music Workstation
10. การรับประกันและการสนับสนุน
KORG products are covered by a limited warranty. Please refer to the warranty card included with your product for specific terms and conditions. For technical support, product registration, or service inquiries, please visit the official KORG website or contact your local KORG distributor.


