1. บทนำ
This manual provides detailed instructions for the installation, operation, and maintenance of your Cooler Master RR-A71C-18PA-R1 CPU Cooler. This air cooler is designed to efficiently dissipate heat from your desktop CPU, featuring a PWM controlled fan for optimized performance and addressable RGB lighting for customizable aesthetics. Please read this manual thoroughly before proceeding with installation to ensure proper setup and safe operation.
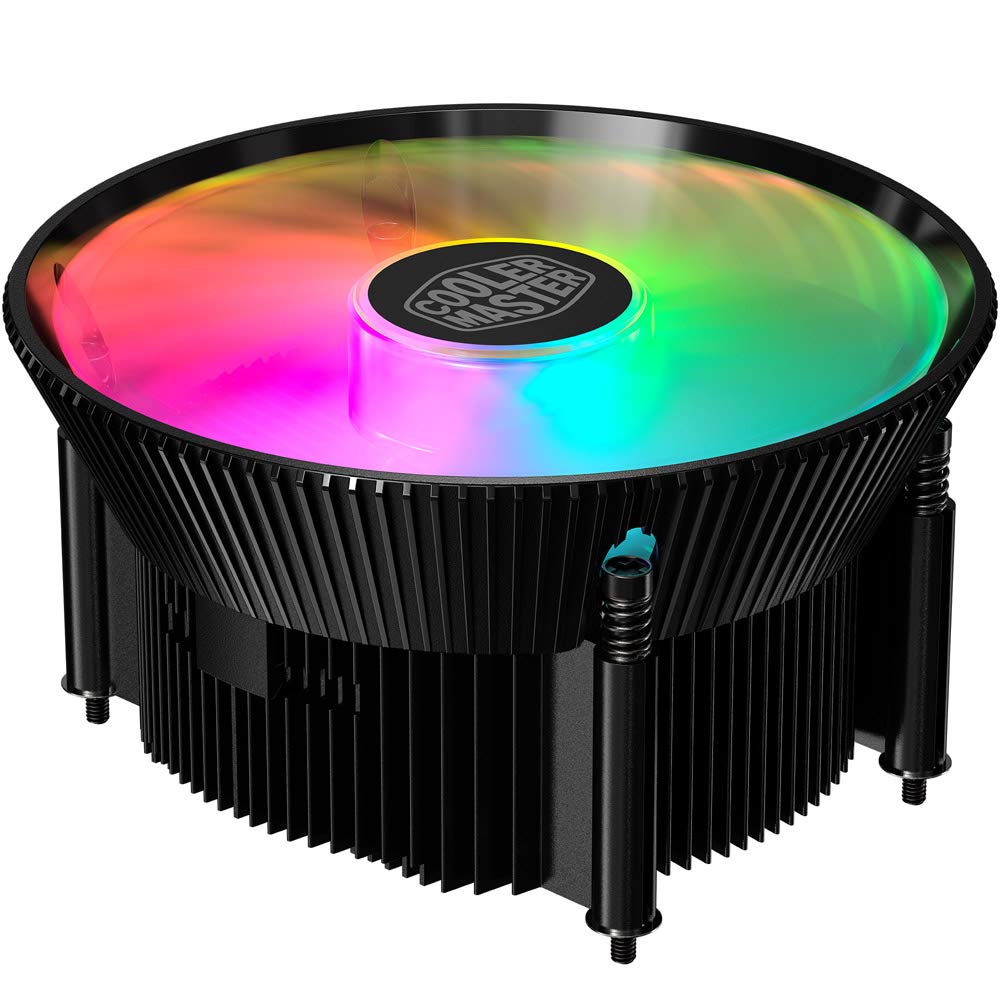
ภาพที่ 1.1: ด้านบน view of the Cooler Master RR-A71C-18PA-R1 CPU Cooler showcasing its addressable RGB fan.
2. ข้อมูลด้านความปลอดภัย
โปรดปฏิบัติตามข้อควรระวังด้านความปลอดภัยต่อไปนี้ เพื่อป้องกันความเสียหายต่อผลิตภัณฑ์หรือการบาดเจ็บต่อตัวคุณเอง:
- โปรดตรวจสอบให้แน่ใจว่าระบบคอมพิวเตอร์ของคุณปิดอยู่และถอดปลั๊กออกจากเต้ารับก่อนทำการติดตั้งหรือบำรุงรักษา
- Avoid touching the fan blades while the system is operating.
- Handle the cooler and its components with care to prevent damage.
- เก็บให้พ้นจากมือเด็ก
- ห้ามดัดแปลงตัวระบายความร้อนหรือชิ้นส่วนใดๆ การดัดแปลงโดยไม่ได้รับอนุญาตอาจทำให้การรับประกันเป็นโมฆะและก่อให้เกิดความเสี่ยงด้านความปลอดภัย
3. เนื้อหาบรรจุภัณฑ์
ตรวจสอบว่ามีรายการทั้งหมดอยู่ในแพ็คเกจของคุณ:
- Cooler Master RR-A71C-18PA-R1 CPU Cooler Assembly
- Mounting Hardware (for compatible CPU sockets)
- น้ำยาระบายความร้อน (แบบทาไว้แล้วหรือแบบหลอด)
- คู่มือการใช้งาน (เอกสารนี้)
4. การตั้งค่าและการติดตั้ง
Follow these steps for proper installation of the CPU cooler:
- เตรียมเมนบอร์ด:
Ensure your motherboard is removed from the PC case or has sufficient access for cooler installation. Refer to your motherboard's manual for specific CPU socket preparation.
- ใช้วางความร้อน:
If thermal paste is not pre-applied to the cooler's base, apply a small, pea-sized amount to the center of your CPU's integrated heat spreader (IHS). Do not spread it manually; the pressure from the cooler will distribute it evenly.

ภาพที่ 4.1: ด้านล่าง view of the CPU cooler, illustrating the fan and copper contact base. Ensure this surface is clean before applying thermal paste.
- ติดตั้งเครื่องทำความเย็น:
Carefully align the cooler with the mounting holes on your motherboard. Gently place the cooler onto the CPU, ensuring even contact. Secure the cooler using the provided mounting hardware. Tighten screws in a diagonal pattern (e.g., top-left, bottom-right, top-right, bottom-left) until snug, but do not overtighten.
- เชื่อมต่อสายพัดลม:
Locate the 4-pin PWM fan connector on the cooler. Connect this cable to the "CPU_FAN" header on your motherboard. Refer to your motherboard manual for the exact location of this header.
- เชื่อมต่อสาย RGB:
Locate the addressable RGB (ARGB) connector on the cooler. Connect this cable to a compatible 3-pin 5V ARGB header on your motherboard. คำเตือน: ห้ามเชื่อมต่อกับหัวต่อ RGB 4 พิน 12V เพราะจะทำให้ LED เสียหายได้
- การตรวจสอบขั้นสุดท้าย:
Double-check all connections. Ensure no cables are obstructing the fan blades or other components. Reinstall your motherboard into the PC case if it was removed.
5. คู่มือการใช้งาน
Once installed, the Cooler Master RR-A71C-18PA-R1 CPU Cooler operates automatically, but its performance and aesthetics can be managed:
- การควบคุมความเร็วพัดลม (PWM):
The fan's speed is controlled by your motherboard's BIOS/UEFI settings or through motherboard software. PWM (Pulse Width Modulation) allows for dynamic fan speed adjustments based on CPU temperature, providing optimal cooling and noise levels. Consult your motherboard manual for instructions on configuring fan curves.
- Addressable RGB Lighting Control:
The addressable RGB lighting can be controlled via your motherboard's RGB software (e.g., ASUS Aura Sync, MSI Mystic Light Sync, Gigabyte RGB Fusion, ASRock Polychrome Sync) or a dedicated ARGB controller (not included). Ensure the ARGB cable is correctly connected to a 3-pin 5V ARGB header. Refer to your motherboard's software documentation for lighting customization options.
6. การบำรุงรักษา
การบำรุงรักษาอย่างสม่ำเสมอจะช่วยให้พัดลมระบายความร้อน CPU ทำงานได้อย่างมีประสิทธิภาพสูงสุดและมีอายุการใช้งานยาวนานขึ้น:
- การกำจัดฝุ่น:
Periodically (every 3-6 months, depending on environment) power off your computer and unplug it. Use compressed air to gently blow dust out of the heatsink fins and fan blades. Hold the fan blades to prevent them from spinning rapidly during cleaning, which can damage the bearings.
- ตรวจสอบการเชื่อมต่อ:
Occasionally verify that the fan and RGB cables are securely connected to their respective headers on the motherboard.
- การนำวางความร้อนกลับมาใช้ใหม่:
If you remove the cooler for any reason, it is recommended to clean off the old thermal paste from both the CPU and the cooler base and apply fresh thermal paste before reinstallation.
7 การแก้ไขปัญหา
หากคุณพบปัญหาเกี่ยวกับพัดลมระบายความร้อน CPU โปรดดูปัญหาและวิธีแก้ไขทั่วไปต่อไปนี้:
| ปัญหา | สาเหตุที่เป็นไปได้ | สารละลาย |
|---|---|---|
| พัดลมไม่หมุน |
|
|
| ไม่มีแสงไฟ RGB |
|
|
| อุณหภูมิ CPU สูง |
|
|
8. ข้อมูลจำเพาะ
Detailed technical specifications for the Cooler Master RR-A71C-18PA-R1 CPU Cooler:
| คุณสมบัติ | ค่า |
|---|---|
| ขนาดสินค้า | ยาว 4.72 นิ้ว x กว้าง 0.98 นิ้ว x สูง 4.72 นิ้ว |
| ยี่ห้อ | คูลเลอร์มาสเตอร์ |
| ประเภทตัวเชื่อมต่อกระแสไฟ | 4-Pin (PWM) |
| เล่มที่tage | 12 โวลต์ |
| วัดtage | 1.44 วัตต์ |
| วิธีการทำความเย็น | อากาศ |
| อุปกรณ์ที่รองรับ | เดสก์ท็อป |
| ระดับเสียง | 24.9 เดซิเบล |
| วัสดุ | อลูมิเนียม, ทองแดง |
| ความเร็วการหมุนสูงสุด | 2500 รอบต่อนาที |
| น้ำหนักสินค้า | 0.42 กิโลกรัม |
| จำนวนหน่วย | 1.0 จำนวน |
| ยูพีซี | 884102066931 |
9. การรับประกันและการสนับสนุน
ผลิตภัณฑ์ของ Cooler Master มาพร้อมกับการรับประกันแบบจำกัด สำหรับข้อมูลการรับประกันโดยละเอียด โปรดดูที่เว็บไซต์อย่างเป็นทางการของ Cooler Master website or the warranty card included with your product. If you encounter any issues not covered in this manual or require further assistance, please contact Cooler Master customer support:
- Webเว็บไซต์: www.coolermaster.com/support/
- ติดต่อ: ดูที่ส่วนสนับสนุนบน webเว็บไซต์สำหรับข้อมูลการติดต่อในแต่ละภูมิภาค