1. บทนำ
Thank you for choosing the Antec NX800 Mid Tower Gaming Case. This manual provides detailed instructions for the proper installation, operation, and maintenance of your new PC case. The NX800 is designed to offer excellent compatibility, cooling performance, and aesthetic appeal for your gaming and high-performance computing needs.
Key features include USB 3.0 connectivity, extensive storage drive bays, and support for large expansion cards and liquid cooling solutions. It comes equipped with two 200mm ARGB fans in the front and one 120mm ARGB fan in the rear, along with a built-in LED controller for customizable lighting.
2. คุณสมบัติของผลิตภัณฑ์
- รองรับเมนบอร์ด: Accommodates motherboards up to E-ATX size.
- Included ARGB Fans: Features 2 x 200 mm ARGB fans in the front and 1 x 120 mm ARGB fan in the rear for optimal airflow and customizable lighting.
- รองรับหม้อน้ำ: Ready for liquid cooling radiators up to 360 mm in the front, 280 mm on top, and 140 mm in the rear.
- การซิงค์ ARGB: Supports synchronization of up to 6 ARGB fans simultaneously for unified lighting effects.
- Flexible Storage Potential: Offers versatile storage options with support for up to 3 x 3.5" HDDs and 4 x 2.5" SSDs.
- แผงด้านข้างกระจกนิรภัย: A clear tempered glass side panel showcases your internal components and ARGB lighting.

Figure 2.1: Antec NX800 Mid Tower Gaming Case with illuminated ARGB fans.

Figure 2.2: Illustration of the included 2x 200mm ARGB fans for the front and 1x 120mm ARGB fan for the rear.
3. ส่วนประกอบเกินview
Familiarize yourself with the various parts and connectors of the Antec NX800 case before beginning installation.
3.1 พอร์ต I/O ด้านหน้า
- ปุ่มเปิด/ปิด: เพื่อเปิด/ปิดระบบ
- ปุ่มรีเซ็ต: เพื่อรีสตาร์ทระบบ
- ปุ่มควบคุม LED: To cycle through ARGB lighting modes or sync with motherboard.
- MIC/AUDIO Jacks: For microphone input and audio output.
- พอร์ต USB 2.0 (x2): สำหรับเชื่อมต่ออุปกรณ์ USB 2.0
- พอร์ต USB 3.0 (x1): สำหรับเชื่อมต่ออุปกรณ์ USB 3.0 ความเร็วสูง

รูปที่ 3.1: รายละเอียด view of the front I/O ports on the Antec NX800 case.
3.2 Internal Layout
The NX800 provides a spacious interior for easy component installation and efficient cable management.

Figure 3.2: Internal layout highlighting component compatibility, including E-ATX motherboard, CPU cooler (max 180mm), GPU (max 350mm), 3.5" HDDs/2.5" SSDs, and PSU (max 200mm).
4. คู่มือการติดตั้ง
Follow these steps for a smooth and successful build process.
4.1 การเตรียมคดี
- Carefully remove the tempered glass side panel by unscrewing the thumb screws and gently pulling it away.
- ถอดแผงด้านหลังออกเพื่อเข้าถึงบริเวณจัดเก็บสายเคเบิล
4.2 การติดตั้งเมนบอร์ด
- Install the I/O shield (if not pre-installed on your motherboard).
- Align your motherboard with the standoffs inside the case. Ensure the standoffs match your motherboard's form factor (ATX, Micro-ATX, E-ATX).
- ยึดเมนบอร์ดด้วยสกรูที่ให้มา
4.3 การติดตั้งไดรฟ์จัดเก็บข้อมูล
- ฮาร์ดดิสก์ขนาด 3.5 นิ้ว: Locate the HDD cage at the bottom of the case. Slide the HDD into the drive tray and secure it with screws.
- SSD ขนาด 2.5 นิ้ว: Mount SSDs to the dedicated SSD trays located behind the motherboard tray or on the PSU shroud. Secure with screws.
4.4 การติดตั้งแหล่งจ่ายไฟ
- Place your ATX power supply unit (PSU) into the PSU shroud at the bottom rear of the case.
- ยึดพาวเวอร์ซัพพลายเข้ากับเคสโดยใช้สกรูจากด้านหลัง
4.5 การติดตั้งพัดลมและหม้อน้ำ
The NX800 supports various fan and radiator configurations:
- ด้านหน้า: 3 x 120mm / 3 x 140mm fans or 1 x 360mm / 1 x 280mm radiator. (2 x 200mm ARGB fans pre-installed)
- สูงสุด: 2 x 120mm / 2 x 140mm fans or 1 x 280mm radiator.
- หลัง: 1 x 120mm / 1 x 140mm fan or 1 x 140mm radiator. (1 x 120mm ARGB fan pre-installed)

Figure 4.1: Diagram illustrating fan and radiator mounting options in the Antec NX800 case.
4.6 การจัดการสายเคเบิล
การใช้ประโยชน์จาก ample space behind the motherboard tray and the cable routing cutouts to manage your cables. This improves airflow and aesthetics.
5. การควบคุมแสง ARGB
The Antec NX800 features a built-in ARGB LED controller that supports up to 6 ARGB fans. You can control the lighting effects via the dedicated LED control button on the front I/O panel or synchronize it with your motherboard's ARGB software.
- Using the LED Button: Press the LED button to cycle through various pre-set lighting modes.
- การซิงค์เมนบอร์ด: Press and hold the LED button for 3 seconds to switch control to your motherboard's ARGB software. Ensure the controller's motherboard sync cable is connected to your motherboard's 3-pin 5V ARGB header.

Figure 5.1: Diagram showing the built-in LED controller with 6-pin ARGB fan connectors and motherboard sync connector.
6. การบำรุงรักษา
การบำรุงรักษาอย่างสม่ำเสมอจะช่วยให้ส่วนประกอบของพีซีของคุณทำงานได้อย่างมีประสิทธิภาพสูงสุดและมีอายุการใช้งานยาวนานขึ้น
- ตัวกรองฝุ่น: The NX800 includes removable dust filters on the top and front. Periodically remove and clean these filters with compressed air or water (ensure they are completely dry before re-installing).
- การทำความสะอาดทั่วไป: ใช้ผ้าแห้งนุ่มๆ เช็ดทำความสะอาดด้านนอกของเคส สำหรับแผงกระจกนิรภัย ให้ใช้น้ำยาทำความสะอาดกระจกและผ้าไมโครไฟเบอร์
- Internal Dust: Every few months, open the case and use compressed air to remove dust from internal components and fans.
7 การแก้ไขปัญหา
If you encounter issues with your Antec NX800 case, refer to the following common problems and solutions:
| ปัญหา | สาเหตุที่เป็นไปได้ | สารละลาย |
|---|---|---|
| Fans not spinning / LEDs not lighting up | Loose power connection to fans or controller; Controller not connected to PSU; Motherboard sync issue. | Check all fan and controller power connections. Ensure the controller is powered. If using motherboard sync, verify the 3-pin 5V ARGB cable is correctly connected and try cycling the LED button. |
| Front I/O ports not working | Front panel cables not connected to motherboard. | Ensure all front panel cables (USB, Audio, Power SW, Reset SW, HDD LED, Power LED) are securely connected to the correct headers on your motherboard. Refer to your motherboard manual for header locations. |
| Poor airflow / High temperatures | Dust buildup on filters or fans; Incorrect fan orientation; Poor cable management. | Clean dust filters and fans. Ensure fans are oriented correctly for optimal intake/exhaust. Improve cable management to reduce airflow obstruction. |
8. ข้อมูลจำเพาะทางเทคนิค
Detailed specifications for the Antec NX800 Mid Tower Gaming Case:
| คุณสมบัติ | ข้อมูลจำเพาะ |
|---|---|
| ชื่อรุ่น | NX800 |
| ประเภทเคส | มิดทาวเวอร์ |
| ความเข้ากันได้ของเมนบอร์ด | E-ATX, ATX, ไมโคร ATX, ITX |
| ขนาด (กxยxส) | 21.75 x 11.75 x 22 นิ้ว (ประมาณ 552 x 298 x 559 มม.) |
| น้ำหนัก | 17.38 ปอนด์ (ประมาณ 7.9 กก.) |
| วัสดุ | เหล็กอัลลอยด์ พลาสติก กระจกนิรภัย |
| ช่องเสียบขยาย | 7 แนวนอน |
| ช่องไดรฟ์ขนาด 3.5 นิ้ว | 3 (convertible with 2.5" SSDs) |
| ช่องไดรฟ์ขนาด 2.5 นิ้ว | 4 |
| พอร์ต I / O ด้านหน้า | Power, Reset, LED Control, MIC/AUDIO, 2x USB 2.0, 1x USB 3.0 |
| พัดลมที่ติดตั้งล่วงหน้า | ด้านหน้า: ARGB ขนาด 200 มม. 2 ตัว; ด้านหลัง: ARGB ขนาด 120 มม. 1 ตัว |
| ความสูงสูงสุดของตัวระบายความร้อนซีพียู | 180 มม. |
| ความยาวสูงสุดของ GPU | 350 มม. |
| ความยาวสูงสุดของ PSU | 200 มม. |
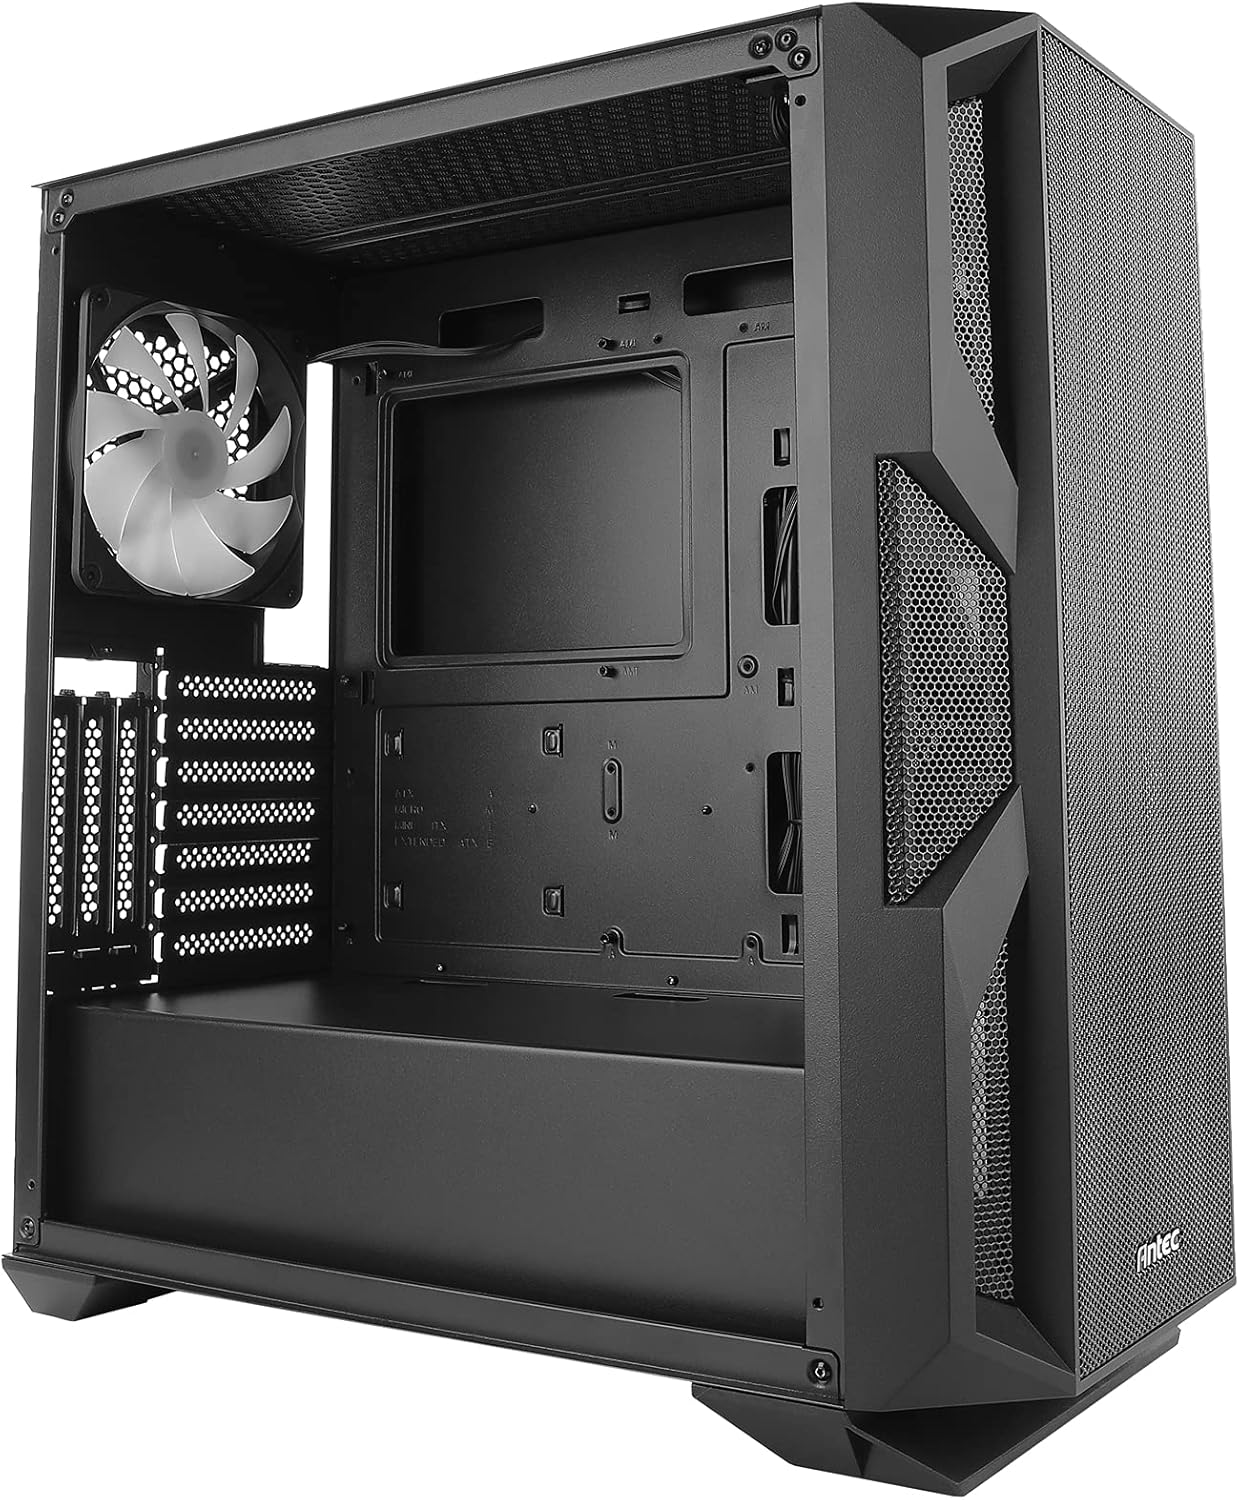
Figure 8.1: Antec NX800 case dimensions: 500mm (height), 230mm (width), 470mm (depth).
9. การรับประกันและการสนับสนุน
Antec products are designed and manufactured to the highest standards. For warranty information and technical support, please visit the official Antec webหรือติดต่อฝ่ายบริการลูกค้า โปรดเก็บหลักฐานการซื้อไว้เพื่อใช้ในการเคลมประกัน
Antec Official Webเว็บไซต์: www.antec.com


