1. บทนำ
Welcome to the TMEZON Wireless Security Camera System user manual. This guide provides detailed instructions for the setup, operation, and maintenance of your MZ-WF8430W system. Please read this manual thoroughly before installation and use to ensure proper functionality and safety. This system features 3-megapixel cameras, an 8-channel Network Video Recorder (NVR), and IP66 waterproof cameras suitable for both indoor and outdoor surveillance.
2. เนื้อหาบรรจุภัณฑ์
กรุณาตรวจสอบแพ็คเกจสำหรับรายการต่อไปนี้:
- 1 x 8-Channel Wireless NVR
- กล้อง IP ไร้สาย 3MP จำนวน 4 ตัว
- อะแดปเตอร์ไฟ NVR 1 ตัว
- อะแดปเตอร์แปลงไฟสำหรับกล้อง 4 ชิ้น
- 1 x USB Mouse
- 1 x สายเคเบิลเครือข่าย
- 1 x คู่มือผู้ใช้
- ชุดสกรูยึด

ภาพ: เหนือview of the TMEZON Wireless Security Camera System components, including the NVR and four cameras.
3. คู่มือการติดตั้ง
3.1 การเชื่อมต่อ NVR เริ่มต้น
ทำตามขั้นตอนเหล่านี้เพื่อตั้งค่า NVR ของคุณ:
- เชื่อมต่อ NVR เข้ากับจอภาพโดยใช้สาย HDMI หรือ VGA
- เชื่อมต่อเมาส์ USB เข้ากับพอร์ต USB ของเครื่องบันทึกวิดีโอเครือข่าย (NVR)
- Connect the NVR to your router using the provided network cable for internet access and remote viewการไอเอ็นจี
- Connect the NVR power adapter and plug it into an electrical outlet. The NVR will power on automatically.

Image: Diagram illustrating the connections for the NVR, including power, monitor, and network cable to a router.
3.2 การติดตั้งกล้อง
The cameras are IP66 waterproof, making them suitable for both indoor and outdoor use. Ensure cameras are within the NVR's wireless range.
- Choose suitable locations for your cameras, considering coverage area and power outlet proximity.
- Mount the cameras securely using the provided screw kits.
- Connect each camera to its respective power adapter and plug into an electrical outlet.
- The cameras will automatically pair with the NVR. If not, refer to the troubleshooting section for manual pairing.
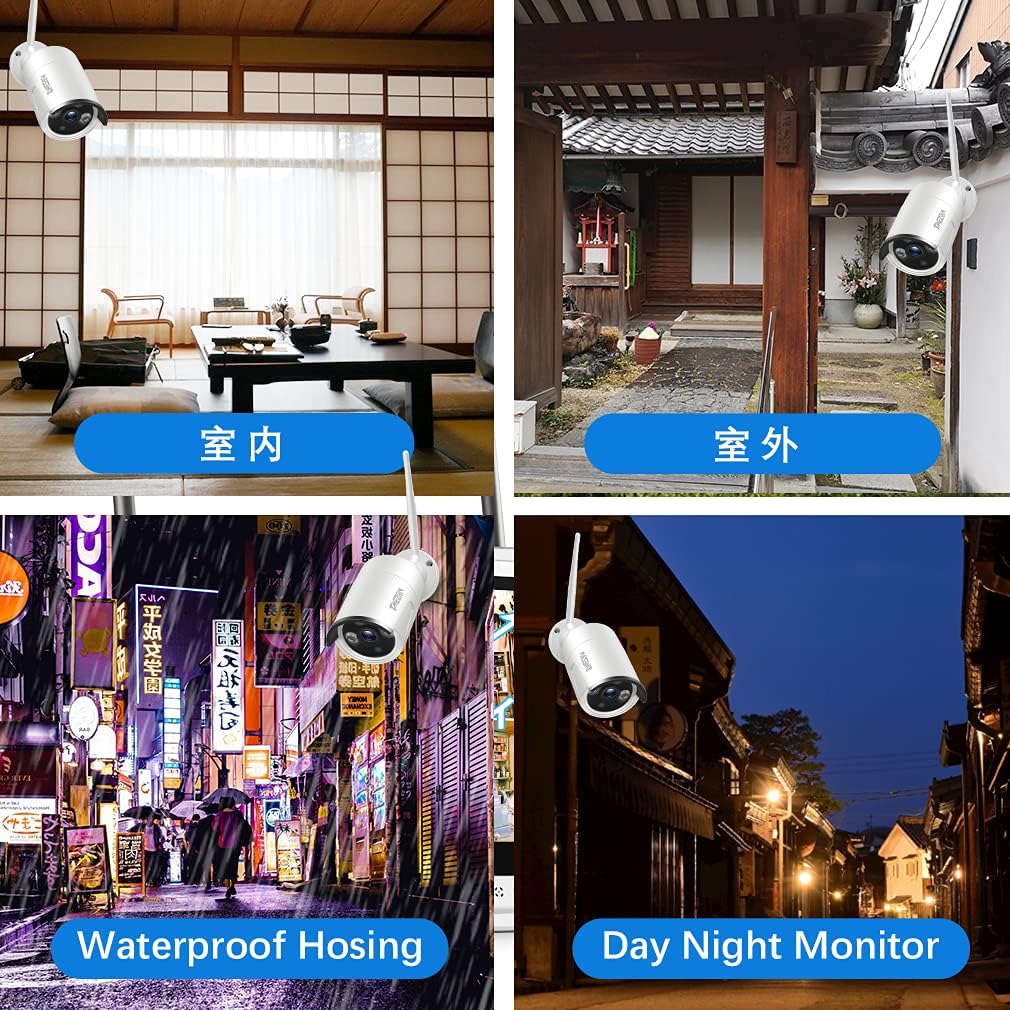
ภาพ: อดีตamples of camera placement for both indoor and outdoor environments.
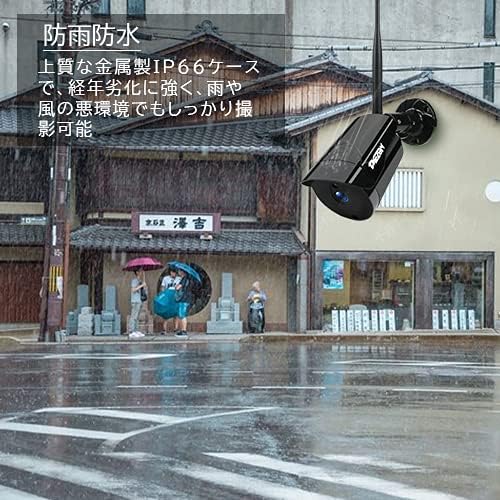
Image: A camera mounted outdoors, demonstrating its IP66 waterproof capability in a rainy setting.
3.3 Remote Access Setup (Mobile App)
ถึง view your cameras remotely on a smartphone or PC, follow these steps:
- Download the 'IP PRO' app from the App Store (iOS) or Google Play Store (Android).
- Register a new account within the app.
- Scan the QR code on your NVR or manually enter the device ID to add your system to the app.
- เมื่อเพิ่มแล้วคุณสามารถ view live feeds, playback recordings, and manage settings from your mobile device.

Image: Demonstrates remote access to the camera system from various devices including tablets, laptops, and smartphones.

Image: A visual guide showing the steps for easy remote access setup via the mobile application.
วิดีโอ: นายพลview of the system's features and setup process.
4. คู่มือการใช้งาน
4.1 สด View และการบันทึก
After initial setup, the NVR will display live feeds from all connected cameras. You can navigate the interface using the USB mouse. The system is configured for continuous recording by default. You can adjust recording schedules and modes (e.g., motion-triggered) in the NVR settings.
4.2 การเล่นซ้ำ
เพื่อview บันทึกเสียงฟูtage:
- Right-click on the NVR interface to access the main menu.
- เลือก 'เล่น'
- Choose the desired camera, date, and time to view การบันทึก
4.3 การตรวจจับการเคลื่อนไหว
The system supports motion detection, which can trigger recording and alerts. To configure:
- Access the NVR's main menu and go to 'Alarm' or 'Motion Detect' settings.
- Enable motion detection for specific cameras.
- Adjust sensitivity and define detection areas as needed.

Image: Highlights key features such as WiFi wireless connectivity, motion detection, night vision mode, IP66 waterproof rating, remote monitoring, and email alerts.
4.4 การมองเห็นตอนกลางคืน
The cameras are equipped with infrared (IR) LEDs for automatic night vision, providing clear black and white video footage in low-light or no-light conditions.
4.5 Email Alerts
You can configure the system to send email notifications when motion is detected:
- In the NVR settings, navigate to 'Network' then 'Email'.
- Enter your email server details and recipient email addresses.
- Enable email alerts for motion detection events.

Image: A smartphone screen displaying an instant email notification triggered by an alarm event, showing a person attempting to break in.
Video: Demonstrates various operational aspects of the security camera system.
5. การบำรุงรักษา
Regular maintenance ensures optimal performance and longevity of your security system:
- ทำความสะอาดกล้อง: ควรเช็ดเลนส์กล้องด้วยผ้าเนื้อนุ่มเป็นระยะๆamp cloth to remove dust and dirt, ensuring clear image quality.
- ตรวจสอบการเชื่อมต่อ: Ensure all power and network cables are securely connected to prevent signal loss.
- อัพเดตเฟิร์มแวร์: Check the TMEZON official website for any available firmware updates for your NVR and cameras to enhance features and security.
- สุขภาพฮาร์ดไดรฟ์: If your NVR has a hard drive, regularly check its status in the system settings to prevent recording failures.
6 การแก้ไขปัญหา
ต่อไปนี้เป็นวิธีแก้ไขปัญหาทั่วไปที่คุณอาจพบเจอ:
6.1 ไม่มีการแสดงวิดีโอบนจอภาพ
- ตรวจสอบพลังงาน: ตรวจสอบให้แน่ใจว่า NVR และจอภาพเปิดใช้งานอยู่และเชื่อมต่ออย่างถูกต้อง
- การเชื่อมต่อสายเคเบิล: Verify the HDMI/VGA cable is securely connected between the NVR and monitor.
- แหล่งสัญญาณเข้า: Confirm the monitor's input source is set to the correct HDMI/VGA port.
6.2 Cameras Not Showing on NVR
- พลังของกล้อง: Ensure all cameras are powered on.
- ระยะสัญญาณไร้สาย: Check if cameras are within the NVR's wireless range. Obstacles like thick walls can reduce signal strength.
- การจับคู่ด้วยตนเอง: If cameras do not automatically connect, you may need to manually pair them. Access the NVR's 'IPC Channel Config' or 'Wireless Add' menu and follow the on-screen instructions to add cameras.
6.3 การเข้าถึงระยะไกลไม่ทำงาน
- NVR Internet Connection: Ensure the NVR is connected to your router and has internet access. Check the network status in NVR settings.
- เข้าสู่ระบบแอป: Verify you are logged into the correct account on the mobile app.
- เพิ่มอุปกรณ์: Confirm the NVR device has been successfully added to your app account.
- การตั้งค่าเราเตอร์: Ensure your router is not blocking the NVR's internet access.
6.4 คุณภาพของภาพไม่ดี
- ทำความสะอาดเลนส์: Clean the camera lens as described in the maintenance section.
- การตั้งค่าความละเอียด: Check the camera's resolution settings in the NVR. Ensure it's set to 3MP (2048*1536P) for optimal clarity.
- แสงสว่าง: Ensure adequate lighting for color images during the day. Night vision will be black and white.
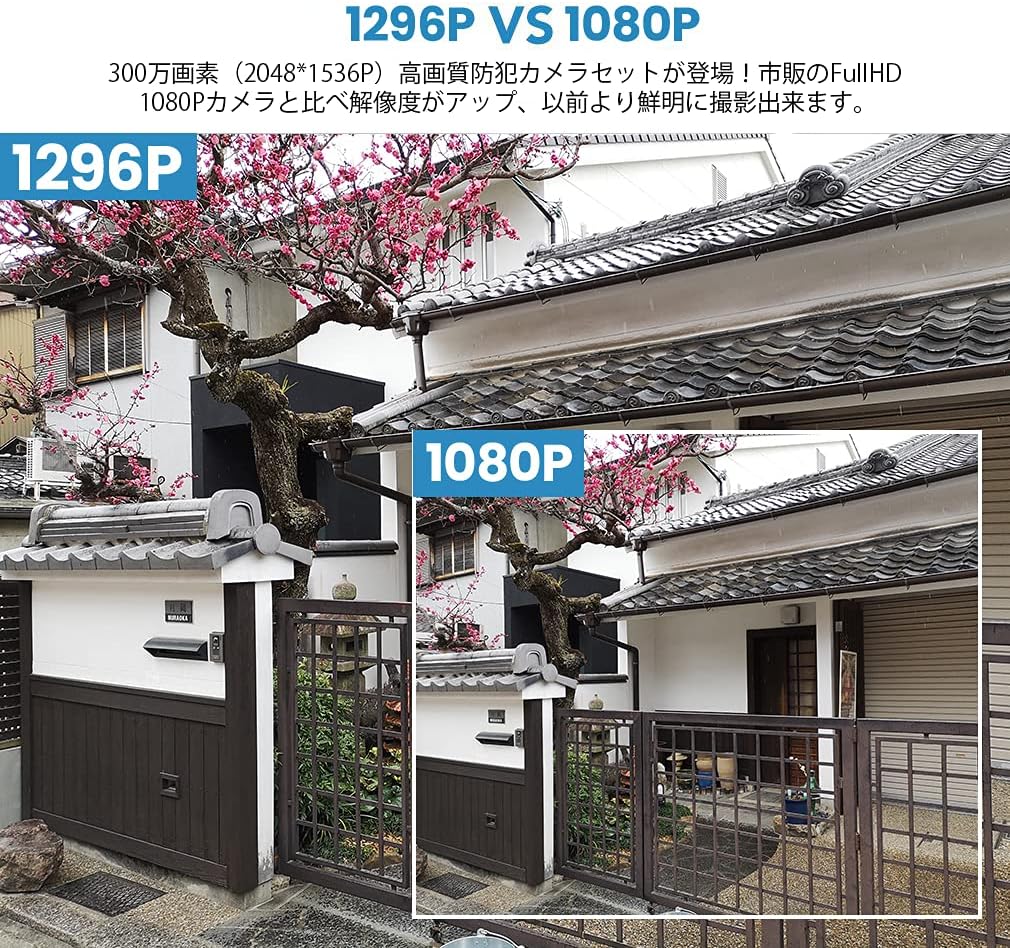
Image: A visual comparison demonstrating the improved clarity and detail of 1296P resolution compared to 1080P.

Image: A comparison showing the difference in image quality between 1080P and 720P resolutions, highlighting the superior detail of 1080P.
7. ข้อมูลจำเพาะ
| คุณสมบัติ | ข้อมูลจำเพาะ |
|---|---|
| ยี่ห้อ | เทมซอน |
| หมายเลขรุ่น | MZ-WF8430W |
| เทคโนโลยีการเชื่อมต่อ | ไร้สาย |
| ความละเอียดในการจับภาพวิดีโอ | 1944p (3 Megapixels) |
| คุณสมบัติพิเศษ | กันน้ำ (IP66) |
| จำนวนช่องสัญญาณ | 8 |
| ขนาดแพ็คเกจ | 32 x 31.1 x 18.3 ซม. |
| น้ำหนักแพ็คเกจ | 3.64 กิโลกรัม |
| แบตเตอรี่ที่จำเป็น | เลขที่ |
8. การรับประกันและการสนับสนุน
TMEZON provides customer support for its products. For warranty information, technical assistance, or any questions not covered in this manual, please contact TMEZON customer service through their official website or the contact information provided with your purchase. Please have your model number (MZ-WF8430W) and purchase details ready when contacting support.


