1. บทนำ
Thank you for choosing the BESDER Home Security IP Camera. This wireless smart WiFi camera is designed to provide reliable surveillance, audio recording, and baby monitoring capabilities with high-definition video. This manual will guide you through the setup, operation, and maintenance of your new device to ensure optimal performance and security.
2. ข้อมูลด้านความปลอดภัย
- ตรวจสอบให้แน่ใจว่ากล้องได้รับพลังงานจากแหล่งจ่ายไฟที่ถูกต้องtage (DC 5V) as specified.
- Do not expose the camera to water or moisture. It is designed for indoor use only.
- หลีกเลี่ยงการวางกล้องไว้กลางแสงแดดโดยตรงหรือใกล้แหล่งความร้อน
- Do not attempt to disassemble or repair the camera yourself. Contact qualified personnel for service.
- เก็บกล้องและอุปกรณ์เสริมให้พ้นมือเด็ก
- Use only the provided power adapter and cable to prevent damage.
3. เนื้อหาบรรจุภัณฑ์
กรุณาตรวจสอบแพ็คเกจเพื่อให้แน่ใจว่ามีสินค้าทั้งหมดอยู่และอยู่ในสภาพดี:
- BESDER Home Security IP Camera
- สายไฟ USB
- อะแดปเตอร์ไฟ (DC 5V)
- สกรูยึดและปลั๊กผนัง
- คู่มือการใช้งาน (เอกสารนี้)

Image showing the BESDER IP Camera along with its accessories: a USB power cable, a power adapter, and a packet of mounting screws.
4. สินค้าหมดview
Familiarize yourself with the main components of your BESDER IP Camera:
- เลนส์กล้อง: จับภาพวิดีโอ footage.
- ไฟ LED อินฟราเรด: สำหรับใช้งานในเวลากลางคืน
- ไมโครโฟน: สำหรับอินพุตเสียง
- ผู้บรรยาย: สำหรับการสื่อสารด้วยเสียงสองทาง
- ช่องเสียบการ์ด SD: สำหรับการจัดเก็บวิดีโอในเครื่อง (รองรับสูงสุด 64GB)
- Power Interface (DC 5V): เชื่อมต่อกับอะแดปเตอร์ไฟ
- ปุ่มรีเซ็ต: ใช้เพื่อคืนค่าการตั้งค่าจากโรงงาน

Diagram illustrating the side view of the BESDER IP Camera, highlighting the SD Card slot, Power interface (DC 5V), and Reset button.
5. การตั้งค่า
5.1. เปิดเครื่อง
- Connect the USB power cable to the camera's power interface.
- เสียบอะแดปเตอร์จ่ายไฟเข้ากับเต้ารับไฟฟ้ามาตรฐาน
- The camera will power on, and its indicator light will begin to flash, indicating it's ready for setup.
5.2. App Installation (iCSee)
The BESDER IP Camera uses the iCSee application for remote monitoring and control.
- Download the iCSee app from your mobile device's app store (App Store for iOS or Google Play Store for Android).
ดาวน์โหลดสำหรับ iOS | ดาวน์โหลดสำหรับ Android - ลงทะเบียนบัญชีใหม่หรือเข้าสู่ระบบหากคุณมีบัญชีอยู่แล้ว
5.3 การเชื่อมต่อ Wi-Fi
Follow these steps to connect your camera to your home Wi-Fi network:
- Open the iCSee app and tap the "+" icon to add a new device.
- Select "Add My Device" or "Add Camera".
- Choose the "Wi-Fi Camera" option.
- Follow the on-screen prompts to enter your Wi-Fi network name (SSID) and password. Ensure your phone is connected to a 2.4GHz Wi-Fi network, as the camera may not support 5GHz.
- แอปจะสร้างรหัส QR ขึ้นมา วางหน้าจอโทรศัพท์ของคุณไว้ตรงหน้าเลนส์กล้อง (ห่างประมาณ 15-20 ซม.) จนกว่าคุณจะได้ยินเสียงยืนยันจากกล้อง
- Once connected, the camera's indicator light will turn solid blue. You can now name your camera and start monitoring.
5.4. การติดตั้ง
สามารถวางกล้องบนพื้นผิวเรียบ หรือติดตั้งกับผนังหรือเพดานได้
- Choose a suitable location with a clear view and within Wi-Fi range.
- If mounting, use the provided mounting screws and wall plugs to secure the camera base.
- Adjust the camera's angle as needed within the app after mounting.
6. ปฏิบัติการ
6.1. สด View
Access real-time video feed from your camera through the iCSee app.
- Open the iCSee app and select your camera from the device list.
- The live video feed will appear. You can pan and tilt the camera remotely using the controls in the app.

Screenshot of a multi-camera monitoring interface, likely from the iCSee application, displaying live feeds from multiple cameras and recording controls.
6.2. การบันทึกและจัดเก็บข้อมูล
The camera supports local storage via a MicroSD card.
- Insert a MicroSD card (up to 64GB, Class 10 recommended) into the SD card slot.
- In the iCSee app settings, navigate to "Storage Settings" to format the SD card and configure recording modes (e.g., continuous, motion-triggered).
- บันทึกแล้วฟูtagอีสามารถเป็นได้ viewแก้ไขและดาวน์โหลดโดยตรงจากแอป
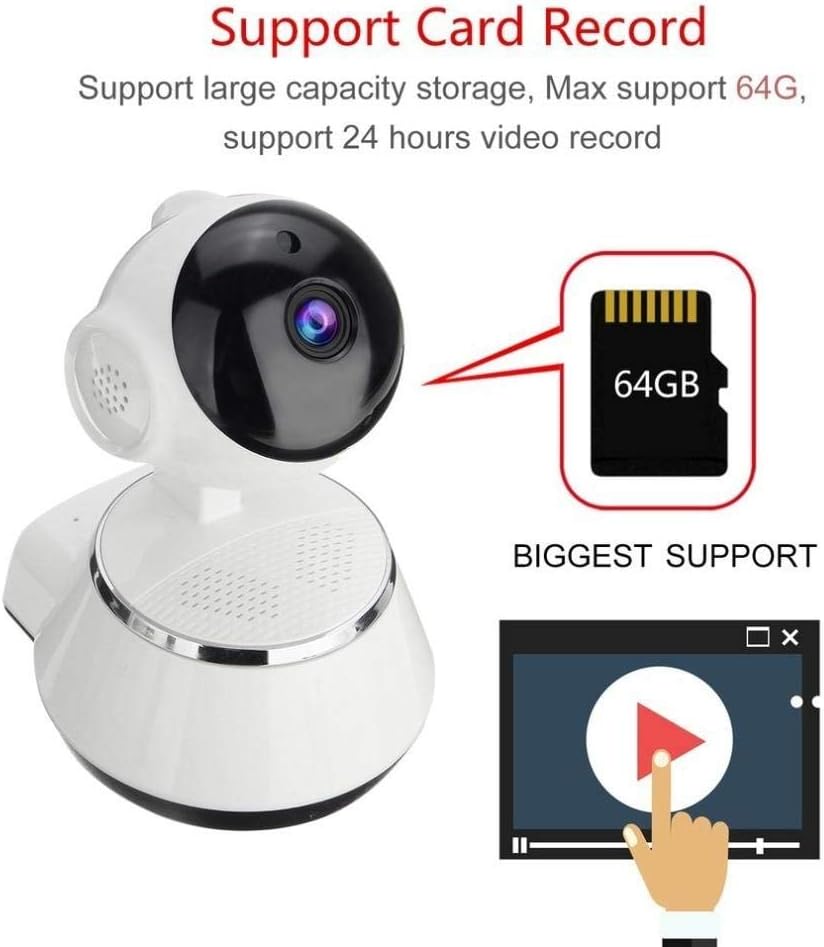
Image demonstrating the camera's support for large capacity storage, specifically showing a 64GB MicroSD card, indicating support for 24-hour video recording.
6.3. การตรวจจับการเคลื่อนไหว
Receive alerts when motion is detected in the camera's field of view.
- Enable "Motion Detection" in the camera settings within the iCSee app.
- Adjust sensitivity levels and set up notification preferences (e.g., push notifications, email alerts).
6.4. การมองเห็นในเวลากลางคืน
กล้องจะเปลี่ยนเป็นระบบมองเห็นตอนกลางคืนโดยอัตโนมัติเมื่ออยู่ในสภาวะแสงน้อย
- Infrared LEDs provide clear black-and-white video up to 10 meters in complete darkness.
- No manual intervention is required for night vision activation.

Comparison image displayed on a smartphone screen, showing the difference between daytime and nighttime monitoring views, highlighting the infrared night vision capability.
6.5. เสียงสองทาง
สื่อสารผ่านกล้องโดยใช้ไมโครโฟนและลำโพงในตัว
- ขณะถ่ายทอดสด view, tap the microphone icon in the iCSee app to speak through the camera.
- แตะไอคอนลำโพงเพื่อฟังเสียงจากบริเวณรอบกล้อง
6.6. การเข้าถึงระยะไกล
Monitor your property from anywhere with an internet connection.
- ตราบใดที่กล้องของคุณเชื่อมต่อกับ Wi-Fi และโทรศัพท์ของคุณสามารถใช้งานอินเทอร์เน็ตได้ คุณก็สามารถทำได้ view live feeds and manage settings remotely via the iCSee app.
7. การบำรุงรักษา
- การทำความสะอาด: ใช้ผ้าแห้งนุ่มเช็ดทำความสะอาดเลนส์และตัวกล้อง ห้ามใช้น้ำยาทำความสะอาดหรือสเปรย์กระป๋อง
- อัพเดตเฟิร์มแวร์: Regularly check for firmware updates through the iCSee app to ensure your camera has the latest features and security patches.
- การจัดการการ์ด SD: Periodically back up important recordings and format the SD card to maintain optimal performance.
- พื้นที่จัดเก็บ: เมื่อไม่ได้ใช้งานเป็นเวลานาน ควรเก็บกล้องไว้ในที่แห้งและเย็น หลีกเลี่ยงแสงแดดโดยตรง
8 การแก้ไขปัญหา
| ปัญหา | สาเหตุที่เป็นไปได้ / วิธีแก้ไข |
|---|---|
| กล้องไม่เปิดเครื่อง | Ensure the power adapter is securely connected to both the camera and the power outlet. Try a different outlet. |
| ไม่สามารถเชื่อมต่อ Wi-Fi ได้ | Check if your Wi-Fi network is 2.4GHz. Ensure the Wi-Fi password is correct. Move the camera closer to the router. Reset the camera and try again. |
| สด view is blurry or dark | Clean the camera lens. Check lighting conditions. Ensure night vision is functioning correctly in low light. |
| การ์ด SD ไม่บันทึก | Ensure the SD card is inserted correctly and formatted in the app. Check if the card is full or corrupted. Try a different SD card. |
| ไม่มีเสียงหรือคุณภาพเสียงไม่ดี | ตรวจสอบการตั้งค่าไมโครโฟนและลำโพงในแอป ตรวจสอบให้แน่ใจว่าไม่มีสิ่งกีดขวางไมโครโฟนหรือลำโพง |
| กล้องตัดการเชื่อมต่อบ่อยครั้ง | Weak Wi-Fi signal. Move the camera closer to the router or consider a Wi-Fi extender. Reduce network congestion. |
9. ข้อมูลจำเพาะ
| คุณสมบัติ | รายละเอียด |
|---|---|
| หมายเลขรุ่น | BES-MH03 |
| เทคโนโลยีการเชื่อมต่อ | ไร้สาย (Wi-Fi) |
| ข้อแนะนำการใช้ | Baby Monitoring, Home Security |
| คุณสมบัติพิเศษ | Motion Sensor, Night Vision (Infrared distance 10m) |
| ฟอร์มแฟกเตอร์ | โดม |
| วัดtage | 3 วัตต์ |
| การสนับสนุนการจัดเก็บข้อมูล | การ์ด MicroSD (สูงสุด 64GB) |
| เสียง | Two-way audio (Audio Record) |
10. การรับประกันและการสนับสนุน
BESDER products are manufactured to high-quality standards. For warranty information, please refer to the terms and conditions provided at the point of purchase or contact your retailer. For technical support or further assistance, please refer to the support section within the iCSee application or visit the official BESDER webเว็บไซต์ (ถ้ามี)


