1. บทนำ
Welcome to the user manual for your Modecom Oberon Pro Glass USB 3.0 White PC Case. This manual provides essential information for the proper installation, operation, and maintenance of your computer chassis. Please read this manual thoroughly before beginning assembly to ensure correct setup and to prevent damage to your components or the case itself.
ข้อควรระวังเพื่อความปลอดภัย:
- ควรตัดการเชื่อมต่อแหล่งจ่ายไฟออกจากเต้ารับที่ผนังทุกครั้งก่อนติดตั้งหรือถอดส่วนประกอบใดๆ
- โปรดใช้งานชิ้นส่วนด้วยความระมัดระวังเพื่อหลีกเลี่ยงการปล่อยประจุไฟฟ้าสถิต (ESD) ควรพิจารณาใช้สายรัดข้อมือป้องกันไฟฟ้าสถิต
- เก็บชิ้นส่วนขนาดเล็กและวัสดุบรรจุภัณฑ์ให้ห่างจากเด็ก
- ตรวจสอบให้แน่ใจว่ามีการระบายอากาศที่เหมาะสมรอบเคสเพื่อป้องกันความร้อนสูงเกินไป
2. สินค้าหมดview
The Modecom Oberon Pro Glass is a stylish mid-tower PC case designed to house your computer components. It features a tempered glass side panel for showcasing your build and a clean white finish. The front panel includes convenient USB 3.0 ports for high-speed data transfer.
รูปที่ 2.1: ด้านหน้า-ขวา view of the Modecom Oberon Pro Glass PC Case. This image displays the white exterior, the front panel with ventilation, and the top-mounted I/O ports including USB 3.0.
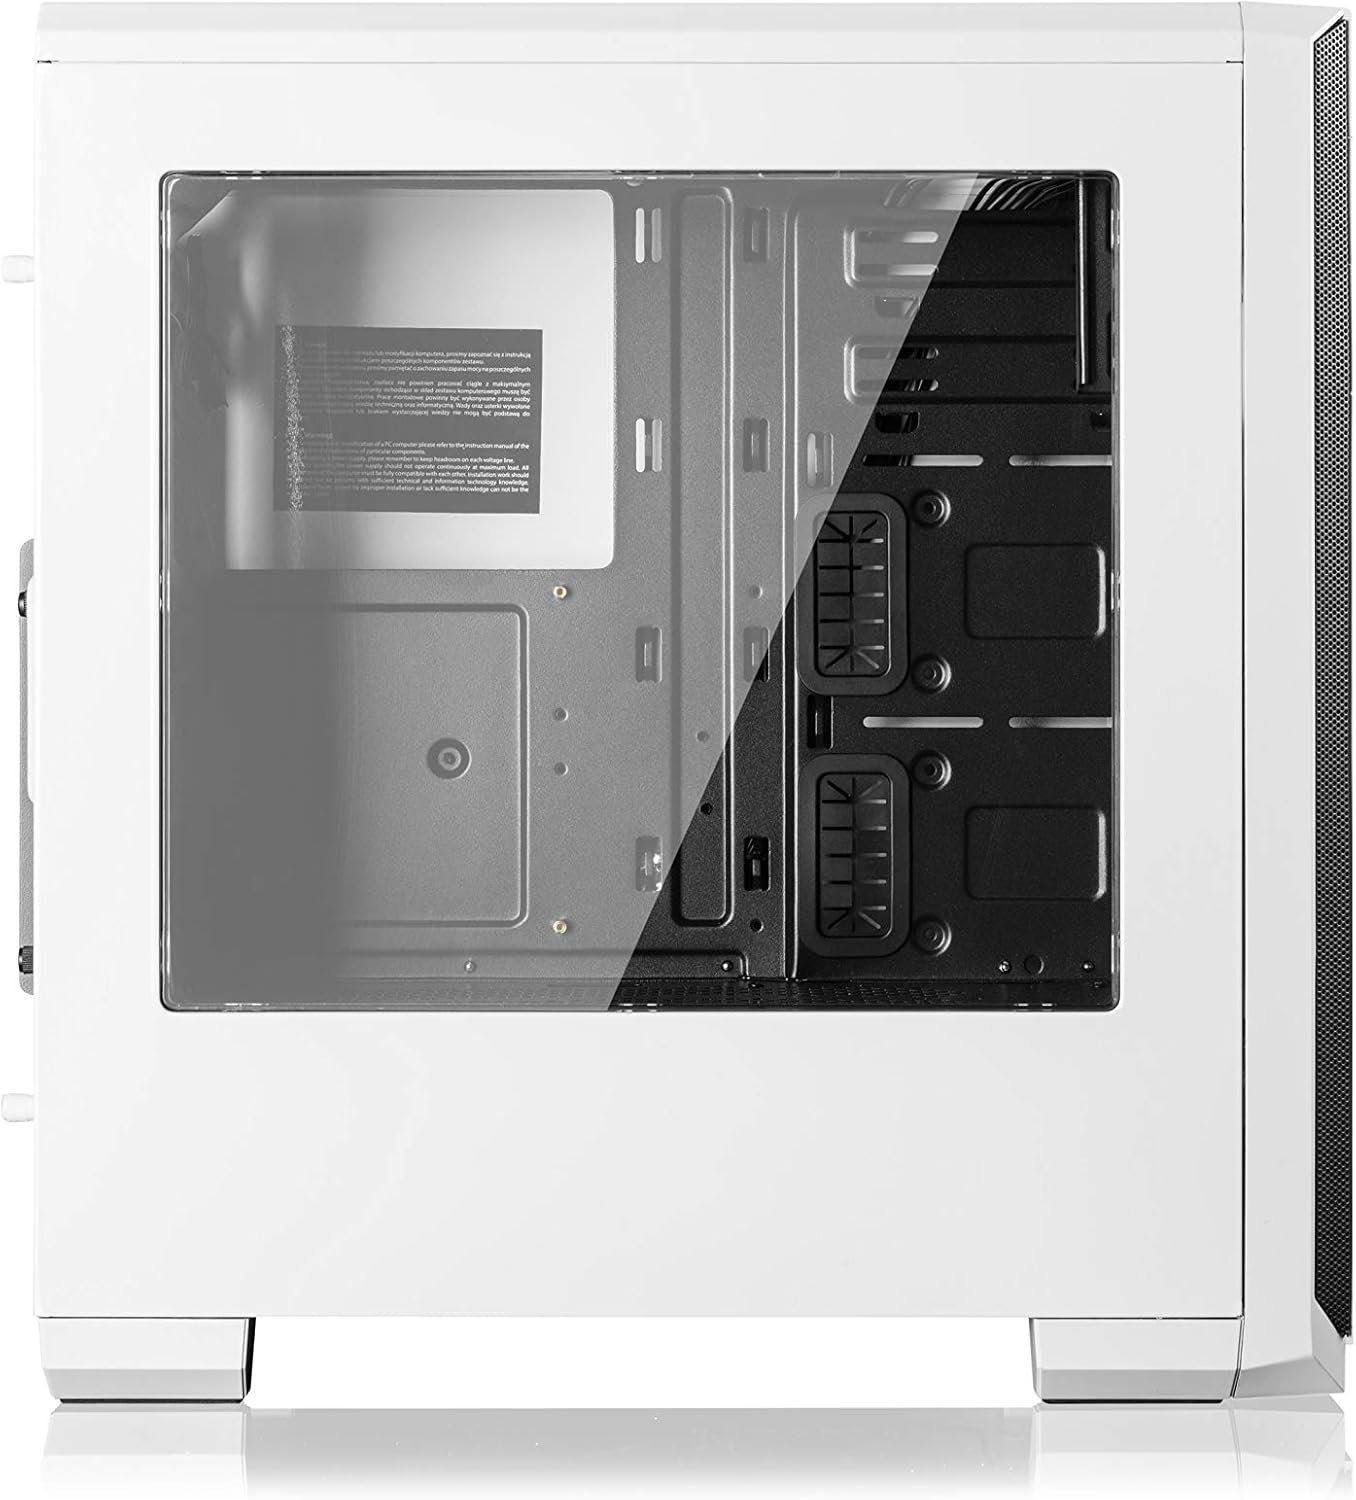
รูปที่ 2.2: ด้านข้าง view of the Modecom Oberon Pro Glass PC Case, highlighting the tempered glass side panel. This panel allows for a clear view of the internal components when installed.
3. การตั้งค่าและการติดตั้ง
Follow these steps to install your computer components into the Modecom Oberon Pro Glass PC Case.
3.1. การแกะกล่องและการตรวจสอบเบื้องต้น
- ถอดเคสพีซีออกจากบรรจุภัณฑ์อย่างระมัดระวัง
- ตรวจสอบกล่องบรรจุภัณฑ์ว่ามีร่องรอยความเสียหายจากการขนส่งหรือไม่ หากพบความเสียหาย โปรดติดต่อผู้ค้าปลีกทันที
- Remove the tempered glass side panel by unscrewing the thumb screws, typically located at the rear corners of the panel. Set the panel aside on a soft, flat surface to prevent scratches.
3.2. การติดตั้งเมนบอร์ด

รูปที่ 3.1: ภายใน view of the Modecom Oberon Pro Glass PC Case, showing the motherboard tray, drive bays, and cable management cutouts.
- Install the I/O shield that came with your motherboard into the designated opening at the rear of the case.
- Ensure the motherboard standoffs are correctly aligned for your motherboard's form factor (ATX, Micro ATX, or ITX). Install additional standoffs if necessary.
- วางเมนบอร์ดของคุณลงบนสแตนด์ออฟอย่างระมัดระวัง โดยจัดรูสกรูให้ตรงกัน
- ยึดเมนบอร์ดด้วยสกรูที่ให้มา อย่าขันแน่นเกินไป
3.3. การติดตั้งชุดจ่ายไฟ (PSU)
- Position your PSU in the dedicated compartment, typically at the bottom rear of the case.
- Align the screw holes on the PSU with those on the case's rear panel.
- Secure the PSU with the provided screws.
3.4. การติดตั้งอุปกรณ์จัดเก็บข้อมูล (HDD/SSD)
- Locate the 3.5" HDD bays and 2.5" SSD mounting points within the case.
- For 3.5" HDDs, slide the drive into a bay and secure it with screws or tool-less clips if available.
- For 2.5" SSDs, mount them to the designated trays or screw points, typically behind the motherboard tray or in specific drive cages.
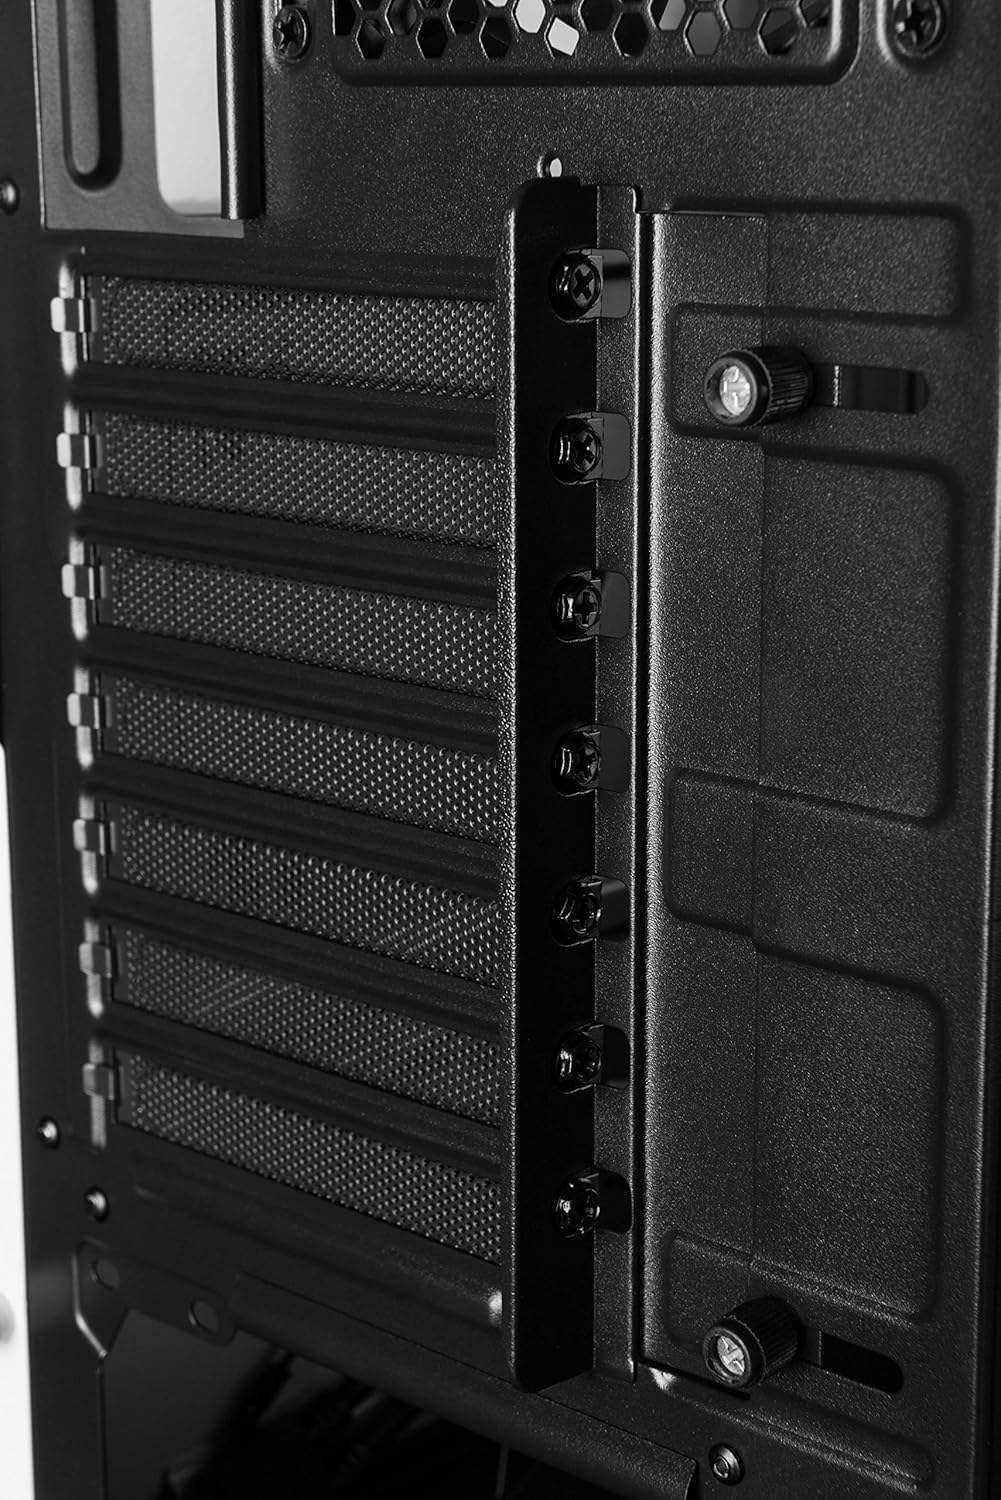
3.5. Expansion Card Installation (GPU, PCIe cards)

รูปที่ 3.2: ภายในด้านหลัง view of the Modecom Oberon Pro Glass PC Case, illustrating the expansion slot covers and thumb screws for securing PCIe cards.
- Remove the necessary expansion slot covers from the rear of the case, corresponding to your card's slot on the motherboard.
- Insert your expansion card (e.g., graphics card) firmly into the PCIe slot on the motherboard.
- Secure the card to the case with the provided screws or retention mechanism.
3.6. การติดตั้งขั้วต่อแผงด้านหน้า
- Connect the front panel cables (USB 3.0, HD Audio, Power Switch, Reset Switch, Power LED, HDD LED) to their respective headers on your motherboard. Refer to your motherboard manual for exact pin layouts.
3.7. การจัดการสายเคเบิล
- ใช้ช่องร้อยสายไฟและจุดผูกด้านหลังถาดเมนบอร์ดเพื่อจัดระเบียบสายไฟ วิธีนี้ช่วยให้อากาศถ่ายเทได้ดีขึ้นและสวยงามยิ่งขึ้น
- Once all components are installed and cables managed, reattach the tempered glass side panel and secure it with the thumb screws.
4. การดำเนินการ
After successful installation, your PC is ready for operation.
- เปิดเครื่อง: Press the power button located on the top I/O panel of the case.
- Using Front Panel Ports: The front panel includes USB 3.0 ports and audio jacks. Connect your USB devices (e.g., flash drives, external hard drives) to the USB ports for data transfer. Plug your headphones or microphone into the respective audio jacks.
5. การบำรุงรักษา
การบำรุงรักษาตามปกติจะช่วยให้มั่นใจได้ถึงประสิทธิภาพสูงสุดและอายุการใช้งานที่ยาวนานของส่วนประกอบพีซีของคุณ
- ตัวกรองฝุ่น: Periodically remove and clean the dust filters (if present) to maintain good airflow and prevent dust buildup inside the case. Use compressed air or a soft brush.
- การทำความสะอาดภายนอก: เช็ดพื้นผิวด้านนอกของเคสด้วยผ้าเนื้อนุ่มและแห้งamp ใช้ผ้าเช็ดทำความสะอาด หลีกเลี่ยงน้ำยาทำความสะอาดที่มีฤทธิ์กัดกร่อนหรือตัวทำละลายที่อาจทำให้พื้นผิวหรือกระจกนิรภัยเสียหายได้
- แผงกระจกนิรภัย: Clean the tempered glass with a glass cleaner and a microfiber cloth to avoid streaks and scratches.
6 การแก้ไขปัญหา
หากคุณพบปัญหา โปรดพิจารณาขั้นตอนการแก้ไขปัญหาพื้นฐานต่อไปนี้:
- ระบบไม่เปิดเครื่อง:
- ตรวจสอบให้แน่ใจว่าได้เปิดเครื่องจ่ายไฟ (PSU) และเสียบปลั๊กเข้ากับเต้ารับที่ผนังอย่างถูกต้องแล้ว
- ตรวจสอบให้แน่ใจว่าสายเคเบิลของสวิตช์เปิดปิดแผงด้านหน้าเชื่อมต่อกับหัวต่อบนเมนบอร์ดอย่างถูกต้องแล้ว
- ตรวจสอบการเชื่อมต่อสายไฟทั้งหมดกับเมนบอร์ดและส่วนประกอบต่างๆ
- พอร์ต USB ไม่ทำงาน:
- Confirm that the front panel USB 3.0 cable is securely connected to the corresponding header on the motherboard.
- Test with different USB devices.
- เสียงดังเกินไป:
- Identify the source of the noise (e.g., case fans, CPU cooler fan, GPU fan).
- Ensure all fans are free from obstructions and properly secured.
- Clean any dust buildup on fans.
สำหรับปัญหาที่ซับซ้อนมากขึ้น โปรดดูคู่มือส่วนประกอบของคุณหรือขอความช่วยเหลือจากผู้เชี่ยวชาญ
7. ข้อมูลจำเพาะ
| คุณสมบัติ | คำอธิบาย |
|---|---|
| ยี่ห้อ | โมเดคอม |
| ชื่อรุ่น | Oberon Pro Glass |
| หมายเลขรุ่น | AT-OBERON-PG-20-000000-0002 |
| ประเภทเคส | หอคอยกลาง |
| สี | สีขาว |
| วัสดุ | โพลีคาร์บอเนต (พีซี) |
| เมนบอร์ดที่เข้ากันได้ | ATX, Micro ATX, ITX |
| พอร์ต I / O ด้านหน้า | USB 3.0, Audio In/Out |
| แหล่งจ่ายไฟ | W/O PSU (Power Supply Unit not included) |
| น้ำหนักสินค้า | 2 กิโลกรัม |
| รหัสบทความระหว่างประเทศ | 05901885248370 |
8. การรับประกันและการสนับสนุน
ข้อมูลการรับประกัน:
Modecom provides a guarantee of spare parts availability for 2 years from the date of purchase. This ensures that essential components for repair or replacement will be accessible within this period.
การสนับสนุนลูกค้า:
For technical assistance, warranty claims, or further inquiries, please refer to the official Modecom website or contact your local retailer where the product was purchased. Ensure you have your product model number and proof of purchase available when seeking support.


