1. บทนำ
The FRITZ!DECT 301 is an intelligent radiator controller designed for integration into your FRITZ!Box home network. It enables automatic and precise control of room temperature, contributing to energy efficiency and comfort. This manual provides essential information for the installation, operation, and maintenance of your FRITZ!DECT 301 thermostat.
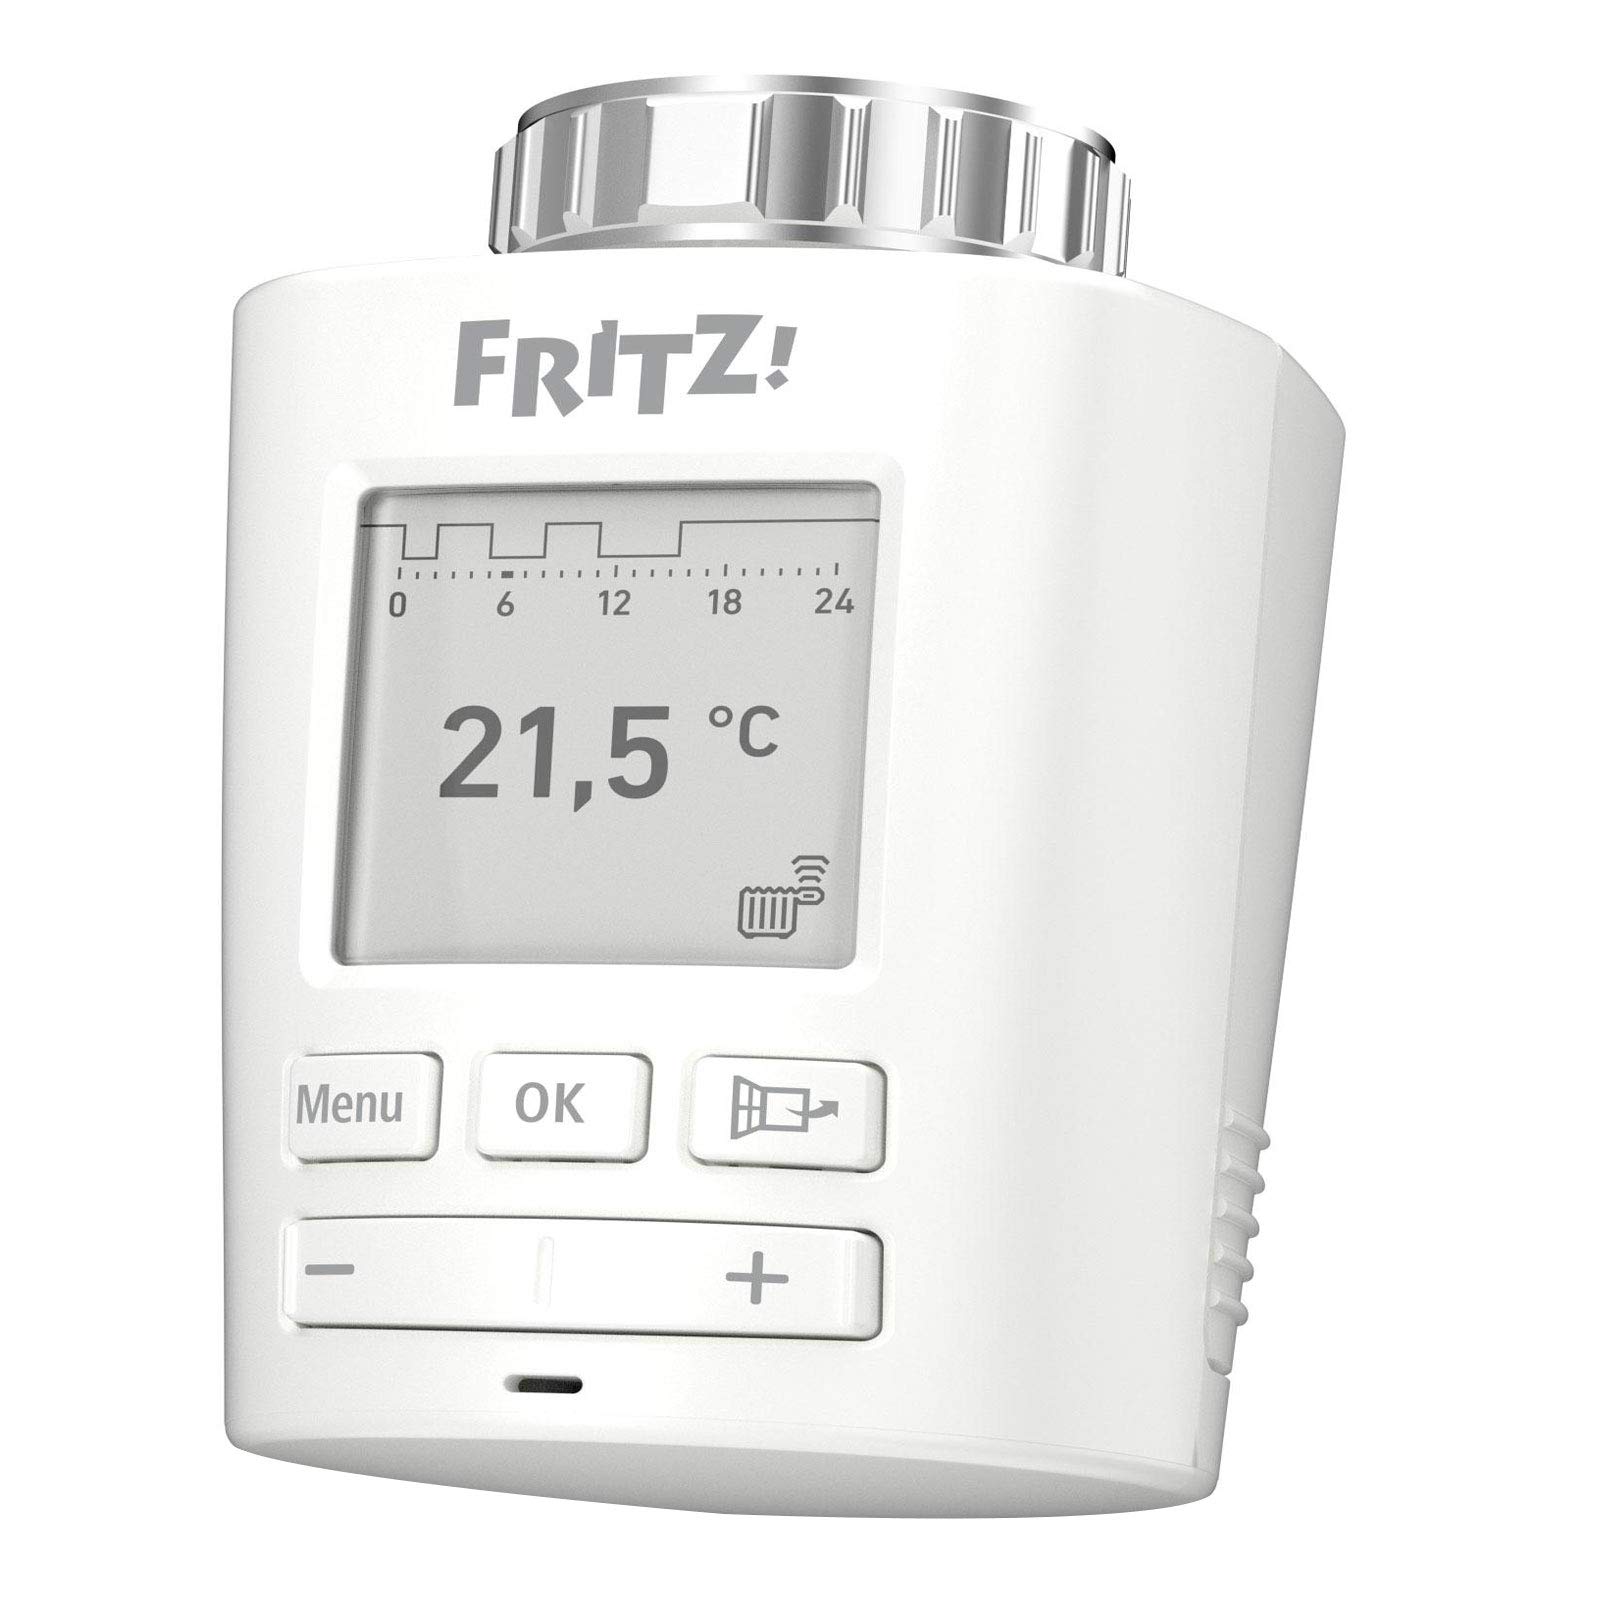
ภาพที่ 1.1: ด้านหน้า view of the FRITZ!DECT 301 Thermostat, showing the e-paper display and control buttons.
2. ข้อมูลด้านความปลอดภัย
- อ่านคำแนะนำทั้งหมดอย่างละเอียดก่อนการติดตั้งและใช้งาน
- อย่าให้เครื่องโดนความชื้น อุณหภูมิที่สูงหรือต่ำเกินไป หรือโดนแสงแดดโดยตรง
- ใช้เฉพาะแบตเตอรี่ชนิดที่ระบุ (แบตเตอรี่ AA 2 ก้อน) ตรวจสอบให้แน่ใจว่าใส่แบตเตอรี่ถูกขั้ว
- เก็บแบตเตอรี่ให้พ้นมือเด็ก ห้ามทิ้งแบตเตอรี่ลงในกองไฟ
- อย่าเปิดอุปกรณ์casing. การซ่อมแซมควรดำเนินการโดยบุคลากรที่มีคุณสมบัติเหมาะสมเท่านั้น
- อุปกรณ์นี้มีไว้สำหรับใช้ภายในอาคารเท่านั้น
3. เนื้อหาบรรจุภัณฑ์
ตรวจสอบว่ามีรายการทั้งหมดอยู่ในแพ็คเกจ:
- FRITZ!DECT 301 Thermostat
- แบตเตอรี่ AA 2 ก้อน
- คำแนะนำในการติดตั้ง (คู่มือนี้)
- Adaptor for Danfoss RA valves
4. การตั้งค่า
4.1. การติดตั้งแบตเตอรี่
- Remove the battery compartment cover on the back of the FRITZ!DECT 301.
- ใส่แบตเตอรี่ AA สองก้อน โดยตรวจสอบให้แน่ใจว่าขั้วถูกต้อง (+/-)
- Replace the battery compartment cover. The device display should activate.
4.2. การติดตั้งบนวาล์วหม้อน้ำ
The FRITZ!DECT 301 is designed for easy installation on all standard radiator valves with a connection thread. An adaptor for Danfoss RA valves is included if needed.
- ถอดหัวเทอร์โมสตัทที่มีอยู่ของคุณออกจากวาล์วหม้อน้ำ
- If necessary, attach the appropriate adaptor to the radiator valve.
- Screw the FRITZ!DECT 301 onto the radiator valve or adaptor until it is securely fastened. Do not overtighten.
4.3. การใช้งานร่วมกับ FRITZ!Box
The FRITZ!DECT 301 requires a FRITZ!Box with a DECT base and FRITZ!OS version 6.83 or higher for operation.
- Ensure your FRITZ!Box is powered on and its DECT function is active.
- On the FRITZ!DECT 301, press and hold the "Menu" button until the pairing symbol appears on the display.
- Within 2 minutes, press the "DECT" button on your FRITZ!Box.
- The FRITZ!DECT 301 will connect to the FRITZ!Box. A successful connection will be indicated on the thermostat's display.
- Further configuration, such as naming the thermostat and setting up heating profiles, can be done via the FRITZ!Box user interface (accessible via PC, notebook, smartphone, or tablet).
5. การใช้งานเทอร์โมสตัท
5.1. การควบคุมพื้นฐาน
The FRITZ!DECT 301 features an e-paper display and several buttons for local control:
- ปุ่มเมนู: Accesses settings and functions.
- ปุ่มตกลง: ยืนยันการเลือก
- ปุ่มบวก (+): Increases temperature or navigates up in menus.
- ปุ่มลบ (-): Decreases temperature or navigates down in menus.
5.2. การตั้งค่าอุณหภูมิ
You can adjust the desired room temperature directly on the device using the Plus (+) and Minus (-) buttons. The current set temperature will be shown on the e-paper display.
5.3. Heating Profiles and Comfort Functions
The FRITZ!DECT 301 offers advanced features configurable through the FRITZ!Box user interface:
- Individual Heating Profiles: Program specific heating schedules for different times of day and days of the week.
- จอแสดงผลอี-พาวเดอร์: Energy-efficient display showing current temperature and status.
- การตรวจจับการเปิดหน้าต่าง: Automatically reduces heating when a window is opened to save energy.
- Group Circuit: Control multiple FRITZ!DECT thermostats simultaneously.
- ล็อคกุญแจ: ป้องกันการเปลี่ยนแปลงการตั้งค่าบนอุปกรณ์โดยไม่ได้รับอนุญาต
- Limescale Protection Function: วาล์วจะเปิดและปิดเป็นระยะเพื่อป้องกันการสะสมของตะกรัน
- Automatic Frost Protection: Ensures the room temperature does not drop below a critical level to prevent pipes from freezing.
5.4. รีโมทคอนโทรล
Control your FRITZ!DECT 301 from anywhere using the FRITZ!App or the FRITZ!Box user interface via the internet. This allows for convenient temperature adjustments and profile management even when you are away from home.
6. การบำรุงรักษา
6.1. การเปลี่ยนแบตเตอรี่
When the battery level is low, an indicator will appear on the e-paper display. Replace the batteries promptly to ensure continuous operation.
- ถอดฝาช่องใส่แบตเตอรี่ออก
- ถอดแบตเตอรี่ AA เก่าออก
- ใส่แบตเตอรี่ AA ใหม่ 2 ก้อน โดยสังเกตขั้วให้ถูกต้อง
- เปลี่ยนฝาครอบช่องใส่แบตเตอรี่
6.2. การทำความสะอาด
Clean the device with a soft, dry cloth. Do not use abrasive cleaners or solvents, as these can damage the casing หรือจอแสดงผล
7 การแก้ไขปัญหา
- อุปกรณ์ไม่ตอบสนอง: ตรวจสอบว่าใส่แบตเตอรี่ถูกต้องและชาร์จไฟเรียบร้อยแล้ว เปลี่ยนแบตเตอรี่หากจำเป็น
- Cannot connect to FRITZ!Box: Ensure the FRITZ!Box DECT function is active and the thermostat is within range. Repeat the pairing process (Section 4.3). Update your FRITZ!Box OS to the latest version.
- การอ่านอุณหภูมิไม่ถูกต้อง: Ensure the thermostat is not obstructed or exposed to direct heat sources (e.g., sunlight, other appliances) that could affect its internal sensor.
- หม้อน้ำไม่ร้อน/เย็นตามที่คาดไว้: Verify that the thermostat is correctly mounted on the valve and that the valve itself is functioning properly. Check the set heating profile in the FRITZ!Box interface.
- จอแสดงผลว่างเปล่า: Check batteries. If new batteries do not resolve the issue, contact support.
8. ข้อมูลจำเพาะ
| หมายเลขรุ่น | 20002822 |
| ยี่ห้อ | ฟริตซ์! |
| ผู้ผลิต | เอวีเอ็ม |
| สี | สีขาว |
| แหล่งพลังงาน | Battery Powered (2 x AA batteries, included) |
| เล่มที่tage | 230 โวลต์ (Note: This likely refers to the system voltage the FRITZ!Box operates on, not the thermostat itself) |
| วัดtage | 3600 (Likely refers to maximum controlled load, not thermostat consumption) |
| รูปแบบการแสดงผล | E-paper |
| คุณสมบัติพิเศษ | Programmable, Window Open Detection, Limescale Protection, Frost Protection, Key Lock |
| เทคโนโลยีการเชื่อมต่อ | DECT ULE (ผ่าน FRITZ!Box) |
| ประเภทตัวควบคุม | Application, Programmable, Smart/Remote |
| ขนาดสินค้า (กว้าง x ยาว x สูง) | 8.7 x 5.3 x 5.2 ซม. |
| น้ำหนักสินค้า | 143 กรัม |
| ส่วนประกอบที่รวมอยู่ | FRITZ!DECT 301, 2 x AA batteries, installation instructions, adaptor for Danfoss RA |

Image 8.1: FRITZ!DECT 301 Thermostat showing its dimensions (8.7cm length, 5.3cm width, 5.2cm height).
9. การรับประกันและการสนับสนุน
For warranty information, please refer to the documentation provided with your purchase or visit the official FRITZ! website. If you encounter any issues not covered in this manual or require further assistance, please contact FRITZ! customer support.
ผู้ผลิต: เอวีเอ็ม
Webเว็บไซต์: www.avm.de/en/


