การแนะนำ
This manual provides detailed instructions for the safe installation, operation, and maintenance of your Project Source 6-Pack 10-inch Brushed Nickel Flush Mount Lights. These fixtures feature a brushed nickel finish and frosted glass shades, designed for indoor use. Please read all instructions carefully before beginning installation and retain this manual for future reference.
ข้อมูลด้านความปลอดภัยที่สำคัญ
Always follow basic safety precautions when installing and operating electrical fixtures to reduce the risk of fire, electric shock, and personal injury.
- คำเตือน: Risk of electric shock. Disconnect power at the main circuit breaker or fuse box before installation, servicing, or changing bulbs.
- Consult a qualified electrician if you are unsure about the installation process or have questions regarding electrical wiring.
- อย่าให้เกินวัตต์สูงสุดtagระบุไว้สำหรับหลอดไฟ (60 วัตต์ต่อหลอด)
- ตรวจสอบให้แน่ใจว่าการเชื่อมต่อทางไฟฟ้าทั้งหมดแน่นหนาและหุ้มฉนวนอย่างเหมาะสม
- This fixture is designed for indoor use only and is not water resistant. Do not install in wet locations.
- สวมแว่นตานิรภัยระหว่างการติดตั้ง
เนื้อหาแพ็คเกจ
Verify that all components are present and undamaged before beginning installation. If any parts are missing or damaged, do not proceed with installation and contact customer service.
- 6 x Flush Mount Light Fixtures (Brushed Nickel)
- 6 x Frosted Glass Shades
- Mounting Hardware (e.g., screws, wire nuts, mounting bracket)
Note: Six (6) A19 60-watt maximum bulbs are required per fixture and are ไม่รวมอยู่.
การติดตั้งและการตั้งค่า
Follow these steps carefully to install your flush mount light fixture. Repeat for each of the six fixtures.
- Step 1: Prepare for Installation. Turn off the power to the junction box at the circuit breaker or fuse box. Ensure the power is off by testing the existing light switch.
- ขั้นตอนที่ 2: ติดตั้งขายึด Secure the fixture's mounting bracket to the ceiling junction box using the screws provided. Ensure it is firmly attached.
- Step 3: Make Electrical Connections. Carefully connect the wires from the fixture to the corresponding wires from the junction box using the provided wire nuts. Typically, black (hot) to black, white (neutral) to white, and bare copper or green (ground) to bare copper or green. Ensure all connections are tight and secure.
- Step 4: Mount Fixture to Ceiling. Carefully push the wired fixture base up to the ceiling, aligning the screw holes on the fixture with the mounting bracket. Secure the fixture to the bracket using the decorative nuts or screws provided.
- Step 5: Install Bulbs. Screw in six (6) A19 60-watt maximum bulbs (not included) into the sockets of the fixture.
- Step 6: Attach Glass Shade. Carefully place the frosted glass shade onto the fixture. Secure it by screwing the finial onto the threaded rod at the bottom of the fixture until the shade is snug. Do not overtighten.
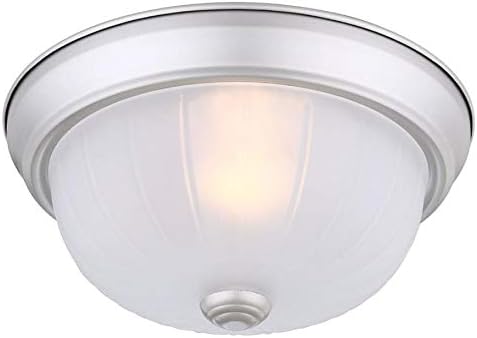
Figure 1: Assembled Flush Mount Light Fixture. This image shows a single 10-inch flush mount light fixture with its brushed nickel base and frosted glass shade, ready for installation.

Figure 2: Fixture Base and Mounting Area. A detailed view of the brushed nickel base of the light fixture, highlighting the rim where the glass shade rests and the mounting points.

Figure 3: Finial for Securing Glass Shade. A close-up of the decorative finial, which is used to secure the frosted glass shade to the light fixture's base.
คำแนะนำการใช้งาน
Once all fixtures are securely installed and bulbs are in place, restore power at the main circuit breaker. The flush mount lights are operated by a standard wall switch (not included) connected to the circuit. Simply toggle the wall switch to the 'ON' position for illumination and 'OFF' to turn the lights off.
การซ่อมบำรุง
Proper maintenance ensures the longevity and optimal performance of your light fixtures.
- การทำความสะอาด: To clean the fixture, ensure the power is turned off at the circuit breaker. Wipe the brushed nickel finish and glass shade with a soft, dry, or slightly damp ใช้ผ้าเช็ดทำความสะอาดเท่านั้น ห้ามใช้สารทำความสะอาดที่มีฤทธิ์กัดกร่อน สารละลาย หรือน้ำยาขัดเงา เพราะอาจทำให้พื้นผิวเสียหายได้
- การเปลี่ยนหลอดไฟ: Before replacing bulbs, turn off the power to the fixture at the circuit breaker and allow the bulbs to cool completely. Unscrew the finial and carefully remove the glass shade. Unscrew the old bulbs and replace them with new A19 60-watt maximum bulbs. Reattach the glass shade and secure it with the finial. Restore power.
การแก้ไขปัญหา
หากคุณพบปัญหาเกี่ยวกับโคมไฟ โปรดดูปัญหาและวิธีแก้ไขที่พบบ่อยต่อไปนี้:
- ไฟไม่ติด:
- ตรวจสอบว่าได้เปิดไฟที่เบรกเกอร์แล้ว
- ตรวจสอบให้แน่ใจว่าสวิตช์ไฟบนผนังอยู่ในตำแหน่ง "เปิด"
- Verify that all wire connections are secure and properly made.
- Confirm that the bulbs are screwed in tightly and are not burnt out.
- ไฟกระพริบ:
- Check for any loose wire connections within the fixture or junction box.
- Ensure the bulbs are fully screwed in and are not faulty.
- Verify that the bulbs are compatible with the fixture's specifications.
ข้อมูลจำเพาะ
| ยี่ห้อ | แหล่งที่มาของโครงการ |
| หมายเลขรุ่น | FJ13-012-1 |
| ยูพีซี | 848507002376 |
| สี | นิกเกิลขัดเงา |
| วัสดุ | กระจก |
| สไตล์ | แบบดั้งเดิม |
| แบบฟอร์มการติดตั้ง | เพดาน |
| ประเภทห้อง | Indoor (Bathroom, Kitchen, Living Room, Bedroom, Dining Room, Office) |
| แหล่งพลังงาน | สายไฟ |
| ประเภทการติดตั้ง | Flush Mount |
| ประเภทแหล่งกำเนิดแสง | หลอดไส้ (ใช้งานร่วมกับ LED ได้) |
| วัสดุบังแสง | กระจก |
| จำนวนแหล่งกำเนิดแสง | 6 (ต่ออุปกรณ์) |
| เล่มที่tage | 120 โวลต์ |
| วัดtage | 60 watts (maximum per bulb) |
| ฐานหลอดไฟ | E26 |
| วิธีการควบคุม | สวิตช์ติดผนังภายนอก |
| จำนวนหน่วย | 6 จำนวน |
| ระดับความต้านทานต่อน้ำ | ไม่ทนน้ำ |
| ขนาดสินค้า | 10 x 10 x 4.45 นิ้ว |
| น้ำหนักสินค้า | 13.02 ปอนด์ (รวมสำหรับแพ็ค 6 ชิ้น) |
| การรับรอง | รายชื่อ ETL |
การรับประกันและการสนับสนุน
For technical assistance, warranty claims, or to inquire about replacement parts, please contact Project Source customer service. Refer to your purchase documentation or the retailer's website for specific warranty terms and contact information. Keep your proof of purchase for any warranty claims.


